• Happy 1st Sighting of Pacific Ocean by Lewis & Clark (1805)! 🧭

Carbon / Kevlar BLACK Pearl

In person Jim's shop is quite well organized, at least compared to mine.I know you weren't really ragging on Jim and that Jim wouldn't be offended. Just wanted to give him props for making great use of a small space.

No offence intended. I am in awe of Jim’s craftsmanship and productivity. Same for other builders here, whose shops look quite similar.

I recognize that I am afflicted with clean shop-itis. I built a crude tabletop today and have stopped to clean up the shop detritus and benches twice so far. And I still haven’t blown out the dust and shavings, maybe tomorrow. OK, I did blow the shavings out from immediately underfoot, if not yet out the garage door.

One of my shop joys is working with a knowledgeable partner, with my day consisting of 90% putting stuff away and laying out next tools and materials needed, and 10% kibitzing about process. Even after a long day in the shop everything is back where it belongs and the benches are open, if not yet clean.

Plus I tend to pre-organize the shop if friends are coming over with boats. Not so much when working by myself, and the shop quickly becomes more and more cluttered, until

https://www.youtube.com/watch?v=p7Z1oD1lGVk

Today I lacked my usual signal that the shop is becoming a mess; I did not needed any of the tape measures. I have three primary tape measures, kept side by side in a small bin at arm’s reach. When I can’t find any of them, having randomly left them somewhere, even the hated last ditch metric one, that is the signal that it’s time to clean the shop.

OK, OK, I have a LOT of shop peeves. I want drills put back in the drill index, not left in the chuck. I want the ends of any tape rolls (duct, painters, masking, etc) folded over dammit; spending time searching for the end tape is not especially productive time. I want tools in the muscle-memory place where they belong. “Just put in on the bench, I’ll put it away”, said to wife and kids almost every day.

I want, no, I need, at least a couple feet of bench available open and uncluttered, if only for a place to unproductively set the beer and smokes and notepad, and think while pondering some small project.
..
 
I would Welcome you to come and help Tidy things up !

I have actually done that in a friend’s shop, not just tidied it up but reorganized it strategically from floor to ceiling, taking everything down and putting it back up. I wasn’t sure how that would be received, they were away while I did the deed, but I had unfulfilled requests from their neighbors and kinfolk to come do the same for them.

I have COLLECTED more things than I need for sure ! I really Hate to throw something away, that I could , and have found a use for !


I am with you there. To the point that I have boxes marked “Miscellaneous Screws” and “Misc Nuts & Bolts” that weigh more than I want to pick up. But if it isn’t in the boxed hardware somewhere in that 40lb bin has always been exactly what I needed.

Beefy steel L-brackets and sized nuts and bolts from crated laboratory equipment. Oh heck no, don’t throw that that stuff away, I’ll take it. I built a welded canoe trailer and custom roof rack from those brackets and bolts, and still have 100 lbs of that hardware left. I know if I toss that I’ll regret it.

Scrap wood needs to get mighty dang small before it goes in the wood stove. Even little pieces of trim, half round, quarter round, corner molding. Keepers all.

About the “could have found a use for” – we are laying new floors and painting in the house. Leftover “marble” vinyl flooring made lovely kitchen cabinet and pantry shelf covering, and I had more than enough scrap trim to dress the fronts.

But. . . . we need some new switch plates. I had accumulated old switch plates for, um, decades. To the point that I had a nearly 100 of them in a box. I may have finally tossed them, or just can’t find them. Wish I could.
.
 
But. . . . we need some new switch plates. I had accumulated old switch plates for, um, decades. To the point that I had a nearly 100 of them in a box. I may have finally tossed them, or just can’t find them. Wish I could.
.

I think I've got a box of 'em. How many do you need?
 
Made some headway this weekend ! Kind of like paddling ! I always seem to be going upstream in a strong current, or I'm paddling against a stiff head wind !

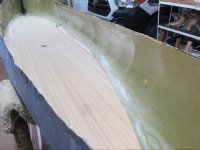
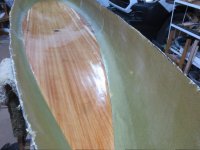
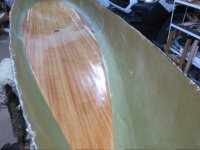
Prepped the insert to be epoxied into the hull.
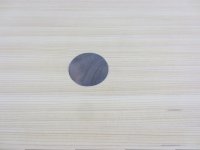
Carefully drilled a hole in the insert, to accept the Black Pearl (a sliver of Black Walnut ) I couldn't find any Black Pearls in my Wife's Jewelry box ! ;)
I rolled a seal coat on the underside of the insert (9 oz) of mixed epoxy.
Then on to mixing resin (18oz) with Cab-o-sil added to give it some thickness. Much like Peanut butter.
Spread this as evenly as I could, and then laid the still wet insert on this.


Once the insert was in position, On went a layer of clear plastic (4 mil).

For a Poor Mans Vacuum bagging, I poured in 3 buckets of dry sand on top of the plastic. This wasn't enough, so I grabbed everything with any weight to it, and placed on top of the sand ! I'm guessing well over 200# spread over the insert.

Caution !!! Support the hull, or it can collapse !! This hull didn't sag like my second Kevlar did ! Must have been the Carbon fiber !

With the insert built to match the hull, It turned out great ! One benefit of staple holes, is the epoxy weeped through the insert slightly, telling me I had made good contact between the hull and the insert !

Today, I Feathered of the edge, and put Black Pearl on the scale. 20 lbs 7 oz., Boy if I could say I was done !!!
I will cover the insert with a layer of cloth (E-glass) At this point the hull really doesn't need it for stiffness, but it will get it. Plus some S-glass near where the seat will hang.
Flotation chambers and trim to go.

I really need to take some of Brian's (Cruiser) advise and lighten my Gunnels !!! Thinking !:rolleyes:

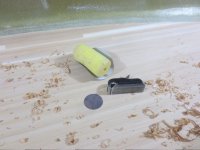
Here's some pics. I'm trying to reduce my picture frames, so Mike McCrea doesn't notice my mess ! ;)

IMG_2676_zpsm5voxpew.jpg - Click image for larger version  Name:	IMG_2676_zpsm5voxpew.jpg Views:	1 Size:	109.5 KB ID:	86536
IMG_2666_zps8hspgb2i.jpg - Click image for larger version  Name:	IMG_2666_zps8hspgb2i.jpg Views:	1 Size:	152.4 KB ID:	86537
IMG_2670_zps2cv1oa1d.jpg - Click image for larger version  Name:	IMG_2670_zps2cv1oa1d.jpg Views:	1 Size:	149.0 KB ID:	86538
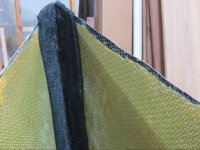
Oh I almost forgot ! Here is how I closed the ends on Black Pearl. Saturated some Black Polyester Sweat Shirt material with mixed epoxy. I figure better to put the Skid plate on the inside, rather than the outside ! It won't be visible, but will do the trick if I ever wear through the hull!
They took a lot of resin, 9 oz each, and were a little difficult to tuck in, but I'm pleased ! I'll do this again !
IMG_2664_zpsto2mcqvr.jpg - Click image for larger version  Name:	IMG_2664_zpsto2mcqvr.jpg Views:	1 Size:	158.0 KB ID:	86539
Jim
 
Last edited:
IMG_2678_zpszmqgkmok.jpgThanks Mike ! The Taco is in Dry Dock, for the Winter. I love the Truck except, I can't clamp on my old Canoe Rack ! Guess I'll have to save up for a Flimsy Aluminum rack.

Anyway ! Made some more progress on the canoe. Insert is glassed, with a layer of 6 oz E-glass, and a couple of partials of 9 oz S-glass in the Tumblehome area. That Tight woven S-glass is simply a Bugger to wet out. Stayed with it and it came out pretty good.

Used 21 oz of resin. Didn't weigh it, after it has cured a few more days, I will !

Also feathered the edges of the S-glass.

Hull seems plenty stiff enough !

IMG_2678_zpszmqgkmok.jpg

Jim
 

Attachments

  • IMG_2678_zpszmqgkmok.jpg
    IMG_2678_zpszmqgkmok.jpg
    156.5 KB · Views: 0
Just had time to drop in at my shop. My Bride was there to read the scale.

Black Pearl weighs in at 23 lbs 8 oz. at this point. Glassing the insert, and a partial of S-glass, took 20 oz of resin

Chambers, trim, seat, and varnish to go. No Deck, just grab handles.

Jim
 
Sounds great! Shooting for sub-40?

Alan

Yes ! I still want to use Ash for the gunnels. I like it's stiffness, and durability.

I picked a short plank of Northern Catalpa, It's kiln dried, and seems a lot lighter than Ash. I may shave off a strip and compare it to Ash. In handling it, it seemed closer to Cedar in weight.

Any experience with ???

Jim
 
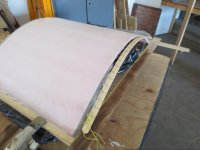
Working on the flotation chambers.

I'm bending the rule, as I measure for the chamber shape. This will increase the capacity. I will need it for a glassed hull.

Here's a few pics.
IMG_2683_zpsiqmbbvib.jpg
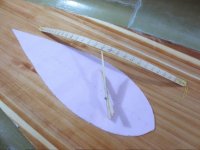
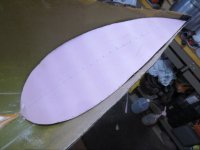
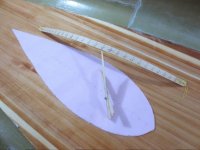
The pic below, shows the Shape of the insert

IMG_2685_zpsnbzekwoc.jpg

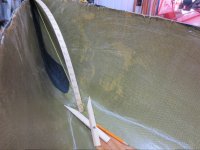
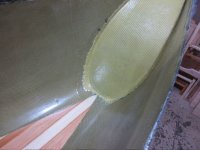
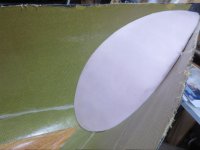
This next pic shows the rough cut "Shape", in place . I will glass another piece of bent Foam, once the epoxy cures, I will use this as a pattern for the actual insert.

IMG_2686_zpsuzikjvvs.jpg

If you have any questions, let me know !

Jim
 
Interesting, Jim. The flotation chambers are the last thing I have yet to decide upon for my spring build. They will probably be the more traditional vertical inserts with a deck plate but I'm still entertaining alternatives like your tear drop versions.
 
Holmes
So many dismiss flotation in strippers, but I believe it's a big mistake.
Good you are putting them in !

Jim
 
Hey Jim, how are you keeping the foam in that bent shape? Do you plan to glass over it and remove the foam? Things are looking good there.

Mark
 
I'm with you Jim, but not just strippers! All boats need some additional flotation, but especially canoes (and kayaks).
I still make it a habit to practice self rescue and paddling a swamped hull (sometimes even on purpose) and any hull will be easier to handle with at least some extra flotation.

And although I like your curved and angled flotation chamber, I still prefer a vertical bulkhead and horizontal deck, if only for the convenient foot step when clambering over beaver dams and snags.
I do a lot of that...
 
Hey Jim, how are you keeping the foam in that bent shape? Do you plan to glass over it and remove the foam? Things are looking good there.

Mark

Hi Mark

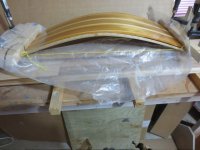
I bend the foam, to match the curved story stick. I hold the bent foam with two cleats clamped to a plastic covered surface . While the foam is held to shape, I glass with S-glass. E-glass will work too, I just have some S-glass scraps. The foam stays with the glass. You could remove it though !
After the epoxy has set, I remove the cleats (that were plastic wrapped to prevent sticking) The foam and the glass hold the shape.
I then lay the Tear drop shaped foam I made earlier, as a pattern, on top and trace. Trim to fit the hull, and lay an overlay of Kevlar, and epoxy to the hull.
I will post pics when when I do this !

Here is a pic of an ATTEMPT to get 1/8" thick cedar to hold the shape like foam does. It didn't work ! But the pic might give you a better idea.

IMG_2278_zps5mopayyt.jpg
Here is a pic of a chamber glassed in Vader, my last composite. One 1/4" foam, one layer of Carbon fiber, a layer of Kevlar, finished with a layer of E-glass
.

IMG_1467_zpsnvzd4xsh.jpg


Jim
 
I'm with you Jim, but not just strippers! All boats need some additional flotation, but especially canoes (and kayaks).
I still make it a habit to practice self rescue and paddling a swamped hull (sometimes even on purpose) and any hull will be easier to handle with at least some extra flotation.

And although I like your curved and angled flotation chamber, I still prefer a vertical bulkhead and horizontal deck, if only for the convenient foot step when clambering over beaver dams and snags.
I do a lot of that...

I'm sure you get even more flotation with your chambers ! I'm just not as agile as I once was, to climb up on the bow, and then on to a beaver dam ! :rolleyes:

Jim
 
Jim
dont take this as an insult but those chambers look like something you’d find on a production boat! Really clean and professional looking
beautiful work as always
 
Jim
dont take this as an insult but those chambers look like something you’d find on a production boat! Really clean and professional looking
beautiful work as always

Thanks !
I must confess, I borrowed the idea from Bell !
 
At it again .

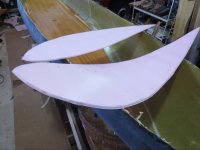
Cut my Flotation chamber pattern out on 1/4" Pink foam.

Took another piece of 1/4" foam, wide enough, that I could get two chambers from.

Bent it to match the arch of my Story stick.

Then glassed it with 9 oz S-glass scrap. Let it cure for several days, and then used the original pattern, to trace the chambers on it .

Cut them, and easily trimmed to fit with a rasp.

Here's a few pics.

IMG_2685_zpsnbzekwoc.jpg - Click image for larger version  Name:	IMG_2685_zpsnbzekwoc.jpg Views:	2 Size:	147.5 KB ID:	88262

IMG_2697_zpss6kji2zo.jpg - Click image for larger version  Name:	IMG_2697_zpss6kji2zo.jpg Views:	1 Size:	136.6 KB ID:	88263

IMG_2698_zps6h4v0nry.jpg - Click image for larger version  Name:	IMG_2698_zps6h4v0nry.jpg Views:	1 Size:	119.3 KB ID:	88264


IMG_2706_zpsxdjh6uuv.jpg - Click image for larger version  Name:	IMG_2706_zpsxdjh6uuv.jpg Views:	1 Size:	121.0 KB ID:	88265
IMG_2711_zpsphvmwl9q.jpg - Click image for larger version  Name:	IMG_2711_zpsphvmwl9q.jpg Views:	1 Size:	162.1 KB ID:	88266

The foam is just a form for the S-glass and Kevlar.
Still debating if I need more reinforcement ! Time will tell ! Probably put a fillet of filled epoxy where the chamber meets the hull.
Now to cut some Kevlar scrap, and glass the chambers in.

Jim
 
Last edited:
Back
Top