• Happy Panic Over Radio Broadcast of "War of the Worlds" (1938)!🛸👽

DIY composite canoe with foam core

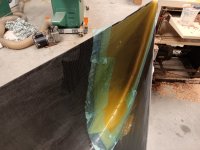
With the ends closed up it was time for the interior layer of kevlar. As usual I put the cloth in the stems first. I find this area to be fiddly and time consuming and I don't want to deal with it when doing the full layer. This gives me more time to work and and it's easier with the small pieces of cloth. I peel ply the edges for a pretty smooth transition and then overlap the main layer.
20240702_211408.jpg

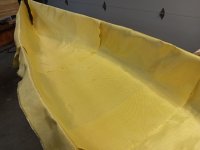
It was suggested I might want to add some ribs or reinforcement strips, especially where the seats will hang and at the center of the hull. This was good advice. Rather than running separate strips I instead laid the interior layer as 3 separate pieces with generous overlaps at the seat positions and center of the hull.
20240703_185855.jpg

The actual wetting out of the inner Kevlar layer was, well, let's just say, interesting.

I think I mentioned earlier in this thread that I'm using up a lot of old cloth and other materials from when I was building a few years back. I did buy a 3 gallon kit of RAKA resin for my 2 current builds and this was pretty much gone but I had a new 1 quart kit of MAS epoxy that has been kicking around for about 5 years. I figured that would be enough and I was saving it for this interior layer.

Well, it wasn't enough after all. It also seemed to give less working time than the RAKA resin I'm used to.

I was about 1/2 done with the interior when I realized I was going to run out of resin. I had a little bit of RAKA left and I hoped that would finish it off. I concentrated on the center of the hull and left the stems dry.

The resin was starting to gel and I wasn't happy with the amount of air pockets scattered around the hull. I was having a hard time removing them. With the resin on the hull starting to gel it seems I was unable to either get the air out or get more epoxy in to fill the voids. I finally reached the point where I had to give up and finish wetting out the stems while I still could.

I mixed up the last few ounces of RAKA resin and I realized this was not enough to finish wetting out both stems. It did do one of them though.

Some quick rummaging found some more ancient epoxy from Adtech. It was thick with a fast setting hardener but it was all I had left and there was plenty of it to finish wetting out the other stem.

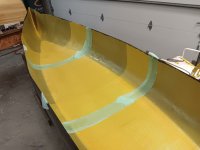
I'd cut up the very last of my peel ply into narrow strips and I placed these over the seam overlaps. The whole thing was not a pretty job.
20240703_211358.jpg

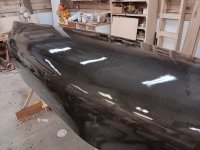
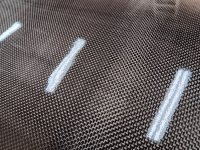
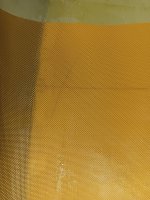
It's difficult to see in the picture but you can see the pale spots that indicate voids under the Kevlar. Many are along the transition area from foam to bare hull but there are plenty in other areas as well. Disappointing.
20240703_211407.jpg

The good news is that the bottom of the hull feels rock solid now that the Kevlar layer is on top of the foam.


Alan
 
Alan,
I feel your pain, been there, don't wanna go there again...
I'm curious to see if the multiple layers of Kevlar will be adequate for the seat loads. I know you'll get quite a bit of hull stiffening once the gunnels are on.
I suppose you can always stiffen up those spots with some foam and more Kevlar if, after paddling it, you find it needs some extra support.
 
I had a similar experience wetting out kevlar, especially the amount of resin it took. The weave of my fabric made it tough to get the resin through. Much different than fiberglass, my Kevlar was more difficult to see the starved areas and areas where resin pooled underneath. Once pooled underneath it was almost impossible to pull it back through.

I wouldnt try and wet out 2 layers of the stuff I have. On my overlaps I pulled back the over lapping cloth and wet out the bottom layer first, then pulled the overlap on top and wet it out.

Mark
 
It really sucks, running out of resin !
I didn't have enough resin to help you out.

I found that when I glassed one side at a time ? There was a dry line, running down the keel. One side wetted out, the other side dry.
I had no problems, at that seem, when I came back 6 hrs later to wet the other side. That would have worked for you !

Kevlar is a big enough pain, to work with. When you try and wet out two layers at a time ? That's a real challenge !

Don't worry ! It will float, and be fine. The boys will have a blast with it !

Did the peel ply, flatten the edge of the kevlar, to be smooth enough, not to need feathering ?


Jim
 
Last edited:
Alan,

I'm curious to see if the multiple layers of Kevlar will be adequate for the seat loads. I know you'll get quite a bit of hull stiffening once the gunnels are on.

I think it will be fine. The sides, after that last layer of Kevlar, are pretty stiff. I've pulled gunwales off a couple composite canoes and the sides feel more rigid on this canoe than those did. And since it's for kids there shouldn't be any 250 pounders in these seats.
I had a similar experience wetting out kevlar, especially the amount of resin it took. The weave of my fabric made it tough to get the resin through. Much different than fiberglass, my Kevlar was more difficult to see the starved areas and areas where resin pooled underneath. Once pooled underneath it was almost impossible to pull it back through.

I wouldnt try and wet out 2 layers of the stuff I have. On my overlaps I pulled back the over lapping cloth and wet out the bottom layer first, then pulled the overlap on top and wet it out.

Mark

Good idea on pealing back the overlapping layers to wet out the bottom layer first.

Absolutely YES on it being difficult to remove pooled resin from under the Kevlar! Carbon can be the same way.

I think much of my problem stemmed from attempting to do too much of the hull at once. I underestimated how much time it was going to take to laminate the interior and I was working on almost the entire length of the hull at the same time. I poured out a bunch of epoxy and starting spreading it all around with the squeegee both lengthwise and up the sides. As a result it took me too long to get to the final stage of working out air bubbles and excessive epoxy and by then the entire hull was starting to gel. I should have started with a 3' section in the center of the hull and fully completed that section before moving on to the next.

Things were going ok on this job until I started squeegeeing off the excess. The excess seemed to be coming off nicely but after squeegeeing it looked like I'd actually removed too much epoxy and then it seemed nearly impossible to get it to absorb more. There were also some pools of epoxy still under the cloth that were very difficult to get rid of, even with a ribbed roller.

I've run into the phenomenon (starved cloth after squeegeeing) before when I was wetting out multiple layers of carbon and Kevlar. I wonder if these thicker cloths compress under squeegee pressure, kind of like a sponge, and then are too dry once they re-expand.

The stuff really is a PITA to work with all around and I'm unsure exactly what the benefit is for us DIYers with hand layup. I doubt there's any weight saving because of the huge amounts of epoxy is sucks up. The worst part is that I'd come to this conclusion after building a couple canoes with Kevlar years ago but here I am, doing the same thing, and running into the same problems.

Alan
 
Did the peel ply, flatten the edge of the kevlar, to be smooth enough, not to need feathering ?

That depends how picky you want to be. And I'm not being very picky. :)

It does a better job if you use wider pieces of peel ply and if the resin isn't already gelling when you apply it.

As it is the transition is eased with no sharp edges of cloth, which is good enough for me. The peel ply makes it easier to smooth the edge perfect later, if desired, but since this Kevlar I'm not going to mess with it anymore.

Alan
 
Time is getting short on this one. I need to deliver it to Minneapolis in less than a week. The outside was varnished a couple days ago and I'm waiting for it to get a little harder before flipping it over. In the meantime the gunwales are cut and scarfed and today I'm making seats.

More epoxy and syringes are supposed to show up early next week and I'll do my best to fill those interior voids under the Kevlar.

Still need to build float tanks as well. It will come down to the wire.

20240706_091458.jpg20240706_091505.jpg
 
As a never-builder, I don't understand all the technical details discussed in these threads. Unless they are reflections off a ceiling-mounted discotheque ball in your shop, what are those white areas on the hull?
 
Epoxy and syringes showed up today so I tried filling some of the voids. I got Total Boat penetrating epoxy from Jamestown Distributors and it's very thin, which is what I wanted.

It was mostly successful. I found it worked best to drill multiple holes in each void. I had to really push the needle sideways into the hole to keep the epoxy from just bubbling back out. When I got it right I could see the epoxy filling the void and the air would be expelled out one of the other holes until epoxy flowed out. It didn't work 100% but pretty good.

The Kevlar was definitely dry in those areas because in a couple spots, as I was injecting epoxy, it started to bubble out through the weave of the cloth. So when I finished filling the voids I mixed up a few ounces and dumped it onto the floor before squeegeeing it around in hopes it will fill in any holes in the weave.

I was thinking tonight that things will have to go absolutely perfect for me to have this hull completed by the weekend delivery date so I think I'm going to deliver it uncompleted. I'll get it paddleable but I'll skip the float tanks and interior spar coating until this winter when paddling season is over and I get it back into the shop. I'm afraid if I try to do it all if one thing goes wrong it either won't get done or I'll be staying up until 2 a.m. to try and finish it.

Alan
 
It's been a rushed and busy week trying to get this boat done but I'm calling it a wrap. I'll get it back this winter to add float tanks and do a little better detail work.

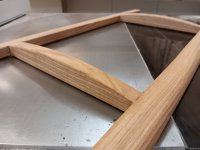
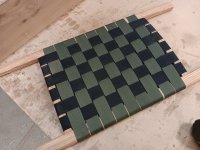
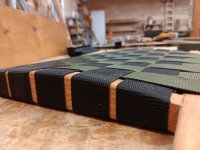
I can't believe this was my first time making wood canoe seats. I've made plenty of carbon ones but no wood. I decided to used the raised side arches that Jim Dodd recently came up with. I'm curious to see how it feels.

20240711_200850.jpg20240712_192159.jpg20240712_192209.jpg

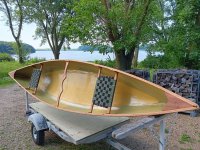
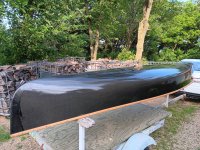
It's all loaded up on the trailer and ready for delivery tomorrow.

The trim is all ash except for the walnut deck plates. Gunwales are 1/2"x3/4" for inwales and outwales.

Final weight was 32 pounds, which I'm happy with

20240713_083015.jpg20240713_083339.jpg
 
Looks great Alan !
I like the lines . Did you get a chance to get it wet ?
If not, at least you have the stripper to test !
I would have liked to get up and see it !
With the flooding and road closures, it wasn't in the cards !
I'll try and get up again soon.

Jim
 
Epoxy and syringes showed up today so I tried filling some of the voids. I got Total Boat penetrating epoxy from Jamestown Distributors and it's very thin, which is what I wanted.

It was mostly successful. I found it worked best to drill multiple holes in each void. I had to really push the needle sideways into the hole to keep the epoxy from just bubbling back out. When I got it right I could see the epoxy filling the void and the air would be expelled out one of the other holes until epoxy flowed out. It didn't work 100% but pretty good.

The Kevlar was definitely dry in those areas because in a couple spots, as I was injecting epoxy, it started to bubble out through the weave of the cloth. So when I finished filling the voids I mixed up a few ounces and dumped it onto the floor before squeegeeing it around in hopes it will fill in any holes in the weave.

I was thinking tonight that things will have to go absolutely perfect for me to have this hull completed by the weekend delivery date so I think I'm going to deliver it uncompleted. I'll get it paddleable but I'll skip the float tanks and interior spar coating until this winter when paddling season is over and I get it back into the shop. I'm afraid if I try to do it all if one thing goes wrong it either won't get done or I'll be staying up until 2 a.m. to try and finish it.

Alan
I find drilling a hole at each side and canting the hull a little allows you to fill from the lower hole, right up the higher one with ease, then slap tape on each and move on to the next.
 
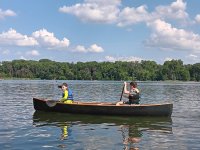
The canoe was delivered this weekend. It was a hot one but we got it out for a quick paddle before doing some fishing. It was a success and the kids did great. These two are 8 and 11 and they should have plenty of years before they outgrow it.

Congrats on a project done quickly. It likely would have taken me a year to get it all done, and I'm talking just the one-off "slip" hull off the outside, I take it that the extra layer(s) in the seats area stiffened things up there sufficiently? That was my big worry. Less of a problem with smaller kids like those two, but they'll grow, also.
 
The canoe was delivered this weekend. It was a hot one but we got it out for a quick paddle before doing some fishing. It was a success and the kids did great. These two are 8 and 11 and they should have plenty of years before they outgrow it.

View attachment 142389
That's what it's all about !

That day will stick with them, the rest of their lives !

Good on you Alan !
 
I take it that the extra layer(s) in the seats area stiffened things up there sufficiently? That was my big worry. Less of a problem with smaller kids like those two, but they'll grow, also.

Yes, I think it's stiff enough. These two are lightweights so not much of a test. I was hoping to paddle it myself and bounce up and down in the seat a bit but time was short and they wanted to do some fishing.

When picking up the canoe and moving it around the sides felt as stiff as the lightweight Kevlar canoes I've owned in the past. I feel good that it will be ok in the long term.

Alan
 
Back
Top