• Happy Birthday, Lead Belly (1888-1949)! 🎸🕛🪨🏝️

A Raven from Scratch

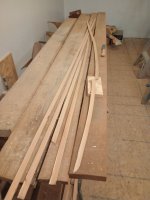
Brian, you're certainly right about the rough cut lumber and and the table saw (which I don't have) would certainly help.

I suspect that my sawyers weren't changing blades often enough as the band saws tend to start wandering & cutting thick-thin when the blades start to dull. I had some thicker spots in the pine (the Larch is more uniform) and probably should have run them thru a planer but I didn't.

Happily, the 1/8 inch cold-rolled seemed to have less flex than the strips and held the strips pretty solidly against the temporary fence.
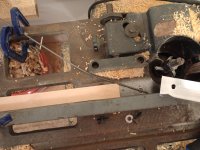
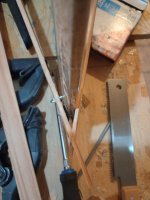
IMG_20241202_170547274.jpg

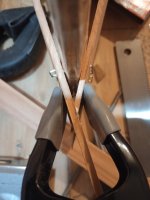
I replaced the lighter TIG wire with the 1/8 inch cold-rolled, used tin snips to cut the leading edge of the angle and then used pliers to form a ramp to guide the strip under it (as seen in the above picture). I inserted a strip, pushed the angle down securely and tightened the screws to secure the angle. It was a bit of a challenge getting the angle to have enough down pressure to hold the strip tightly to the table but, by bending the trailing corner down a little, I got it and the results are (IMO) acceptable.

One board had a pretty thick area at one end and the shaper set-up seems to uniform the strip pretty well. I may leave the crowder in place for the coving operation just to ensure total uniformity but I'm very pleased with today's results. You'll notice that the wire provides sufficient force to keep the strip tight against the fence while cutting much deeper as it removes the thick part of the strip. (apologies for the shaking, I was holding the phone with one hand & shoving the strip with the other)


Again, I think that running the boards thru a planer (especially when they have THAT much thickness variation) would have been a great idea, but I'm pretty satisfied with this set-up as a work-around and I'll, hopefully, get the bead cut into rest of the pine and the Larch on Wed. I'll then have to reset the shaper for the cove. (would a 2nd shaper seem excessive? Then I'd only have to reset if I changed strip thickness) 🤷‍♂️
 
Last edited:
I'm usually not one for over thinking things like this, I usually just forge ahead and d@mn the torpedos.
However, I'm thinking maybe you might get a variation in the depth of your bead doing this. Wider strips will probably all have the same depth, but less wide strips might only have the crest of the bead, with a flat spot on the top. You might get both of these aspects in the same strip if there is enough variation. I don't think it's that important for the bead, but I have had that happen on the cove, it can be frustrating. I can remember mixing up different width strips before and getting some very shallow coves, which still worked because in the end I really don't care, but it was somewhat frustrating.

Anyone ever use one of the those robo-bevels? I've been looking at it for a while. I assume you would have to have one good side for that to work too though.
 
I'm thinking maybe you might get a variation in the depth of your bead doing this.
I've tried to compensate for this by setting the depth for the thinnest part of the strips. Like you, I'm building daily drivers so a gap here or there (if I get them) won't bother me. I can certainly see that a shallow cove would be more problematic.

I've wondered about the robo-level too
 
Rough lumber is just that, rough. It may or may not be uniform in width or thickness. If you get a board that has varying thickness along the length, then when you cut strips, the strip edge (or new width) will also vary .... you are not going to "uniform" that with the router. You need something that starts as being reasonable straight to be gin with.
All lumber starts out Rough.
It's the machine work, that uniforms it.

I've worked with several planks that varied 5/8" - 7/8".
My router easily turned those strips, into uniform strips, of slightly less than 5/8", including the lip on the cove.

I've proven this time and time again.
No need to plane those strips!

Jim
 
Last edited:
Anyone ever use one of the those robo-bevels? I've been looking at it for a while. I assume you would have to have one good side for that to work too though.
I have read pros and cons of the bevels.
While some like them, to me it's too fiddly.
It doesn't do anything to lock the strips in place, like bead and cove.
I can bead and cove all my strips in far less time, than it takes to hand bevel.
With the roto bevel, you would want to plane your planks before cutting your strips.
I use planks that have one rough side, and as stated before I don't plane my planks, the rotor does that for me.

Jim
 
With the crowder figured out on the shaper, I stopped over tonite to bead everything. I had stripped out enough White Pine for (probably) 3 builds and in about 2 hours I'd beaded all of that, enough Sassafras & Cherry to do accent strips on the Raven and the next boat (to be determined) and started in on the Larch.

Another hour and a 1/2 later, I'd gotten most of it done but a few notes for anyone considering this wood: 1) it is much more finicky than the Pine, Aspen, Cherry or Sassafras and it tore out easily unless I watched the grain. Even then, I couldn't just shove the strips through like I could the other woods and I can probably mill Pine or Aspen 3-4x faster than I can the Larch. 2) The grain seems to go in all directions at once and it wasn't unusual to be machining with the grain at the beginning of the strip and against it at the end. 3) When it tore out because I wasn't careful in reading the grain or got feeding it too fast, the strip would sometimes just explode against the bit and it was often necessary to disassemble the crowder & shoe set-up to remove the splintered wood. 4) I have no idea if it was due to cutting green(ish) strips and letting them air-dry for a year in the upstairs of the garage or if it's just the nature of the wood species but some of these strips had a lot of twist. Enough that I was sorting & trimming the really bad pieces either before stuffing them in the shaper or after (when they were obviously under-sized)

IMG_20241204_205923883.jpg

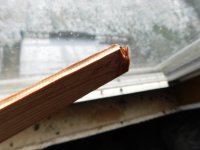
(Note: Just to give an idea of how well the crowder works, the twisty strip in the above picture was uniform at 1 inch until the piece I cut off. IMO, that's a pretty badly twisted strip and I can't expect any better results than what I got.)

Finally, 5) This is a really pretty wood. I'm still undecided if it'll be worth all the extra hassle and attention necessary to build with it but I'm going to proceed. Like dating a high maintenance but gorgeous woman, I think it'll be worth the effort. Of course, if the finished boat weighs as much as the Titanic, I'll have to reconsider... (been there, done that)
 
Last edited:
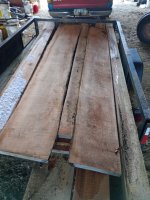
Not sure if I have mentioned it before, but Tamarac is universally despised up here as anything other than firewood, and even then it is approached with caution, as it burns so hot due to its resinous nature. It is well known for its inability to dry in a straight line, and it is very difficult to work with, as you have described. I only made one thing out of it, a carrying yoke for one of my solo canoes, and it ended up being just as heavy as a hardwood.

Generally speaking, as we age, we learn to avoid the high maintenance partner and the drama it brings to life in favour of reasonable and predictable outcomes.
 
Gamma, I did a bit of napkin math on weight projection for the materials (since you mentioned weights).

The Larch hull in 3/16" strips should end up ~30 pounds (cedar ~18.5 FYI), glass/epoxy will be ~12 pounds, depending somewhat on application (estimating surface area at 52 square feet).
So when you get the hull off the molds you should be close to 42 pounds, with the present plan. If you know the gunnel/thwart/seat sizing, it will be pretty easy to figure the likely end weight, then add about 2.5 for varnish.

Brian
 
Thanks Brian. I'll be thrilled if it works out that way as I'm hoping to finish in the 55-60 lb range (still heavy but manageable). Mem tells me his White Pine Raven was 65 lbs but that's likely with 1/4 inch strips.

Early finish today at work so I'm headed back over to see if I can get finished up & start cutting some coves.
 
Lol, you won't be dropping it off, you will either love it, or burn it in a raging fire of regret in your back yard.

John Winters developed the Raven as a river tripping canoe, hence the rocker. I really like the rocker, gives you nice loose stems for when the going gets tough. Performs really well in big bad waves, and is a lot easier to turn than the Osprey. Might not be the preferred hull for Satan's double blade, but for single stickers who can make canoes go straight, it seems to motor right along, keeping up to or passing tandems. When conditions are appropriate on the flats, I've got it heeled over, so rocker doesn't really enter the equation then.

As I've said before, people either love it or hate it, there is very little middle ground. It has the reputation of being a very large solo hull, which it is, but people who have soloed for their entire lives in tandems might find it too small for their liking, and people who have soloed in the usual small hulls might find it gargantuan. Switch hitters, or hutters, or whatever the proper term is, will not like the hull because of the rocker, dedicated white water enthusiasts will not like the hull because of the asymmetrical hull and rocker, and lightweight trippers will not like the boat because of the weight.

For a classless fella like me who sometimes carries a dry bag with 72 beer in it, and a chainsaw and gas, and assorted other creature comforts, it rounds out to the perfect hull.

You are my kind of classless fella!
 
I took some time yesterday, got the crowder set-up off of the shaper and reset it to cut the coves. It took some time to get that part right as the strips were extremely flexible, more so in some places than others, and I was initially finding places were the cove was running off the edge of the strip.

DSCN3496.JPG

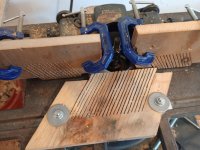
I came to the conclusion that my featherboards were too far from the cutter and also too tight against the strip so I moved them toward each other until they were touching (above the bit), set them so that the were just touching the strip enough to hold it against the table but not enough to put pressure on and relied solely on the horizontal featherboard to prevent any possibility of the strip kicking back.

IMG_20241207_112952423.jpg

(sorry, I didn't take a picture of the final set-up. PS: I also moved the clamps from above the cutter- thought OSHA might have a fit about that lol)

Overall, I was pleased with the result although many strips would kick a little after they cleared the fence on the infeed side or cut a little thin until they reached the outfeed fence. I trimmed off these boogered ends as I went and also inspected the beaded sides for any that did not seem useable.

DSCN3497.JPG

It was still necessary to feed material slowly and there were still places were the grain caught & ripped out. In all, I'd bet that nearly 1/3 of the strips landed in the reject pile although there were 4 that were not beaded well but were straight and took the cove nicely. I set these aside as starter strips since the sketchy beads will be covered by the gunwales.

DSCN3499.JPG

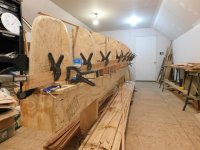
In all, it took me about 4 hours to sort and machine the strips. I wound up with 2 thicknesses of Larch (7/8 in and 1 1/16 in) and a dozen or so strips of Sassafras (which was much, much easier to work with). I decided not to cut coves onto the Pine & Cherry but left the shaper set up for them after this build is completed. (Pine is under the strongback in the above picture and Cherry is on the other side. Both will probably have to be moved before I sand and glass)

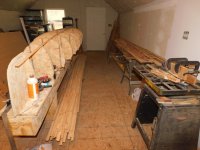
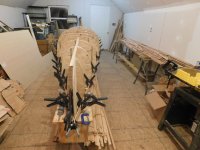
I had to leave briefly to pick up a load of Poplar, Red Oak and (really nice) Cherry that my sawmill buddy needed rid of and, when I returned, I started stripping. (no, it wasn't too warm in the shop and nobody wants to see that anyway... I started putting strips onto the forms!)

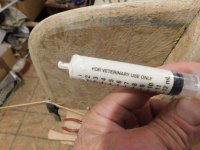
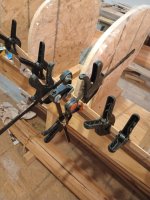
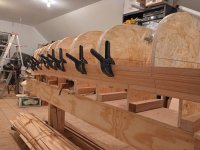
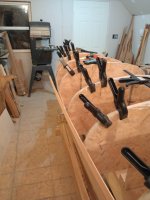
After my Freedom build, I'd decided that I didn't want to taper the strips along the chine again and before dogbrain & Alan showed me a better way to get a sharp edge there, I had rounded off the chine when I cut the forms. (I figured that anything above waterline won't affect hull performance anyway so I might as well try to make it easier on myself). I started at the sheer with the 4 "reject" strips, loaded my syringe with Gorilla Glue (not only does the syringe work well for making very thin glue lines but I also take pleasure in disobeying things like "for veterinary use only") and got 3 strips on each side before calling it a night.

DSCN3503.JPG
DSCN3504.JPG
DSCN3505.JPG
 
Last edited:
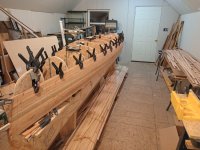
A simple trick, to prevent tear out, turn the strip, end for end, when you run your next strip.

I would add an extra layer of tape to your stem forms. Often times, I would nick the tape, when tapering strip ends, on the forms. It's no fun prying your hull off the forms !

Nice clamps !


Jim
 
A simple trick, to prevent tear out, turn the strip, end for end, when you run your next strip.

I would add an extra layer of tape to your stem forms. Often times, I would nick the tape, when tapering strip ends, on the forms. It's no fun prying your hull off the forms !

Nice clamps !
The grain seems to go everywhere in these strips and it wasn't unusual to start a strip with the grain and finish against it. I think this hull will be gorgeous but I remain unconvinced that it will be worth it (more on that in a minute)

I am touching up the tape as I nick it and trying to be extra careful. I avoided gluing my strips to the stem form in the Freedom and I hope to avoid it again.

Yep. "Jimmy" clamps work great. Thanks again for the idea.
------------------------------------

I stopped by the boat shop on the way home from my daughter's and put in a couple more hours. I needed to redo the last strip I'd placed at the stern as I wasn't careful enough and the one strip had pulled away from the form.

IMG_20241208_184101441_HDR.jpg

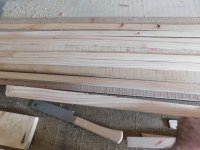
I pulled the staple from the left-hand strip and used the pull saw to cut the right-hand strip away. 3 passes later I had both strips against the form so I re-glued and replaced the staple. (close enough)

IMG_20241208_184402972~2.jpg

(Incidentally, if you look closely at the above picture, you can see how far off I'd been by where I'd cut the cove away with a chainsaw file. I try to show stuff like this to encourage others who may have an interest in building but aren't sure they can. I, sometimes, screw up a couple of times a day but there's usually a solution if you think it through. Besides, at the end of the day, it'll be covered in fiberglass and it's certain to displace water... It absolutely HAS to float!)

Speaking of screwing up...maybe it has something to do with the Larch or maybe it was just a bad idea to round off the sharp edges of the the chine but I think it was harder trying to wrap these strips around the rounded-off chine than it was tapering the strip like I did on the Freedom. Happily, the Larch was flexible enough to twist it like a pretzel but it really took some creative clamping to get the strips glued and held together as they were forced to twist around the chine.

IMG_20241208_203901856.jpg

In the end, I got past the chine area tonight and should have relatively smooth sailing the rest of the way. Accent strip (Sassafras) is next & will hopefully be on tomorrow after work and a couple of donkeys (work and more work before I can work :LOL:).

IMG_20241208_204242601_HDR.jpg
 
Last edited:
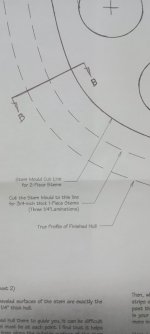
I put in a couple of hours after work and got another few strips on but, more relevant to this site, I screwed up a fair amount. (anyone thinking of building: it's ok to screw up & here's how I fixed today's mistakes)

I'm building stemless (sorry, not gonna fix that "mistake" as I don't really think it IS one) and it's important to alternate the strips that go over & under at the stems so as to provide maximum strength (admittedly, not the strength of a solid piece of hardwood but adequate IMO).

When working up the sides, I've set it up so that I started at the bow and went past the stern on one side and then started at the stern & went past the bow on the other. I then reverse direction around the boat (bow to stern & vice versa) when I move to the next strip, sighting down the strip below while cutting and then using a scrap piece to fit the shorter piece (the strip being bypassed at the stem) before gluing on the longer piece.

IMG_20241209_205035328.jpg
IMG_20241209_195406849.jpg

I hope that I'm explaining that clearly and I feel that it's necessary to explain this because, in my excitement to lay strips, I forgot to do it twice tonight.

The first time, I didn't really forget as much as I just miscalculated the length of the strip. I wound up about an 1/16th of an inch short on the accent strip and, rather than try to duplicate the compound angle of the strip (maybe there's any easy way to do this?) I spliced in a short piece and re-cut the pre-beveled Sassafras strip so that it fit.

IMG_20241209_192114996.jpg

(I doubt anyone will notice but if they do... Well.... use your imagination, this is a profanity-free forum)

The second time, I just forgot to cut the beveled strip before installing the bypassing strip. Happily, it was a very short piece so I pulled the staples, removed it, cut the piece being bypassed and reinstalled the bypassing strip. End result was some extra glue to sand off but not a deal-breaker.

IMG_20241209_195643577.jpg

Incidentally, I've found that it's easiest to trim the bypassing strip as you go so that you don't walk into it (the Raven is nice in that it is shorter than the strongback so missing the strongback means missing the canoe)

IMG_20241209_192030733.jpg
IMG_20241209_194724176.jpg

and that the easiest way to get the next strip length (I don't use full-length strips so I bevel every one at least once) is to hook the next strip behind the one that's already on and then bend it around the forms so I can select the following strip (according to length) and minimize waste.

IMG_20241209_200154415.jpg
IMG_20241209_200158573.jpg

The only other note I'll make at this point (and apologies to builders as you already know this) is that the strips, cut at this thickness, are extremely flexible and can be pulled to fit tightly before being stapled. The glue will (hopefully lol) hold it all in place until it's fiber-glassed at which point it's permanent.

IMG_20241209_201744395.jpg
IMG_20241209_201840216.jpg
IMG_20241209_200903445.jpg
IMG_20241209_200940362.jpg

Overall, I'm very pleased with this build at this point... The material is easy to work for this stage and I'm really liking the way it looks. Despite upcoming medical issues, I think I can have it off the forms by New Year's.
 
Tamarack looks great! One thing slipped my mind...all of Martin's plans come with the idea that you will be using internal and external stems. I can't remember, been a while, but did he also include a line for a stemless build?

With my new method of building stems from 1/8 inch laminated pieces, forgoing the steaming process, I really don't see the advantage to stemless builds for time saving. Each to their own though, I don't want to have the stemy arguments, lol.

Seeing this build is giving me the itch again, gonna haul those Pal forms down and see what kind of solo I can put together.
 
Cut back on the glue ! You will thank me later !

My goal is not to see any glue squeeze out. It will save you a ton of sanding and scraping later !!!

Yes ! Go stemless, or go home ! Ha ! Just a little rib for those Stem guys ! :p
 
One thing slipped my mind...all of Martin's plans come with the idea that you will be using internal and external stems. I can't remember, been a while, but did he also include a line for a stemless build?

I don't think there were lines for stemless. In fact, I think he may have recommended against it as Bear Mountain had on my Freedom. I'll be out of the boat shop for a couple of days (I get sliced open @ 10 tomorrow) but I'll check when I get back.

I'd like to try building w/ stems @ some point but I like to get what I'm doing down before I start switching things up too much (except wood species... a big part of these builds are to see what the different woods (& combinations) look like... I'll keep doing that.

Yes, unless I'm very much mistaken, the Larch / Sassafras combo is going to look beautiful. Maybe even pretty enough to make up for the PIA machining it. Grab some & build your Pal but I probably can't deliver more Sassafras until August. (Of course, you can drive down... I'll load you down with some 5/4 Cherry too :))

IMG_20241208_131429465.jpg

My goal is not to see any glue squeeze out. It will save you a ton of sanding and scraping later

Some of those pictures ARE pretty glue-heavy... I usually shoot for barely visible squeeze-out and wipe it off as I go. I may actually sand this one better than the last so I'll have to be stingier on the glue.
-------------------

I stopped by the shop briefly and got another strip or two on tonight. I think I'm going to be pretty close on the Larch (I'm really getting short on the 7/8 inch strips) but I also think I'm close to 1/2 of the area covered.

IMG_20241210_213726087.jpg
 
The plans for the Raven I built didn't make any mention of being stemless. It discussed one or 2 piece stems 17339449331216025730333844139242.jpg
I went with the 2 piece stems because it was what, I assume, the true design of J Winters. And it was interesting to do.
Enjoying following along.
Roy
 
Back
Top