• Happy Birthday, Lead Belly (1888-1949)! 🎸🕛🪨🏝️

A Raven from Scratch

I'm trying to understand why a builder would choose a heavy wood to be the core of what is essentially a composite canoe. I can think of a few reasons.

1. Simple curiosity and desire to experiment with unusual woods as a hobby.
2. The heavy wood is spectacularly aesthetic or valuable such as 200 year old drowned cypress or Sri Lankan ebony.
3. It's the only wood one has on hand or can afford.

Aside from those situations, for an actual usage canoe rather than a garage or mantel queen canoe, I'd prefer a 25% lighter canoe to a 25% more aesthetic wood core canoe any day. And I know from experience that I'd prefer the lightness factor more every day I get older.
 
Glenn, I'm choosing the heavier woods because:
1) I like the aesthetics, particularly of the various wood combinations
2) the woods I'm using are readily available near me at much cheaper prices than Cedar
3) These trees grow at much faster rates than Cedar so they can easily be replaced within my lifetime
4) I like to be different
5) and enjoy seeing what's possible.

I plan to actually use the canoes I build and this particular hull is destined for another 100 mile(ish) trip near Memaquay on the Marshall lakes loop in (hopefully) July. I think it's less portaging than I did on the Steel river but I'll still try to keep weight reasonable.

I think that, shortly after I joined, someone "dared" me to build one from Oak. If the micro balloons actually work, I may build the next from 1/8 inch strips of White Oak. (I'm just ornery that way). 🤷‍♂️

Is balsa wood a real option?
Yes. I'm pretty sure I read somewhere about someone having done it already. IIRC, it wasn't aesthetically pleasing. (which is ok, as it doesn't grow near me)

You will want to play with the forms to get them as accurate as possible but, honestly, grab some wood & dig in. Worst case: it's 100% flammable and the next might be better. As I'm sure you're aware, there are lots of people here who will help steer you clear of failure. We'll also watch intently if you decide to do something nuts.
 
If you build one of oak, consider adding frames and deleting the cloth. Just seal both sides with epoxy.
Larger boats have often been built with unclad strip planking. My 39' ketch has 1.25" square strips of cypress, edge nailed and glued with resorcinol, coated with only paint. She has heavy sawn frames, in a canoe I would bend lighter ones.
 
OK, I'm about done messing around with test panels and such.

I'd previously determined that the Larch could be sanded without gumming up the paper but I wanted to be certain that the epoxy would bond and I needed to try out the micro balloons to see if they would affect the bond and if the aesthetic change be tolerable.

In order to find out, I sanded 2 test panels and then wet out 4 oz e-glass w/ straight epoxy on one and, on the other, I wet out 4 oz e-glass with epoxy that was mixed 2/3 epoxy and 1/3 micro balloons. I was impressed with how well the micro ballooned epoxy wet out the glass and coverage was noticeably better (like, almost double... more than I'd expected from a 1/3 volume change).

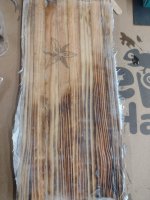
Note: as you'll see in the pictures, I also experimented a little with burning the wood with a propane torch to enhance the grain & try a different appearance. I think burning might be an option for a later build if the wood used is unremarkable but I felt the Larch was prettier in its natural appearance. IMO it was worth trying but I'll not be burning this boat (at least, not until after I portage it a few times)

I allowed the epoxy to cure about 5 days and then broke the panels on Sat night to see what what kind of adhesion I'd achieved and if the micro balloons affected the bond. I was very pleasantly surprised by how much pressure it took to break the panels and I actually had to jump up and down on them to get them to fail. (I know, not very scientific. I suppose I could calculate my body weight vs the area of the test panel vs the area of my footprint and then take into account the height of my jump, etc. but I don't feel like it. I jumped on it, it broke and I tried to pull the glass away from the wood... good 'nuff)

IMG_20240217_150455520.jpg

I found that I was tearing wood fibers away from the strips on both the micro balloon panel and the straight epoxy panel so I feel that good adhesion was achieved with both. The micro balloon cloth, when torn away, seemed much more flexible and felt softer but I assume this was due to the micro balloons themselves and the panel did not seem to be any easier or harder to break when I stepped on it. Like the un-micro ballooned panel, it held my full weight until I jumped up and down on it.

The deal-breaker for me was that the addition of the micro balloons did leave the glass with a slightly cloudy appearance... enough so that I won't be using them on this build. Given the extra coverage and the feel of the cloth I was able to rip off of the panel after breaking it, I feel fairly certain that they would provide a good bond with potentially significant weight savings but I prefer the look of wood and I'll accept the extra weight in order to enjoy the improved aesthetics.
IMG_20240211_200521045.jpg

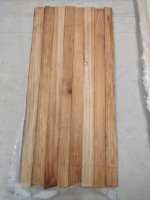
For comparison, here's the straight epoxy panel
IMG_20240202_084449353.jpg

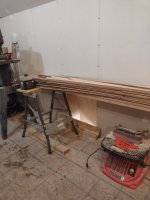
The rest of this afternoon was spent cutting some holes in the garage and building some heat runs to warm the upstairs of the garage. As winter tries to stage a comeback in my neck of the woods, it'll be nice to be able to warm the boat shop enough to cure epoxy. I should be able to get the forms set this week and, if all goes well, I should be milling strips next weekend.
IMG_20240217_212821480.jpg
 
Ready to go! I love it. I never take the time to do test stuff. I know I should. Great job on test panels.
Roy
 
Since the last posting, I've stolen a few hours here & there to prep for the build and thought I'd update:

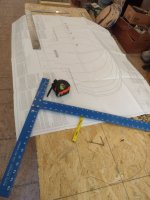
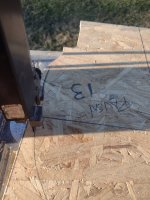
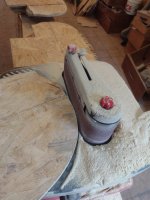
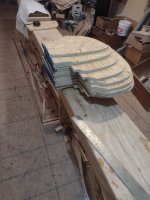
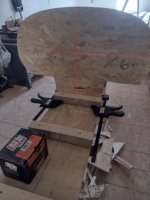
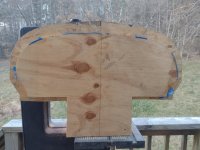
I took about 5 hours last weekend transferring the lines to the plywood, cutting out the forms slightly wide of the lines & then sanding to true them.

IMG_20240303_150653248.jpgIMG_20240303_172159881.jpgIMG_20240310_160347240.jpg

As you can (maybe) see in the above pictures, I used the factory edge for the bottom of the forms and penciled a line 12 inches up from the base and parallel to the factory edge. I'd found tracing the pattern and setting up the forms to be the least enjoyable part of my last build (it's stressful in that the care taken during these steps will impact the integrity of the hull so I try to get it as close to "perfect" as possible) and I believe that will be the case on this one as well.

I did find the plans easier to transfer as the Freedom had fore & aft stations on the same piece of paper (I had to trace 1/2 and then invert the page for the other side) while the Raven plans had the whole pattern on one page and fore & aft stations were on separate pieces of paper. (note: I bought actual paper plans, not digitals, from Green Valley though I suspect that there's no difference)

One place that I cheated (hard) was the chine (at least, I think that's what the hard knuckle at the tumblehome is called). I didn't enjoy fitting long, tapered strips on the Freedom and I saw that Green Valley wanted me to put the 1st strip in the middle of the boat also... I cheated here as I figured that anything above waterline would not affect paddling performance (what happens above waterline, stays above waterline, right?) so I rounded off the hard edges and I'll start stripping at the gunwales and simply bend & twist to get past the knuckle (I like skipping "sucky" parts)

IMG_20240310_164920357.jpgIMG_20240303_182704397.jpg

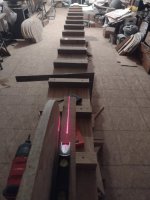
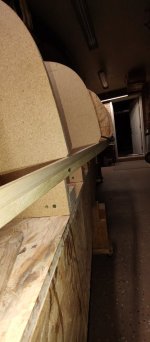
That done, I repositioned the 2x2 station attachments on the strongback to 12" intervals (the extended version of the Freedom was [IIRC] 12 & 3/4"), turned off the overhead lights on that 1/2 of the shop and set up the laser level. This was the reason for the line 12" up on the form as it simplified alignment and I started at the bow and worked my way back.

IMG_20240310_195729585.jpgIMG_20240314_121408109_HDR.jpg

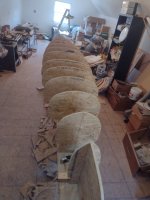
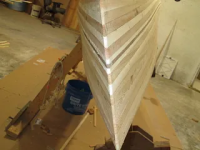
In all, I had about 7 or 8 hours from 2x4 strips of plywood to the finished jig. Next step is to clean up all the scraps around the strongback so that I'm not walking on them and then machine the strips. I'm hoping to start stripping next week (cover your eyes if you're squeamish).

IMG_20240314_124327187.jpg
 
Last edited:
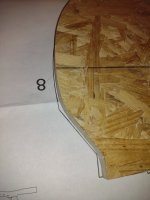
Oh, one more thing for any who might be interested... While cutting the forms, I did a comparison and it became clear just how much more volume this boat will have than my Freedom. Shown is the widest form (#8) of the Raven vs the widest (#9) of the Freedom.

IMG_20240303_174728716.jpg

I may regret all of that extra wood on portages and I suspect the challenge will be to keep weight under 60# using Larch but I'm going to proceed as planned. I think that most of the w/c canoes are heavier than that and (at least for now) I can handle it.
 
Looking good👍 I struggled a little coming around the chime on mine also. I think it's just one of those things. Mine came in about 60#. The poplar wood I used was about 32lb/ft
 
I'll soon have some doctor-enforced downtime and I'm determined to get this boat done. (In fact, I'm hoping to build two this winter... more on that later). I was struggling with getting the strips consistent when I quit on it last spring and, having some free time today, I decided to take another crack at it.

I'd cut a pile of White Pine and Cherry strips for the 3rd build and figured that, while the shaper was set up for bead and cove, I might as well do all the strips for both boats. I'd set the shaper up for the bead last year and the depth was correct, I just couldn't keep the strips uniform as they passed the bit due to thickness variations in the boards (now width variations in the strips) and the amount of yaw in some of the strips.

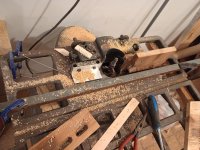
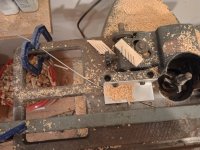
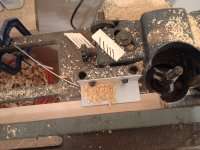
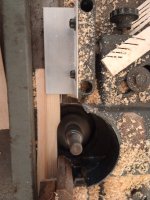
Here's my solution to date: I clamped a piece of square stock to the shaper so that it was parallel to the outfeed guide board and set the distance equal to the desired width of the finished strips (based on the narrowest pine strips that I had). I then attached a fingerboard to that guide board so that it would hold the finished strip securely and removed the guide board (sorry, I have no idea what it's really called) from the infeed side.

IMG_20241201_185825304.jpg

I replaced it with a piece of 1.25 inch x 1.25 inch aluminum angle with the attachment holes slotted a little so the infeed side was elevated and the outfeed side would hold the strip against the shaper table. I placed a piece of TIG welding rod under the aluminum to act as a crowder spring and clamped it to the edge of the shaper in a manner that the bend would keep pressure against the strip.

IMG_20241201_185853244_HDR.jpg
IMG_20241201_185915773.jpg

Overall, it worked reasonably well on the straighter strips. I did run into problems if the strips had an end that wasn't square (the TIG rod would ride up or down and the strip would become wedged under the angle) or if the strip had a lot of yaw (the TIG wire wasn't stiff enough to overcome the yaw and keep the strip pinned against the fence)

IMG_20241201_190540571.jpg

I believe that I can overcome the first of these issues by remounting the angle parallel to the table and bending the infeed side up a little to guide the strip under. This should remove the clearance that allows the TIG wire to ride up or down and force it to remain on the side of the strip.

For the severely twisted strips, I see two options: 1) I'll try a heavier piece of TIG wire tomorrow (I think my buddy's got some 1/8 inch) to see if it can generate enough pressure to keep them against the fence and, if that fails, 2) mark the strips where they get really wonky and cut out those sections.

If anyone has other solutions, I'm certainly willing to try... I'd like to have strips milled for both boats by Saturday (I'll have a few evenings free to work on them this week).
 
I'm having trouble figuring out your shaper, it almost looks backward or something. However, I think what you are saying is that you are pushing the strip against the outside fence, not the fence next to the router bit. Interesting concept, I've never done it like that. I always just used feather boards to push the strip toward the inside fence, and some from the top pushing the strip down. The strips all turned out the same width, if they were thickness planed to the same width before cutting.
 
Yes, I'm trying to run strips between the temporary fence and the bit in order to get uniformity of strips (I don't have a thickness planer and shouldn't need one if I get this right). The Aspen I used last time was more uniform but I still had gaps between boards so I'm trying to clean it up this time.

I have a feather board on the outfeed to hold the strip down & keep it from trying to kick back. On the infeed, I think the angle should hold it down but I need to find something that's less than 3/16 inch to keep the strip against the temporary fence. If I can uniform the strips during this operation, I can put the shaper back together and use it normally for the coving.
I read and reread the post describing the issue, please excuse me if I get it wrong (I do that at times)

Since you are talking about initial thickness variations and then those become width variations, I assume you are using rough lumber that isn't planed and the width variations you mention are from thickness variations in the stock the strips are being cut from.

IF this is the case, the issue isn't getting the setup correct, I believe it is that you need at least 1 straight side for it to work and those thickness variations can occur on either side of rough lumber. Put a strip that varies on both sides in that shaper and whether it works or not isn't likely due to your setup, but luck of the draw that one side of the strip is straight enough to allow it to function.

It does look like you are taking off a good bit with the cove cut, so I assume further that you are trying to trim these to whatever width you are aiming for , all in one go ( I also like economy of operation) ... which means you have some extra material.

I know you don't want to add an operation, but to get this to work you will likely need one reasonably straight side ... I think a jig to hold the strip to a longer fence on saw (think table or in my case a radial) and trimming a bit off the strip will give a reasonably straightened edge (IMO). It wouldn't be a substitute for an initial planing/jointing but that longer fence should flatten out the width variations enough to let the strip flexibility allow your shaper to do the rest on the uncut side.

This is just a thought, you know your shop and tools best, there are likely many ways to handle this, but the issue I believe maybe that you need that 1 good enough edge to make it all work.


Brian
 
Yes Brian, I'm using rough cut, you understand what I'm attempting and, in hindsight, I agree that it might be a good idea to pick up a jointer & get a good edge for future builds. For now (because the strips are already cut) I'll try to see if I can get enough pressure on the strips to keep them pinned to the temporary fence until they get past the cutter.

I'm hopeful that, if I can keep it tight to the temporary fence, I can achieve uniformity in the same manner that the circular saw follows the contours of the board when cutting strips (although, instead of following the contour, I'm flexing the strip to remove the contour and figuring that I'll deal with the twists and turns when I glue them in place).

I'm trying not to take TOO much off and, in the last picture, what you are seeing is where the TIG rod had more flex than the strip it was holding (note that it has gotten quite far from the piece of square stock).

I stopped by the hardware store and grabbed an 1/8 inch x 36 piece of cold-rolled round stock. I've gotta fix a furnace for a friend after work and then I'll see if the cold-rolled is more rigid.
 
Point I was making Gamma, is that is you pass them through a large saw (i.e. tablesaw) with a longer fence, just trimming, say 1/16" ... it will smooth out a lot of the edge wave and maybe make what you trying to do a lot easier.
 
Glad your back at it. I decided to take a year or two off from building another.

I've never used a shaper, so I don't know anything about them. After cutting my strips out of the rough lumber, I ran them through my table saw before routing the bead. The router setup couldn't handle that much variation. I made, abused and destroyed a few. Finger boards. They were fairly easy to make and I could cut a few fingers off so I could put it over the router bits.

Good luck and I look forward to watching.
Roy
 
No need for a joiner, when cutting strips from rough cut planks.
A Skilsaw will cut your strips very uniform, in thickness.
A Router will uniform your strips in width, the very first pass while cutting the bead, using this method.
If you run your strips between the fence and the bit. Which you have.
You are going in the right direction.
Uniformity in your strips will ease the work in sanding later on.
Note. If you can afford to buy strips from a well known supplier, you will get very uniform strips.
Better to make your own!

a pic. to illustrate, my simple router set up.

fb4e87eb-70cb-477b-bbfd-f04d567dcd95.jpg


Another advantage to uniform strips. Only uniform strips, will match up at the ends.


1733190043910.png
Good luck Looking forward to seeing the hull stripped up !


Jim
 
Last edited:
Rough lumber is just that, rough. It may or may not be uniform in width or thickness. If you get a board that has varying thickness along the length, then when you cut strips, the strip edge (or new width) will also vary .... you are not going to "uniform" that with the router. You need something that starts as being reasonable straight to be gin with.

Jim, in your router setup (and Gamma is using a shaper) that guide is long enough that if there is an arc in the edge of the board (varying thickness in the source board), you will not be able to make a uniform strip with out addressing the edge first.

You really have to look at your source lumber, if you are getting it from a supplier, then it will likely be close enough ... however ... rough lumber is undimensioned and it can also be somewhat misleading ... I have had 4/4 boards that were closer to 6/4 boards and boards that vary in width down the length, a lot. The board width doesn't matter with the skillsaw method, but that varying width will make a difference when you try to "uniform" those strips. If the edge has too much wave, you just aren;t going to make it work ... you need a least one side to be "fairly" straight for it to be workable.
 
Back
Top