• Happy Birthday, Stan "the Man" Musial (1920-2013)! ⚾🐦

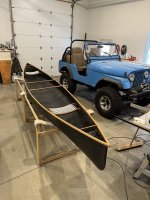
Sawyer 17’9” Cruiser on a diet

Jim,
I forgot to ask
Did you do any of your composite copies with the stems closed?
The Sawyer has no tumblehome and slightly laid out stems, I think I don’t need to leave the stems open. Pretty sure it would pop off the plug with fully finished stems.
I went back and found the advice I'd received from Muskrat. It's on this page: https://www.canoetripping.net/threads/gp-build.37137/page-4

I also went back and read my build thread where I used a male mold for my composite tandem. I did leave the ends open but when it was time to close the ends I put the composite hull back on the male mold to give it the proper shape. And the dang thing stuck on me after wrapping the ends! I had a heck of a time getting it to release and was legit worried I wouldn't get it without damage. Eventually I did but it was close. I think, because there is no give at all in the rigid stems, that it makes it much harder to break even a light bond. On the main hull a few hits with a palm or rubber mallet will flex the hull and cause separation from the mold but not at the stems.

Alan
 
My first canoe was a Cruiser. It made a lot of other canoes seem slow.
You are doing some interesting alchemy here. This where new ideas come from. Keep it up.
 
Well, it's been a heck of a 2024...had to spend way too much time back at my R & D company. So much time, that I had no time to work on the SC-1 (Sawyer carbon copy #1).
Things have finally slowed down a bit, so here's an update.
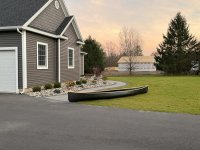
First things first, I had to retrieve the hull from my 48 ft box trailer. I know you guys study these pics carefully (as I do all of yours), in the background is my son and DIL's future detached garage and new house (house is hidden from view).

IMG_5635.JPG

I bought some mahogany planks, at least enough for a handful of thwarts and a couple seats.
Blanked out the thwarts.
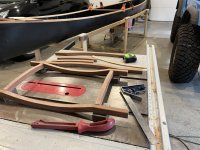
Then I laid out the curved pieces for the Dodd seats, IIRC, I used a 28" radius to give a 1" drop on the long parts, and used the same template to cut the crowned side rails.


IMG_5665.JPG

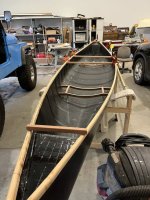
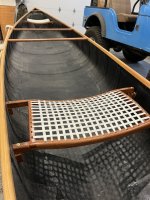
And here's the epoxy assembled seat frames and roughed in thwarts in the hull.

IMG_5666.JPG

I ordered last week and just received today the same 1/2" fiberglass webbing (tubing actually) that Jim used for his seats.
Then I laid out the holes for the webbing, 7/8" on center.

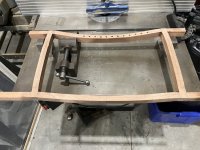
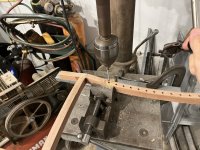
I supported the Dodd seat frames on a couple 1-2-3 blocks on my shaper table and clamped them in a small machine vise. That held the Dodd seats parallel to the bottom of the rails, so I could drill straight holes.
Yeah, I had to move the Dodd seat in the vise several times per rail...

IMG_5673.JPG

Lastly, I clamped a guide rail to my drill press table, so I didn't have to line up the drill in two axes for every hole, just had to line up to the 7/8" spacing for each hole. Drilling goes a little faster that way.
Drilled all the holes with a forstner bit.


IMG_5674.JPG

Thwarts are already shaped and cut to fit the hull. Gotta round over the edges of the Dodd seat frames yet. Then epoxy some cleats to the hull for the Dodd seats, sand, epoxy and screw into place. Then varnish and done!!
Not likely to paddle it this season, but it will likely be christened on a spring 2025 manly trip.
 
Back
Top