• Happy National Pfeffernusse Day! ⚪🇩🇪😋

NWC Cruiser build

Looks great !
Love the roller !

Did the Dacron suck up to the tumblehome, to suit you ?

That was the biggest problem I had with my composite builds. I'm thinking on mine, I might have been better off with a release agent, at least in the tumblehome, than the window film. I have a solution for the next one I build !

Again it looks great ! I'll be watching for more on your build !!

Jim
 
Jim,

It seems the Dacron pulled in nicely.
Before I put the window film on, I put a strip on the very bottom edge of my forms from one end the the other, which I could put staples in.
Then I stapled the window film on that strip. I didn't cut the excess off, instead I rolled the excess and used it for extra hold with the staples. Cut and taped the ends shut. Then shrink with heat gun. Much more effort goes into the Dacron but it will prevent me from having to sand the inside before doing any secondary bonding. Also it will allow me to build the hull with the ends closed as there will be no bond between strip hull and composite hull.
 
Jim,
. Also it will allow me to build the hull with the ends closed as there will be no bond between strip hull and composite hull.

I'd recommend against that. BTDT and it didn't work very well.

For starters are you sure you can spread the hull wide enough to clear the tumblehome?

I built a composite tandem with no tumblehome using a woodstrip mold. I waxed the mold and applied PVA. I figured I'd be fine leaving the ends closed but at the late minute was convinced by other members to leave them open. I'm glad I did as it was a struggle getting it to release even with the open ends.

When it came time to close the ends I simply set the shell back on the form so that I could get the shape perfect. I put clear packing tape on the hull to keep anything from sticking and then peel ply over that so that, like you, I'd have a textured finish on the inside. Despite this I had a heck of a time getting the canoe to release. I honestly didn't think I'd get it off without ruining it for a while. I even pulled the first few forms out of the stripper hoping it would shrink a little. With those ends closed up there's absolutely no give at all, you can't get a run at it.

I finally got a thin piece of spring steel (for attaching large loads to pallets) slipped between the hulls so that it came out both sides about 1/4 of the way back along the hull. I clamped this to the strong back to hold the stripper in place as it kept trying to lift off the forms. Finally, after much hitting with a rubber mallet, prying and lifting the two separated.

I've heard that if you put a 50 cent piece in front of the wheels of a stopped train that it can't go forward without backing up first to get a little run at it. I don't know if that's true or not but that's how I envisioned those ends being stuck. The rest of the the hull is able flex but right there at the stems it's rigid and there's no give at all. So even though the bond is very low it won't budge.

I do like Jim's method of wrapping the stems during layup and then cutting a slit while the epoxy is still a little green so that they can be spread for release. Should make it easy to put them back together again later.

Alan
 
I'm going to echo Alan here. I sealed the ends on two of my kevlar glass boats. The molds I used to make were foam and drywall mud covered in window shrink plastic. The first shell not sealed popped off with ease. The two with sealed ends, I worked for hours with thin metal shims compressed air and three people prying and tugging. I couldn't get them released from the mold. I wasn't reusing the molds so I destroyed them to get the shells off. Open stems on male molds is about as close to religious faith as I get.
 
When I built the fiberglass model late last year, I built it with closed stems. I do realize it was much smaller, but it had tumblhome as well. The composite building book I read stated that it might take some effort to get it to pop free from the mold. That was not my experience. After I pulled all of the staples the darn thing lifted right off with no fuss at all. I partially equate this to the lack of bleed through of epoxy through the much heavier weight Dacron I used compared to what was specified in the book.

I do appreciate the experienced advice.... but I'm stuck on doing it this way, at least on this one.

If this ends up being a terrible decision, you are welcome to say "I told you so" I will certainly let you know how it works out.

I really do appreciate all the guidance that has been given from all that contributed thus far!
You are all talented and helpful people in my book.
 
I do appreciate the experienced advice.... but I'm stuck on doing it this way, at least on this one.

You're going to fit in just fine here. Most of the rest of us have the same 'problem'. Good luck!

Alan
 
Thanks Alan,
By the way I have not made it over to express composites yet, but will try to make it there soon. I will inquire about foam for you as you requested when I get a chance.
I sure wish they were open on Saturdays. I brought my twins with me last time I went, and will never do that again. I have never been in a place that smells like every chemical synthesized by man! I am not exaggerating either. If you have stepped foot in that place before, you know what I'm talking about.
 
Alan, truer words...

Final warning and I'll let you be. With window shrink film alone there is no bond between kevlar and mold. I don't see what the added dacron is doing? A Rizzetta canoe mold is not the same as a male plug. I don't think the tumblehome is so much the issue as the stems. The cruiser has no rake to the stems, that means that the shell will have to go straight up to come off. If one end is pulled up first it will bind. Godspeed.
 
Muskrat,

I agree that rizzetta's style of making a mold is different than using a complete hull. I understand it will probably require more effort to get it to slip off the plug.
The Dacron helps to avoid sanding on the inside. I really only put the shrink wrap on for peace of mind. Also it was quick and easy. Easier than using Saran Wrap as Sam suggests in his book.
 
I've been out of town. But want to share my method, that Alan refers to.

I placed two layers of friction tape on the leading edge of my mold stems, before glassing.

I closed the ends of the hull. Then a day after I glassed, I simply came back with a utility knife, made a cut down the leading edge of the stems, where I had placed the tape. The hull was easily to spread, and lifted off the mold easily. No Problems. I will do the same thing on my next composite !
The friction tape served as a barrier, so I wouldn't cut into the mold !

I too, as Muskrat stated, wonder if the Kevlar won't bond to the Dacron ?
If you are sure they will separate, it should work.
I know it will release from the mold .

Jim
 
Last edited:
No Title

Well, all questions shall be answered soon.
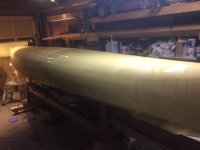
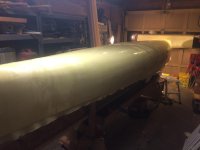
Put the first layer of Kevlar on tonight.
The epoxy makes a temporary bond with the Dacron.
I have faith that it will work.
I won't seal the ends until the end, so if I feel the need to abort the mission, I still can!
It certainly took a while to wet the Kevlar.
A couple pictures....
 

Attachments

  • photo6483.jpg
    photo6483.jpg
    172.7 KB · Views: 0
  • photo6484.jpg
    photo6484.jpg
    164.2 KB · Views: 0
So....I'm getting a little concerned about this Kevlar I'm working with. It doesn't seem to soak up the resin very well, and i don't feel like it is bleeding through one layer to the next.
I put a skim coat on the first layer before laying down the second hoping it will make sure they stick together.
How do you guys that have worked with Kevlar do your layups?
 
I'm guessing I'm too late to offer any help. I use 9 oz biaxial. Never used the 8. I put 2 layers on my guideboat. I had the first layer soaking wet when I put the second on. If I recall the resin would slowly seep through while rolling on the next. Kevlar soaks up resin slowly and it just gets darker when it's wet out. There's no drastic change like fiberglass. It's probably fine. There a few days that have been more worrysome in my life than laying up a shell. I feel for you. Don't be afraid to put some pressure on it with the squegee and really force the resin around. Slow set resin is our friend here as the Kevlar can still be soaking up while the glass goes on.
 
Muskrat,
I think my worst fears have been realized. You pretty much confirmed what I thought was the case. The cloth didn't change color....
I bought this stuff at 10$ a yard and I'm thinking its type 29 and not 49.
I'm not sure I should pontentially waate any more material at this point. I'm thinking I basically have about a 200$ failed experiment.
 
Yeah. I've never seen 4 oz Kevlar before. I do have some 29. The weave is much tighter than 49. I have an unfinished hull up in the barn rafters. I had a bad epoxy pump that threw off the mix ratio. crap happens.
 
I think I need to visit express composites to get some proper Kevlar this week, and compare them with a wet out sample.
Could not agree more with the "crap happens" comment. I'm not terribly upset at this point, as there is still a beautiful stripper under that mess of Kevlar.
 
My first Kevlar was 9 oz biaxial, like Muskrat used. It worked fine. I bought it from RAKA. They no longer stock, as far as I know.
The next Kevlar was 8 oz woven, from Noah's. I like it better. Seemed easier to cut, and handle.

I've had the best luck with wetting out one layer at a time, and letting it cure, past the tacky stage, before adding the next.
It was just too hard to get both layers wet out at one time, without air trapped between, and in the cloth layers.

I think everyone is trying to save resin by wetting out two layers at a time. I don't believe it works.

Jim
 
I've NEVER trusted pumps !!!!
Cups !

Jim

I liked the marked double cups method for big jobs. I use a digital scale for everything else. RAKA still has 9 oz. as far as I know. Last year I talked to them they said they had plenty unless I was building a battleship.
 
Sven,
Before you totally throw in the towel...is there a section of the shell that you could cut out to further inspect, look for resin penetration? Maybe a spot that's easy to patch, or some extra sheer?
Even if your laminate is dry on the inside, you might still be able to salvage it with another wet out from the inside.

BTW, I use graduated paint mixing cups to measure and mix in the same container. I've found there can be much error when emptying a measuring container to another for mixing. Really have to scrape the sides of the measuring container to get consistent results. Also, I've found that all that thorough scraping and transferring eats up precious time. At least, that's how it is for me. I keep many graduated containers on hand, a clean one for each batch. Later, I clean out any cured residue and reuse the containers.
 
Back
Top