• Happy National Pfeffernusse Day! ⚪🇩🇪😋

NWC Cruiser build

SG,
I have not given up yet. I may do as you suggested later today. I'm pretty certain the Kevlar will be dry on the inside, which is not my main concern. I'm more concerned that I don't have a good bond between layers, leaving potential areas for delamination to occur.
I was using the same kind of paint cups you mentioned as well. Kind of nice that they have markings on the side for different mix ratios. Makes for easy mixing.
 
No Title

Here are a couple pictures.
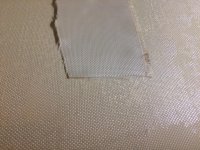
I'm guessing that the first picture where the cut ends got darker is what the whole thing should look like?
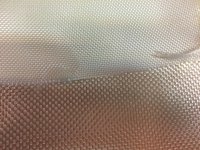
Second picture is of a scrap piece that has not seen any resin sitting on top of the "wetted" hull.
 

Attachments

  • photo6511.jpg
    photo6511.jpg
    298 KB · Views: 0
  • photo6512.jpg
    photo6512.jpg
    346.7 KB · Views: 0
I liked the marked double cups method for big jobs. I use a digital scale for everything else. RAKA still has 9 oz. as far as I know. Last year I talked to them they said they had plenty unless I was building a battleship.
I can see the benefit of the scale ! no more mixing in increments of 3. That alone would save me a lot.

It was several years ago ! They had it on their site, but at the time wasn't in stock. That's why I went to Noah's. The 9 oz biaxial was tougher to cut, and left a texture, more of a line where the stitching was. It required at least another layer of glass to even it out.
The woven left a texture, but not as bad.

Jim
 
SG,
I have not given up yet. I may do as you suggested later today. I'm pretty certain the Kevlar will be dry on the inside, which is not my main concern. I'm more concerned that I don't have a good bond between layers, leaving potential areas for delamination to occur.
I was using the same kind of paint cups you mentioned as well. Kind of nice that they have markings on the side for different mix ratios. Makes for easy mixing.
Before you cut into your hull !

I would roll on at least another coat of resin. Thinking you could at least use it as a start for a Female mold !

Jim
 
Oh, how much resin did you use to wet out both layers ?

Wetting two at a time takes a lot more resin for sure.
By the time you applied the last cup of resin, where you started is beginning to set, unless you have a real slow set epoxy.

I hope you can save the Dacron, if you decide to pull the hull off !

Jim
 
Jim,
I might apply a skim coat tonight and give it a couple days to harden up before I monkey with it.
I only wet out one layer at a time. Put the first on on Friday night.
Put the second on yesterday after applying a skim coat of fresh epoxy.
I would say I used a little more than a half gallon of epoxy for both layers. I do have a significant amount of that on the floor....
I'm pretty much at a fork in the road as to how to proceed....
 
Last edited:
No Title

Back to the drawing board...
So, anyone reading this that is aspiring to head down the path I intended to should heed these words!
Don't get ahead of yourself like I did!
I will be peeling this ballistic grade Kevlar off my mold soon.
Buy the correct material!
At 10$ a linear yard it seemed like a good deal, and it was, if I were making armor!
I should have followed the lead of the experienced builders on this site.
When doing something like this I will never again dive in head first!
It kind of hurts!
Make some test pieces!

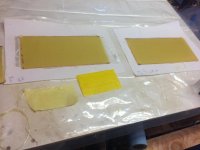
So, enough preaching, I made some 6" x 12" test layups. Easy to calculate approximate resin consumption, and also make sure your materials are compatible!
I made 3 different plaques.
1: 3 layers 5 oz Kevlar
2: 3 Kevlar 1 4 oz e glass
3: 3 Kevlar 2 4 ov e glass
Now to wait for them to cure!

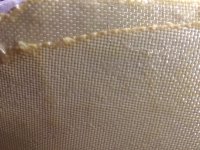
Note the very tightly woven ballistic Kevlar next to the Kevlar made for building composites!
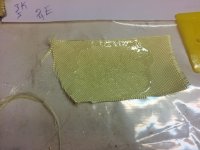
Also note the tiny test piece in the bottom left which did not darken!
I was able to force epoxy through the small piece with my finger and lots of pressure after awhile, but it also seems to bead up on the surface. That material refuses to absorb epoxy. It might be a different story if using infusion or vacuum bagging, but it was not working for my intended purpose.

Live and learn!
 

Attachments

  • photo6514.jpg
    photo6514.jpg
    203 KB · Views: 0
  • photo6515.jpg
    photo6515.jpg
    281.5 KB · Views: 0
  • photo6516.jpg
    photo6516.jpg
    347.1 KB · Views: 0
Sorry we didn't see that one coming ! Good hard learned advise !
So the Ballistic K was lighter in color, something to watch for!

Keep us posted ! And Don't give up !!! We've all made mistakes ! Does anybody need some PINK foam ???

You can do it !

Jim
 
Jim,

Once again, thanks for the encouragement!
I'm definitely not giving up!
Adapt and overcome!
The guy I talked to at express composites today thought there wasn't much reason to put glass over Kevlar, but even at this point, the two layers of 4 oz made the test plaque at least 30% more rigid! Maybe closer to 50%. That's just kind of a seat of the pants assessment but the epoxy just hardened in the last couple hours or so. I would expect a serious improvement on the overall rigidity in about 2 weeks since it takes a while to cure!
i ran some numbers... and even if I decide to go with 3 Kevlar layers and 2 layers of glass, I should be around the 38# mark before gunwales and so forth!
 
I don't think any of us really learns until we get burned...and sometimes not even then. My most expensive (in terms of money and time) screw-up was when I thought I could go against the accepted wisdom and put vinyl ester resin over top of epoxy. I did this to infuse my carbon over cedar gunwales onto the hull. Spent a full day getting everything placed and setup and infused that night. Came out the next morning to a gooey mess. Ripped all that carbon back off and started over again....this time with epoxy.

Alan
 
Alan,
Sometimes the best lessons are hard learned. Doesn't seem to Matter if we are told not to do something, we need definitive proof!
Some might consider this a flaw, I consider it curiosity.
My current situation is due to my occasional "bull in the China shop" tendencies.
In the grand scheme of things it's not that big of a deal.
I do recall reading your post about that attempted infusion of gunwales! When I read it, i felt your pain!
I did ask them about foam at express today, and it seems their product offering has not changed. Also they said it's not recommended to try to put a core in a canoe without some sort of vacuum.
I am thinking when I get to that point I might copy jim's idea of making a thin cedar core on the forms and using sand or water to pressure fit it in place.
 
Covering the Kevlar with cloth, just serves as a sanding barrier. Kevlar fuzzes up when sanded. A real pain.
Better to sand the glass than the Kevlar, especially on the outside.

And Yes, that stripper underneath ! Funny how, out of sight, out of mind comes into play ! Two solo boats, is better than one tandem ! ;)

Jim
 
So I scrapped the mess of Kevlar that was meant to be a boat. I am not regretting it at all. The epoxy that I put around the edges to make the Kevlar stick to the mold stayed on the Dacron....not a good sign. That Kevlar gained almost no rigidity from the epoxy!
I have some tune up to the Dacron that needs to be done before the next go-round.

Jim,
I too will be using glass on the outside of mine as well.
Are you telling me I should have built two solos instead of two tandems?😉
 
Jim,
I too will be using glass on the outside of mine as well.
Are you telling me I should have built two solos instead of two tandems?😉

My bad ! I forgot the Cruiser was a tandem ! But actually you can NEVER have TOO many canoes ! So I guess my answer is YES ! :o
 
No worries Jim.
I want to build a solo as well, but I think that will have to wait until next winter. I don't think the boss lady will let me build another until then.
If I don't hurry up I will still be working on these two next winter!
 
So...
I hated to do it, but I jumped ship!

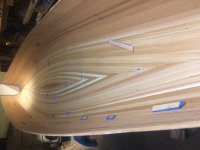
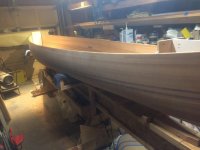
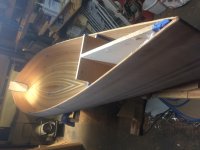
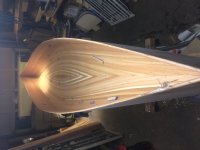
I pulled the forms and I have decided to finish out the stripper!

I must say that it feels good to see it right side up!

Now for the fun part....
 
No Title

Oops!

Forgot the pictures...
 

Attachments

  • photo6545.jpg
    photo6545.jpg
    208.6 KB · Views: 0
  • photo6546.jpg
    photo6546.jpg
    224.4 KB · Views: 0
  • photo6547.jpg
    photo6547.jpg
    214.9 KB · Views: 0
  • photo6548.jpg
    photo6548.jpg
    187.4 KB · Views: 0
Looks great ! As ALL strippers do, to me at least !

Did the stems come out OK ?
I like to keep my center form in, as much as possible, to maintain the hull shape.

At least this time of year, you can get outside for the sanding ! Good timing !

Jim
 
Took some wiggling to get them out, but no too bad. Any tricks for getting the tape out of the stems?
Do you throw a strap around the center to hold the form in place?
 
Any tricks for getting the tape out of the stems?

A scraper if it fits or a long and sharp chisel if it doesn't. On my first builds I used masking tape over the forms and always had tape stuck to the inside of the hull and it was a hassle getting it out of the stems. I've now switched to using duct tape, clear packaging tape, or foil backed tape (real duct tape). These don't stick to the glue at all and make for a much cleaner release and less work.

Boat looks good. Flipping them over and seeing it from a different perspective is always fun.

Alan
 
Back
Top