• Happy National Eggnog Day! 🎄🥛😵

NWC Cruiser build

No Title

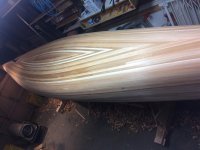
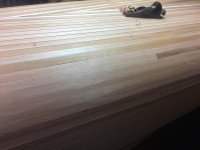
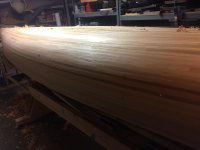
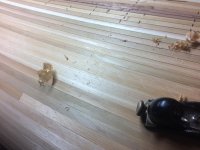
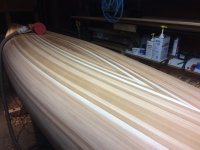
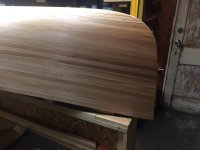
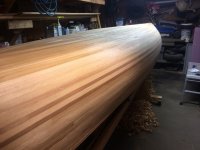
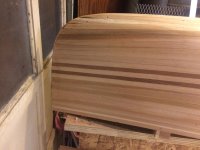
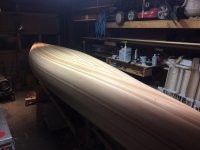
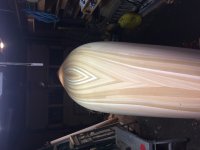
I started pulling staples yesterday afternoon, and from there I went to the block plane to knock down high spots. I also did a minimal amount of sanding. Feeling a lot better about how that last strip looks at this point since the rest of th hull looks pretty good.
 

Attachments

  • photo6190.jpg
    photo6190.jpg
    256.1 KB · Views: 0
  • photo6191.jpg
    photo6191.jpg
    251.9 KB · Views: 0
  • photo6192.jpg
    photo6192.jpg
    196.4 KB · Views: 0
  • photo6193.jpg
    photo6193.jpg
    274.5 KB · Views: 0
No Title

Here are a few more pictures. Uploading directly from the phone takes a little bit, so I split them up.
 

Attachments

  • photo6194.jpg
    photo6194.jpg
    230.2 KB · Views: 0
  • photo6195.jpg
    photo6195.jpg
    232.7 KB · Views: 0
  • photo6197.jpg
    photo6197.jpg
    229.3 KB · Views: 0
  • photo6196.jpg
    photo6196.jpg
    279.1 KB · Views: 0
That last piece for the center is always a challenge. On my last build I think I finally figured out how to make it work for me.

The difference between a really good fit and a gap is really pretty small. Once I have the shape close, I transition to making the fit adjustments with a sanding stick. If you only make small adjustments, it takes some time, but you can't really "over adjust" and make a big gap.

Brian
 
Looks good from here. I don't worry about perfectly fitting strips on those final ones with such a long taper. Nor do I even try to do them as a single piece. All of those tapered strips have butt joints on my canoes. The gaps disappear once filled with thickened (and tinted) epoxy. Or when painted over. Or when covered with opaque cloth like carbon or kevlar. It used to bother me a little. Now not at all.

Alan
 
The screw holes are hard to blend in . I had a sliver of wood fly off my table saw once, Putting a hole in freshly stripped up hull. Instead trying to make it match the surrounding wood. I just filled it with Walnut Plastic wood filler. Nobody ever knew.
I might even be tempted to drill a few more holes, appropriately spaced and fill them with the Walnut wood filler, to create pattern. Just a thought !

Hang in there !

Jim
 
Last edited:
I like the idea of turning the screw holes into an accent. I might drill and dowel them. Maybe.... I will have to ponder this one. The last few strips on either side are split as you describe Alan. The very last one is the one that sucks. Thinking back I should have cut the bead off and put a flat edge piece in rather than the way I ended up doing it.
 
Thinking back I should have cut the bead off and put a flat edge piece in rather than the way I ended up doing it.

Yes, the bead or cove will mess you up when it comes to cutting tapers. You need flat edged strips to butt into. My last build, which I think was my 11th or 12th, was the first time I actually remembered to think ahead and put square edged strips where they needed to be. Otherwise I was always trying to shave off the bead with a razor blade after the strip was installed.

Alan
 
I like the idea of turning the screw holes into an accent. I might drill and dowel them. Maybe.... I will have to ponder this one. The last few strips on either side are split as you describe Alan. The very last one is the one that sucks. Thinking back I should have cut the bead off and put a flat edge piece in rather than the way I ended up doing it.

You wouldn't have to drill all the way through. 1/16-1/8" deep, and smear in some walnut wood plastic.

Jim
 
No Title

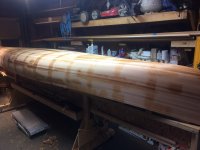
I have the hull completely sanded with 60 grit. How far should I go with sanding before glass? Also should I fill imperfections with thickened epoxy before I finish sanding? Any thoughts are appreciated.
 

Attachments

  • photo6199.jpg
    photo6199.jpg
    193 KB · Views: 0
  • photo6200.jpg
    photo6200.jpg
    187.7 KB · Views: 0
My usual hull sanding schedule is 40/60/80/100. The 40 grit is a pretty quick general pass to take off the glue drips and high edges. The 60 is a slower general sanding and after this one things are looking pretty good. The 80 grit pass still covers the entire hull but now I'm looking closer and spending more time on localized areas that need attention. After 80 grit the hull should be pretty much good to go and I give the stems their final shape. After the 80 grit is when I apply thickened epoxy to fill any cracks/gaps. Once it's cured I'll roughly sand those areas smooth with 80 grit and then give the entire hull a quick go over with 100 grit.

I might go up to 120 if I'm more concerned with clear coat aesthetics, like the canoes I donate to the nature center raffle, or I might stop at 60 for a toothier bond if I'm going to be covering it with opaque cloth or painting it.

Alan
 
I would fill with a standard wood filler and then sand the entire hull with 120 and call it a day. I use that stuff in a squeeze tube, it has a couple of types that are pretty good colour matches.
 
I'll agree with the above. I hate to see swirl marks in my wood, AFTER I've applied epoxy. I've even gone as far as 150 grit, partly because I have a lot of it.

I really like Plastic wood, it hardens in short order, and sands easily. Shy away from filler that has oil in it.
Looks great !

Jim
 
I have the hull completely sanded with 60 grit. How far should I go with sanding before glass? Also should I fill imperfections with thickened epoxy before I finish sanding? Any thoughts are appreciated.

You definitely DON'T want any cross grain scratches remaining.
I use a random orbit sander, and I'm pretty sure Alan does too...not sure what type of sander you're using. I don't remember what Jim or mem use.
I rough in with 40 grit, then switch to 80, and do a final 120 grit if finishing the hull bright. Opaque finishes I stop at 80 grit. On the inside, 80 grit is more than adequate, the cloth weave hides much.
If you wipe the outside of the hull with a damp rag, what you see is what you'll get when glassed. If you're happy with what you see, you've sanded enough.
 
No Title

Thanks to all for the input. I am also using RO sander with interface pad hooked to hepa vac. I will be doing a clear coat so I will probably go all the way to 120 with my sanding. How many of you would recommend a seal coat before glass? I sanded with 80 last night then hit the staples and imperfections with thickened epoxy. Going to try finish sanding tonight, maybe seal coat depending on general consensus from all.
 

Attachments

  • photo6204.jpg
    photo6204.jpg
    217.1 KB · Views: 0
I don't do seal coats and since you've already filled your staple holes I think it's even less important. Resin running through the staple holes and creating micro dry spots can sometimes be an issue but won't be for you.

Alan
 
Seal coats seem to be another of those topics where you have 2 sides and both will swear there's is the right one.

I don't use a seal coat, it just seems to add extra work and I can't figure any real benefit to justify the effort.

Once you start, just have everything arranged in the shop to support doing the glassing, get an assistant to mix epoxy (solo is doable, but sucks) and keep the wetout moving. Start as early as is comfortable, it gives you more time to complete the 3 coats and not end up in a panic/rush.


Brian
 
I didn't seal coat either... something that was done before glassing was to wet down the cedar to raise the grain after drying and sand again just to make sure the surface remained smooth. Although this also has others saying it's unnecessary.
 
OK ! I guess I'm the guy that seal coats ! But I'm going to go with the majority THIS time ! HA ! If you have the staple holes filled, as well as any voids ? Skip the seal coat.
Let US know how it goes. You might talk some sense into me . HA

Cruiser brought up some great points, as you are about to glass ! A good extra hand, especially for the wet out is good !

I'd like to offer some tips, that I believe will save you some headache.
Warm your working area, for this time of year, as high as you can get it. Awhile back I had my shop at near 90 F. You don't need it that hot, but 70 or above would be good.
While applying the wet out coat, lower the temp at least a few degrees. This should nearly eliminate the Outgassing of air from stapleholes, or small gaps.

I let the wet out coat set. Past the tacky stage. DON"T WALK AWAY FROM IT, while the resin is setting in this stage, is where most of your troubles will appear.
Stay around it for a couple hours while the resin sets. I time this so I'm done in the evening.
The next morning I start applying fill coats. Here is where it gets tricky.

The wet out coat leaves a textured surface, that's great for holding resin. Once you apply the first Fill coat, to the cloth, wait about an hour, and apply the second coat. Your first Fill coat will still be tacky, and will hold the next coat without runs. This is a big benefit, later ! I hate runs.
Second coat on ? Again wait an hour and apply Third Fill coat..
Depending on the resin you are using, three fill coats might be enough. If you see ANY resemblance of the weave,is visible on the sides, go with another fill coat. When I was using System Three's Clear Coat, I sometimes need 5 fill coats !
One word on fill coats ! One extra fill coat, is way better than not enough !!!

This technic eliminates any sanding between coats, and is recommended by System Three. I've used it on nearly all my canoes !

I'd love to be there to help !

This all leads to the my next question. Most everyone knows, wait for it !....... Are you going to double layer the bottom ?

Jim
 
I'm a little late to the party, sorry.
I always apply a seal coat. Why? It's easier to get a uniform penetration into the wood, resulting in more uniform color and tone of the wood.
Also, I've seen bare wood hulls suck the resin out of the cloth, leaving resin starved cloth and a mottled finish.
 
I would go with the seal coat to prevent staining, where the overlaps from wetting out show through. I have some really noticeable streaks on my first boat that I wrote off to total inexperience with glass. Had the same issue with my second but not nearly as bad. I think to get a uniform look you either need to seal coat or be very good at wetting out and have plenty of help to keep the process flowing. I picked up a tip from you tube on when to apply the fill coats using a cotton ball. Touch the cotton ball on the boat, if it pulls a lot of fibers It's tacky enough to re coat. The cotton fibers sand out easily.
 
Back
Top