• Happy Founding of Columbia University (1754)! 👑🏫🦁

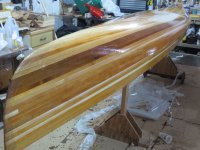
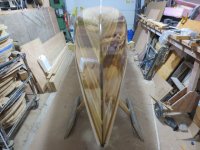
First Build: 17'-6" J. Winters "Yukon"

I'm hoping to at least get the exterior glassed before winter. My work space does not have temperature control, but I could rent a heater if necessary.

My shop (in Maryland) is unheated, though fairly well insulated. I have had success in keep a hull warm in winter for epoxy work by using an electric radiant oil heater placed beneath the gunwales-down canoe on sawhorses.

https://www.walmart.com/ip/Mainstays...hite/681622973

The inverted hull nicely captures and holds the heat, and the boat is usually 20F+ warmer than the shop temperature the next morning.
 
Looking awesome Rick,

I didn't see a response to leveling that "V" ... so 2 more cents. I wouldn't over think it, it will be about the same as the stem roundover and will change as you move back to the strip area. I just "eyeball" what looks good to my eye. So it will be sharper and higher near the end and approach a slight curve at the back, so it flows with the line of the strips.

Brian


My shop (in Maryland) is unheated, though fairly well insulated. I have had success in keep a hull warm in winter for epoxy work by using an electric radiant oil heater placed beneath the gunwales-down canoe on sawhorses.

https://www.walmart.com/ip/Mainstays...hite/681622973

The inverted hull nicely captures and holds the heat, and the boat is usually 20F+ warmer than the shop temperature the next morning.

An inverted empty hull, is different than a hull sitting on a strongback and forms. Not much circulation. Glassing a hull is much better when the whole work area is warm !

Glassing is different than repairing.

Just my experience !

Jim
 
Gentlemen, thanks for the kind words and advice!

I won't chance less than optimal environmental conditions for my 1st glassing attempt.

Brian, Thanks for your 2 cents. That helps me think about it differently. The transition areas are tricky when you don't have a clear picture of the end zone. I'm sneaking up on it, standing back and looking things over often.
 
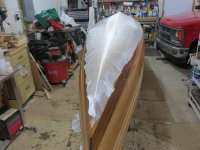
photo18588.jpg Work on the hull is on hold until spring, and warmer temperatures.

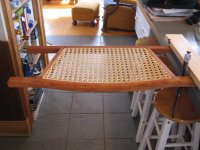
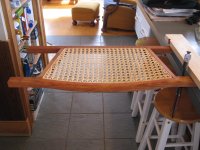
Winter is a good time to build seats. I'm really fond of cherry, and had a piece thick enough for front rails with a 7/8 inch swoop. I also had some leftover stair balusters that could be re-milled and repurposed. Plan A was to lace the seats with deer hide from last falls buck, but the buck didn't cooperate. Plan B was cane, which we like the look, feel and function of. The cane seats on our 1979 Mad River Explorer are original and still going strong. I basically followed the excellent instructions in Gilpatrick's book, "Building a Strip Canoe", with the following changes:

I reduced seat depth 3 inches to 12 inches.

I couldn't quite wrap my mind around plastic cane (says the guy building a fiberglass canoe), and used natural cane.

I added the detail of rabbeting the footprint of the cane on the seat frame down 3/32 inch so that everything would be flush in the end.

For the side and back pieces I went 1 and 1/8 inch wide by 1 inch thick. I made the front rail a 1/4 inch wider, knowing I was going to heavily profile the top, leading edge. After cutting the mortises and drilling the cane holes I gave the front and back rails a "Woodchuck Stress Test" before glue up by placing them individually on blocks the future installed span distance apart and balancing on one foot in the center. They bent but didn't break so I figured all good.

I've no idea what canoe seats typically weigh. The stern seat weighs 2 pounds, 4 ounces, ready to trim for install.
 

Attachments

  • attach122403.jpg
    attach122403.jpg
    337 KB · Views: 11
Last edited:
I like the look of contouring just the front rail.

Nice job lacing.


​​​​​​​


I added the detail of rabbeting the footprint of the cane on the seat frame down 3/32 inch so that everything would be flush in the end.

I have no idea if this double entendre was intentional or not, but it is perfect! Yes, with the cane recessed, the seat surface will be flush with your end.

The seat looks great! I've weaved three seats using Gil's dimensions/instructions but I've always used plastic cane. The plastic has some give and can sag slightly after a long day of paddling but always springs back. Will be curious how the natural stuff holds up for you.
 
Thank you Jim and Dave. We are used to smallish, level, cane seats. Karen primarily sits and I mostly kneel. Hopefully these seats will be a bit more comfortable while accommodating both styles.

Thanks Al. The double entendre was news to me as I'm not nearly that clever! I too will be interested to see how the natural cane holds up. Gil recommends plastic cane and with his experience I did think twice about choosing differently.
 
That is phenomenal work Rick! I think you got the ball on the head by adding the contour on the front and decreasing the depth of Gil's seat plans by 3 inches. This supports the dimensions I'm going use on my solo.
 
I like the contoured seats. I've made 4 seats using the plastic cane. The first 2 that I made are in my Madriver canoe, I strung them pretty taught. The 2nd set are in the Wabnaki I built last year, I strung them more loosely and are way more comfortable. The next one I build will be contoured like yours are. The natural cane sounds interesting, and of course way more traditional. Looking forward to seeing you finished canoe.
 
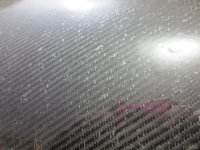
I'm finally back working on the canoe and nearly ready to glass the exterior. I have all material on hand. My layup schedule is 6 oz. E-glass with a 6 oz. S-glass football outside, and 6 oz. S-glass inside. I'm using West System epoxy and finally got around to reading the instruction manual the other day. I was surprised to learn that for a strong chemical bond between coats, subsequent coats need to be applied while the previous is still "tacky, like masking tape, but won't transfer to a gloved finger". I thought there must be a little wiggle room there, so contacted their technical department. I received a quick, thorough reply, and no wiggle room. In my mind I had always anticipated adding the football after the initial wet out coat, but when that was no longer tacky, so I could easily position the football.

My quandary now is whether to wet out both layers at once, which may be a bit of a heavy lift for a first timer, or deviate from West System recommendations and follow my original plan. There are probably other options I have not thought about. I'd appreciate any advice those of you with more experience might be willing to share!

Rick
 
I've only wet out two at a time, once.

Had a lot air entrapped in the cloth. Never again !

IMG_2118_zpsrfsqfx0u.jpg

I wet out the main layer, and once Past Tacky ? I apply, and wet out the extra football layer. As I'm wetting the extra football I also apply the first fill coat on the main layer.

I've done this many times I I would recommend it to the experienced, as well as the First timer.

Others mat tell you a different method. This works for me !

IMG_2016_zpsqqrblnfc.jpg

IMG_2016_zpsqqrblnfc.jpg

IMG_2517_zpsnxbivgmf.jpg
Jim
 
Interesting...System three told me there is a 72 hour window, and I have used it many times without any problems. I always wet out both at once, a lot has to do with the viscosity of your epoxy. System three clear coat is probably the thinnest epoxy out there, like water really, and it penetrates very well. Nothing wrong with doing one layer at a time either, might be better to do it that way the first time. I have had a day between west layers and it was fine.
 
Build is looking good!

On the Layer-At-A-Time vs. simultaneous wetout debate:

- The goopier epoxies, such as WestSystem, are going to be more prone to the air-entrapment issue. Not saying it can't be done, it's just more work
- E-glass gets "squirrel-ey" when wet out - managing it can be a bit of a learned skill, and adding another layer complicates this. I haven't tried S-glass, so no comment.
- Working, open, and cure times are extremely sensitive to temperature - Figure double of halve the published figures for every 17 degrees Fahrenheit below or above the calibrated point - for WestSystem, they publish figures for 72 degrees. Keep in mind: skim-coats to fill the weave are subject to the same open-time constraints as adding another layer of glass.

I'd personally be inclined to do the two layers separately, since you are a first-timer, but scheduling might be tricky- been there, done that. Do you have any smaller glass projects, such as a paddle blade? It might be best to do that before committing to trying for the hull, just to get some hands-on experience.

If you must do both layers at once, might be worth looking into doing a release fabric. This does not need to be real "PeelPly" - go to your local fabric store, and ask for the cheapest, ugliest woven polyester lining fabric that they have in stock. Walmart usually has something for less than $3 a yard. Once the resin is a bit more cured than the "Masking tape" phase, a firm tug will remove it, and you'll have a surface that' can be knocked back just a bit by 120-grit paper. The release layer tends to wick the resin up enough so that the low spots in the weave are filled.
- less need for fill coats later, but not as easy to over-resin (Which can make the cloth float off the surface if the puddle is deep enough)
- You also get a bit of an indicator that an area is short on resin: if you see little bubbles under the release film, and they won't work out, add more resin.
- Also provides a slick surface to be able to push resin around with a spreader without dragging on the glass; kind of hard to describe until you've experienced it.
 
Interesting...System three told me there is a 72 hour window, and I have used it many times without any problems. I always wet out both at once, a lot has to do with the viscosity of your epoxy. System three clear coat is probably the thinnest epoxy out there, like water really, and it penetrates very well. Nothing wrong with doing one layer at a time either, might be better to do it that way the first time. I have had a day between west layers and it was fine.

Very Interesting ! System Three is where I learned that sooner than 72 hrs was better. I have had my clearest coatings, when I didn't wait, not to mention far fewer runs.

Amine Blush is another reason not to wait.

System Three's Clear Coat, is a lot thinner than RAKA. It also requires more coats, to fill the weave. One to two extra in my experience.

I used a lot of Clear Coat, and loved how it wet out. It just got too expensive, when they changed hands.
 
Thank you all for your responses. I very much appreciate it! I'm thinking now one layer at a time, but jumping on the football as quickly as I'm sure I can position it. System 3 sounds like a really nice product, and one to consider for a future build. On the big day I'll do a test panel wet out with scrap cloth and cedar to start, so I know what to expect as far as working and cure time (wish I'd done a test panel the first time I caned a seat!). Sailsman63, the release fabric technique sounds really interesting, and a strategy to remember. I did not realize how sensitive epoxy cure/working time is to temperature.

I'll be sure to post pictures and let you know how it went. And again, thank you for the advice!

Rick
 
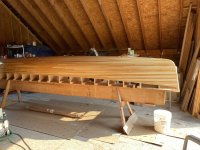
Well, finally, glassing and subsequent coats are complete. Sometimes schedule drives process and that proved to be the case this time. I ended up doing a coat a day, sanding in between. Hopefully it'll all stick together. Karen did a great job mixing and keeping track of "time until squeegee".

tempimagecxe7tu-jpg.127045


The wet out coat went well. I chose not to seal coat. We did a small sample test wet out with scrap to get an idea of timing. I'm really glad I didn't try to wet out the football at the same time. I do have a couple of spots that if you know just where to look there are subtle shading differences, I presume from not advancing the wet edge quickly enough? I didn't have any trouble with air bubbles or out gassing. Temps were steady in the mid 70's. I used DogBrain's trick of taping out the football, wetting to the tape and trimming the excess glass afterwards. Having started stripping at the waterline made knowing where to tape easy.

tempimagel8s10g-jpg.127046


I babysat the football cure which reached a point where I could lift the tape back to the football edge and cut the excess off at the fold with a sheetrock knife.

tempimageepmssi-jpg.127047


The next morning I tried to feather out the football edge with a new, sharp, tool steel scraper. I made it about a foot before giving up and running to the hardware store for a carbide scraper, which worked well. S glass scrapes way harder than E glass.

tempimage8kmuin-jpg.127051


The first fill coat went on easily. For the final coat I decided to try an 1/8 inch foam roller. I was so excited at how quickly and easily that worked that I neglected to check frequently enough for bubbles. Too late to tip off, I saw lots and lots of tiny bubbles.

tempimagejics98-jpg.127053


The next morning I sanded everything and recoated with a roller again, but tipped off with a brush as I went. In hindsight, I'm not sure the 4th coat was necessary, but I decided to play it safe. The bubbles were extremely small and not very deep. I guess I didn't want to risk sanding into the cloth, so chose to play it safe.
tempImage9R6Rqh.jpg
 
Back
Top