• Happy Birthday, Robert Wadlow (1918-40)! 8️⃣–1️⃣1️⃣

A Raven from Scratch

Thanks Brian. Your explanation makes sense & I welcome the suggestions... it's how we learn (unless we insist on making every dumb mistake on our own- I sometimes do that lol)

Given the extra width of this seat (my last was about 6 inches narrower) and the fact that this one's maiden voyage may be 3 weeks solo outside of Wabakimi, I'm wondering if I should make another or perform some kind or real-world testing (It won't be easy to replace once it's epoxied into place).

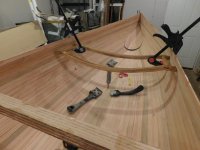
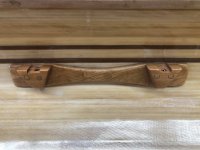
You are correct, the cross pieces are 7 plies (alternating stack of 4 Sassafras & 3 White Oak while the spreaders are 3 plies Sassafras top & bottom w' White Oak in the center) If I dado on the side, should I increase the thickness to 5 plies? I won't be drilling any of the seat pieces, I wrap the paracord around so as to provide an extra layer of security. In the event of breakage, the wrapped paracord will (theoretically) prevent catastrophic failure. (here's the last one)
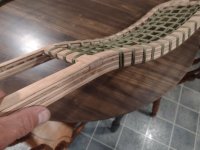
IMG_20230812_201226044.jpg

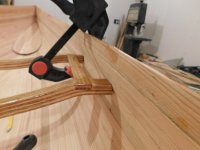
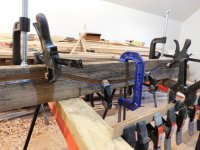
I also need to find a better way to clamp the seat pieces in order to keep them all on plane. I've got a slight twist that, while not a deal-breaker, it would probably be easier to fit the seat without the deviation.
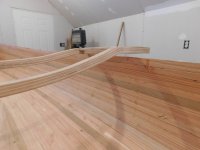
DSCN3598.JPG
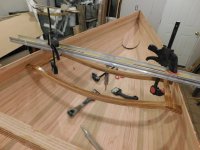
(the other 3 pieces of the cross-rails are sitting on the hull)

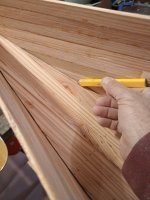
Also, speaking of suggestions: I spent a few hours in the boat shop today and got the inside sanded sufficiently. I used the half-round files and then went over the whole thing with an orbital and 40 grit. One word of caution to anyone considering Tamarac: The same splintering properties that caused me to discard 1/3(+/-) of the strips during beading & coving came into play when sanding.

When the staples came thru, many of the strips developed splinters which I found everytime any bare skin was exposed alongside of the file and, frequently, while feeling the hull for smoothness. There were a few places where the strips were badly misaligned and I found that taking a Surform shaver across them at an angle seemed to quickly take the edges off.
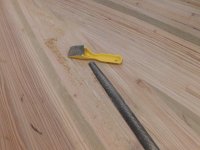
DSCN3599.JPG

I made it about 3/4 of the way around the hull when I got tired of bleeding and I grabbed the orbital, slapped on a 40 grit pad and gave the whole entire hull a once-over.
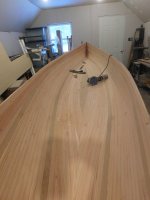
DSCN3600.JPG

Now the "suggestions" part... there was one place that I'd had to piece in a small section of Sassafras when closing the football. That small piece was proud on the outside & was, therefore, sanded flush with the longboard. This, of course, means that it is recessed on the interior and I'm undecided as to what to do.

DSCN3601.JPG

I have some Sassafras shavings from making the paddles and I could glue / epoxy some of them into the low spot and then sand it flush. At this point, however, I'm thinking I could use a scrap or two from the outside, lay it in the hollow & glass over it like this.
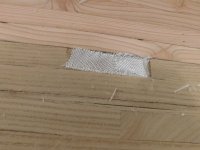
DSCN3602.JPG

the extra material should provide adequate strength and I doubt that it would be visible. (there will be 2 layers of 4 oz e-glass over this area regardless of how I fill the void)

Your thoughts?
 
I would probably just fill that void with thickened epoxy, that's probably the easiest way to get it flush.
Concur with Mem, thickened epoxy slightly proud, then use a flat scraper to get it flush, tint it with the copious amounts of wood dust you are currently producing (lol).

If you want it to colour match, use cabosil (fumed silica) and wood dust in about a 10:1 ratio
 
Personally, with all the stuff you need to get done, I would be inclined to suspend that seat and bounce in it a bit, if holds, it holds ,,, if it creaks or cracks, you know it is something you need to do ... otherwise you have lots to keep you busy. Maybe figure a way to "fasten" instead epoxy it in place, that would make your life a lit easier when it needs work.

When I do seat glue ups, I like to turn it upside down and clamp the corners, but generally it lays flat, the skew may be that top dado.

As far as the seat spacers (for/aft stringers), I don't usually make a lamination for those, they don't bear the same weight and unless it is a fashion thing, where you want all seat panels to match, I don't think it really is required. I like to make a full thickness piece (fill the ado) shape the extra bits away, cut an arch to save a little weight and call it a day. We are essentially making the same seats, there are lots of pics in the last build thread I did on seats, you may get an idea there : https://www.canoetripping.net/threads/light-weight-solo-tripper-build.105054/post-111763
 
I'll grab 100# of feed and flop down on it like I got fat(ter) and lost my balance. I just hope I don't take a couple of plies in the posterior if it fails. :rolleyes:

Either way, I'll probably dado it your way next time as that would also make it easier to arch the stringers like Jim has been doing. Looks pretty comfy.
 
I've been making some headway but went over to the shop last night & screwed up the seat.

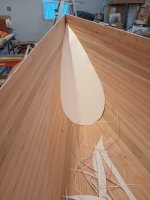
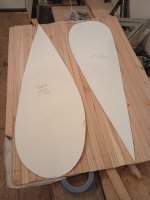
Since last check-in, I made paper patterns for the float tanks by taking heavy construction paper (thin cardboard?) from the dollar store and trimming progressively smaller slices as I got closer to the correct shape.

IMG_20250120_171235655.jpg
IMG_20250120_171050955.jpg

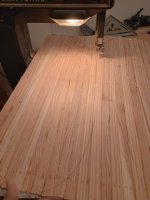
When I seemed to have a decent fit, I transferred the paper patterns to the panel I'd made previously, cut them out with the band saw and then started final shaping with a spoke shave and rasp.

IMG_20250120_172710409.jpg
IMG_20250120_173040941_HDR.jpg
IMG_20250120_181817655.jpg
IMG_20250120_181452025.jpg

It should be noted that float tanks aren't required as these boats will float without them. I use them primarily to hide the mess that I'm about to make glassing the tight corners inside the stems. The fact that the canoe will float a little higher when swamped is a nice benefit for a solo tripper.

Satisfied with the fit, I wanted to fit the seat and then I'd be ready to glass the inside, install the float tank panels and epoxy in the seat and seat supports all on the same weekend. (by doing it all within 48 hours I should get a chemical bond instead of just a mechanical bond).

I really liked how the seat on my Freedom doubled as structural support and the plan was to fit the Raven seat for a nice, tight fit and epoxy it to the hull in the same manner.

I trimmed off the ends of the seat cross pieces where I thought they'd be a little long, had to spead the gunwales a little to get the seat inside the hull, measured back 10 inches from the center and started trimming the seat to fit. The beauty of this is that I can sneak up on a nice fit and move the seat up and rearward if I wind up short before getting snug hull contact (I was shooting for 12 inches behind center).

The downside is that all 4 points of contact need to fit well against the hull at the same time.

DSCN3622.JPG
DSCN3623.JPG

Due to the compound angles of the hull & the desired seat height (shooting for 9-10 inches up) placing the seat onto the tumblehome, I missed the fit on one or more contact points and had to keep moving the seat rearward until the seat was about 20 inches behind center at which point I gave up.

DSCN3625.JPG

New plan starts tomorrow.
 
That was how I made the patterns for the flotation chambers, on my first few. It worked.
I glassed both sides
Haven't had an issue in over 30 years.

Jim
 
@Cruiser, I like it and it looks like it would still provide enough structural support to still eliminate the rear thwart. What kind of anchor did you insert? It seems that a stainless machine screw would provide a lot more strength than an exterior deck screw.
 
I used Helicoil style inserts ... since I am lazy I will just link the relevant post from the last build, it covers the seat build and instalation, so you will need to scroll down to the helicoil install. You can get them in whatever size you want, but it is a bit of a kit and you need to buy a couple pieces to use them.

Once fastened down, it is definitely structural ... once it is installed, it gets a lot stiffer

 
OK, I spent the better part of today in the canoe shop.

More and more, I'm liking the idea of making the seat removable and I looked at adding a support like Cruiser used. In the end, I've decided that I'll do something similar.

I looked at re-using the seat that I'd cut short but I'd have had to extend the supports almost 2 inches from the hull in order to place the seat 12 inches behind the center and I felt that the leverage would be excessive and I should just remake the seat. I'll admit that it felt pretty good to open the door and fling the seat out into the yard in frustration. (yes, I picked it up at the end of the day)

There was a twist in the seat anyway and, now that the seat will be removeable, I think I can do better by building the seat and using the canoe as a jig. Here's what I did:

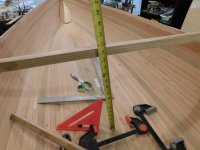
I measured back 12 inches from center (I prefer my seats back but Mem cautioned against being too extreme and Roybrew [IIRC] placed his about 12 inches back). I placed the thwart across the hull, measured hull depth and found that it was 14 1/2 inches from the sheer to the floor.

DSCN3633.JPG

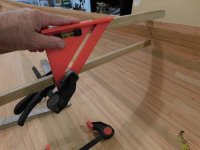
I was figuring on the seat being about 10 inches off of the floor so I clamped what will likely become the grab handles to a combination square at the 4 inch mark and checked where it looked to line up.

DSCN3634.JPG

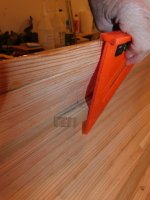
It seemed like it would land on the Sassafras strip so I marked the seat support locations on the hull, took the cut-off pieces from the old seat, shaped and sanded them to fit tightly in those locations and then marked the centerline of the seat supports and the corresponding location on the hull.

DSCN3636.JPG

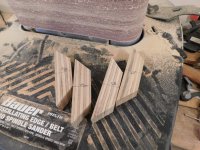
Each support is 4 inches long where it contacts the hull and is tapered at a 45 degree angle (won't really save much weight but I thought it looked better). I marked each one with their specific location and set them aside.

DSCN3638.JPG

The current plan is to epoxy them to the hull when I install the float tank panels and then drill them for the threaded inserts. The new front and rear seat supports will then be fitted individually and then the seat will be glued together using the canoe as the jig.

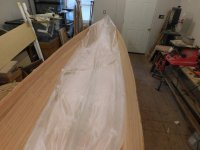
Next, I laid a piece of 30 inch, 4 ounce e-glass lengthwise down the hull and trimmed it to fit the football (I used the Sassafras accent strip as a guide and tried to stay 3-4 inches above it)

DSCN3639.JPGDSCN3640.JPG

I tucked some of the cut-off scrap pieces into the stems and then laid more 30 inch, 4 ounce e-glass across the hull so that the pieces overlapped about 2 inches. I tried to be generous approaching the sheer figuring that a little wasted cloth was much better than running short. When I got to the stems and the (somewhat bunched-up) scraps, I found it easier to use individual pieces on each side and overlap them instead of trying to run one continuous strip side-to-side.

The plan for tomorrow is to epoxy the inside in the morning then install the float tanks and seat supports while the epoxy is still tacky. I'll also epoxy more seat pieces while I'm mixing.

DSCN3642.JPG
 
Well, the weekend was a fiasco but I did manage a few hours in the shop.

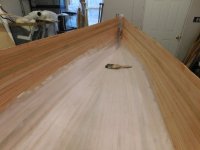
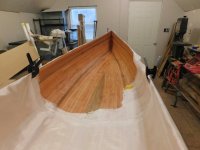
It took me about 3 hours to wet out the inside and I'm still impressed with how pretty the Tamarack is (might even be worth using it lol). It was a pain in the butt keeping the glass tight to the wood as I worked up and around the chine but I still find it really cool to watch as the cloth turns transparent.

DSCN3644.JPG

After wetting out the entire hull, I placed the float tanks in & pressed some 4 oz glass against the tacky hull. (I trimmed the bottom a little before glassing but didn't re-take the pic)

DSCN3647.JPG

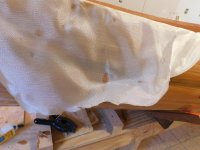
(Note: you'll probably also notice a few areas at the sheer where the glass pulled away from the hull. I kept after these a little as the epoxy started to kick and eventually found a sweet spot where they stayed in place & stuck)

As I was waiting for the epoxy to tack up enough, I buttered a stack of Sassafras & White Oak strips, used some small pieces of 3/4 plywood (covered in clear packaging tape) to keep them aligned & pressed them into the seat jigs. I did not soak them as I usually have and it seemed to make no difference.

DSCN3655.JPG

I stopped by after work today, trimmed the extra cloth from the sheer and ran the scraper around to knock down the sharp edge. There were a couple of places where I was extra sloppy and managed to epoxy the overhanging cloth to the outside of the hull but these were fairly easy to tear away and then scrape away the residue (made me glad that I hadn't spar varnished the outside yet)

DSCN3649.JPG

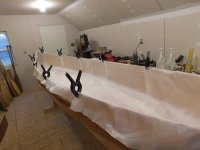
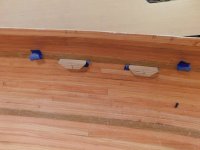
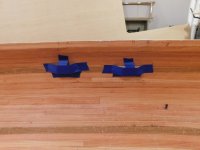
Having cleaned all of that up, I taped the seat supports to the hull. I used some wide-ish (1 1/2 inch?) clean release tape along the bottom edge, mixed up a small batch of epoxy and buttered the support tabs where they'll meet the hull.

DSCN3652.JPG

I left them hang there awhile while I buttered the stack of strips for the other seat support and pressed them into the jig and, after the epoxy started to seem a little more tacky, I rolled the seat supports upward, made sure that I got some squeeze out along the top edge and taped them in place with more quick release tape.

DSCN3654.JPG

I'm getting pretty optimistic that I'll have this one finished by the end of the month which means that I can probably get another done this winter.
 
Looking great! One thing about hanging seats from the gunwale....It's easy to move it around if you find the distance from the centre needs to be changed. Just pop it off, re-drill and hang. Takes about a half hour. You can fill the old holes with epoxy of plug with dowling. Also, very easy to change height if you find it too high or too low, just change spacers. With a new hull to me, I usually end up changing seat positions at least once until I find what feels right.

Tamarac is such an under used wood up here, although if you drive three hours to the east, it is the main firewood used for wood stoves, as it is the only kind still available that the lumber industry hasn't cut down. How does it react to a sanding disk? Did it gum up the sand paper fast, or was that a non-issue?
 
you'll probably also notice a few areas at the sheer where the glass pulled away from the hull.

From the photos it looks like quite a bit of cloth is hanging over the edge. That will cause the cloth to pull away from the hull near the shear. After the initial quick wetout I trim this back so there is less than an inch of cloth above the hull. Basically you want whatever excess cloth is left to stand straight up. If there is enough cloth for it to sag over the shear then it will pull away from the hull.

Very attractive looking hull. Can't wait to hear how it performs!

Alan
 
Thanks Alan. I'll have to trim it more closely next time and I hadn't thought to do it while wetting it out. The local river is defrosted for now but I'll probably wait until Spring to throw it in water. I don't own a wetsuit and would hate to take a belated "polar bear plunge".

Mem, The Tamarack sanded easily and I had no issues at all with gumming up. About the only issue I had was the fact that it splintered so easily. When milling strips, I had quite a few splinter and, since the grain changed direction in some of the strips, you couldn't always predict which strips would explode or where. (I thought about using Larch for the gunwales and saving the Sassafras for paddles but I won't because of the tendency to splinter. I feel that it's strong enough encased in glass but might splinter easily when dropped on a portage trail- hey it happens)

Another (and more irritating) issue with the splintering was found when sanding the inside. There were more than a few places where the strip splintered when the staple went through. I tend to feel for smoothness with my hand when rasping and, invariably, those splinters would quickly show me the folly of my ways. There were at least 3 places where the boards are bloodstained but, due to the color of the wood, even I can't find them now.

The only other knock I've heard against Tamarack as a wood is that it twists easily when drying. Mine was air dried when I bought it but I've heard that it needs stickered right away and put a lot of weight on the pack. On the upside, it makes beautiful paneling and shelving (and canoes) and it's extremely rot-resistant.

I'm not sure what this hull weighs yet (there's not a lot of weight left to add) but I was very pleasantly surprised when I lifted an end yesterday (so surprised that I lifted the other just to see if that's where all the weight was).

BTW, I've been meaning to ask: When driving to the Marshall Lake parking area, there where virtual mountains of tree tops along the road. Do the logging companies forbid cutting them for firewood or are there simply too few people in the area to make use of all of it? Back in my tree-cutter days, we typically left the tops where they lay unless someone was hauling firewood logs. Then we'd sometimes skid them closer to provide better access (and less liability for the landowner & logging company)
 
The tree tops are available for firewood, the problem is that area is too far away to make it viable to get them. If I'm up there I'll sometimes load the truck up on the way back, but I've got spots a lot closer to get most of my firewood.

One of my students built a raven as well, and he used local tamarack for the gunwales and trim, turned out good. It is a fairly heavy softwood, but also quite strong.
 
One of my students built a raven as well, and he used local tamarack for the gunwales and trim, turned out good. It is a fairly heavy softwood, but also quite strong.
Interesting... I may revisit the idea of Larch gunwales although I'm heading out Saturday morning to pick up another 250(ish) board feet of Sassafras. (I still haven't found Catalpa under $3 a foot but that's 2 hulls from now so I've got all summer to find or cut some.)

I wonder what a Catalpa & Tamarack combo would look like? I was figuring on Butternut trim but it's almost as hard to find as Catalpa.

If I'm up there I'll sometimes load the truck up on the way back...
Hauling capacity is probably diminished with the new Ranger though... Do they still make a long bed?
 
Do they still make a long bed?

Yes but the specs have changed. The long bed is only 6 feet. :)

A few years ago a friend was looking for a new truck and he was frustrated that all he could find was 4 door short bed trucks. He said "If that's what I wanted I'd just buy a sedan and drive around with the trunk open." I thought that was pretty funny.

Alan
 
As replacing my Ranger (its 7 foot bed is always full) becomes more imminent, I've been looking for a standard cab, long bed, 4x4 with a manual transmission. Not many choices out there except special-ordering a Toyota or just upgrading to a truck that's only 25 years old.
 
Back
Top