• Happy Apple Cider Day! 🍎🍵

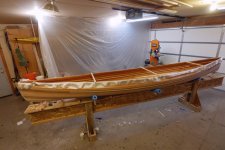
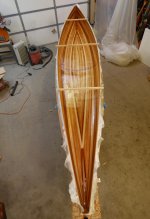
Another Kite Canoe Build

Mark,
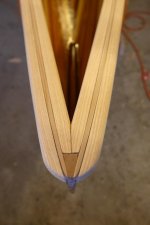
Very interesting how differently we all build...I stripped my Kite only as far as my laminated stems, so my length was exactly what I wanted. I also kept my stem pieces lower than the keel line by the thickness of my strips. So, from keel line to uppermost stem section, my strips transition from overlapping to flush.
I have a series of photos here, should you want to see how I completed my Kite.

I didn't realize at the time that I was reading your progress posts what a dilemma you would face with the filler blocks. I had imagined that those blocks entirely filled the gap.

Anyway, back to your quandary. I would epoxy seal all of the exposed interior as well as possible. If you're concerned about strength, don't be. The stems are the strongest section of the hull. You will likely have a tough time glassing that area, but I'm sure you'll figure out a clever way to make it easy.

If you are planning to put a through fitting in the stems for lining, you should probably do so now, while you can see (and seal/fillet) the bushing as it passes through the stems.
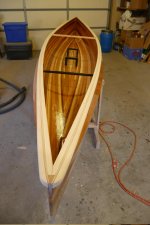
Love the photos, I really like the design and the stem to stem crease.
BTW, did you weigh it yet?
 
That is puzzling .

I think you have a good plan. I'd be tempted to cut some E-glass strips to tuck in there. At least you could try it, if it didn't work you could pull them out.

I'd go stemless next time. I've built all of mine stemless, and not one problem ! Even the two that came off my truck going down the highway !

It's so easy.

Next time !

Jim
 
Thanks again everybody for the advice. I'll ponder the fix while I sand the inside of the hull today. I wanted to do the sanding outside in the open air to avoid cleaning the garage again, but the weather has been terrible around here lately and I want to keep moving on the build. Mark
 
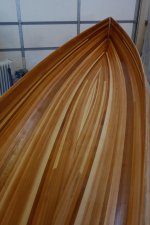
Here area few more pictures from the last couple days. Sanding inside the hull went well on Monday, and it was as everyone describes. Just as you think you've done well enough, you see an area that needs more attention, then another and another. I wet the inside with water to raise the grain and of course saw more dry wood glue that had to be sanded. It's hard to not say "good enough" when you're tired and want to move on.

Tuesday morning I did a seal coat. I like the wood pattern on the outside of the hull, but from the inside it seems a little busy to me.

P1270526.JPG


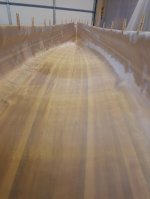
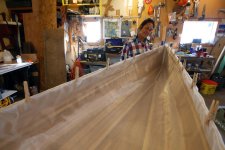
After 3 or 4 hours the epoxy had firmed up enough to lay out the fiberglass. This part was a bit more difficult to do than the outside of the hull. I took my time and eventually got the hang of getting it to lay right. Getting everything tucked in and overlapping in the stems was a small challenge, but the 2nd stem was much easier.

P1270531.JPG


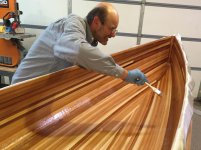
I called in for support this time around for help with mixing epoxy. Earlier, when I did the outside of the hull, I was all by myself and it was a bit hectic for a while. The inside seemed like it would be a bit overwhelming if I tried to do it all alone.

P1270533.JPG


In the end, not too bad at all. It really, really helps to have somebody there to mix batches of epoxy. I need to double the lights in my shop, my eyes aren't what they used to be.


image2.JPG

All done. It ended up taking me about 4 hours total from start to turning out the lights for the evening.

P1270538.JPG


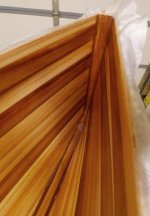
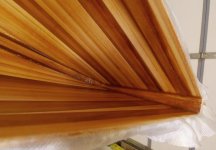
A closeup of the stem.

P1270542.JPG


P1270551.JPG


OK, today I'm on to trimming the fiberglass, possibly putting another thin layer of epoxy on the inside and more epoxy on the outside knuckle. Mark
 

Attachments

  • P1270542.JPG
    P1270542.JPG
    112.4 KB · Views: 14
Wetting the inside with water, sent up a red flag to me ! Make sure that moisture you added to the hull, is gone before applying epoxy !

I never wet my hulls with water, but understand how it highlights the glue.

Help mixing is a great aid !!!

Nice photos, and the hull looks great !
Nice cloth fitting on the ends.

I always relax a little after that last fill coat is dry !

Jim
 
Good point on the water Jim. It's dry, dry, dry here in Montana. We can hang sheets on the line and by the time you get the last sheet hung the first one is almost dry, especially if there's a breeze (there's almost always a breeze).
 
Glad it's dry out there, and hopefully warmer than when you glassed the outside !
If the bubbles don't appear, I'd keep your mixing partner ! HA !
I really like the looks of the hull !

I like to trim that glass before it sets hard. I've waited 3 or 4 days, and that's too long.

Jim
 
Last edited:
Mark,
That is a sweet hull, isn't it? Sanding the inside sucks, and the inside of the knuckle is a little tricky, but it looks like you've got it down pat.
Yeah, you did a real clean job with the glass in the stems, I always struggle with that area.
I agree with Jim, I always trim the excess cloth while the resin is still a little green, makes for easier trimming with a utility knife.
Did you weigh it yet? I don't know how you can stand the suspense!
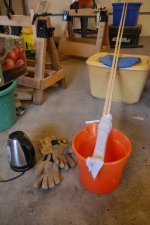
 
It's a bit warmer here now. Today I did a couple fill coats on the upper knuckle on the outside of the hull. While glassing the inside, I was able to keep the shop heated and have falling temperatures while it set. I also heated up the epoxy before hand and it certainly seemed to flow better with fewer bubbles. I did notice a couple of bubbles come up that I could easily pop. In the future, just to make things a little less hectic, I might glass in the stem area during the seal coat. I think that would make the main glass wet out a bit faster and more enjoyable. I saw a post where Alan or Stripperguy did that.

Yeah, my helper is certainly a keeper. I don't ask for help enough and it would make things easier. As far as weight, I'm not sure. I don't have a scale, but I've thought about asking to borrow one to see where I'm at. There's a little more epoxy on the hull because of the double layer bottom and those thick dynel strips on either end. I have used more epoxy on this than expected, but I think I wasted a fair amount during the bubble fiasco and just not being efficient in its use.

I did trial fit all the hardware to get an idea of how the boat will look when finished. I said in an earlier post that these parts came out of a graphite Prism. I was surprised how little the box weighed when it arrived. One thing I noticed is that the rear thwart isn't in the same place as a Wenonah Prism, but a Northstar (Bell) Magic has a similar spacing on the thwarts. I do like the rear thwart being just behind the aft most adjustment on the sliding seat, like on Wenonah solos. Since my seat is mounted on the floor instead of the gunwales or the side of the hull, it won't provide the cross bracing like the Magic has. I'll have to search for some black aluminum tubing to make a longer thwart or I'll just call Wenonah and have them make me one.

I found a nice 10' ash board that I want to get ripped into strips and scarfed to make gunwales today or tomorrow. Maybe cherry for small deck plates? Mark

P1270569.JPG
 
The black looks like a great contrast. As for getting more black aluminum I just paint the regular stuff with flat black spray paint after rubbing it down with 400 grit sandpaper. Looks great but not as durable. Will probably last a quite a while on thwarts but my black foot braces start to show some silver through after a season.

Alan
 
Alan, do you just crimp the ends in a bench vise? Anything to watch out for when doing that?

Mark

If I had a bench mounted vice that's what I'd do. I set mine on a chunk of whatever scrap lumber is handy and smash them flat with a big hammer. Nothing in particular to watch out for (other than fingers).

Alan
 
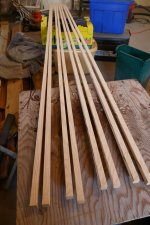
Finally back to work on the canoe. I've been getting out hiking and also trying to catch up on house projects around here. The weeds and sidewalk project were put off for way too long. I ripped the ash board for gunwales late last week. I got 9 nice strips out of a 10-foot ash board that only cost me $20.


P1270673.JPG


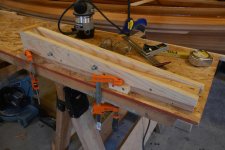
I made one of these fancy router jigs for cutting the scarf joints. I was shooting for a 12:1 but somehow ended up with 11:1. I think it'll be good enough.

P1270674.JPG


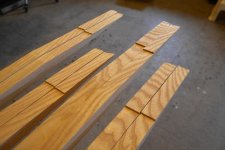
I tried the hooked scarf joint that Jim (Boatman53) put up as a tutorial a while back. After a few tries I finally got it right and they came out great.

P1270681.JPG


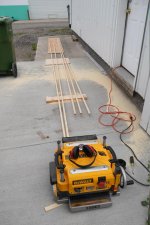
After the epoxy cured, I planed down the 19-foot boards to 3/4 high x slightly less than 3/4 wide for the inwales, and 3/4 high by 5/8 for the outwales. I'm not doing scuppers nor decks and probably could have gotten away with smaller dimensions for both since my seat will be mounted on the floor anyway. I also ran the gunwales through the router table to take the edge off the inwales and round over the outwales.

P1270688.JPG


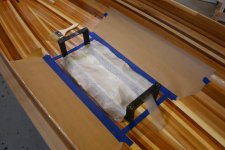
Today I epoxied down the seat frame and glued blocks along the side for my foot rest.


P1270700.JPG


I was going to go ahead and do a dry fit of the inwales today too, but I was afraid I'd mess up all this stuff. I think I'll just let them sit as they are until tomorrow.

P1270705.JPG

I did finally fix those openings on the bow and stern. I poured in some epoxy, then stuffed a rag in there on a wire and swished it all around. I'm sure I got everything coated really well. I sprayed in some of that expanding foam, then plugged the tops with a lot of thickened epoxy and a thick chunk of cedar. I learned my lesson on that one.

Tomorrow I'll install the gunwales. I'm going with the Jim Dodd installation method.

I mentioned above that I'm going deckless. I'm not sure whether there is any penalty in hull stiffness, or whether there is a practical reason to have them, but I don't feel like adding the extra weight. They seem like a holdover from wood/canvas canoes. I could be wrong? Maybe someone could explain their purpose or argue why I should change my mind on that.

After that, all that's left is varnish inside, install the hardware, do a little more epoxy fill of the dynel strips with epoxy and varnish the outside.

Man! I can't wait to get this thing in the water.

Mark
 
Looking great... Maybe one day I will get the bug and build one of those strippers!!
 
The Scarfs on the ash look great !
I knew I needed to build a jig ! Thanks for reminding me, and thanks to Boatman 53 for sharing it !!

I'm going deckless on Nokomis also. I have the flotation chamber, to help out, and plan for a small hand thwart, close to the end.

One of my earliest solos had solid gunnels, no thwarts, and no decks. It held up great, and I thought looked cool !

Nice work !

Jim
 
Last edited:
Mark,
You're just about there!! The boat's looking great, you must be pumped to get it in the water...
I spent the past weekend humping up and over all sorts of obstructions with my Kite, including many, many beaver dams. The bottom mounted seat makes for easy traveling fore/aft for weight transfer. I do wish that I had positioned my center (sort of) thwart a bit farther forward. That would have allowed me to quickly shift even more weight forward, to float the stern off of beaver dams and deadfalls. The crease/knuckle on the Kite adds tremendous strength and rigidity to the hull in the transverse direction. I would guess that the hull is insensitive to thwart placement.

Anyway, nice work. I'm anxious to see photos of it on the water.
 
Thanks stripperguy,

I'm curious, how much varnish should I buy for my canoe? I assume I'll put 2 or 3 coats on the inside and out, and wouldn't mind having a little left over for future recoats. Thanks in advance.

I got the inwales on today. I'll do the outwales tomorrow morning and let it sit while I go out backpacking for the weekend. The stormy weather is supposed to continue on through the weekend. Pretty soon we should be getting our June heat wave.

Mark
 
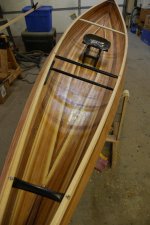
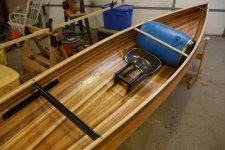
A minor update. I drilled and installed all the hardware today. I also gave the inside a light sanding and it should now be ready for varnish. I found an old Wenonah center thwart from when I installed a portage yoke in a canoe some years ago. It's not black, but when I go to install all this stuff for good I'll paint it like Alan suggested. Cutting the bar to size and pinching the end in the bench vise worked well. I was a little apprehensive about doing this because earlier I practiced on a small piece of black tubing and it split all along the side. Maybe the black stuff is a little more brittle? I was a little more careful with the actual thwart. Here's a photo of the boat as it sits tonight. I'm back to considering small decks, but I better make up my mind before I glue on the outwales. I'm liking the look of those Bell decks with the little scuppers, so maybe I'll make one out of some cherry I have on hand and see how I like it.

P1270737.JPG


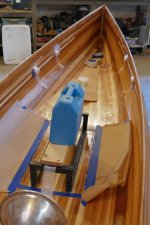
A blue barrel fits perfectly behind the thwart. Maybe enough room for a barrel harness too.

P1270744.JPG


You'll notice in the last 2 pictures that I didn't get the outwales on today. Here's the problem I ran into.

P1270724.JPG


There was no way to get that rail to bend without way too much force, so I soaked the ends with boiling water for a while.

P1270728.JPG


Then clamped them in a hastily built bending form. These things should be ready for attaching to the boat next week if all goes to plan.

P1270731.JPG
 
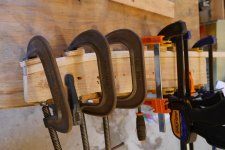
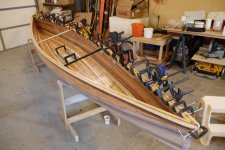
OK, just a short post to get things moving again in this thread. I decided to go without deck plates afterall, mostly because I couldn't quite get what I had visualized, but also because having no deck plates looks good too. I figure I can add them later if I really want to. After the holiday weekend, I went ahead and glued the outwales on, one at a time. I don't have enough clamps to do both at the same time, so the second one was done on Tueday morning. I have roughly 40 clamps that fit on the gunwales, I would need double that to do both at the same time.

P1270748.JPG


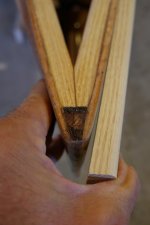
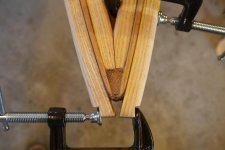
Here's a closeup of the ends that I was having trouble with before bending the rails on a form. They squeezed together well after steam bending. This was just another lesson learned about cedar strip canoe building. Don't try to shape the stems until the gunwales are attached! This silly little mistake alone cost me a whole day. I've had many similar issues. But in the end there is a solution.

P1270749.JPG


And after it's all sanded and shaped................. ready for oil.

P1270762.JPG

So, this week I have been able to get the outwales installed, the interior varnished with 3 coats, the final fill of the outside with epoxy, paint the silver thwart black, and do the final sand of the gunwales. Now I just need to lightly sand my epoxy patches on the outside of the hull, varnish the outside and put some oil on the gunwales.

P1270761.JPG


Whew! I feel like I've wasted a lot of effort and materials on this build. The biggest issue lately is either putting too much or too little epoxy on, then either sanding too little or too much afterwards. I seem to be going back and forth. When and if I build another canoe I think I'll be able to gauge things a little better. After having to put another layer of epoxy patches on the outside of the hull, I was disappointed to learn that I should wait at least 6 or 7 days before varnishing. I plan to get this thing in the water by June 15th, come heck or high water!

Mark
 
Back
Top