Stripping Part 1
Since this is a staple less build, some of the clamping solutions need to get creative. Whenever there is a concave section, as it is here,it is never an easy day, find it is best to not short cut and just work out some decent supports. There is no question, building stapleless is more difficult than using staples, if you can't see the holes or they don't bother you, don't build staple less ... if they drive you nuts, welcome to the "Gluttons for Punishment Club".
The current plan is to break the stripping up into 3 parts, 1 - First 6-8" of concave section starting at sheer 2 - rest of stripping just short of closing 3 - closing the football
So ... all the forms are set, strips are selected... now to get that all important first strip set on. Personal preference for me is to strip parallel to the waterline and this usually involves using the sheer of the middle 4-5 forms and allowing the strip to find its balance to the end. However this particular design is not from strip plans and the KeeWaydin hull just doesn't have any flat spots ...
This is a pic borrowed from Glenn's Keewaydin 15 Review ( https://www.canoetripping.net/threa...-trip-reports-in-winter-cold-and-wind.129842/ ) .... you can see that there are a lot of curves and virtually nothing flat

the easiest solution to follow the waterline is to just use the middle form sheer and draw that on each form to the bow/stern

since this is a stapleless build, I needed someplace to rest/support/fasten the strips at the ends. I took a few scraps of 3/4" birch ply and made a couple of end caps

lined those up with the sheer marks

and screwed them in place

On this canoe, the first 6" up from the shear are a bit tricky/wavy/pita to do, so I just made up custom strip forms for most of the difficult areas from scrap ply
here are is the starting pile, with the cut out drawn in

lining up with spring clamps before fastening with C clamps, the strip rest bottom lines up with the drawn in sheer mark, the curvy part is adjusted so it doesn't interfere with where the strip touches the form

center form gets an extra piece to make it centered on the form, others are fine on the side facing the canoe end.

Jimmi Clamps are a staple for my builds now (thank you Jim Dodd) but my regular size ones are just too large for these smaller strips, so smaller clamps were purchased and outfitted
Regular versus new smaller clamps

new inner tubes

the new tubes have a powdery lubricant inside, that is better washed out after you cut them up, pile of washed 4.5" inner tube pieces and clamps

to put the tubes on the clamps I just locked one Allan Key in the vise and opened the tube with the other

The three stages after the tube is slid on, 1) initial 2) pushed in 3) seated with a rod ... and I present "Minni Jimmi's" ... I am making one other change to these clamps, the 3/16" tubing I ordered tends to bend when zip tied to the clamp, so I have opted to just use 48" pieces of 3/16" dowel along the strip ... I am happy with how well this works

Finally, time to lay in the first strips


Minni Jimmis in action

That was a short lived "woot I am started" ... turns out that when you buy from Home Depot the little caps on the clamps were applied after the little dab of adhesive dried, meaning every one pulled off as soon as I removed the clamp
So this is Minni Jimmis dismantled again

clamps top part sanded down

then a drop of Goop was added and all the clamps recapped then retubed, lesson here is to check your caps if you make Jimmi Clamps
This first 6" of stripping is the most difficult, so I am taking my time, this is a shot of the first few strips and they seem to be fitting well

and a close up of that skarf joint

and as always, I inspect each strip, to get rid of crud, before I install

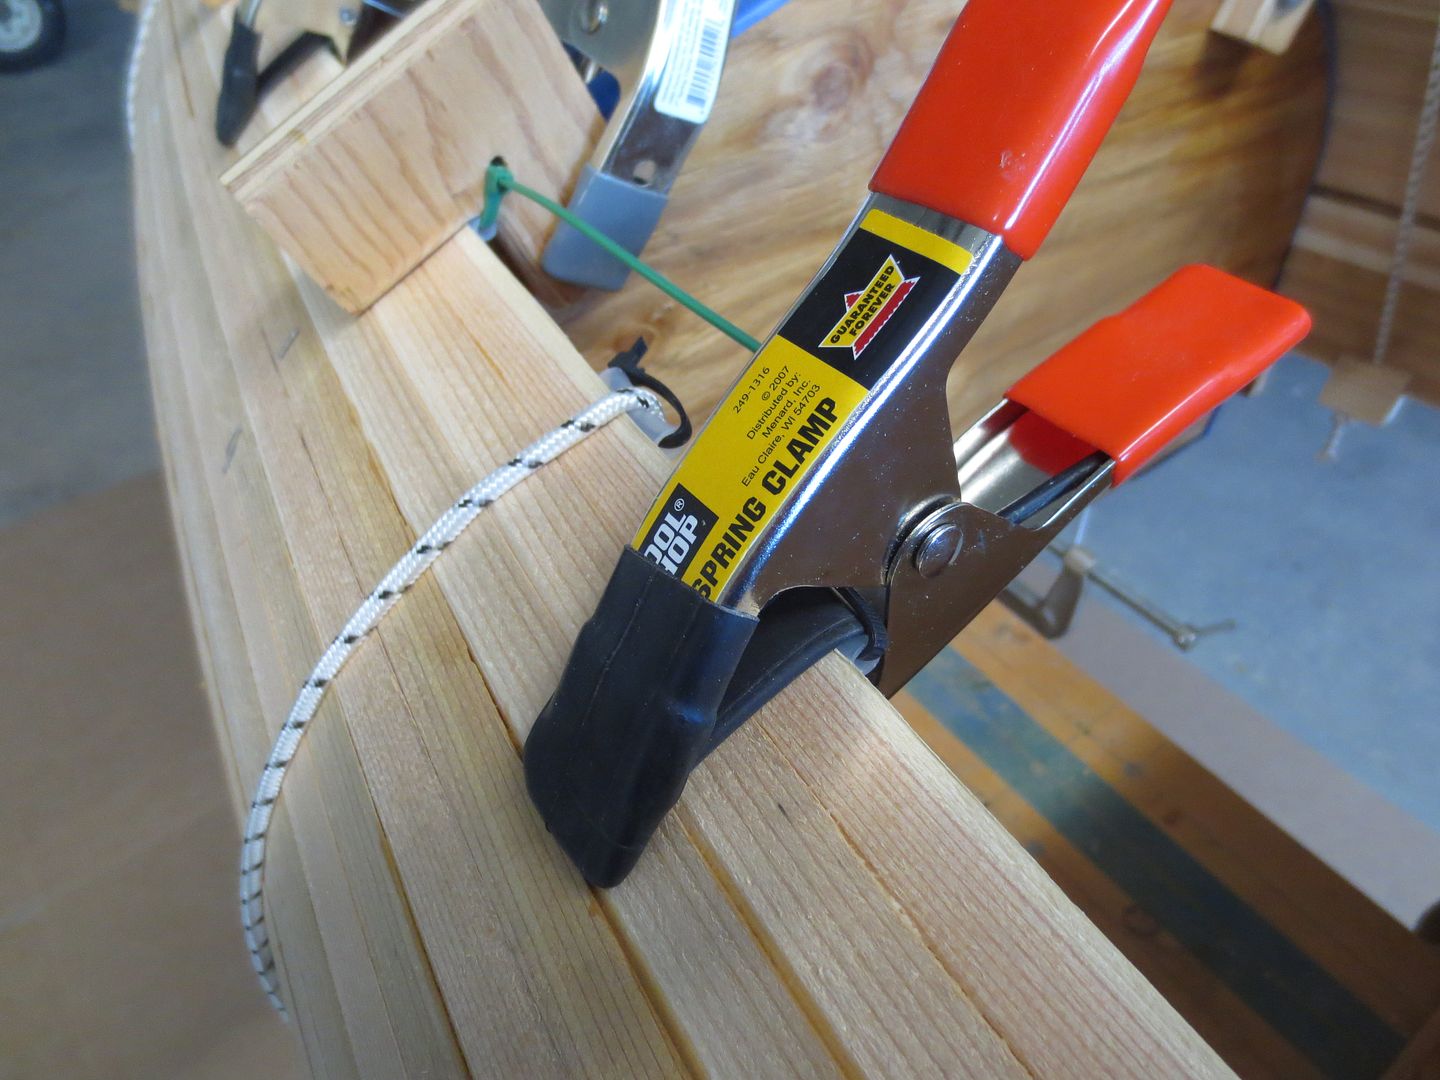
the caps at the end were a good choice, I added some elastic cord and an eyelet. This allows easy down and "in" pressure to be added to the strip ends

The narrower strips are definitely easier to get a good fit to the form

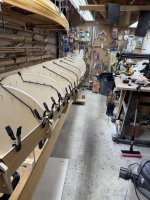
Stripped to the top of the custom holders ... done with the concave section, This doesn't look very wavy, but photos can be pretty deceptive, that's why I posted the first shot of the Kee .... it was one of the better pics that show just how curvy this boat is.

Now I have to reconfigure how to hold the strips for the next convex section of stripping .... stay tuned
Since this is a staple less build, some of the clamping solutions need to get creative. Whenever there is a concave section, as it is here,it is never an easy day, find it is best to not short cut and just work out some decent supports. There is no question, building stapleless is more difficult than using staples, if you can't see the holes or they don't bother you, don't build staple less ... if they drive you nuts, welcome to the "Gluttons for Punishment Club".
The current plan is to break the stripping up into 3 parts, 1 - First 6-8" of concave section starting at sheer 2 - rest of stripping just short of closing 3 - closing the football
So ... all the forms are set, strips are selected... now to get that all important first strip set on. Personal preference for me is to strip parallel to the waterline and this usually involves using the sheer of the middle 4-5 forms and allowing the strip to find its balance to the end. However this particular design is not from strip plans and the KeeWaydin hull just doesn't have any flat spots ...
This is a pic borrowed from Glenn's Keewaydin 15 Review ( https://www.canoetripping.net/threa...-trip-reports-in-winter-cold-and-wind.129842/ ) .... you can see that there are a lot of curves and virtually nothing flat
the easiest solution to follow the waterline is to just use the middle form sheer and draw that on each form to the bow/stern
since this is a stapleless build, I needed someplace to rest/support/fasten the strips at the ends. I took a few scraps of 3/4" birch ply and made a couple of end caps
lined those up with the sheer marks
and screwed them in place
On this canoe, the first 6" up from the shear are a bit tricky/wavy/pita to do, so I just made up custom strip forms for most of the difficult areas from scrap ply
here are is the starting pile, with the cut out drawn in
lining up with spring clamps before fastening with C clamps, the strip rest bottom lines up with the drawn in sheer mark, the curvy part is adjusted so it doesn't interfere with where the strip touches the form
center form gets an extra piece to make it centered on the form, others are fine on the side facing the canoe end.
Jimmi Clamps are a staple for my builds now (thank you Jim Dodd) but my regular size ones are just too large for these smaller strips, so smaller clamps were purchased and outfitted
Regular versus new smaller clamps
new inner tubes
the new tubes have a powdery lubricant inside, that is better washed out after you cut them up, pile of washed 4.5" inner tube pieces and clamps
to put the tubes on the clamps I just locked one Allan Key in the vise and opened the tube with the other
The three stages after the tube is slid on, 1) initial 2) pushed in 3) seated with a rod ... and I present "Minni Jimmi's" ... I am making one other change to these clamps, the 3/16" tubing I ordered tends to bend when zip tied to the clamp, so I have opted to just use 48" pieces of 3/16" dowel along the strip ... I am happy with how well this works
Finally, time to lay in the first strips
Minni Jimmis in action
That was a short lived "woot I am started" ... turns out that when you buy from Home Depot the little caps on the clamps were applied after the little dab of adhesive dried, meaning every one pulled off as soon as I removed the clamp
So this is Minni Jimmis dismantled again
clamps top part sanded down
then a drop of Goop was added and all the clamps recapped then retubed, lesson here is to check your caps if you make Jimmi Clamps
This first 6" of stripping is the most difficult, so I am taking my time, this is a shot of the first few strips and they seem to be fitting well
and a close up of that skarf joint
and as always, I inspect each strip, to get rid of crud, before I install
the caps at the end were a good choice, I added some elastic cord and an eyelet. This allows easy down and "in" pressure to be added to the strip ends
The narrower strips are definitely easier to get a good fit to the form
Stripped to the top of the custom holders ... done with the concave section, This doesn't look very wavy, but photos can be pretty deceptive, that's why I posted the first shot of the Kee .... it was one of the better pics that show just how curvy this boat is.
Now I have to reconfigure how to hold the strips for the next convex section of stripping .... stay tuned