For Rippy, photos without description


-
Happy National Bean Counter Day! 🫘🔢🧮
You are using an out of date browser. It may not display this or other websites correctly.
You should upgrade or use an alternative browser.
You should upgrade or use an alternative browser.
J Winters "Kite" build
- Thread starter stripperguy
- Start date
Thanks for thinking of me SG.
Wow!! Thank you SG
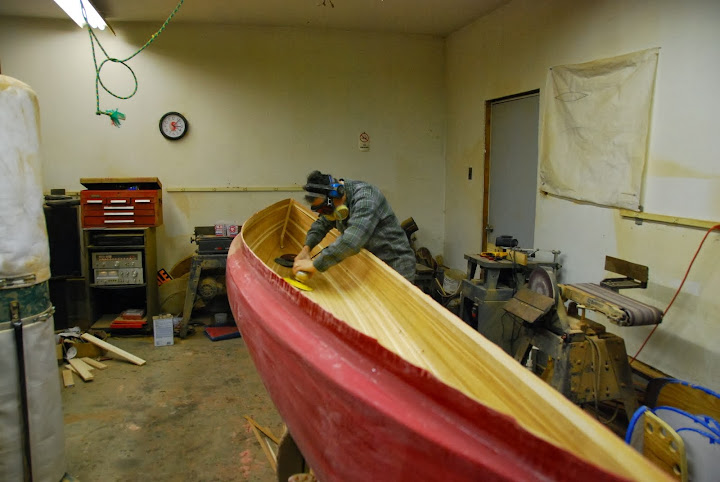
I remember this part!! Mask, goggles, headphones...oh yeah, my least enjoyable part of building a stripper, sanding the inside. In the earlier photos, I used a scraper to remove most of the glue drips and discontinuities between strips. Then, suit up with the aforementioned gear, and have at it. A cheapo 7" sander/polisher (I've burned up 3 of them) and some 50 grit disks. I have nearly one whole side done so far. I'll weigh the hull again just before I'm ready to glass, maybe I can sand off a few pounds!
Yup, the worst part, I often listen to Highway to Hell by ACDC while sanding the inside!
And here's what I look like when enduring that "worst part".
Now you see me, now you don't!! Inside is all done.
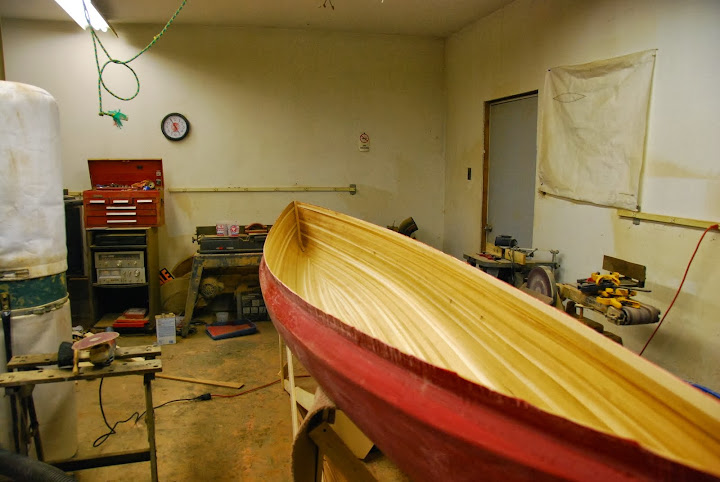
I need to apply a fillet of Cabosil thickened epoxy at the sharp crease. Then an epoxy seal coat, and then a single layer of glass inside.
After sanding, hull weighs 22.5 lbs...it will only get heavier from this point.
Now you see me, now you don't!! Inside is all done.
I need to apply a fillet of Cabosil thickened epoxy at the sharp crease. Then an epoxy seal coat, and then a single layer of glass inside.
After sanding, hull weighs 22.5 lbs...it will only get heavier from this point.
Last edited:
Last night, I mixed some Cabosil thickened epoxy and applied a 1/4 inch fillet in the sharp corner of the crease. Tonight, I applied a seal coat of epoxy, in anticipation of glassing on Friday or Saturday.
I have an extra 3/4 inch of sheer, to be trimmed off after the inside is glassed. The severe tumblehome and overhanging crease will make it tricky to keep the glass in place above the crease. So I intentionally left some extra sheer, so that the glass will have a fighting chance of staying put. Even if the glass wants to droop, I can use some clothespins to hold it where I want. The clothespins may cause some disruption in the glass, but that would matter not, the disrupted areas will be trimmed off.
BTW, I wiped down a section of the hull with some acetone, and I was nearly blinded by the intense shine, at least until the acetone evaporated! I can just imagine how it wil look with the clear coat on the outside. Ooooh!!
So here it is, just before the seal coat.
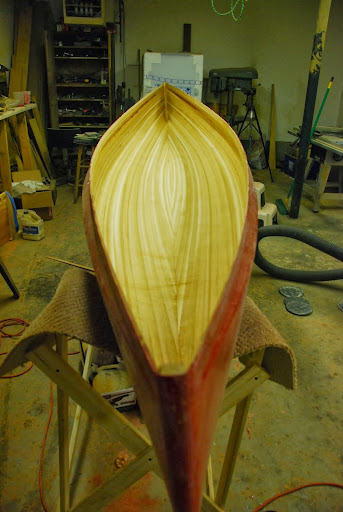
And here it is just after the seal coat.
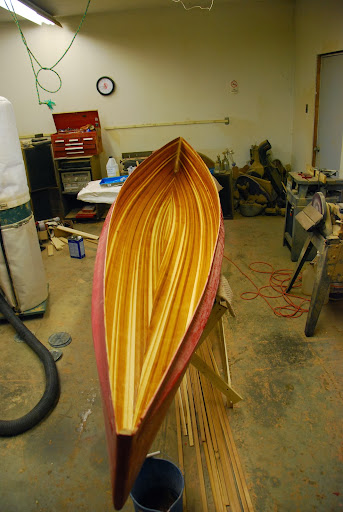
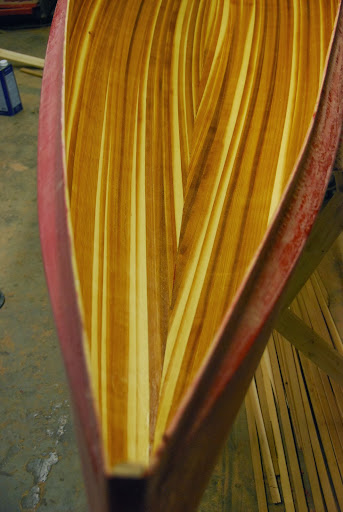
The crease is not yet sanded, only the hull below it.
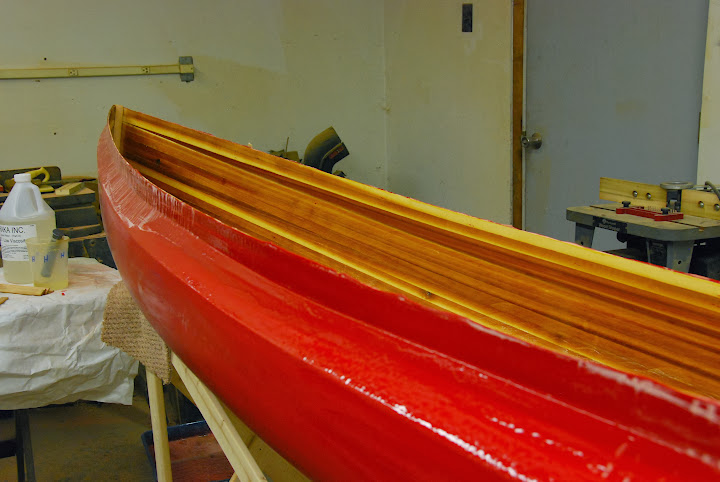
I have an extra 3/4 inch of sheer, to be trimmed off after the inside is glassed. The severe tumblehome and overhanging crease will make it tricky to keep the glass in place above the crease. So I intentionally left some extra sheer, so that the glass will have a fighting chance of staying put. Even if the glass wants to droop, I can use some clothespins to hold it where I want. The clothespins may cause some disruption in the glass, but that would matter not, the disrupted areas will be trimmed off.
BTW, I wiped down a section of the hull with some acetone, and I was nearly blinded by the intense shine, at least until the acetone evaporated! I can just imagine how it wil look with the clear coat on the outside. Ooooh!!
So here it is, just before the seal coat.
And here it is just after the seal coat.
The crease is not yet sanded, only the hull below it.
G
Guest
Guest
Geeze Louise, have I worn out the WOW word yet?! Do those wood strips visually POP , or what!? Here's a question SG. Regarding laying the glass interior and potential sagging. Do you lay the canoe on one side, and do one side at a time? This is all new to me, so I'm sorry if this is another dumb question from me.
Anyway, thanks for sharing this.
Anyway, thanks for sharing this.
Geeze Louise, have I worn out the WOW word yet?! Do those wood strips visually POP , or what!? Here's a question SG. Regarding laying the glass interior and potential sagging. Do you lay the canoe on one side, and do one side at a time? This is all new to me, so I'm sorry if this is another dumb question from me.
Anyway, thanks for sharing this.
Brad,
Believe it or not, I am still amazed at the way these things come out, even after building many, many strippers, I still enjoy seeing the transformations. I prefer to put the strips on in a random fashion, rather than try to create some sort of light/dark scheme. I helped a boat buddy build a stripper where he alternated light and dark strips, matching them on each side. Seemed like a good idea, until I saw the final results...it looked like a circus tent, or a cheap RV awning!!
When glassing the hull, inside or outside, it really needs to be done all at once. If I were to wet out a partial section, wait for it to cure, then wet out an adjacent section, the transition line would not look so good. Why?? No matter how hard I might try, it is nearly impossible to leave a clean line...some resin is bound to get on the cloth, but not all the way through the cloth, at the line where I would stop. That resin on the surface would cure, and prevent any other resin from penetrating and making the cloth transparent, effectively creating a long bubble. So it is best to wet it out all at the same time. When a hull like this one, or my DY Special has such a severe tumblehome, it is tricky...not the best choice for a first time build, that's for sure. A slow curing resin helps immensely. I will roll as much as I can as quickly as I can, then go back over everything with a squeegee. The squeegee will force the cloth close to the wood, for a stronger laminate. The squeegee also removes excess resin while removing any bubbles. But I have to careful with the squeegee, get carried away and it is too easy to pull the cloth off the wood on the inside radii. When the inside is done, I want the least amount of resin possible, while keeping the cloth thoroughly saturated. Any extra resin only makes the boat heavier, and makes the inside more slippery. The exposed weave really helps to reduce slips and falls when clambering around in the boat.
I did lay the hull on its side to sand the overhung crease, it was the only way to see what I was doing. With enough surface are, the cloth will stay put OK on a vertical surface, and that can help keep the cloth to stay in contact with the wood on the overhung portions too.
And Brad, there rare no dumb questions. Better to ask now than to get boxed into a corner when you're building your boat.
You are going to build, aren't you?
G
Guest
Guest
Thanks for your explanation Stripperguy. When you describe the process, it makes perfect sense. Does inside glassing add water resistance + added structural integrity? It sure sounds tricky. I'm nervous just thinking about it.
Many years ago I dreamed of building a boat; kinda a family project. Well, it never happened. In more recent years, my son has shown interest, and so I gave him a couple books I'd treasured. We'll see what happens next. I sure know who to call on for advice, thanks SG.
Many years ago I dreamed of building a boat; kinda a family project. Well, it never happened. In more recent years, my son has shown interest, and so I gave him a couple books I'd treasured. We'll see what happens next. I sure know who to call on for advice, thanks SG.
Man that looks good SG. Cudos, well done, (trying not to wear out 'wow')
Jason
Jason
Thanks for your explanation Stripperguy. When you describe the process, it makes perfect sense. Does inside glassing add water resistance + added structural integrity? It sure sounds tricky. I'm nervous just thinking about it.
Many years ago I dreamed of building a boat; kinda a family project. Well, it never happened. In more recent years, my son has shown interest, and so I gave him a couple books I'd treasured. We'll see what happens next. I sure know who to call on for advice, thanks SG.
Brad,
The inner layer of fiberglass does certainly add tremendous strength to the hull, but without any laminating on the outside, the hull would still be weak. The modern stripped hull is a stressed skin structure, the wood between layers of fiberglass is really just an attractive spacer. I don't know your background, but I'll give you my standard short description. The hull strength in bending is a function of the material properties and the geometries. Especially the thickness of the wood spacer. Hull strength is a function of the cube of the thickness, all other parameters being held the same. Huh?? If you double the thickness, the hull strength increases by a factor of 8!
The glassing itself is not too terrible to learn or do, this hull in particular is a slight challenge. My son has been helping build boats with me since he was 6 years old...he's now 24, and still hasn't built his own boat! Maybe this year.
Man that looks good SG. Cudos, well done, (trying not to wear out 'wow')
Jason
Jason,
Thank you too much...my goal here is to expose the "mystique" of strip building and show that is within the reach of anyone capable of walking upright. Maybe I should correct that statement...anyone capable of ambulatory motion can do it!
I think you'll be surprised how little problem that knuckle will present. I was nervous with the Raven too, which has a similar look to the osprey and kite, but once wetted out, the glass stuck great. Are you using one long sheet of cloth length wise, or running three sheets on the horizontal? I don't use one sheet anymore, I find it much easier, and more material efficient to role out the three or four pieces needed. I like having about a four inch overlap too, it doesn't look the greatest, but i think the double layer adds some strength.
While cruising around the WCHA site, I came across some builders who strongly recommend doubling up on the interior cloth as opposed to the exterior cloth for added strength. My experience has shown this is probably true. The only time I had a catastrophic failure (on the Steel River in the middle of no-where), after a major impact, the glass developed a running split on the inside, about 18 inches long. The outside bore the brunt of the collision, and was still functional, but the inside was a mess.
Anyway, you are almost there, it must feel great!
mem,
Thanks for the words of encouragement, I am pretty happy with the way it's all coming together. I did have an abstract vision of the final results, but the discussions here actually helped me to tweak a few things along the way.
As far as the inner layers, yeah, additional layers or thicker (stronger) glass on the inside is beneficial for impact and bending loads from the outside of the hull. Going over an obstruction, the outside of the hull tries to flex inward, putting the outside skin into compression. The inner glass then tries to deflect (actually does deflect) and goes into tension. The fancy spacer, otherwise known as wood, needs only to not fail in shear.
I'm convinced that if glass and resin existed in earlier times, there would have been no lapstrakes, no wood and canvas, no curvel planking...these stressed skin sections are just too efficient!!
Last night, while waiting for the seal coat to become non tacky, I stripped a panel to be made into bulkheads and decks. Sorry, no photos, Rippy.
Tonight, I sanded the dust burrs from the seal coat, and cleaned out the hull really well. Then I laid in the single layer of 4 oz cloth, in preparation for tomorrow's wet out.
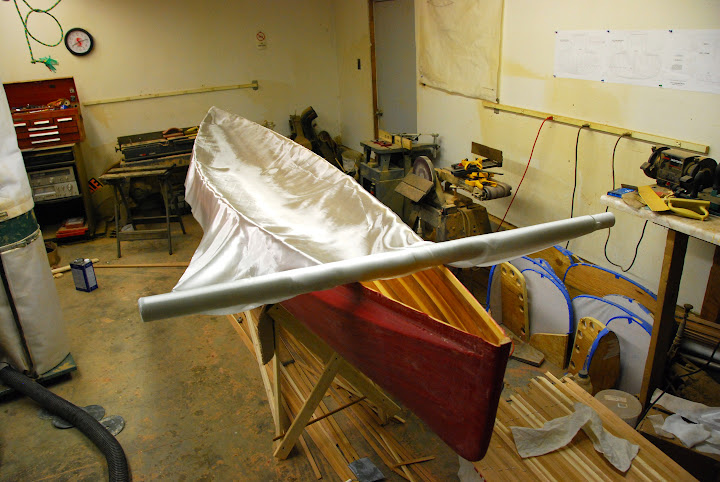
I just noticed, you can see that stripped panel in the photo above, there it is in the lower right corner...
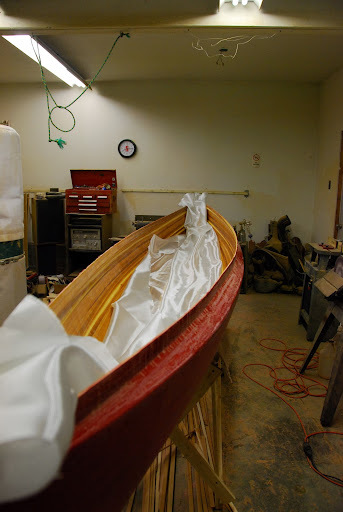
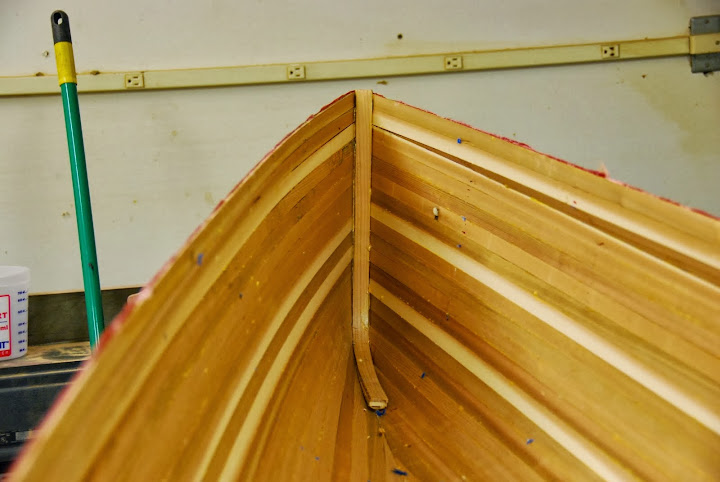
Here's the stern stem area, the wide stems make for an easy lay for the cloth. Most of my hulls have very slender stems, and this section is usually a struggle. But these blunt ends are a cake walk!

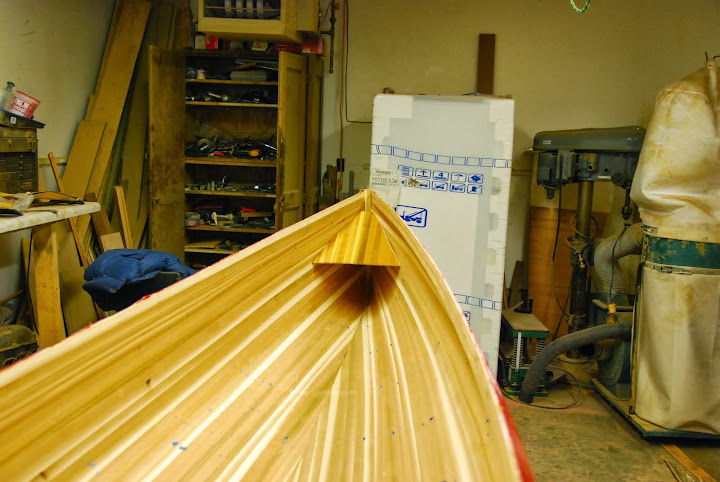
Here's the view towards the bow, you can't tell from this photo, but I had quite a few snags in the cloth. My hands were very rough today...I usually sand my hands with some 320 grit, but that wasn't working for me. I did get most of the snags to mostly disappear by gently brushing back and forth to get the warp and weft to relax.
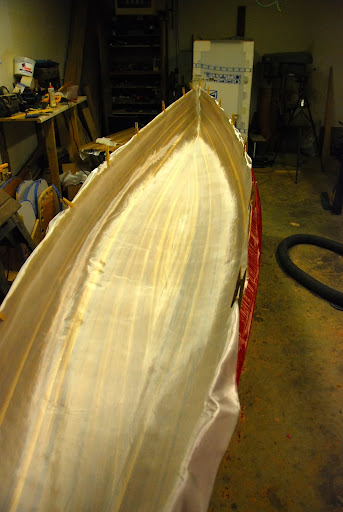
And here it sits, waiting for a buddy to come over tomorrow and help me do the wet out.
BTW, some (15 ft) of the carbon fiber bias woven 4 inch wide tape arrived today, after the wet out I can play with a sample gunnel section.
I still haven't finished building that hot wire foam cutter, I guess I'm just lazy!!
Oh, and in another thread, I was inspired by davavd's use of velcro to hold his footrests. I can use some velcro to hold my seat frame in place. I've been struggling to figure an easy and reliable way to allow for an adjustable seat position, but without tools or fasteners. And it would be great if I could also quickly and easily get the seat frame out of the way when carrying.
Velcro could be the answer to all of my pondering. I'll just epoxy in some carbon fiber over foam cleats, glue on some velcro, and have the mating velcro on the seat frame. Nuthin' to it!
Tonight, I sanded the dust burrs from the seal coat, and cleaned out the hull really well. Then I laid in the single layer of 4 oz cloth, in preparation for tomorrow's wet out.
I just noticed, you can see that stripped panel in the photo above, there it is in the lower right corner...
Here's the stern stem area, the wide stems make for an easy lay for the cloth. Most of my hulls have very slender stems, and this section is usually a struggle. But these blunt ends are a cake walk!
Here's the view towards the bow, you can't tell from this photo, but I had quite a few snags in the cloth. My hands were very rough today...I usually sand my hands with some 320 grit, but that wasn't working for me. I did get most of the snags to mostly disappear by gently brushing back and forth to get the warp and weft to relax.
And here it sits, waiting for a buddy to come over tomorrow and help me do the wet out.
BTW, some (15 ft) of the carbon fiber bias woven 4 inch wide tape arrived today, after the wet out I can play with a sample gunnel section.
I still haven't finished building that hot wire foam cutter, I guess I'm just lazy!!
Oh, and in another thread, I was inspired by davavd's use of velcro to hold his footrests. I can use some velcro to hold my seat frame in place. I've been struggling to figure an easy and reliable way to allow for an adjustable seat position, but without tools or fasteners. And it would be great if I could also quickly and easily get the seat frame out of the way when carrying.
Velcro could be the answer to all of my pondering. I'll just epoxy in some carbon fiber over foam cleats, glue on some velcro, and have the mating velcro on the seat frame. Nuthin' to it!
Buddy of mine came over around 3:30 this afternoon, the boat and I were ready.
Here's what we started with

I mixed 12 oz of resin and we both rolled as fast as we could.
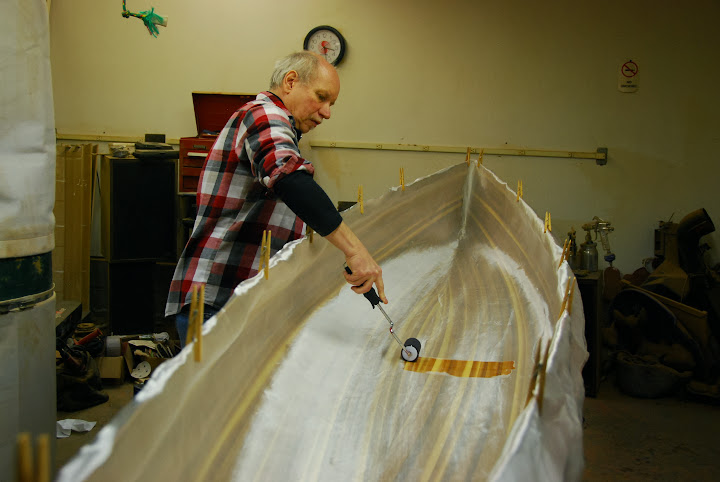
After the 2nd batch of 12 oz, we got about this far. As we got closer to the stems and the sheer line, things went a bit slower.
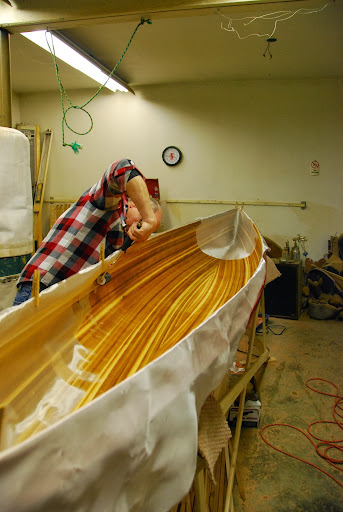
After the 2nd batch was gone, I mixed only 6 oz at a time (twice) and he kept rolling, and I switched to a squeegee to get rid of any excess resin. After he rolled all that could be, he took over the squeegee detail and I switched to a brush to do the stems. Next thing we knew, we were done!! It took us maybe 1:15 to do it all. Stems fell into place, and the overhanging crease was a no brainer.
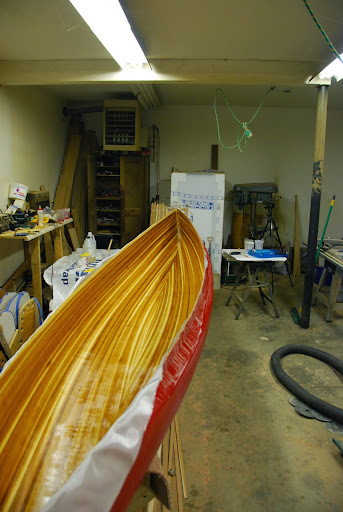
So here's how the inside will look for the next 50 years or so...
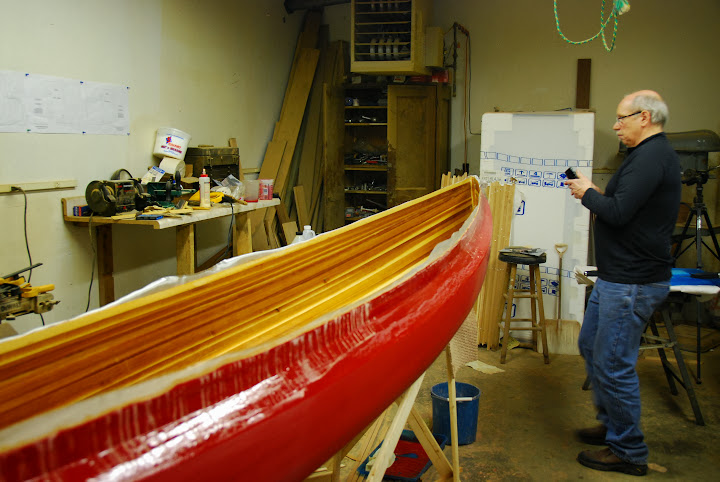
Maybe tomorrow, I can weigh it again. And I can mess around with the carbon fiber tape a some foam substrate.
Any questions? Or is everyone bored with this??
Here's what we started with
I mixed 12 oz of resin and we both rolled as fast as we could.
After the 2nd batch of 12 oz, we got about this far. As we got closer to the stems and the sheer line, things went a bit slower.
After the 2nd batch was gone, I mixed only 6 oz at a time (twice) and he kept rolling, and I switched to a squeegee to get rid of any excess resin. After he rolled all that could be, he took over the squeegee detail and I switched to a brush to do the stems. Next thing we knew, we were done!! It took us maybe 1:15 to do it all. Stems fell into place, and the overhanging crease was a no brainer.
So here's how the inside will look for the next 50 years or so...
Maybe tomorrow, I can weigh it again. And I can mess around with the carbon fiber tape a some foam substrate.
Any questions? Or is everyone bored with this??
I'm interested to see what the weight will be tomorrow. Are you still planning to take that extra strip off? Will you do it before or after you put the gunwales on?
I'm interested to see what the weight will be tomorrow. Are you still planning to take that extra strip off? Will you do it before or after you put the gunwales on?
You and I both...although, I've already missed my mark.
Anyway, that extra bit of sheer has to come off so that the hull conforms to the design. I may not be able to trim it tomorrow, the resin could still be a little soft.
Most, or maybe all, of the sheer strip will be covered by the gunnels. I bought 4" wide CF tape, with a bias weave. That tape can stretch out to nearly 7", but I want to keep it closer to 4". The gunnels will be somewhere around 3/4 x 3/4, with a slot to fit the hull, and rounded edges to allow an easy wrap for the CF.
But before I fully commit to a gunnel cross section, I'll do a test section, and test it to failure at work next week. I tested a seat cleat a few years ago, it was simply a cedar cleat, epoxied to a sample hull build up. I applied over 300 lbs load before the wood failed. The cleat was epoxied to the sample hull (glassed on both sides) using the same Cabosil and RAKA resin that I always use. Even so, the epoxy bond did not fail, only the cedar itself.
Here was the setup and the resulting load-deflection plot.
Here's the failure itself
And here's the plot
I made sure that the setup simulated the applied loads that a real seat cleat would experience. From the above, I concluded that my seats were safe for a 1,200 lb paddler!!
Anyway, I'll perform the same sort of testing to failure on a sample hull section with and without the CF gunnel. I'll post the photos and results here, if anyone is interested to see them.
I am certainly not bored yet!
Similar threads
- Replies
- 75
- Views
- 3K
- Replies
- 15
- Views
- 888
- Replies
- 73
- Views
- 9K
- Replies
- 28
- Views
- 3K
