• Happy Boxing Day! 🎁📦💰

Cedar Strip Build "The Experiment"

I would need to build a Dragons Tooth with slots to run screws through on w/c boats. We do use slanted blocks with sandpaper facing but this would solve almost all issues we have with that.

Karin
 
Jim Dodd Finally took a look at RAKA. If their epoxy handles as well as the SystemThree ClearCoat, I may end up switching brands if (when) I do another build. A kit to match what I started with this build would be about 1/3 the cost, and I like the idea that their clear resins are speed-tweakable. (Everyone else has 1 clear kit, with maybe some expensive additives to speed up the crazy slow resin/hardener) What tone do their resins turn out? I'm really not into the Amber, prefer something closer to water clear.

I thought that I had allowed enough overage to give me a buffer. This is really the first build that I have used epoxy for anything other than the glass. Now I've discovered Cabosil, and my life changed! I've used it for filling, and a lot of the crazy lamination projects. I have not logged the resin use (Should do that next time) but judging by how much Cabosil I've gone through, I probably put a quart of mixed resin into various glue-type situations. some of that ended as squeeze-out, and I did loose a couple of pots that kicked faster than I anticipated.

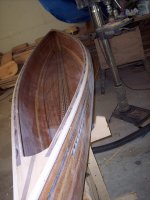
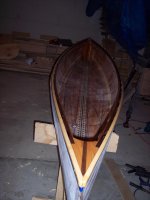
Yes, I'm capping the Shear strip. In the first photo where I'm fitting the inwale, that short bit of maple is actually a scrap from the outwale, being used as a height gauge. Though, as you are probably aware, I'm not adverse to adding interesting woods into my hull. Depending on the look one wanted, I wonder what would happen if I used Walnut or Cherry for my shear strip, and then sandwiched it, rather than capping? Hmmm.... The rabet to do the cap properly was kind of a pain...

Thanks for reminding me about the Dragon's Teeth. I remember a few other posts about them, but they slipped my mind. We'll see - may have to make a pair tomorrow to try out...

Question regarding your decks: is that drain hole in the tip intended purely for function, or is it a style thing as well? And have you found it to make a practical difference?

Alan Gage Thanks. I'm about ready to have this one on the water. Including form work, she's been in progress just about a full year. (That's what happens when you can't just grab any available 45 minutes to work on something....

Not so much a panic attack, but I could have worked out a few frustrations on something--- set me back a whole week, and I'm already antsy to be done!

If I get going to the point that I can guarantee that there will be a next one, I'll probably buy resin in bulk, as well. This was a test. Like most tests, I've learned some things, but I think I'll call it a success. (The design still needs to be evaluated in the water)
 
The biggest difference you'll find between System Three's Clear Coat, and RAKA's 127+350 Non-blush hardener, is viscosity, Raka is thicker. It will take fewer coats of RAKA, to fill the weave.
You will also find pot life is a little faster with RAKA. Very little difference in color. I find the color of the varnish has a bigger effect.
Additives really add to the usefulness of epoxy ! We ought to start a list of the things we use it on !
Price now days is a factor. When I first started We could buy Clear Coat, very reasonable in 15 gal kits, right from System Three! Now that they sell to distributors it's gone way up.

Your attention to detail, has made this an interesting build ! It has also taken more time to build ! I'm guessing a straight forward canoe, could easily be built in half the time, especially, now that you have one under the belt !

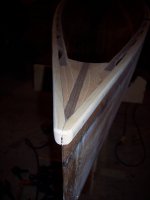
The weep hole, I put into all my decks is there for function. And at the take out, entertainment. Years ago I attended a Wood canvas canoe rebuilding seminar. The presenter said that nearly every wood canvas canoe he rebuilt, was rotted in the stem area. He stated that IF all the wood canvas canoes were built with a Weep hole, most would have survived ! It was the inability to drain water in the stems, that caused them to rot out.
From that day on, I built all my decks with a weep hole, allowing all the water to drain from under my decks.

Thanks for sharing your build with us !

Jim
 
Last edited:
I did catch the gauge block you used for the inwhale. Screws make assembly easier, especially if you glue with epoxy. The epoxy seal will make your trim last almost indefinitely. I hate replacing trim !

Epoxy. I always end up buy RAKA's three gallon kit. I have some of their Fast cure hardener in their UV- inhibited, but find the slow cure hardener more to my liking.

I like hiding screws as much as possible ! They are just moisture collectors, and I like the looks without them, (Personal preference)
The Dragons Teeth make that possible in the deck area.

Jim
 
SaganagaJoe As soon as I have them. Just about there, but I can only work on the canoe part days.

Jim Dodd Thanks for the info about RAKA. I'm certainly going to give them some serious thought next time. Looking at the spec numbers, their 127 + 350 can't be all that much thicker than ClearCoat... not as thick as Silvertip, anyway. This build, I have definitely come around to some form of peel ply, so ease of handling will trump fill capabilities...

I probably could do a plain build much faster, but I always make things.... Interesting.


100_4246.JPG 100_4255.JPG

Thanks for the hints about dragons teeth - They worked out great! Five minutes with a Forstner bit and a bandsaw. I like the blue tape for release, as it has a bit for friction that plastic would lack, and it still sheds small amounts of epoxy - just don't saturate it. I see a lot of you take your outwales back to the stem of the canoe, while I tend to like mine to remain a little longer. Saves from certain kinds of bumps.

100_4257.JPG 100_4265.JPG

Everything epoxied in place and cleaned up, and then with a light seal coat of resin - Doesn't it just come alive?

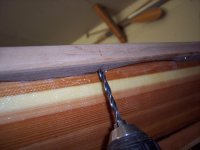
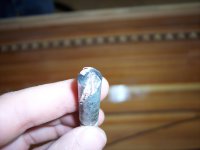
I was doing some final check fitting of the bent laminations, and found that I had missed a pair of threaded inserts. Not a big deal, but to put them in with the inwale on the boat, I needed a short 3/8 drill bit. This was not to be had, so I improvised.... with a die grinder and a drill sharpener:

100_4261.JPG 100_4263.JPG

To drill here, I made this. Not something I would use for production work, but for two holes, it functioned. Needed to be cleared a lot, as the slots don't go up far enough to pull the chips out.

100_4270.JPG 100_4272.JPG

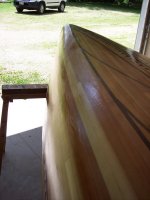
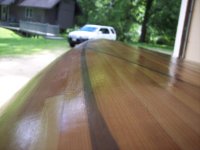
Applied SystemThree's WR-LPU. Man, this stuff dries fast. The second photo is with two coats, thinned, brush application. Ambient in the shed was 70 deg. Fahreheit, 40%-45% RH. The open door allowed sun and breeze in, accelerating the dry time. The stuff didn't have time to self level. After the second photo, I lightly wet sanded with 320 automotive.

100_4273.JPG
I applied a third coat with the door shut, which I hate doing because I then loose the lovely natural light. This coat, though, seemed to flow and level itself much better. The color variations are under the glass, puddle print from the resin, but this lighting tends to emphasize it.

I'll try for better photos after I do the inside tomorrow.
 
Applied SystemThree's WR-LPU. Man, this stuff dries fast. The second photo is with two coats, thinned, brush application. Ambient in the shed was 70 deg. Fahreheit, 40%-45% RH. The open door allowed sun and breeze in, accelerating the dry time. The stuff didn't have time to self level.

You're not kiddin' about that stuff drying fast. I had a hard time keeping a wet edge. I thought next time I'd try thinning it a little more to hopefully slow it down some more. Spraying it would be nice too if the weather cooperated. Self leveling wasn't really a problem for me except where fresh finish met 1 1/2 minute old finish.

Alan
 
Last edited:
Alan Gage Turns out, that was the worst part for me as well - keeping a wet edge. I did the interior with the doors closed, and was sprinkling water on the concrete floor to boost humidity. Thinned the stuff by 30%, which is the absolute max that SystemThree recommends. I've enough leftovers for another couple of coats, if I decide to try to improve the finish. Sounds like people who are using the pigmented version usually go up to five coats, and then use automotive buffing compounds, etc. I've got too many glass imperfections for that to be worthwhile.

I'm calling the build done, even though I still have things to work on. (and redo - some of that will get its own thread) The hull is finished, and I can paddle it.
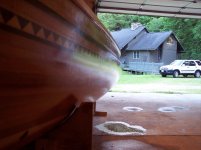
100_4278.JPG 100_4279.JPG

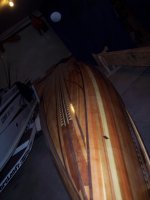
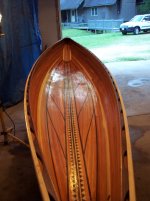
Inside coat while fresh, and the outside from a low angle. The amber tint is due to the halogen lights that I had running in the background.
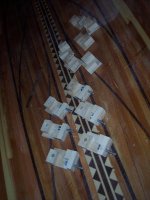
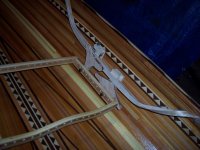
100_4267.JPG 100_4285.JPG 100_4286.JPG

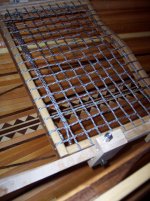
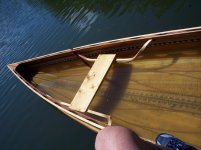
And this is what all the fuss with the various laminated and mystery parts was about. The blocks slide on the rails, and have a bushing embedded like the seat frames. Please excuse the fact that they have no finish and that the bent laminations in particular are sort of ugly. They were a prototype that did not turn out as well as I had hoped, and are on the list to be replaced. The weird shapes allow this seat, in theory, to pivot to an upper position or a lower one, and to remain stable in either.

Even this was not without its wrinkles, though.
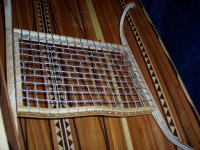
100_4283.JPG 100_4284.JPG

The slide frames near one end were mounted about 4" closer to the stem than I had intended. This narrowed the space between the rails so that there was not room for the pivot. I ended up mounting like this - I still have some height adjustment, if I pull the blocks and turn them upside down. This allows me about 2" adjustment.

All loaded up and ready to ride:

100_4290.JPG

100_4301.JPG 100_4298.JPG

100_4296.JPG

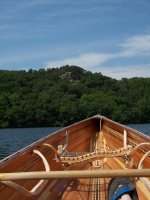
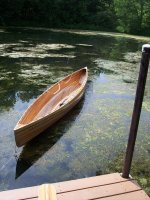
Just went down to the local state park. Fairly successful test paddle, managed to sunburn myself. Notice anything wrong?

This paddle, I went without any gear other than the safety stuff. In reviewing my notes from the design stage, I'd kind of figured that 200#, boat, paddler and gear was the minimum for performance. All things considered, I had maybe 195#. This is too light, the canoe was rather skittish with a breeze. That, or I need more practice handling a canoe solo.

Numbers wise, the hull, slide rails, and one seat came out right at 50#
There is no thwart installed, as I intended the center seat to stiffen things a bit. I did include threaded inserts in the gunwale for a thwart in the middle cary position, and may add one as an "Option" so that I can reconfigure depending on what I am doing that day.

The Knuckled tumblehome worked out great. I was able to hit-and-switch right across the widest part of the beam with no trouble. It was not even a stretch.

I experimented a bit with "Canadian Style" This needs more work for me. (I had forgotten that many of the examples I have seen have the paddler's inside leg extended in front of him, and with both feet under me, I was having issues controlling my roll)

I also was able to stand for short periods. Not something that I would want to duplicate in wind or current, but then I will normally have a partner or more gear along, which should stabilize things. I also found that sitting very low, 2 1/2" boat cushion on the bottom, is not a good paddling station for me.
 
Another day, another test. Wanted to see if self recovery from a swamping would be possible, so I intentionally sunk my canoe!

100_4346.JPG

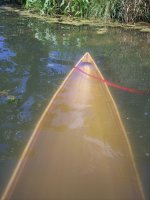
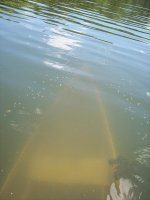
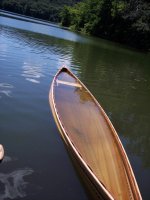
This is how far the unloaded hull will sink, turned on its side and not pulled under. From this point, boarding from the water is definitely possible. I was able to come over the stern deck. This did pull the deck under a bit, But there was still enough freeboard to float me. I'd need to do quite a lot of bailing at this point. (I actually did this right by the landing, so I cheated)

100_4347.JPG 100_4348.JPG

With judicious application of some pressure (Need to keep a gunwale under until the hull is full) it is possible to take the canoe bodily under. This was with me providing ballast midships. Most of my bulk was still out of the water.

100_4349.JPG

Once the mobile ballast is lifted, the filled hull will float back to this point. If you turn the hull on its side just a bit, it will self-empty out to the level of the first picture. I'm not sure if two PFD wearing adults would be able to provide enough extra lift to pour much more than that out.

Which brings up a question: What is everyone's favorite bailing tool? I need to arrange something, just in case.
 
Which brings up a question: What is everyone's favorite bailing tool? I need to arrange something, just in case.

Interesting question.

I like the gallon sized liquid laundry detergent plastic jug with the bottom cut off. Nice big handle and the plastic is thicker and more durable than the usual bleach bottle. Plus the big dog-bone canoe sponge fits nicely inside. A big sponge is really handy, not just for the last of the water but, more critically, to swipe out the sand, dirt and mud that I wet foot into the hull.
 
I do the same as Mike but lately for trips I've been bringing a hand pump, I find it easier to get into those tight places like around the float bags. The bailer does come in mighty handy for middle of the lake...hmmm...needs though!
 
I do the same as Mike but lately for trips I've been bringing a hand pump, I find it easier to get into those tight places like around the float bags. The bailer does come in mighty handy for middle of the lake...hmmm...needs though!

I bring a bilge pump in the decked boats, but I bring the bailer there as well. I have tried pumping out one of the decked boats that was filled with water. Uh, nope.

For a kayak with bulkheads sure, but for emptying water a gallon at a scoop the bailer is the way to go.

Plus it is really difficult to pee into a bilge pump.
 
I just ran across this thread, from a few years back !

I thought it was cool to note that Sailsman 63, actually sunk his build !
Interesting how much of the hull floated above water ! Not much ! All the more reason to incorporate Flotation in a stripper !

I really enjoyed this build thread, as it's from a beginners perspective !

And lots of good advise.

Jim
 
Update on the float/sink situation.

I did end up inadvertently dumping this canoe, and it was a lot harder to recover than I had thought.

Mostly, I had a much harder time removing enough water to be able to do a self-rescue in water over my head. Passer-by on a paddleboard helped me out, otherwise I would have had to swim it to shore.

I've since added a float bag to mitigate that a bit, but have not tested it yet.
 
I remember Alan's videos of self rescue practice, he was preparing for one of his epic trips.
Maybe he'll post a link to it, he used a well known technique.
 
The issue wasn't so much "Getting in the Canoe" it was "Making sure I got rid of enough water that my weight doesn't just push it under"

I know exactly what you mean. Even in my lightweight (34 pound) Bell Magic I had a very hard time getting enough water removed. My 40 pound strip built Kite was more difficult yet.

That's why I built my float chambers to be flush with the gunwales. This keeps the stems floating very high when the canoe is upside down and makes it much easier to flip and empty. Your float bags should do the same thing.

Here's the video Stripperguy mentioned. You'll see how high it floats. With factory float tanks it would be lower in the water and much more difficult to empty the water. In this video the boat was all but empty after flipping upright.


Alan
 
Note how much Boyancy is in Alan's hull ! Flotation Chembers are the key ! Alan has more flotation in his, than most Commercial canoes ! Even more than mine ! Way to go Alan !
 
Back
Top