• Happy Card Playing Day! ♠️♥️♦️♣️🃏

Rebuild of a Mad River Traveler

Chris, When I tried to put on some ash, old gunwales, that curl kept pulling them out at an angle. My thought at the time was to add thwarts, many many thwarts. When I picked up the boat, a 7 hour round trip, it only had the seat in, no thwarts and the gunwales were monster thick. I really hope you can pull that curl in and make it good. You are making headway.

I gave up routers to round over the gunwales a while ago and have been using this instead which works well for me:

shopping
 
Great stuff. You are moving along faster than I had anticipated, especially working outside in the north country. Love the “drywall monkey on meth” image; poorly regunwaled canoes are always a challenge.

Fingers crossed that the new gunwales resolves the sheerline deflection, and eager to see the brightwork fit out, including the sliding seat.

FWIW I use a DIY oil mix of turpentine and boiled linseed oil, but I add old spar varnish to the mix, varnish itself being oils. I stuck a hockey puck of solidified varnish in my oil mix can when I needed to replenish it and the hockey puck had completely dissolved a few months later.

I’ve dumped the dregs of other oils in that can as well, tung oil and Watco, so it is a mystery mix secret sauce.
 
Chris, When I tried to put on some ash, old gunwales, that dang curl kept pulling them out at an angle. My thought at the time was to add thwarts, many many thwarts. When I picked up the boat, a 7 hour round trip, it only had the seat in, no thwarts and the gunwales were monster thick. I really hope you can pull that curl in and make it good. You are making headway.

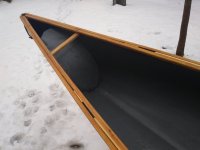
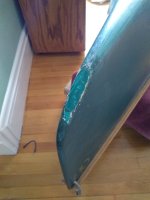
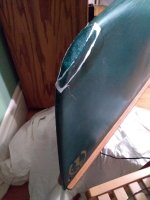
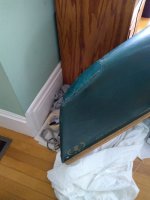
The gunwales are in, and I'm becoming more optimistic about the shearline curl. When the boat is thwartless and relaxed, the tops of the gunwales "lean out" maybe 15-20 degrees, more on the right than the left. However if I pull the sides in to regulation 26.5" -- which I can do without creaks, pops or other sounds of protest -- they eyeball out as pretty much flat. Moreover, that action causes the float tank sides to make contact with the hull. Like a good conspiracy theory, it all fits together!

IMG_20211204_120956278.jpg

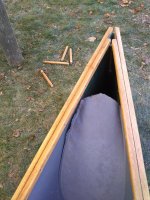
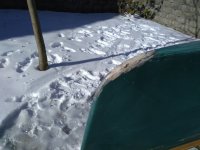
I'm trying to keep the ends clean and even since I might go deckless.

IMG_20211204_120936690.jpg

Great stuff. You are moving along faster than I had anticipated, especially working outside in the north country. Love the “drywall monkey on meth” image; poorly regunwaled canoes are always a challenge.

Fingers crossed that the new gunwales resolves the sheerline deflection, and eager to see the brightwork fit out, including the sliding seat.

FWIW I use a DIY oil mix of turpentine and boiled linseed oil, but I add old spar varnish to the mix, varnish itself being oils. I stuck a hockey puck of solidified varnish in my oil mix can when I needed to replenish it and the hockey puck had completely dissolved a few months later.

I’ve dumped the dregs of other oils in that can as well, tung oil and Watco, so it is a mystery mix secret sauce.

I was just thinking that if I re-gunwaled a royalex boat outdoors in these temps it would probably have "warm cracks" come June.

I read the thread about gunwale juice, and actually looked around my cellar for any hockey pucks but couldn't find any. I usually use Helmsman spar urethane in a can, so I don't have any brushable varnish around.

The sliding seat is really well preserved, and I'm looking forward to using it. However, it means I need to get my positions right, since those rails have to be parallel and their outer sides are contoured to follow the hull.
 
Update on this rebuild ...

Things were going great until they weren't. I made up a set of thwarts (more on that later), guestimated where to put them, cut them to length so the boat would be 26.5 wide, applied copious quantities of spar urethane, and installed them. Everything looked great! Then I picked it up and swung it around as one might while car topping etc and heard a loud CRACK. Upon examination, it turned out one of the outwale scarfs had partly failed. Much swearing commenced. I don't even have a picture because I was too pissed.

The fact that I used a 9' board for ~16' 4" rails meant that I didn't have that much choice in terms of where the scarfs ended up. I've done a lot of epoxy work on hulls, but this was my first set of scarfs, and it seems I scored 75%. It doesn't help that on this particular hull the outwale is under a lot of strain since the correct/spec shape of the boat is much narrower than the relaxed state. Still, knowing all this I probably should have at least upsized the outwales a bit (they are 3/4 x 3/4, same as the inwales). Also, a horizontal orientation of the scarfs would have been better. I had to admit that a decent drywall monkey would not have screwed this up. Maybe this humility will do me good.

It wasn't a fatal failure and I was able to repair it in situ, but I did feel the need to add a bit of support in the form of a bolt at that point, which is an aesthetic flaw. More humility.

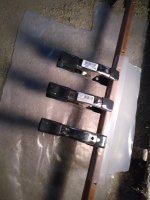
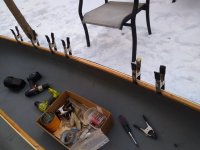
Here's a pic of the rescue -- "save the outwhales!". Straps are holding it to maintain spec width/tumblehome.
IMG_20211205_150853842.jpg
(As an aside, the more I hang out on this board the more clamps I think I need.)

On the bright side, the outfitting is coming along nicely. When I ripped the gunwales I ended up with a strip of poplar about 1.25" wide left over. It looked about thwart sized to me, and this boat didn't come with any (non ad-hoc) thwarts. However, test bending it it didn't seem quite up to the task. However, I was already in ripping mode, and it occurred to me that with a bit of hardwood laminated in that almost-thwart would be plenty strong. I looked around the scraps in my cellar and found a clear piece of maple left over from a kitchen remodel (15 years ago). It was hard as a rock, but I ripped some 1/4" strips out of it and made ice cream sandwiches with the softer poplar.

Making the thwarts -- I could have used more clamps.
IMG_20211127_153945827.jpg

I had to do quite a bit of planing/sanding, being careful not to carve too deeply into the soft "ice cream" but they turned out well, light (less than a pound for both of them) and quite strong to my knee. I liked them so much I did the same thing for the grab handles, only they're one 1/4" maple strip with 3/4" poplar (used end scraps from the rails).

Here's the boat in a more or less operational state (sorry for the lack of focus)
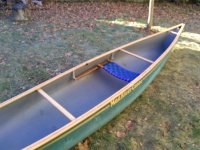
IMG_20211212_140009442.jpg

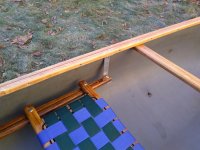
Detail on the seat/thwart
IMG_20211212_140030437.jpg

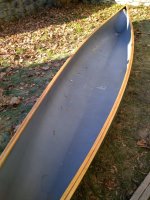
With the boat in it's correct shape you can see the chines. I know this is a Jim Henry design, but it strikes me as Jenseny.
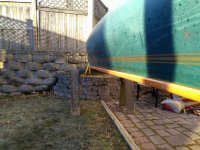
IMG_20211212_142739388.jpg

I consider these soft gunwales on probation, I may later need to upgrade them or at least the outwales. Still, this rebuild is far enough along that I know the hull is valid and that the shearline flare issue is solvable without drastic measures. For now, the opera singer's corset is holding.

Still a lot more work to do:
Sliding seat tweaks
Float chambers
Decks?
Liberating the bow from Bondo
 
Considering the literal shape it was in not long ago, you did a fine job. The canoe looks great. When glue/epoxy joints fail on me ((just the other day on a piece of furniture) it is because I clamped too hard and squeezed out too much glue or there wasn’t enough surface area.
Looking forward to seeing it done!

Bob
 
I am really impressed with your progress on the Traveler, considering much of the work is being done shop-less outdoors. In Maine. In December. And I boo hoo when my shop is cold in the morning before I flip the heaters on.

About the scarf joint CRACK, maybe partly the wood selection, partly the length of the scarf and, I wonder, partly the location/pressure from the sheerline deflection curl?

I know Doug tried to squeeze that curl damage back into place with some loose gunwale stock and clamps. No go. He tried grabbing the curl with channel locks and hand bending it back in place. No go.

Screwing the gunwales in place, with incremental straightening pressure along the gunwale length, did work, but I’m thinking there may have been a lot of deflection curl pressure trapped between the gunwales, and if the scarf joint was near the curled area, CRACK!

If that was the case it would make sense that the outwale, being pushed apart, cracked, while the inwale stayed intact.

Keep at it; I haven’t found a winter rebuild, so I may need to live vicariously through yours.

BTW, a friend is a multi-trade master and a wizard at drywall. Watching him slap mud across a drywall seam - two passes, up down and done in seconds- is like watching magician; I’m 10 minutes at each seam, going back trying to make it better only to make it worse. Just watching him do that “monkey” work provides a dose of humility.
 
Thanks, guys.

Considering the literal shape it was in not long ago, you did a fine job. The canoe looks great. When glue/epoxy joints fail on me ((just the other day on a piece of furniture) it is because I clamped too hard and squeezed out too much glue or there wasn’t enough surface area.
Looking forward to seeing it done!

Bob

Yes, I think surface area is the kicker. Even though epoxy is stronger than fate, it still has to be attached to enough uncompromised wood fibers that it can take the load. If I was doing this again with the same materials I think I'd just rip the rails to 1/4 thick strips and make each gunwale out of three of them.

I am really impressed with your progress on the Traveler, considering much of the work is being done shop-less outdoors. In Maine. In December. And I boo hoo when my shop is cold in the morning before I flip the heaters on.

About the scarf joint CRACK, maybe partly the wood selection, partly the length of the scarf and, I wonder, partly the location/pressure from the sheerline deflection curl?

I know Doug tried to squeeze that curl damage back into place with some loose gunwale stock and clamps. No go. He tried grabbing the curl with channel locks and hand bending it back in place. No go.

Screwing the gunwales in place, with incremental straightening pressure along the gunwale length, did work, but I’m thinking there may have been a lot of deflection curl pressure trapped between the gunwales, and if the scarf joint was near the curled area, CRACK!

If that was the case it would make sense that the outwale, being pushed apart, cracked, while the inwale stayed intact.

Keep at it; I haven’t found a winter rebuild, so I may need to live vicariously through yours.

BTW, a friend is a multi-trade master and a wizard at drywall. Watching him slap mud across a drywall seam - two passes, up down and done in seconds- is like watching magician; I’m 10 minutes at each seam, going back trying to make it better only to make it worse. Just watching him do that “monkey” work provides a dose of humility.

I think of that outwale as being kind of like when you break a pencil in your hands, your thumbs are the hull flare force and your index fingers are the thwarts. I'm reminded of that old rule (known to all wizards and even some heathen) that you never mess with the middle third of a joist -- it's overengineered at the ends, a plumber can take a chunk out of it there and no big deal, but in the middle it might need all its girth.

The next time I have those thwarts out I'll see if I can rig a spring scale to see how much force is pulling on them. I'm guessing maybe 20 lbs each? I had to hold them together with my knees as I marked the thwarts and it was difficult enough to be awkward, but not so hard I needed a helper. (The helper would have been my wife, and it was cold so that would have required some persuasion.) The screws adjacent to the thwarts are doing a lot of work -- the thwarts pull on the inwale, the outwale pulls on the hull, only a few little screws bind them together. I probably should have done 4 inch spacing rather than 6.5. Ah, well, my first gunwale job.

I'm hoping to make a bit more progress before it gets really cold, but we'll see. Fast hardener is the winter blend.
 
I have had this boat out on the (unfrozen) water once, so she's officially ambulatory.

However, after review, those rails that were on probation had to go back in the lockup (i.e., my cellar, where I have semi heated workspace for small or narrow objects that will fit down there).

A close inspection revealed a crack in the right inwale, near where the outwale scarf failed. I figured I should fix that and, while I was at it, laminate in another strip to give the gunwales stiffness near the center of the boat where the thwarts really pull.

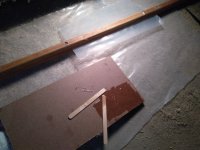
First, fixing the crack meant bringing in a new section of uncompromised wood, i.e., two scarfs. Fair enough, scarf practice will do me good, and I had enough extra gunwale trim left over. To keep everything straight and avoid changing the length/spacing of the inwale I screwed the right inwale and outwale together before doing the deed. That worked pretty well. I had some plastic in between to keep stray epoxy off the outwale.

IMG_20211226_110624950.jpg IMG_20211226_111037806.jpg

Once I had four reasonably sound (but still somewhat underengineered) rails, I laminated a ~10' x 1/4" strip of buttery clear pine to the outside of the inwales. I don't have a picture of that in progress; clamps, titebond III, sticky fingers, etc.

This hull already has plenty of screw holes in it, so in mounting rails version 3.1 I wanted to be sure I was aligned with the holes of version 3.0. I fed some screws through the holes in the inwales and the corresponding holes in the hull and clamped everything together.

IMG_20211226_153256155.jpg

I decided I liked the "stripe" so I didn't stain the new strips.

With the inwales being ~1" thick in the middle but 3/4" at the ends I needed to make some kind of transition. The wood basically wants to do that convergence anyway since it results in a more gradual bend as the inwale follows the shearline, but I did need one spacer. I shaped those by hand, just rubbing 3"x1/4"x3/4" pieces on course sandpaper held on a flat surface. The gaps should provide some drainage when the boat is flipped up for a carry. While it's not the kind of thing that gets talked about at WCHA cocktail parties, I like the overall aesthetics.

IMG_20220101_125644785.jpg

Next up, I need to adjust the thwarts to bring things closer to original dimensions (thanks @Dagger!), and then I'll probably work on the bondo blob in the bow. I'd like to close the float chambers, but that will have to wait for warmer temps.
 
This rebuild is mostly on ice until epoxy friendly temps return, but I did step out this morning to chisel off that blob of bondo. Cracked, crusty Bondo doesn't care about the cold (single digits F).

Here's the bow before I got started.

IMG_20220116_103158265.jpg

Here's a second before picture, note the confidence-inspiring cracks outlining the center strip.

IMG_20220116_103149870.jpg

It didn't take long to chip most of that stuff off, although the darker colored stuff (perhaps the 1st attempt at a repair?) was fairly well adhered. Still, I want those "sleek lines" and buckets of "smooth water displacement" that the catalog promised, so all barnacles have to go.

Here's it is clean and raw.

IMG_20220116_120919135.jpg

Note that there's some kevlar showing. This is a fiberglass layup, but presumably they used some kevlar in strategic places to toughen it up, like Sawyer GoldenglassTM. There seem to be 2 layers of kevlar and several layers of fiberglass, then gelcoat. The damage went through the gelcoat, all the fiberglass, and all but the innermost layer of kevlar (what you see above, cut on a 45 degree bias). That layer is too loose to keep water out, and I can push it in or out with my fingers, but I'm glad it held as now I have something to reinforce.

I have the float chambers open and de-foamed, so unlike the previous owner I can work from the inside. I don't know how someone would make this repair from the outside only. Maybe a very substantial skid plate, but that'd be saying goodbye to "smooth water displacement" forever.

This wound isn't very big, about 3 inches. I'm thinking I'll add 3 layers of kevlar on the inside, small patches since it really is just one spot (but a very high wear spot). Then a couple layers of dynel on the outside, only within the damaged area and not overlapping the intact gelcoat. If I let the dynel soak up resin it should fill most of that space and I can sand and/or add thickened epoxy to fair it out. I'm not too fussed about the color but this is the nose of a sleek boat so I'm looking for gurgle-free performance. Any suggestions?

Here's the same area from the inside. That last-line-of-defence piece looks almost like a patch, but it can't be since it was inside a float chamber filled with OE foam. I think the original layup schedule (in that area) was kv-fg-kv-fg-fg-gelcoat.

IMG_20220116_120712641.jpg
 
Sub-freezing temps may have been the ideal time to chisel off the Bondo. I know that big globs of tree sap are a PITA to remove in summer heat but will pop right off if you tap the edge with a flat head screwdriver.

Mad River did include kevlar in the stems of their fiberglass canoes. Per a 1994 MRC catalog:

“The selective use of kevlar and graphite reinforcement in the bow and stern areas make Mad River canoes” blah, blah, blah
 
Warmer temps (in the living room) have me making some progress on the stems.

Although the almost-breached bow was the motivating problem there was also some wear in the stern, so I decided to strengthen that a bit, largely so I could practice one handed lamination in a crowded space. In the stern the glass was all intact, but the gelcoat had worn through so I could see some daylight. Unlike the bow, the stern was all glass, no kevlar. I added a single strip of 5oz kevlar. It was so snug in the bend of the stern that a gloved finger wouldn't fit, I had to use the eraser end of a pencil in places, "sleek lines" yadda yadda.

IMG_20220129_171144486.jpg

On to the schwerpunkt, the beat up bow, recently liberated from Bondo. I wanted strength and stiffness on the inside, and some wear surface and fairing on the outside.

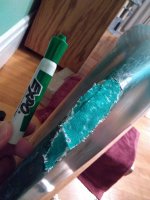
First I put a half dozen small pieces of dynel in the cratered area on the outside. Dynel's tendency to puff out is welcome in this case since the gelcoat was once thick and that space needs to be filled.

IMG_20220129_173601637.jpg

On a dark hull the tightey whitey dynel looks absurd, so I decided to try darkening and greening it a bit. The only thing I could find in the house was a green dry erase marker. Worth a try! It'll all be encased in UV inhibited epoxy anyway.

IMG_20220129_173853308.jpg

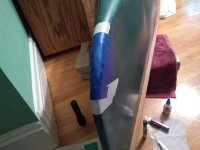
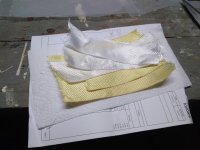
I wrapped that up with a strip of peel ply and some masking tape. The hope was that enough epoxy would soak through from the inside to wet out this dynel and bind everything together.

IMG_20220129_174508779.jpg

With only one layer of original hull left, I wanted to put plenty of material on the inside. I settled on two layers of 5oz kevlar 4" wide and three layers of 4oz glass 2" wide. In the actual install I did it club sandwich style, fg-kv-fg-kv-fg.

IMG_20220129_191136859.jpg

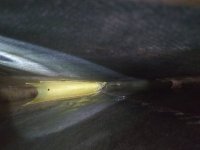
I don't have any in-process photos of the in-the-bow work since I was wearing epoxy covered gloves, but it went pretty well. I had notions of using peel ply and/or clear plastic to pseudo vacuum bag but given the tight space that just wasn't happening. I dribbled epoxy in there and did one layer of cloth at a time, very frustrating but I was eventually able to get everything in the right place, +/- a half inch. Gravity and surface tension were on my side. Glass can be as much as a pita as kevlar if you can't get in there to cut the loose threads. Here's what it looked like morning after:

IMG_20220130_093327875.jpg

I'm pretty happy with how it turned out. The fabric follows the shape of the hull and has good contact.

Even better, the soaking through to the dynel that was largely wishful thinking actually happened. Now the whole sandwich is connected: 3 layers of glass 3 layers of kevlar (one original to the hull), 4-6 layers of dynel, all in one cast. It still needs some fairing, and I may add one wider strip of dynel to bridge the gelcoat and epoxy/dynel, but that's all routine skid plate work.

IMG_20220130_100332958.jpg

Now it's time to shovel some snow.
 
The living room eh? I’ll have to ask the missus if I can bring the canoe inside tonight for the big game.

I had to look up the main emphasis of schwerpunkt, and had not considered Dynel’s tendency to “swell like an old sweatshirt” as a filler advantage; I’ll keep that one in mind.

I have been told, and keep meaning to try, that a bit of acrylic paint will work as a color agent pigment with epoxy.

https://www.amazon.com/Colore-Acryl...locphy=9007844&hvtargid=pla-349368207320&th=1

I bought a small WallyWorld set of acrylics year ago, enough years ago that I forgot about them until they had hardened and wouldn’t mix.

Anyone tried a dab of acrylic paint as epoxy pigment?
 
I have regularly used dollar store hobby paint tubes, 1$ a piece, to mix in with epoxy for coloring. At that cost if I need to add more to darken it more it's worth it. Just my .02.
 
I did one more layer of dynel on Sunday, to even out some peaks and valleys and wet out the far fore end which the resin didn't quite reach with the main cast.

To prep I did more dry erase markering, and even dithered in some black since Expo marker green was lighter than MR gelcoat green. I wanted to avoid the skidplate stem muffintop problem so I cut a couple strips of peel ply and pressed them along the interface where old hull met new dynel/epoxy. I'm still getting to know peel ply, in the past I've just used clear plastic. I didn't compress the middle, and true to dynel's character it puffed up like a forgotten wart.

IMG_20220130_193040736.jpg

The peel ply did its job and I barely had to sand those areas. I did smooth out the wart, although not too aggressively since that's an abrasion surface anyway. I'm not a shore rammer but I feel like there's enough material there to soak up normal bumps, dark rocks, etc. I'm optimistic that this will be a gurgle free bow, nothing sticks out.

IMG_20220202_111158245.jpg

I'm pretty happy with how it turned out. I'll do a bit of gelcoat buffing and then declare the outside done.

Open side, I just need to close the float chambers and then it will be seaworthy. After that, a footbrace and some minicell foam comforts.

Right now the boat weighs 56.5 lbs, vs. the original spec of 60. That's still a portagable weight for me, although probably double carry under most circumstances.

When it's quiet in the living room I can hear it whispering take me to Chesuncook. I try to explain that Chesuncook is frozen and covered with ice fishing shacks, but it doesn't seem to understand.
 
I've got the hull open side up now (still in the living room), and I'm trying to figure out what to do with the float tanks. Some photos/background...

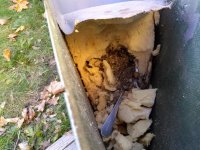
When I got the boat, the float tanks were foam filled but the foam had clearly been waterlogged and had contributed to the distortion of the hull. Moreover, the bow needed some epoxy work which could be best done from the inside, so it made sense to de-foam the inside of the tanks. The foam was in poor condition, and it all came out easily with a soup spoon. Unfortunately, some critter's cache of acorns and seeds had to be sacrificed, but you know, progress.

IMG_20211121_143656419.jpg

This is the first MR boat I've worked on, but my understanding from photos is that MR doesn't completely cover the float tanks with glass, but just counts on the foam keeping most of the water out. The foam that isn't covered is normally under a big deck plate, so that's OK (at least until the mice get interested).

Right now the boat has gunwales, thwarts, grab handles, no decks, and is pretty much in the correct shape. The photo below is the stern; the bow is similar but slightly more open.

IMG_20220205_174206015.jpg

The gap is a triangle ~11 inches high x 5 inches base.

This boat has no foam core or ribs, so the only buoyancy would be the woodwork, vs about ~45lbs of resin and glass. It would sink like a rock given the opportunity, so going without any supplemental flotation would be a bad idea. There are three approaches I can think of:
  1. Close the float chambers and make them watertight. This was my original plan, but I'm starting to think it would be a pain. First, I have to close off that triangle, which is a free form lamination job in an awkward spot under the gunwhales. I suppose could take the gunwhales partly off, but then I'd be concerned about maintaining the correct hull shape. Then, I'd have to actually waterproof the tank. I can see daylight through many of the little holes you can see in the photo above. MR didn't fully wet out that single layer of glass, since they were relying on the foam.
  2. Fill the float chamber with foam and hide it under a deck. This would be the closest thing to a stock restoration. Could I just bung some Great Stuff or similar in there? I'm not a huge fan of spray foam, nothing lasts forever and I like things that can be taken apart. Moreover, if I have an exposed orifice of foam then I need a pretty big deck plate to cover that up. I don't really like decks, they add weight, collect pond scum and attract critters. I was planning on going with very minimal decks, just enough to tighten up the ends.
  3. Remove the float chambers entirely and add flotation elsewhere. Right now the tanks are just a single layer of glass not totally wetted out, I could just remove them, sand and repaint any rough areas, and then glue some decent minicell foam elsewhere, like under the inwhales. Sawyer seemed to do that on many of their composite boats.
Any words from the wise on these alternatives?
 
Every old MRC composite I have worked on has had that unglassed open end on the float tanks. As a design & construction “feature” I’m not sure why, maybe to eliminate the need for a relief valve or breather vent as on a fully sealed tank.

About the choices:

Close the float chambers and make them watertight. As you say, awkward spot, probably need to free the gunwales at the stems, and if fully sealed it would need something like the little rubber breather holes seen on fully closed float tanks. I’ve seen a sealed 60L barrel with sucked-in side after elevation change; they might not be good for the glass tank/stems. And there is the “If water does get in how do you get it out? Issue.

Fill the float chamber with foam and hide it under a deck. Sure, but not Great Stuff expanding foam. That stuff isn’t so great when it repeatedly gets wet. End pour floatation foam is a two part urethane marine “pour” foam. See this end pour adventure from Chip:

https://www.canoetripping.net/threads/replacing-floatation-in-a-fg-canoe.113984/

Remove the float chambers entirely and add flotation elsewhere. I like the add floatation elsewhere part, which could be combined with smaller, easier deck plate hidden stem floatation. Minicel knee bumpers, kneeling pads/heel pads etc; that volume of minicel can begin to add up to significant floatation. Figure the volume of minicel roughly equals the weight of that volume of water.

https://myccr.com/phpbbforum/viewtopic.php?f=16&t=48855

We sunk a Bell carbon Prospector while attempting a deep, fast water attainment. That canoe had the smallest float tanks of any canoe I had ever seen. It did not resurface for a worrisome long time, and when it did it was 50 yards downriver and barely broke the surface.

There are a lot of possibly functional places of adhere minicel foam.

The float tanks in my Polaris are quite small… swamping on a calm lake, it stayed at the surface pretty well though. (It was part of the check-off to be able to paddle a canoe or kayak for work. And since they picked me to train and check off other staff, I’ll get more recovery practice.)
 
Every old MRC composite I have worked on has had that unglassed open end on the float tanks. As a design & construction “feature” I’m not sure why, maybe to eliminate the need for a relief valve or breather vent as on a fully sealed tank.

About the choices:

Close the float chambers and make them watertight. As you say, awkward spot, probably need to free the gunwales at the stems, and if fully sealed it would need something like the little rubber breather holes seen on fully closed float tanks. I’ve seen a sealed 60L barrel with sucked-in side after elevation change; they might not be good for the glass tank/stems. And there is the “If water does get in how do you get it out? Issue.

Yes, the tanks I'm used to are the Wenonahs with a rubber stopper in the top, often going through a piece of wood that rots away after a while. Maybe that piece of wood is what I need to make the lamination job work. I've also thought about putting access hatches in the tanks. That would add significant weight, but would allow for pressure release and internal repair.

Fill the float chamber with foam and hide it under a deck. Sure, but not Great Stuff expanding foam. That stuff isn’t so great when it repeatedly gets wet. End pour floatation foam is a two part urethane marine “pour” foam. See this end pour adventure from Chip:

https://www.canoetripping.net/threads/replacing-floatation-in-a-fg-canoe.113984/

Hmmm, 45 seconds? That's not long to learn a new trick with a material I've never used before. Definitely not living room work.

Remove the float chambers entirely and add flotation elsewhere. I like the add floatation elsewhere part, which could be combined with smaller, easier deck plate hidden stem floatation. Minicel knee bumpers, kneeling pads/heel pads etc; that volume of minicel can begin to add up to significant floatation. Figure the volume of minicel roughly equals the weight of that volume of water.


https://myccr.com/phpbbforum/viewtopic.php?f=16&t=48855

We sunk a Bell carbon Prospector while attempting a deep, fast water attainment. That canoe had the smallest float tanks of any canoe I had ever seen. It did not resurface for a worrisome long time, and when it did it was 50 yards downriver and barely broke the surface.

There are a lot of possibly functional places of adhere minicel foam.

This is really tempting, since as you say much of that minicell is going to be there for outfitting anyway. I was thinking yoga blocks were 9x6x3, and with water 0.036 lbs/in^3, that would be about 6lbs displaced, and what do they weigh?, but if the thicker 9x6x4's are empirically verified at over 8lbs that's even better.

The naked null weighs around 46 lbs (after removing the old foam, which weighed >3 lbs, but some of that was acorns/dirt). Assuming the woodwork/fasteners are close to neutral, I'd need a minimum of 6-7 Yoga Block Equivalents (YBEs) of minicell. A pair of knee pads might be 1 YBE. I usually use half a block for knee bumpers, but could be generous and use one on each side. I like a head pad / center console, one more YBE. Still need to find a few more. I hadn't thought of exercise flooring, that could add up to a lot of volume without being in the way.

The OE float tanks in the Traveler are really big compared to other composite boats I've seen. It would float well with those intact.

Thanks much ... more to ponder
 
Hmmm, 45 seconds? That's not long to learn a new trick with a material I've never used before

Hey, if Chip could do it first time. . . . and now you have a speedy-stir tutorial.

“I've also thought about putting access hatches in the tanks. That would add significant weight, but would allow for pressure release and internal repair”

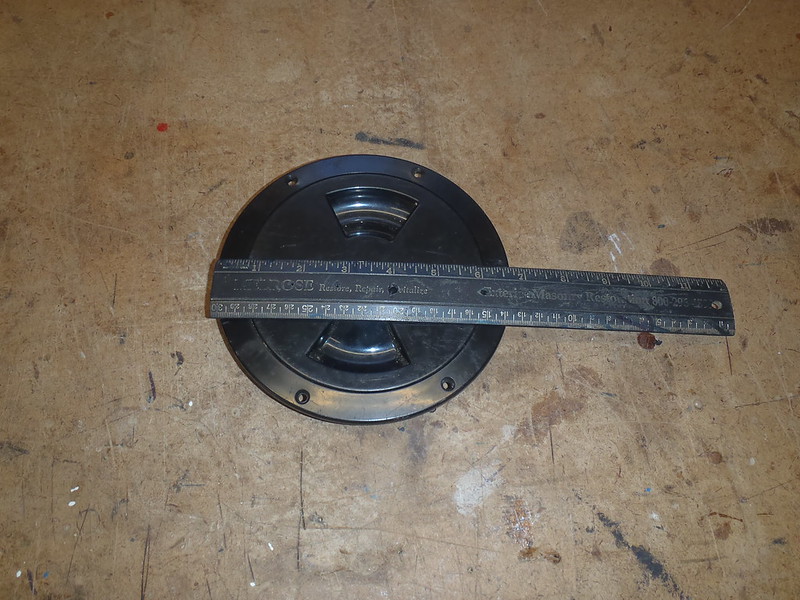
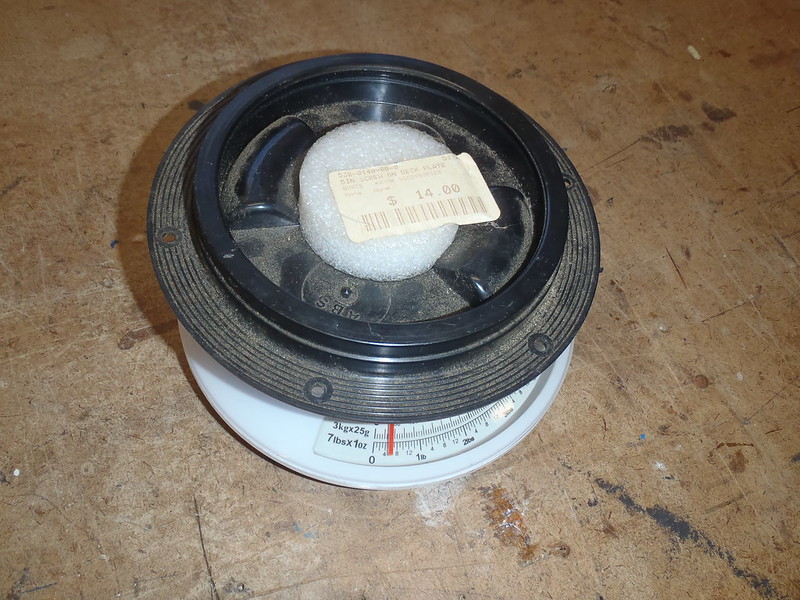
I don’t know about “significant weight”, but I’m intrigued with that idea. Which I will never pursue, but I just happen to have, in a little visited box labeled “Odd Miscellaneous Outfitting”, an unused/never to be used day hatch for a kaya. . . . .float tank dry storage.

A day hatch, threaded housing 6 ¾” at the outer rim

P2060003 by Mike McCrea, on Flickr

With a 5 ½” dia screw off day hatch lid.

P2060004 by Mike McCrea, on Flickr

Day hatches usually have a sealed waterproof bag attached underneath, but that would be easy to DIY. That WP bag could even be encased in foam floatation. If not an end pour maybe minicel (or yoga blocks); easily custom carvable, starting with a belt sander and 80 grit and working down to finer shaping. That finickyshaping, semi-laborious work could be done in the living room. Or freezing fingers outside.

Day hatch weight, outer housing and screw-on lid, without a mini dry bag insert, 5oz.

P2060005 by Mike McCrea, on Flickr

If something like that will work as float tank dry storage, well shucks, it’ll fit in a padded envelope. I’ll even pay the postage just to see it finally get used.

And to make DougD jealous. The Traveler is not a hull design for me, or even skinny Doug, but I really like how it is turning out, and feel like I have some history (and no-thanks avoided repairs) with that canoe.

And I’m trying to purge the shop of unused, taking up space miscellanea overstock. If you want to try that day hatch just let me know.
 
Back
Top