• Happy National Pfeffernusse Day! ⚪🇩🇪😋

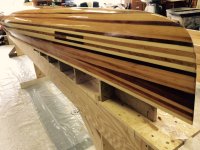
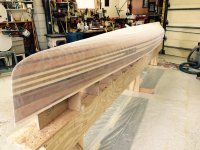
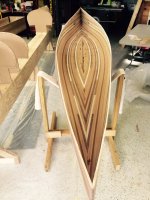
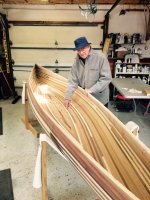
My first stripper in progress

Talk about a flat palm to my forehead, I never ever considered trimming the fiberglass prior to wetting out. Wow, I wasted a bunch of material through my complete oversight. In my defense, I sort of was focused on other aspects of the project. Thank you very much for the tip...it will be applied on my next build and the next one and so on.

The roller was yellow and very firm. Left over from another project, it likely wasn't the proper tool for this application. The foaming was pretty spectacular and it was quite evident that this was not something I should spend time attempting to make it work.

Question for the group...how much of the residual visible weave will be taken out in the varnish process? In mentally reviewing the hull, I see about 80 percent smooth as glass and another 20 as being "weave textured" when spied at an angle. Thank you,
Mac
 
Last edited:
If you have any weave showing before varnishing, the texture will remain after varnishing. If any of the glass is actually exposed and semi opaque, then the varnish will make the glass turn clear again. If I have any areas of lifted weave, I usually scrape or sand between covering coats to eliminate them.

WRT air entrainment, if you aggressively work the roller, you can definitely introduce trapped air. Usually this is the result of rolling over the resin multiple times...the resin takes time to penetrate the weave of the cloth. If you try to rush it by rolling over and over, many bubbles will result. A combo of roller, squeegee and patience works best for me.
And I certainly agree with Allen's preference for slow hardener, it is a much more relaxing wet out. As I mentioned above, the wet out doesn't like to be rushed.

Anyway, if you think you're enjoying the build, just wait until you paddle it!! Talk about a head trip!
 
I'm guessing if you put the bias strips under your main layer of cloth, you will be sanding through the main layer to smooth everything.
A layer of 6 oz cloth is at least .009 thick. It doesn't seem like a lot, until you feather the top layer flat.

The sanded weave usually disappears under varnish, so long as you've removed the dust particles.

Jim
 
In further review of my project I realize that the foam I made my first attempt with, with didn't come out of the new pack, white ones, could well have been contaminated with previous solvents. I'm too dam cheap and should have used a new one.

Can I wipe the dust off with a treated tack cloth our perhaps thinner? How cured does the resin need to be prior to this step?

Thanks,
Mac
 
Can I wipe the dust off with a treated tack cloth our perhaps thinner? How cured does the resin need to be prior to this step?
Thanks,
Mac

As long as it feels hard (can't dent with a fingernail) you should be able to wipe it with solvents. Worse that happens is that it gets a little tacky, no harm done.

If you put on the last fill coat within the last couple days you're probably ok to put on the next coat without scuff sanding.

I remember having terrible foaming problems the first time I used a roller. It was like there was a little motor in there cranking out bubbles. It was ridiculous. I can't remember what kind it was but it kept me from using them for quite a while afterwards. Never had a problem since though. I use either the little white foam cigar rollers or the black foam ones you can get at the hardware store. The only size available locally for the black ones is 9" so I cut them in two and and use them on a 4" roller frame.

I think I like the little white ones better but the resin I'm using now eats them. So it's back to black but no problems.

Alan
 
No Title

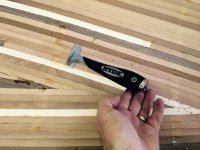
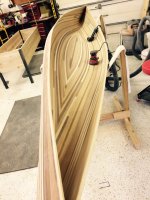
All is well in the MacCamper shop. The exterior has been sanded smooth and wiped clean with a 10% ammonia solution. Removing the forms was a snap. Dad came out to critique the project and give a few pointers. And I have begun scraping and sanding the inside. A nifty tool I picked up on Jet.com for under 12 bucks made scraping glue a breeze.

To be honest, I am disappointed that I didn't take more time and create a more special design in the bottom of this, my first canoe. I should have/could have. And, in review I wish I would have cut slivers to fill the "gaps" between the last strips I installed instead of using resin putty. Should have, could have, would have... it reminds me of a relationship I was in along time ago. On the flip side, I look forward to making amends in my next build.

Although perturbed, I can hardly wait to get this working craft onto the water. My first solo trip to the BWCA this year is the third week of May and I want to be ready.
 

Attachments

  • photo3982.jpg
    photo3982.jpg
    384.3 KB · Views: 1
  • photo3983.jpg
    photo3983.jpg
    408.4 KB · Views: 1
  • photo3984.jpg
    photo3984.jpg
    359.6 KB · Views: 1
  • photo3985.jpg
    photo3985.jpg
    385.6 KB · Views: 1
  • photo3986.jpg
    photo3986.jpg
    440.3 KB · Views: 1
Scraping tools are great. I have one that has interchangeable blades, for different contours. I love it. Made by Alltrade I think. Need to take a pic.

Your next canoe is always better ! Hint Hint !
The learning curve is soo great, especially after that first one !

You can do it by May, especially if you buy trim. Eds canoe has seats and such, and North West canoe should have gunnels.

Lookin good Jack !

Jim
 
No Title

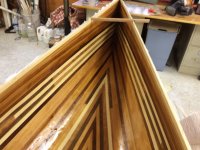
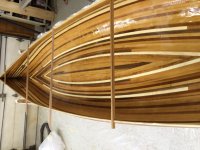
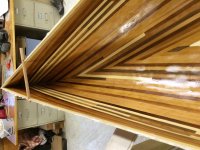
Sanding the interior of the canoe is much more challenging than fairing the exterior...primarily due to errors I made in cutting the strips. At one point and upon a haIf dozen strips, I had temporarily failed to take into account a dimension change when replacing my saw blade mid stream. Of course the few strips that were thicker are the hard wood accents and have added to the inside fairing process considerably. Chalk it up another lesson learned.

The rigid sanding discs suggested by Jim have been instrumental in cleaning up the bow and stern nooks where mechanical tools are too big and sand paper too flimsy. Thanks Jim.

As I look toward glassing the interior, I am curious if I should draw the top of the hull together while the resin cures. After removal from the forms there is a marginal outward expression of the top several strips. Suggestions please, if even necessary, on how to tame this deviation. Or perhaps I am over-thinking the project and the the gunnels, seat and thwart will draw everything together.
 

Attachments

  • photo4026.jpg
    photo4026.jpg
    432.6 KB · Views: 0
Oh, you defecately want to hold your sheer line to the design width when the inside is glassed.
Imagine if the center beam is too large, how did it get to be? Typically, from the stems drooping down...there goes your design keel line!! Worst case would be a negative rocker and a boat that handles pretty poorly.

I use a form or two to verify that the hull is supported in such a way that the design sections are intact before glassing the inside. If I can't maneuver my supports to hold proper hull shape, then I'll add in a temporary thwart while glassing the inside. Nothing fancy, often just a spare strip stapled in place, removed after the inside has cured. I know some builders use exterior forms to hold their hulls while working the inside. I always thought that was overkill, especially for a one design build.
I hope you plan to squeegee excess resin as you wet out the inside. Any more resin than just wetting out the cloth only makes your hull heavier and the inside more slippery.

I think your build is looking great, even though you are already suffering the artists' lament. Like Jim says, the next boat is always better.

I used to paraphrase the old potato chip commercials...

"Bet you can't build just one".
 
Oh, you definitely want to hold your sheer line to the design width when the inside is glassed.

Seconded. It's normal for this spread to happen. Humidity levels can also have a big effect. The inner layer of glass will make the canoe much stiffer, and you want it to be stiff in the correct shape.

I'm thinking that I'll use light cord or woven strap at several locations around the hull this time. Don't need but a tiny bit of pressure, but I'd prefer it to be distributed all around the shell.

Do make sure that you check at a couple of different points. I have my hull on a couple of reasonably spaced cradles, so no obvious distortion from hard points. Just pulling the center in is not enough. The beam needs, currently, to be pulled ~1.75" - 2" Even when this has been done, my #3 frames, at about 3'9" from the stems, need to be pulled in about .75"

You have definitely caught up to my build, if I get the inner filler cleaned up in good time, I'll be glassing tomorrow. The quality on this build is looking to be very good. Every Crafting person/artist alive wishes that they had done a better job. That's what keeps us trying.
 
Continued sanding today and, following your suggestions, messed around a bit with "tightening up" at several points along the shell . I couldn't believe the different contour it took when brought back to correct form. Although I expected some movement at the top of the boat, I didn't anticipate the action I observed along the center line. The symmetry she took is much more pleasing to the eye and I can visualize a better end product. Glad I broached the question, thank you for the help. Sailsman, I took a look at your beautiful masterpiece and how you remedied the draw. Great idea.

Stripper, artist's lament describes my melancholy attitude completely. Now I can empathize with my wife, a water color artist, when she tears one of her completed pieces apart...sometimes literally too. No, I won't be deconstructing this canoe as I am satisfied with my first build. Yet, I am already looking forward to my next one and doing a better, more thorough and prettier, job. I love the Lays, the sour cream/onion is my go to salty snack when Earl's popcorn isn't available.
 
Great advice !

I keep my center form strapped in place unless I'm sanding that area. And Yes, nearly all hulls distort a little.

Just after I finish glassing the inside, I take a couple scrap strips to span the gunnels, notch them about 3/8" and with a small piece of plastic, between the notched strip and the hull. I make sure the shearlines are where they are supposed to be
Try not to distort the cloth.

Then it's time to breath, and look over your work !!!

Wow ! Everyone is about the same place with their builds ! My son finished sanding his Traveler today. We pulled it off the forms. Funny how a canoe looks right side up, especially after looking at it so long, upside down !

I'll try and get pics soon.

OH ! I'm NOT racing !!!
 
No Title

Well...I pulled the trigger and after much preparation glassed the inside of the canoe. Half way through the project, and on my third pot of resin, I hit a snag with material sloughing from the tumblehome followed by screwing around and then when I grabbed my pot of resin it was warming up. I quickly spread it out to cool it down but that compounded my novice abilities. In hindsight I probably should have smoothed what I had in the canoe and made a new pot. From that point forward the project became a series of lessons learned. Every time I attempted to move the settled resin it moved the cloth. Bottom line, I am not keen on the volume of resin nor lack of texture in the section that challenged my abilities. On the other hand I am my worst critic and the excess material will be in a wear area of the canoe.

The bow glassing, my last section, also got a little messy and at that point I was pleased to be nearing completion. Following a bit of clean up and many more attempts to "move" the excess product, I noticed a section of the glass was delaminating from the wood. Quickly I pressed it back into place and now, a couple of hours later, it doesn't appear to have moved anymore.

Fun yes, but dang it was a bit frustrating at times.
 

Attachments

  • photo4193.JPG
    photo4193.JPG
    580.6 KB · Views: 1
  • photo4194.JPG
    photo4194.JPG
    522.1 KB · Views: 1
  • photo4195.JPG
    photo4195.JPG
    648.3 KB · Views: 1
the excess material will be in a wear area of the canoe.

You've got a good outlook on it. We've all been bit by thinking we could outrun the warming epoxy. The stuff is vicious when it reaches a certain point.

Use a varnish with satin finish on the inside. The inside of my composite Bloodvein looked pretty bad since below the waterline I'd used peel ply and above I hadn't, so two very different textures and sheens. After a couple coats of satin Spar varnish you can't tell without looking close. It really evened things out.

For the inside I just dump the epoxy into the bottom of the hull and spread it around with a squeegee. Much easier than the outside since anything that falls off the squeegee just goes back in the boat rather than on the floor (or your shoes). This keeps the epoxy spread thin and seems to take a lot less time.

Otherwise I roll it on and the epoxy goes straight into the paint tray which, again, spreads it out and keeps it cooler a little longer.

Alan
 
Last week, I rolled my inside, and I too pour my resin out shortly after mixing, right on the hull.

I do the ends last, and focus on the sides.

Jack, we all encounter troubles, you can survive yours ! The photos don't look too bad, in fact not bad at all !.

Jim
 
Last edited:
Mr. Camper,
From your photos, it looks just fine!! As long as the glass is well adhered to the wood, that's all that matters. After a season or two of mud covered boot scuffs, you'll never even notice any of it.
I prefer to use my Orwellian memory... [h=2]“He who controls the past controls the future. He who controls the present controls the past.”[/h] I eventually choose to remember my mistakes as intentional learning moments. ;);)
 
Resin looks fine. Much better than my first build! You should also take a look at some of the patching I had to do on my current build. You'd think I'd know better...
 
No Title

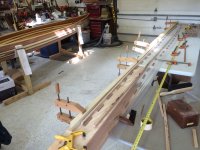
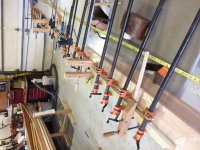
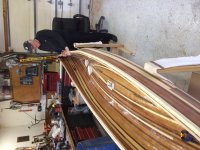
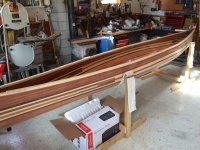
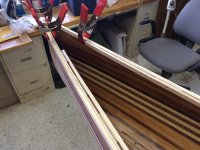
Had a great time last weekend working on the gunwales. Dad gave me a hand and then we had a fine chat about Ospreys as he five years ago had built an Osprey stand near a four acre pond adjacent to his property. No Osprey yet but there has been a red tailed hawk hanging around.

Here are a couple of pictures from Saturday. As I move forward I seem to be forgetting my errors and am thinking more and more about how the canoe will react in the water. I can hardly wait!

Quick question...how far apart should I set my screws for the gunwales? My scuppers are four inches with four inch spaces. I was considering one every eight inches. Overkill?
One more thing...how do I turn the pictures right side up?

Thanks,

Mac
 

Attachments

  • photo4267.JPG
    photo4267.JPG
    584.1 KB · Views: 1
  • photo4268.JPG
    photo4268.JPG
    521.5 KB · Views: 1
  • photo4269.JPG
    photo4269.JPG
    664.6 KB · Views: 1
  • photo4270.JPG
    photo4270.JPG
    667.1 KB · Views: 1
Although I do not do my scuppers in the way you did, I put one screw in each solid about middle. The only place I placed a screw off center was to hit the middle of the scarf joints on the outwales. I think I had 23 screws per side, with two in the center due to having the remove-able yoke attack there.
 
No Title

Another excellent Saturday in the shop. Dad was out to inspect my gunwale and gave it the nod. It installed fairly well with limited challenges.

Yesterday I picked up my spar varnish, gloss for the outside and satin for the inside, and with luck I'll have more time this weekend to continue the project.

I am having a blast
 

Attachments

  • photo4275.JPG
    photo4275.JPG
    708.9 KB · Views: 1
  • photo4276.JPG
    photo4276.JPG
    617.2 KB · Views: 1
  • photo4277.JPG
    photo4277.JPG
    568.8 KB · Views: 1
Back
Top