• Happy National Pfeffernusse Day! ⚪🇩🇪😋

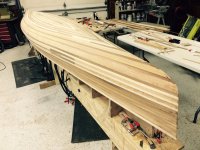
My first stripper in progress

Joined
Jan 3, 2016
Messages
107
Reaction score
1
Location
Twin Cities, MN
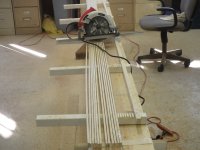
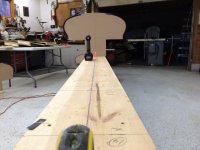
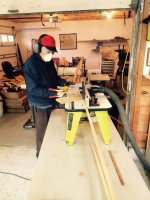
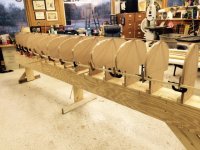
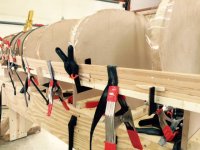
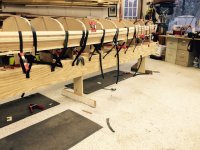
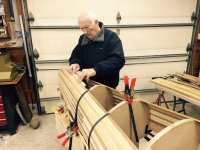
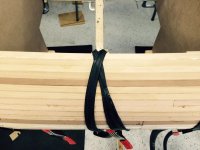
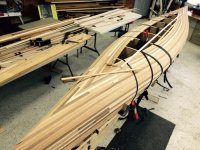
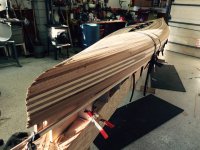
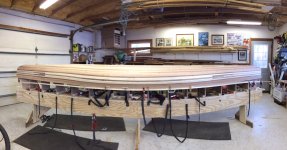
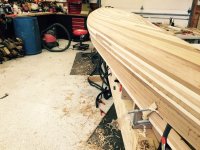
Thank you Jim and Alan for your mentoring on this project as The Canoe has been a work in progress upon another forum. With their encouragement I have begun participating upon this site. The following are pictures up to now.

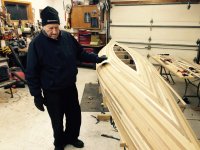
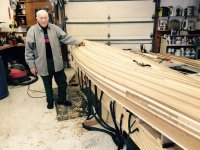
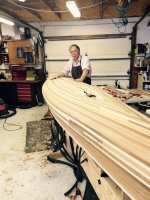
My Dad and I are having a great time enjoying each other's company and building this Merlin. He comes out to the shop on occasion to share some senior insight, about wood projects or anything else that is on his mind, as I work on the canoe.
 

Attachments

  • photo3531.jpg
    photo3531.jpg
    459.2 KB · Views: 0
  • photo3532.JPG
    photo3532.JPG
    164.4 KB · Views: 0
  • photo3533.jpg
    photo3533.jpg
    231.8 KB · Views: 0
  • photo3534.jpg
    photo3534.jpg
    388.2 KB · Views: 0
  • photo3535.jpg
    photo3535.jpg
    138.8 KB · Views: 0
  • photo3536.jpg
    photo3536.jpg
    114.7 KB · Views: 0
  • photo3537.jpg
    photo3537.jpg
    465.5 KB · Views: 0
  • photo3538.jpg
    photo3538.jpg
    379.2 KB · Views: 0
  • photo3539.jpg
    photo3539.jpg
    313.8 KB · Views: 0
  • photo3540.jpg
    photo3540.jpg
    498.7 KB · Views: 0
  • photo3541.jpg
    photo3541.jpg
    315.8 KB · Views: 0
What, how did I miss this?! Another builder inspired by this forum! (I think)
I'm always intrigued to know the motivation behind the decision to build a stripper.
Mr. Mac, I saw some of your other posts, so I know a little bit about you.

Why now? Have you chosen your resin and glass yet? Any special plans for the trim?
 
Copied from a thread called The Canoe found on the bwca.com site. It all came about from a renovation, a road trip and a slight suggestion from my father. A little long but it is provided on request.

This project has been a while in concept and implementation, as I have considered building my own canoe for over a year. To set the stage, please follow a previous post and I will pick up the construction thread as I progress with my build.

Disclaimer: This will be my first woodcraft project since making a guillotine frame in Mr. Melcher's 9th grade wood shop class. The next quarter I cast an aluminum blade in metals shop. Cool but very crude. My strongback and form, a Merlin, are on loan from renowned master knife forger Karl Andersen and I have had virtual support from Jim D, a vigorous contributor and fine composer of water craft. A special nod of approval goes to everyone who has posted upon the bwca.com site and perhaps more importantly, the builders group section. Your canoe construction stories have inspired me and it is my hope to build a vessel capable of withstanding your scrutiny. Kudos to my Dad as well as he inspired my building The Canoe.

This will not be a fast build as my shop address in near my father's house, 20 miles away and my time is like yours, split between work and play.

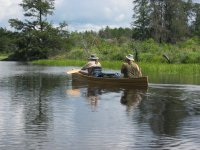
The finished product will be a working canoe for my solo trips to the BWCA and beyond. I look forward to wearing The Canoe out.

The past:
9/02/14 bwca.com post

12 hours 11 minutes, 623 miles, 7 pit stops, numerous small towns, rain, sunshine, lunch in Independence, a bag of fresh home baked chex-mix and many recollections made Labor Day 2014 perhaps the most memorable, and enjoyable, holiday I have had in a long time. All because of a chance of an old canoe.

On the south side of St. Paul, my father mentioned to me that he likely hadn't been twenty miles from home in over four years. We traveled through his sales territory on our way to central Iowa; each sight a new story, each story another insight into my Dad. Our first stop in Zumbrota was a wake up for me as the "walker" had replaced the "cane" and taking a restroom break underscored the aging process as a challenge each of us will face in our own way at some time. My father, the one who introduced me to the BWCA in the mid-1960's, whose first canoe was a 1955 red Old Town wood/canvas and whom I have admired for his tenacity and intelligence is maturing gracefully...although way too fast. Our excitement over the canoe project was building as we continued down 52 in and out of both vibrant and gentrified farm communities.

Lunch was to have been in "one of those family diners", and although we looked for one high and low, our tastebuds settled upon BBQ at an all around sports club/family dining/bar and grill called Bill's. We left with a doggie bag and more than half of his order. No appetite anymore from a guy who hovered around 180 the last 60 years and loved good food. One hour to go and we would be viewing the catalyst of the day's adventure. By now the "what if" game was being kicked around. What if it has dry rot, what if it is too long for transport back on top of my Impreza, what if it is in amazing shape, what if the small amount of gunnel rot the owner mentioned on the phone is just an easy fix, what if it we moved the table saw to create more space in the shop, what if we painted it red just like your first canoe....

Jerry, a fine gentleman greeted us at his house and we followed him to his storage facility for the viewing. At first blush my heart stuttered upon realization that this restoration opportunity was way, way more than I had anticipated. Although pretty handy with tools and quite able to ferret out answers to wood craft mysteries, the extent of my patience was not going to do the vessel any favors. It was apparent quite quickly that the restoration of this canoe would likely test our father/son relationship rather than enhance it.

Many cracked ribs, missing half-ribs, rotted stems, disintegrating gunnels, animal chewing damage upon numerous ribs and bow planking worn through on the transport trailer quickly brought my father and me back to reality. We wanted a project that we could complete together in his remaining life-time and not one that would over-tax our future days. This canoe deserved better than us to make her dance upon the water again. This canoe would require an experienced restoration craftsman with the tools necessary for a bottom up rebuild.

You bet we may have left a valuable example of canoe heritage in that Iowa pole barn, but to be honest, it sure was nice not to put it on the top of my car. In all likelihood we would have been scattering loose planks, delaminated gunnels and busted ribs across Iowa as we transported the 18 foot piece of kindling back home.

However this canoe was a vehicle of great satisfaction as it brought a father and son much closer together. I reheard many of his tales of triumph and tragedies, politics and motivations as we cruised our way to and from Montecello. Every new small town a story, every mile on the road a memory, I could not have had a better adventure.”

As I recall, somewhere around Northfield and a side trip down memory lane to Dad’s college years at Carlton, he turned to me and said, “Rather than wait for a fixer upper, why not build your own canoe?”
 
The past:
9/02/14 bwca.com post

You bet we may have left a valuable example of canoe heritage in that Iowa pole barn, but to be honest, it sure was nice not to put it on the top of my car. In all likelihood we would have been scattering loose planks, delaminated gunnels and busted ribs across Iowa as we transported the 18 foot piece of kindling back home.

This rings a bell. Two Summers ago we drove 1000km east to pick up two very old w/c canoes that Robin had graciously brought north and west for us. Picked up in Geraldton Ontario then transported to Warren Manitoba. The Morris was scabbed back together using the broken keel from the Penobscot and screws to keep the missing gunwale together, sufficiently enough to get it home but every passing semi on the highway threatened to snap it in half. It was a nerve jarring ride home.
 
Mr. Mac,
You are fortunate indeed to have such a relationship with your dad...not everyone is that lucky.
From the photos, it looks that you're pretty far along and moving fairly fast (unless you started back around that labor day trip!).
Those last bunch of strips near the keel are the most time consuming, but don't rush it, it's all part of the experience. 20 years from now, you'll be paddling along, still regretting that joint that could have been just a little better, no matter how good it really is.
 
Straps and dowels, gotta love that.

I have one butt joint and 6 scarfed strips in my present project. First stripper 59 of 78 strips were scarfed.

Looks like a nice shop with a great view as well. Lovely place to work.

Karin
 
No Title

Stapleless construction!! Yes. You rock the Casbah my friend. I really like the way the hull looks without all the holes. Sometimes you have to do it but it is not when you dont have to. Wait till you get it in the water, I really like mine.
 

Attachments

  • photo3543.jpg
    photo3543.jpg
    68.2 KB · Views: 0
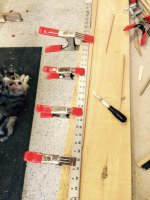
Yesterday I worked on the football and bird's eyes. In another thread on this forum I was tipped off that to eliminate consternation in cutting long angle strips necessary for the bird's eye that an exact-o knife is the best tool to use. WOW! This clue saved me a considerable amount of time and hassle. I laid the strip upon the area to be filled, pencil marked the start and stop of the angle, clamped my strip and steel ruler to a work bench and made the cut with an exact-o knife per recommendation. Slick, super slick.
Birdseye.jpg

The strip was then slipped into place with a bit of adhesive and tightened down with jumbo rubber bands and a couple of clamps. I don't recall who posted the exact-o tip... but thanks a ton for the suggestion whoever you are.

I also continued on the football area. ftball smaller.jpg

This build has really enhanced my wood working confidence. When The Canoe is complete perhaps I'll make some bread boards.
 
No Title

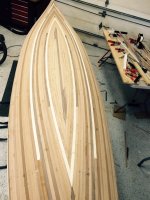
Back at it after a week of conferences. Last weekend I encountered my biggest challenge thus far: the football. With little room to spare, I began introducing a minor design of an double pointed black walnut configuration down the middle. This was flanked by cedar strips, expanding out to the football edges. The issue came on either side as the space became more and more confined. The final gap being about 1/16 to 1/8 of an inch side of the football. As the adjacent strips are identical cedar, it is my intent to make some cedar "mud" and fill the crack. In the process I used a variety of helpful tools at my disposal.


My question for the group is; how does one fill a narrow gap, dramatically thinner than the width of a strip? Maybe an application of cedar stretcher?

The bird's eye sections are coming together well...or at least well for this novice builder.
 

Attachments

  • photo3580.jpg
    photo3580.jpg
    409.6 KB · Views: 0
  • photo3581.JPG
    photo3581.JPG
    314.3 KB · Views: 0
  • photo3582.jpg
    photo3582.jpg
    392.7 KB · Views: 0
My question for the group is; how does one fill a narrow gap, dramatically thinner than the width of a strip? Maybe an application of cedar stretcher?

Usually trial and error and patience. Many times the last "strip" ends up being very narrow and has to be gently sanded or planed. Other times when there's a gap I'd like to partially fill but I don't deem it possible or worthwhile to make a piece that skinny that fits perfectly I'll rip a sliver on the bandsaw or tablesaw and use that. It will be too skinny but takes up a lot of space in the gap, making it easier to fill later.

Alan
 
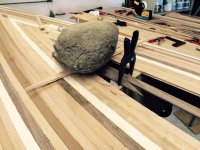
I love the stone on top of the hull ! I have a few pieces of rail road iron, that I enlist to hold things down.

It's a good time to learn to mix epoxy. I measure out my resin and hardener, and while I mix, I add a little heat from my blow drier (The Wife's OLD one) Then I'll add filler to the mixed resin.

The good thing about fillers, there is no specific blend. Saw dust for color, cab-o-sil for thickness, and ground glass for strength.

And tape the underside, as resin likes to run.

Looks Great Jack !

Jim
 
I think my last piece on this boat was about 1/4" wide. I cut a tapered piece as close as possible and just glued it in. I had to do that in other places where my strips got out of order, meaning they weren't meeting in the middle properly and needed thinning to get it back on track. No biggie.
 
Looks great sir! I haven't built a strip boat... yet... but on the stitch and glue kayaks I built I used thickened epoxy. Think Peanut butter while your mixing it and then add a little more wood dust. Tape the underside and force it in the crack with a piece of scrap.

Jason

Oh, almost forgot. Be sure to scrape the left over mound of epoxy down flush with the hull while the epoxy is still in it "green" state. Sanding fully hardened epoxy is tough business
 
Last edited:
No Title

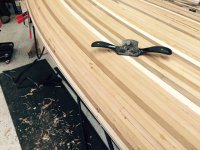
A very productive shop day as the canoe comes together nicely. Two of the four bird's eyes are completed with only a small bit of consternation on one strip. Using the described razor/steel straight edge cut method and a sharp rasp, I have developed a very quick and, more importantly, accurate means of filling the final gaps. In between strip placements I began to shave the high points and excess glue with a spoke shave. It had been suggested I only use an orbital sander for this finishing process but my this canoe, my first build, had some significant high spots due to a slight learning curve. In particular a bunch of poplar strips I cut just after changing saw blades...a thinner blade made for a thicker cut. I caught it after a dozen strips, oh well, part of the process.

Dad stopped out for a visit and was fairly impressed with how the project is shaping up. The feeling of accomplishment I achieve with each step is hard to describe. Four years ago I had a major career change moving from a very "hands on" and continuous positive feed back management position to one of strictly administration. The mid-life change has been exceptional and I enjoy this career as much as my former, however the tangible results from accomplishing my daily chores was lacking, or at least not terribly rewarding. The canoe build has restored a piece of my internal puzzle that I didn't know was out of place.

I have greatly appreciated the suggestions from this board as well. Thank you for following along as I learn from this adventure.
 

Attachments

  • photo3619.jpg
    photo3619.jpg
    366.1 KB · Views: 1
  • photo3620.jpg
    photo3620.jpg
    449.5 KB · Views: 1
  • photo3621.jpg
    photo3621.jpg
    396.9 KB · Views: 1
  • photo3622.jpg
    photo3622.jpg
    475.4 KB · Views: 1
  • photo3623.jpg
    photo3623.jpg
    417.1 KB · Views: 1
  • photo3624.jpg
    photo3624.jpg
    445.2 KB · Views: 1
Last edited:
Looking good. Always fun to see other's take on the accents, etc.

Don't feel bad about using a spokeshave, etc. on the high spots, especially if you have it tuned properly to slice, rather than tearing. Another handy tool is a scraper, especially a convex one, for when you find similar spots on the inside of the hull. Your'e moving quickly - you might even pass me, and mine has been in-progress for over six months now!
 
... The feeling of accomplishment I achieve with each step is hard to describe. Four years ago I had a major career change moving from a very "hands on" and continuous positive feed back management position to one of strictly administration. The mid-life change has been exceptional and I enjoy this career as much as my former, however the tangible results from accomplishing my daily chores was lacking, or at least not terribly rewarding. The canoe build has restored a piece of my internal puzzle that I didn't know was out of place.

Just wait until you get that boat out on the water!!
The realization of a dream, in the form of a tangible form of transportation and recreation, can be a real head trip. Immensely gratifying, and incredibly personal at the same time.

Yeah, it's looking very good, bet you can't wait to see it sanded smooth!
 
Back
Top