-
Happy Publication of Dickens' "A Christmas Carol" (1843)! 😠👻🩼🎄
You are using an out of date browser. It may not display this or other websites correctly.
You should upgrade or use an alternative browser.
You should upgrade or use an alternative browser.
Carbon/Kevlar build
- Thread starter Alan Gage
- Start date
Are you kidding me? What am I supposed to do till 11?
Jim
Jim
I didn't plan to pull it off the mold today but it was kinda like a scab; once I started picking at it I couldn't stop. First I pulled back the stems and it looked to be releasing nicely. Then I thought I'd try just breaking it loose along the shear. Once that was done there was no stopping.
It went quite well. A few rounds with a rubber mallet helped to loosen up the bottom and the curve of the bilge. A scrap strip of cedar jammed up the from the shear took care of the sides. Interior finish on the canoe is really nice, not that I want it to be, I prefer rough on the inside, but it's nice to know I can get that nice of a finish if I want to. The woodstrip canoe came out unscathed. After wiping it down with water to remove the PVA it will look just like it did before. What a relief!
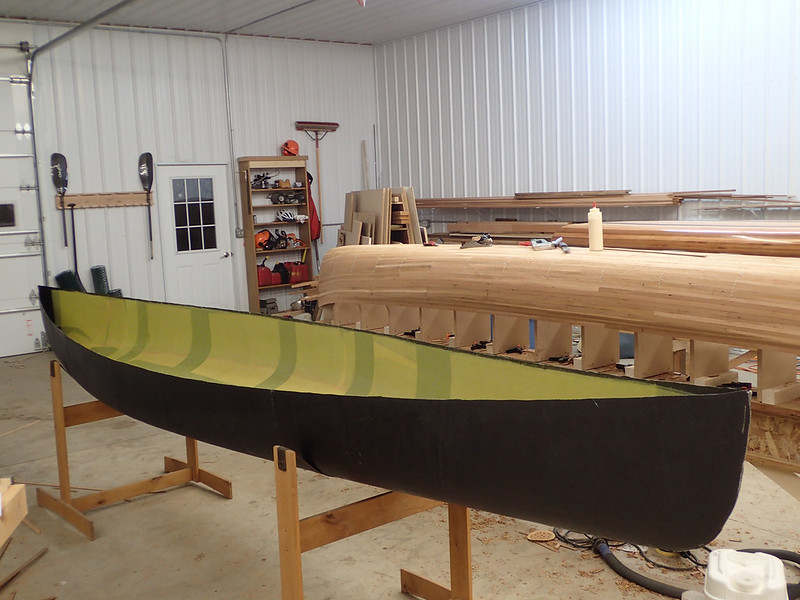 20151213_001 by Alan, on Flickr
One layer of Kevlar wasn't as opaque as I thought:
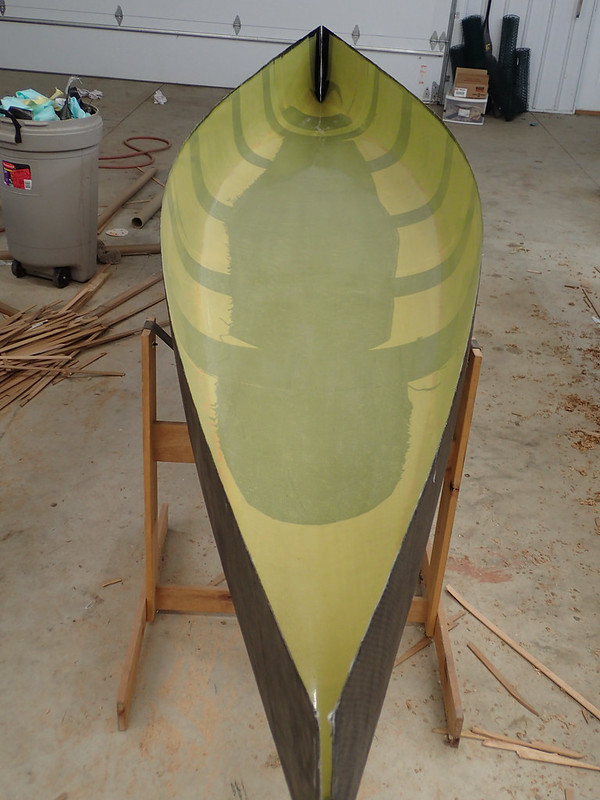 20151213_002 by Alan, on Flickr
My winter entertainment:
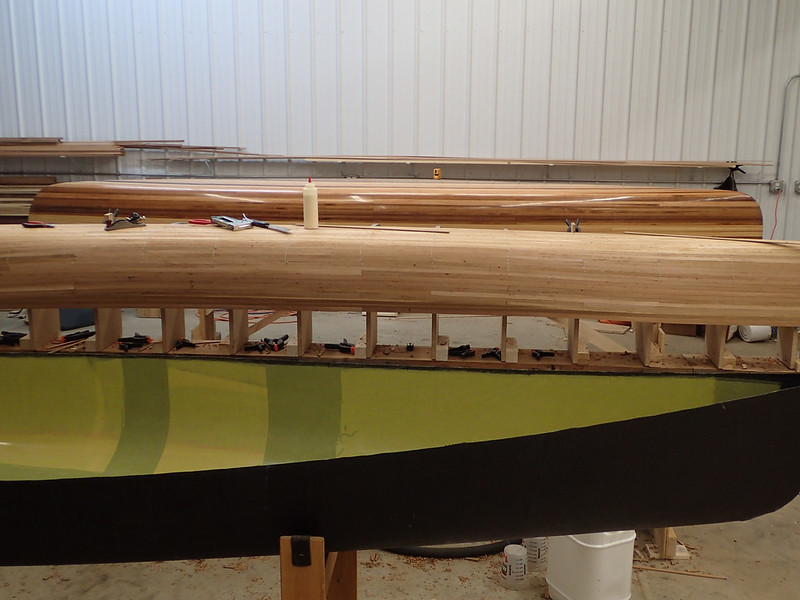 20151213_003 by Alan, on Flickr
Right now the canoe weighs 30lbs on the button. I'm not sure if the bottom is stiff enough or not. It will probably stiffen up a bit more as the resin fully cures and it's also hard to tell when the stems are open and there are no gunwales or thwarts. I'm guessing it will take another 10lbs to finish it off which would give me a 40lb. 16.5' tandem canoe.
In trying to judge how heavy my layup should be I'm trying to compare it to similar production hulls with similar materials. I realize I can't hope to beat or match a good production hull so if I come in at or under their weight I'll know I didn't build it heavy enough. Savage River offers their Deep Creek with carbon/foam rails in a carbon/kevlar layup at something around 31lbs., but that's with a foam core. Unsure how much weight the core saves as opposed to a solid bottom. Time to scour more manufacturer sites to see what I can come up with....
Alan
It went quite well. A few rounds with a rubber mallet helped to loosen up the bottom and the curve of the bilge. A scrap strip of cedar jammed up the from the shear took care of the sides. Interior finish on the canoe is really nice, not that I want it to be, I prefer rough on the inside, but it's nice to know I can get that nice of a finish if I want to. The woodstrip canoe came out unscathed. After wiping it down with water to remove the PVA it will look just like it did before. What a relief!
 20151213_001 by Alan, on Flickr
One layer of Kevlar wasn't as opaque as I thought:
 20151213_002 by Alan, on Flickr
My winter entertainment:
 20151213_003 by Alan, on Flickr
Right now the canoe weighs 30lbs on the button. I'm not sure if the bottom is stiff enough or not. It will probably stiffen up a bit more as the resin fully cures and it's also hard to tell when the stems are open and there are no gunwales or thwarts. I'm guessing it will take another 10lbs to finish it off which would give me a 40lb. 16.5' tandem canoe.
In trying to judge how heavy my layup should be I'm trying to compare it to similar production hulls with similar materials. I realize I can't hope to beat or match a good production hull so if I come in at or under their weight I'll know I didn't build it heavy enough. Savage River offers their Deep Creek with carbon/foam rails in a carbon/kevlar layup at something around 31lbs., but that's with a foam core. Unsure how much weight the core saves as opposed to a solid bottom. Time to scour more manufacturer sites to see what I can come up with....
Alan
So, my Swift Mattawa, 15' 8" tandem. Kevlar with integrated Kev/Carbon gunnels. Cherry decks, thwarts, seats and yoke with the foam bottom slab, 40 pounds even.
Looks Great Alan !
Are you glad you left the ends open ? I know about being unable to wait any longer before popping it off !
I'm guessing that resin content is the culprit of the weight issue.
Did you keep track of how much you used ?
Three boats in the shop at one time ! Wow. That's what I call entertainment ! I like them all !
You know we will always want more ! Ha !
Great work !
Jim
Last edited:
Alan,
That thing looks great!!
You said that the plug had wax and 3 coats of PVA? Well, and some tape at the stems...That was all? No plastic wrap? I would have been sweating bullets waiting to to pop the hull off!
And just how springy is the hull at the sheer? Do you think a similar layup would be able to stretch its way clear of a Kite plug? The Kite has a pretty radical crease...
I know you are going to access the stiffness, before going any farther, but what kind of trim do you have in mind ?
Also I wanted to compliment you on not running the Kevlar clear to the ends. Shaping it will be so much easier !
Jim
Also I wanted to compliment you on not running the Kevlar clear to the ends. Shaping it will be so much easier !
Jim
So, my Swift Mattawa, 15' 8" tandem. Kevlar with integrated Kev/Carbon gunnels. Cherry decks, thwarts, seats and yoke with the foam bottom slab, 40 pounds even.
Those foam cores seem to really let them take a whack out of the weight. The closest corollary I could find to what I'm building is the Hemlock Eagle. Same dimensions and built without a foam core. Premium+ hull with lightweight wood trim is billed at 49lbs. http://www.hemlockcanoe.com/eagle.html
There will be a weight savings on my end due to carbon/foam trim but the writing is on the wall, I need to make my boat heavier. I'm thinking another full layer of Kevlar on the inside. That will give me the texture I want on the inside too.
Are you glad you left the ends open ?
Yes, I should have mentioned that. Very glad I left them open. Made a nice starting point for breaking the bond and also allowed me to pull the sides out farther to help separate the composite hull from the mold. Once it was loose it lifted straight off without spreading but I can see the open ends made it a lot easier to get to that point. Finishing them looks straight forward enough. I'll sand them back, put the hull back on the mold (with taped stems), add thickened epoxy, sand smooth, and then layers of cloth.
I'm guessing that resin content is the culprit of the weight issue.
Did you keep track of how much you used ?
I didn't keep track of epoxy usage but I'm pretty happy with it. I just looked back at some calculations I made before laying up the boat. I figured up the square footage of the entire hull and the waterline area and, figuring a 60/40 ratio of resin to cloth, the best I thought I could expect at my skill level, I calculated the hull should weigh about 26 pounds. Along the way what was going to be a light layer of kevlar reinforcements turned into a full layer. I also added a full 38" layer of fiberglass on the outside rather than cutting it back to the water line. So I'm pretty happy with my 30lb hull with no foam. There should be at least 15lbs of resin in the hull.
Alan
You said that the plug had wax and 3 coats of PVA? Well, and some tape at the stems...That was all? No plastic wrap? I would have been sweating bullets waiting to to pop the hull off!
Correct, no plastic. I was pretty worried before I sprayed the PVA. I'd only wiped it on before and always ended up with fisheyes and spiderwebbing. Boatdesign.net has a ton of great information buried in the archives and one fella that seems quite experienced emphatically claims the best way to apply PVA is to thin it about 50/50 with water and spray it on very lightly. Says if you can see it on the mold then you sprayed too heavy. This is to keep a glossy surface. Since I wasn't worried about gloss I sprayed two very light layers (that I couldn't see on the hull) and then one heavier layer that I could see. After it dried it looked perfect. I felt a lot better after seeing that.
And just how springy is the hull at the sheer? Do you think a similar layup would be able to stretch its way clear of a Kite plug? The Kite has a pretty radical crease...
That's a good question. I've built a Kite and am familiar with the crease. My Bloodvein is similar. On this hull I was able to pull it quite a ways from the mold in the center but that crease in the Kite adds a lot of stiffness too. I believe you were talking about a couple layers of glass and one layer of carbon before removing from the mold and adding more from the inside. I think it would pull away enough but I don't know for sure. Jim did his on a solo with tumblehome but I'm not sure how much tumblehome it had. I'm stripping the mold for my composite Bloodvein now and it will be a sacrificial mold. The wood is all salvaged, so free. Won't use any fiberglass, only resin. I'll close the ends of the composite hull, take the whole shebang off the forms, and rip out the wood mold. I don't need 3 copies of the same hull.
I know you are going to access the stiffness, before going any farther, but what kind of trim do you have in mind ?
Gunwales and thwarts are both going to be carbon/foam. I think I've got a good plan to shape the composite gunwales off the hull which will let me use either shrink tape or shrink tube to get a nice finish. Then I'll epoxy the separate in/outwales to the hull.
Also I wanted to compliment you on not running the Kevlar clear to the ends. Shaping it will be so much easier !
Before starting this I did some research on the best way to trim kevlar after it's cured. The best advice I saw was to plan your layup so the kevlar never reached the edge, which meant it wouldn't need to be sanded/ground back. Sounded like good advice to me.
Alan
Very Stealthy looking! I like it! In my books, any canoe fifty pounds or less is light weight. You should raffle it off, when I win Rippy's knife, I could drop by your place, pick up the sleathmeister, and say hi to the chickens!
Very Stealthy looking! I like it! In my books, any canoe fifty pounds or less is light weight. You should raffle it off, when I win Rippy's knife, I could drop by your place, pick up the sleathmeister, and say hi to the chickens!
You still alive, i gave you up for dead a few posts back. Cancel the Viking funeral everyone.
- Joined
- Mar 20, 2013
- Messages
- 3,356
- Reaction score
- 972
You still alive, i gave you up for dead a few posts back. Cancel the Viking funeral everyone.
Maybe some one highjacked his computer and is using it at his place....
Maybe some one highjacked his computer and is using it at his place....
How will we know for sure that it is the real Mem?
Alan, that is way cool the way everything is falling into place. I know it didn't just happen. As usual you did some research before jumping in. Also gathered some good advise from other members here. I think leaving the stems loose made all the difference in the world. For me the research part is also a fun part of any project. Also I'm old enough now, as you are also, to take advise. Dave
Wow, nice post. Building a canoe in that fashion is all new to me and your explanation of the process makes it easy to comprehend. Can you give a ballpark figure as to how much the material cost is at this point?
Can you give a ballpark figure as to how much the material cost is at this point?
Let's see.....The carbon and kevlar are about $20/yard. The fiberglass is around $6.50/yard. It takes about 5.5 yards for each layer. Two layers of carbon, two layers of kevlar, two layers of glass, so 11 yards of each. Technically there are more than two layers of kevlar and carbon but the rest were made from scraps that were trimmed off.
By my calculations that puts me around $512 in cloth. I suppose a couple gallons of resin so another $200 or so there. Probably going to add another layer of kevlar so that will be another, roughly, $140 when you include the resin. That should put me at $850 with gunwales, seats, and thwarts to go.
Alan
When I restore old canoes, wood or Royalex, I don't really figure in my time as an added expense, too much fun and a great pass time. I guess if it was a daily thing, then things would change but $850 is a great price, Thanks
Time to close up those stems. They'll be wrapped with carbon and fiberglass but first I need something to give them a solid profile. Yesterday I sanded off the excess from the original layup and then flipped it back onto the mold. But before I did that I taped the stems of the mold and put some peel ply in place. The tape will make sure nothing sticks and the peel ply will give me a nice surface for a mechanical epoxy bond when I add reinforcements to the inside.
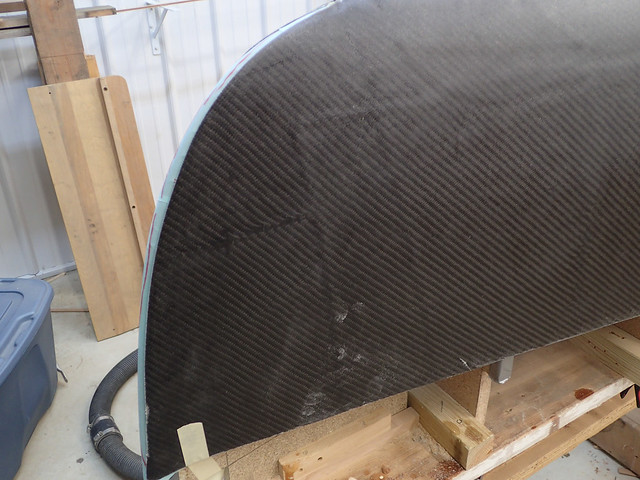 20151216_001 by Alan, on Flickr
 20151216_002 by Alan, on Flickr
The shop is a bit cool for epoxy work (low 60's) so I used fast setting epoxy from Raka. The normally very short pot life gets extended with the cool temps. Mixed in cedar dust saved from sanding until I had a thick mixture that wouldn't run and then I slathered it on the stems:
 20151216_005 by Alan, on Flickr
And that's how I left it. No sense trying to build up and smooth a thin layer of thickened epoxy in that state. I had to eat dinner and do some other work in the shop so I kept an eye on it. After nearly 3 hours it was setting up to the point it was like working with sticky clay. Now you can actually manipulate and work it. I got it pretty close using my fingers:
 20151216_007 by Alan, on Flickr
I'd like to even it out a little more but that's tough because it's pretty tacky. So I laid a piece of peel ply over the top. That let me smoothly run my hand up and down the peel ply to help even out the surface and bumps:
 20151216_008 by Alan, on Flickr
And that's good enough for tonight:
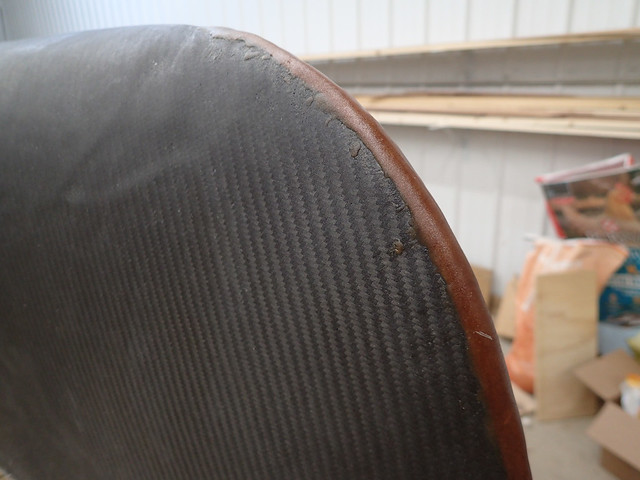 20151216_011 by Alan, on Flickr
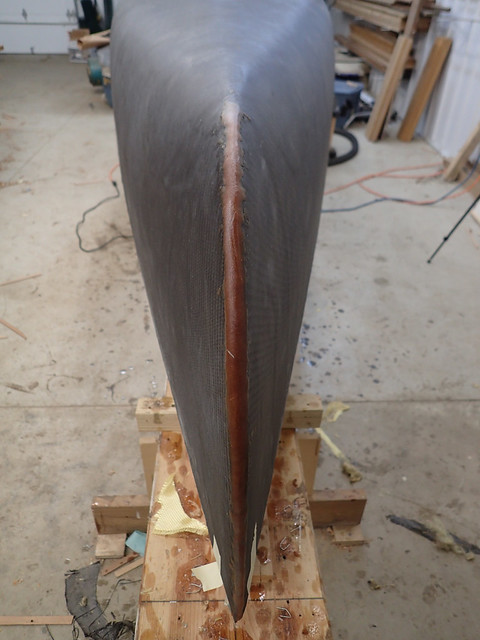 20151216_010 by Alan, on Flickr
Tomorrow I'll sand and shape the epoxy and that will give me a solid stem shape to wrap the carbon around.
Alan
 20151216_001 by Alan, on Flickr
 20151216_002 by Alan, on Flickr
The shop is a bit cool for epoxy work (low 60's) so I used fast setting epoxy from Raka. The normally very short pot life gets extended with the cool temps. Mixed in cedar dust saved from sanding until I had a thick mixture that wouldn't run and then I slathered it on the stems:
 20151216_005 by Alan, on Flickr
And that's how I left it. No sense trying to build up and smooth a thin layer of thickened epoxy in that state. I had to eat dinner and do some other work in the shop so I kept an eye on it. After nearly 3 hours it was setting up to the point it was like working with sticky clay. Now you can actually manipulate and work it. I got it pretty close using my fingers:
 20151216_007 by Alan, on Flickr
I'd like to even it out a little more but that's tough because it's pretty tacky. So I laid a piece of peel ply over the top. That let me smoothly run my hand up and down the peel ply to help even out the surface and bumps:
 20151216_008 by Alan, on Flickr
And that's good enough for tonight:
 20151216_011 by Alan, on Flickr
 20151216_010 by Alan, on Flickr
Tomorrow I'll sand and shape the epoxy and that will give me a solid stem shape to wrap the carbon around.
Alan
Good method Alan !
Better than how mine turned out for sure !
Jim
That's yet to be seen. Hopefully I can avoid sanding all the way through while I'm shaping. It might take a few tries.
Alan
I like putting the canoe back on the forms ! Everything is squared back up. I wish I would have thought of that !
I've been wondering, that when you pull the blue peel ply off the hull, did it soak up any of the resin ? And by chance would it be reusable ?
Jim
I've been wondering, that when you pull the blue peel ply off the hull, did it soak up any of the resin ? And by chance would it be reusable ?
Jim
Similar threads
- Replies
- 14
- Views
- 896
- Replies
- 43
- Views
- 8K
- Replies
- 39
- Views
- 3K
