• Happy Boxing Day! 🎁📦💰

Another first timer here!

I can't talk myself into buying unseen lumber either !

We have a Lumber Wholesaler here in Humboldt.

They're mission, is to buying truck loads, then resort, grade for big bucks. The owner has done very well with that.

I was able to weasel in and get a few planks of #1 grade WRC. It was planed to 5/8" ( thinner than I'm used to.) And expensive. Another life lesson.

With all the Builders in Wisconsin. The Wooden Canoe Museum in Spooner, should be able to help !

Jim
 
You might try cedar deck boards at a big box store ...you could likely get the length and they are close to 1" thick. If you don't mind the look of knots, you can just stabilize them with epoxy (tape one side, saturate leave to set) before you cut strips.

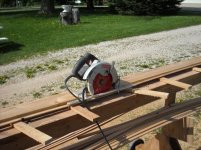
Use the skill saw method for cutting strips ... it is about the easiest and likely most flexible method and produces surprisingly consistent strips, with minimal waste.


Brian
 
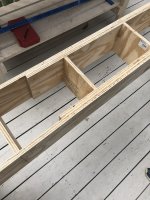
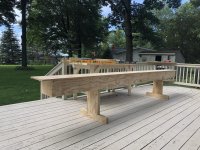
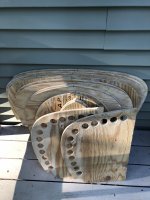
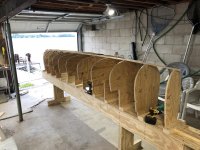
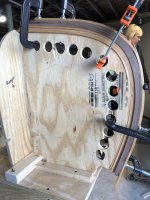
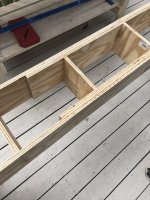
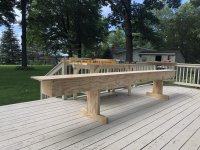
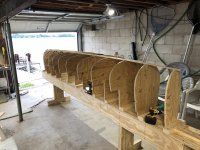
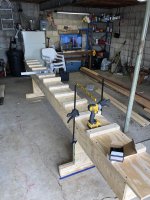
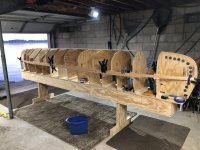
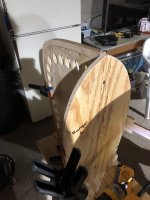
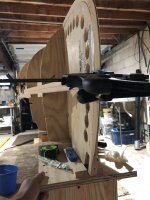
C3CD71C2-0DF9-4B95-9CA2-948CBAB5A6B9.jpegDB31CFAC-764F-40CB-A378-0ED467970473.jpegB65C68B0-8643-49A8-9679-9070945C6D0E.jpeg9D61D891-4392-4DDD-A89F-735C3DFC91FB.jpegA0733CC8-2DE2-41E7-9E6F-83ECEE1A1FF7.jpegA3594979-E85C-41EB-A2FE-AD786E887FEF.jpeg Here is my progress so far. If I can find some wood, I’ll be planking by next weekend.
 

Attachments

  • C3CD71C2-0DF9-4B95-9CA2-948CBAB5A6B9.jpeg
    C3CD71C2-0DF9-4B95-9CA2-948CBAB5A6B9.jpeg
    345.7 KB · Views: 1
  • C3CD71C2-0DF9-4B95-9CA2-948CBAB5A6B9.jpeg
    C3CD71C2-0DF9-4B95-9CA2-948CBAB5A6B9.jpeg
    345.7 KB · Views: 1
  • DB31CFAC-764F-40CB-A378-0ED467970473.jpeg
    DB31CFAC-764F-40CB-A378-0ED467970473.jpeg
    512.2 KB · Views: 1
  • A0733CC8-2DE2-41E7-9E6F-83ECEE1A1FF7.jpeg
    A0733CC8-2DE2-41E7-9E6F-83ECEE1A1FF7.jpeg
    368.9 KB · Views: 0
  • BA5ABC9D-09F9-47CA-BD42-E982147B993C.jpeg
    BA5ABC9D-09F9-47CA-BD42-E982147B993C.jpeg
    405.6 KB · Views: 1
I’m really trying to stay away from the knot look.

Is the skillsaw method easier than a table saw and featherboards?

Yes ! http://www.canoetripping.net/forums/...cutting-strips

Your strongback works great to support your planks, while you walk back and forth cutting strips.

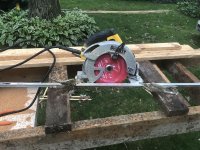
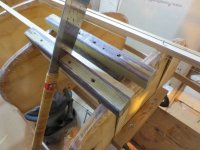
You need at least a 13amp Skilsaw (15 is better), a Freud Diablo, 24T blade. a piece of aluminum angle, and a few small clamps. I really like one to be a small Vise grip. It makes a great handle, and keeps your hand in a safe place !

If you have to go the route of cutting 2X stock. A table saw with both infeed and outfeed tables are needed.

The Skilsaw with a fence, cut very uniform strips ! That's all I've ever used !

Jim

​​​​​​​
 
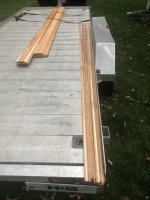
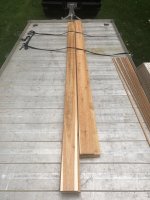
Finally got lucky and found some wood this morning. Made the 4 hour round trip and picked up what I think is some nice looking White Cedar. I know it’s not the traditional WRC that I was looking for, but at least it was cheap and almost knotless. Of course they didn’t have 16 foot lengths like I was looking for though. Ended up picking up (8) 1x6x12 and (3) 1x8x12 for about $130.

Since I am new to wood working (this is my first wood working project), I really don’t know the difference between the woods other than some are soft and some are hard. I’m hoping this white cedar will work? Is there much of a difference between it and WRC?

Seems to cut cut pretty easy as I managed to get 1 board cut before the rain came in. Jim, The skillsaw method works awesome. Thank you for that. The last stuff I bought, I tried to cut on a table saw and it did a pretty good job, but had to adjust the feather boards after every pass. The only downfall I have found with the skill saw setup is that the board seems to slide while I’m trying to cut it. I had to resort to holding the wood with one hand and running the saw with the other. I’m hoping that the blade doesn’t angle when I’m cutting. That, or I should probably enlist some help in holding the boards while I cut. Just in case, I might buy a planer and run them through just to be safe. It would probably benefit me to plane the rough side prior to cutting them on the skill saw as well. Do most people do this, or do you just let the router do that for you when you bead and cove it?

Anyways, I’m attaching pictures of the wood, let me know if you think I will be ok using it.

Thanks,
Terry
 

Attachments

  • 895B32F9-D341-4C17-803E-C42A56C57F5D.jpeg
    895B32F9-D341-4C17-803E-C42A56C57F5D.jpeg
    434.1 KB · Views: 0
  • 031D283E-4A45-404F-A821-788FB9E719EF.jpeg
    031D283E-4A45-404F-A821-788FB9E719EF.jpeg
    371.8 KB · Views: 0
  • 48D7854F-9A08-4BBA-9C64-981C1E8C336D.jpeg
    48D7854F-9A08-4BBA-9C64-981C1E8C336D.jpeg
    494.1 KB · Views: 0
I’ll get better pictures of the wood once it stops raining. Also, the strongback in the picture is just a workstation. Friend of a friend had it in his barn for the past 20 years, and now it’s my cutting bench.
 
Western are (much) larger trees and would, most likely, be available with fewer knots. It is also lighter as Eastern (also called aromatic) comes in around 33 lbs/cubic foot which is similar to poplar and most pines. As far as cedar goes, I think Northern White is the lightest per cubic foot.

As Denise said, sawmills (especially small, local mills) are often the best sources and many even have kilns.

Woodmizer is one company that makes portable band mills and they have a link to people in your area that bought one. Might be worth a look: https://woodmizer.com/us/Services/Find-a-Local-Sawyer

I knew I read something about White Cedar. Since it is the lightest per cubic foot, I’m assuming it’s still ok to use.

Thanks!
 
A bargain for sure on the Cedar ! Butt joining strips is really not a problem ! Especially if you bead and cove the strips !

Set the saw fence so the strips, come out as close to 1/4", this helps when you bead and cove later !

I would shorten your fence to no more than 18". That is the longest one I've seen !

Absolutely no need to plane the strips. You will take care of that when sanding the hull !

Holding planks in place ! I used to take a small finish nail, or two and tack the plank down, at the very edge away from the saw. Now I use a little hot melt glue, works great !

Your planks look good ! Flat grain ! You'll get the best strips from flat grained planks !

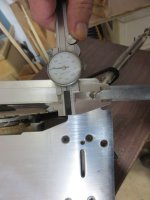
Below, I'm getting ready to cut Ash for gunnels, and setting the fence. Accuracy counts. I check the gap with the blade set at it's deepest cut !

IMG_1464_zpsobhpaz7m.jpg - Click image for larger version  Name:	IMG_1464_zpsobhpaz7m.jpg Views:	0 Size:	102.0 KB ID:	97883

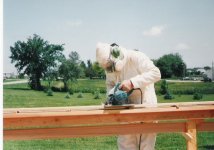
3e385cec-da21-4a3a-ba4f-c8ff0ec7a07c_zpscf911cb6.jpg - Click image for larger version  Name:	3e385cec-da21-4a3a-ba4f-c8ff0ec7a07c_zpscf911cb6.jpg Views:	0 Size:	114.3 KB ID:	97884

Put the pic above in , because it's from the early 90s ! Ha !

In the pic below, you can see the sacrificial cleats, on the strongback. This is an early pic ! Before I thought of the Visegrip trick.


28ccb1ce-0b40-4649-b3ed-89e5c40b0834_zpsasp4x7se.jpg


Keep up the good work Terry !

Jim
 
Last edited:
Ok so I got all of my strips cut an put a bead and cove on them today. I got to say, I’m pretty impressed with how that turned out. One of the 1x6s that I cut strips out of was not as tight of grain as the other ones and it really showed when I did the cove edge. The edge seemed to splinter quite abit, but I still think it’s quite usable. Also, the first and last 2-3 inches on each board seem to be a little distorted, so I’ll just cut them off. I would guess that this is most likely due to my feather boards being too tight? Either way, not that big of a problem.

Since these boards are only 12 foot, I will need to randomize the joints and put them together. I will be going through that process tomorrow hopefully. I know that some people just butt the ends together, and others scarf them. Is any way better than the other? Like I mentioned before, I’m pretty new at woodworking, so I’ve never done a scarf joint, but it doesn’t seem like it would be that big of an issue.

Thanks again for for the help and encouragement!

-Terry
 
Butt joints are all that are needed, easier yet since you have cove and bead strips
just be sure to position the joints where there is little off axis bend in the strips lest they try to open the joint up before your glue sets
 
Last edited:
Stripperguy Knows !
I make my butt joints between the forms.
A 2" spring clamp gives you enough room, to make the splice and keep going with the next course.
Take two pieces of scrap and cover with clear packing tape. use them to hold the strip parallel .

IMG_0571_zps4cspzzt6.jpg - Click image for larger version  Name:	IMG_0571_zps4cspzzt6.jpg Views:	0 Size:	105.1 KB ID:	98090

Cut your butts square !
IMG_0571_zps4cspzzt6.jpg - Click image for larger version  Name:	IMG_0571_zps4cspzzt6.jpg Views:	0 Size:	105.1 KB ID:	98090


You have a great start Terry !

Jim
 
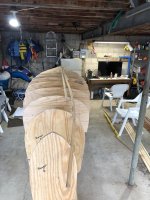
Managed to get the first two rows on today. Since I’m trying to do this without staples, it will be slow going from here. I’m shooting for two strips a day. One in the morning and one in the evening. 7DCC6DFB-9D92-47BE-B84C-8511AC84F081.jpeg
 
Good job Terry. Keep up the good work. That's quite the view out your garage door. Are you motivated enough to get it out on the lake before freeze up?

Mark.
 
Terry, I just zoomed into your picture. The inside stems appear to be sticking up above the last form. Are you sure you want to proceed like that? I've only built one with stems, but I'm pretty sure they should be flush with that form otherwise you'll end up with a hump there. Anyone else see that?

Mark.
 
Jim, those clamps look like they would be a great asset. I’m definitely going to try to add the inter tube to mine.

Mark,

Great catch on the stem being over the mold. I didn’t have my stem form attached to my 6th station so it wasn’t properly seated. Apparently I missed that as I was too excited to get the first strip on. I Just went to check on it and was a quick fix. They still stick up a tiny bit, but I haven’t shaped the top yet so it shouldn’t be a problem.

As for getting the canoe in the in the water before ice comes.... No! I plan on taking my time with the planking process to ensure everything is perfect. I’ve also been kicking around some design ideas for the football, but not sure I have the skills to pull off what I would like to do.

Also, yeah I can’t really argue with my view out of the boat house. One of the main reasons I decided to build the canoe, was to give me something to do as I was fishing. Funny thing is, I haven’t even put a line in the water since I started the building project. 6463280A-0A09-4A58-80C4-5932A01EE5FE.jpeg
 

Attachments

  • BF9EF711-C6A8-4703-AC1C-8AE3293407EA.jpeg
    BF9EF711-C6A8-4703-AC1C-8AE3293407EA.jpeg
    312.9 KB · Views: 2
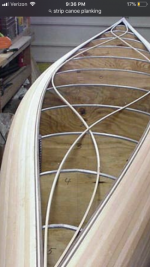
Here is what I would like to attempt, but like I said, I’m not sure I have the skills to pull it off. I do have plenty of extra strips to make a few dry runs and see if I can make it work, and I’ll have all winter to try it out.

Again guys, thanks for all the tips, tricks, and support.

-terry
 

Attachments

  • C60D1154-914D-4B4C-B9A7-CBDC1B04DEA4.png
    C60D1154-914D-4B4C-B9A7-CBDC1B04DEA4.png
    290.8 KB · Views: 1
Ok good. I just wanted to make sure. Easy fix now, but not so easy later. I just looked again and I can't tell if you put some tape on the form edges. Might be a good idea for when it comes time to pull them off.

I am more of a utility boat builder myself, but I do appreciate the extra effort people take to put a unique signature on their creation. I'm looking forward to see what you do with yours.

Mark.
 
Back
Top