• Happy Winter Solstice! 🌇🌃

Skid plate suggestions

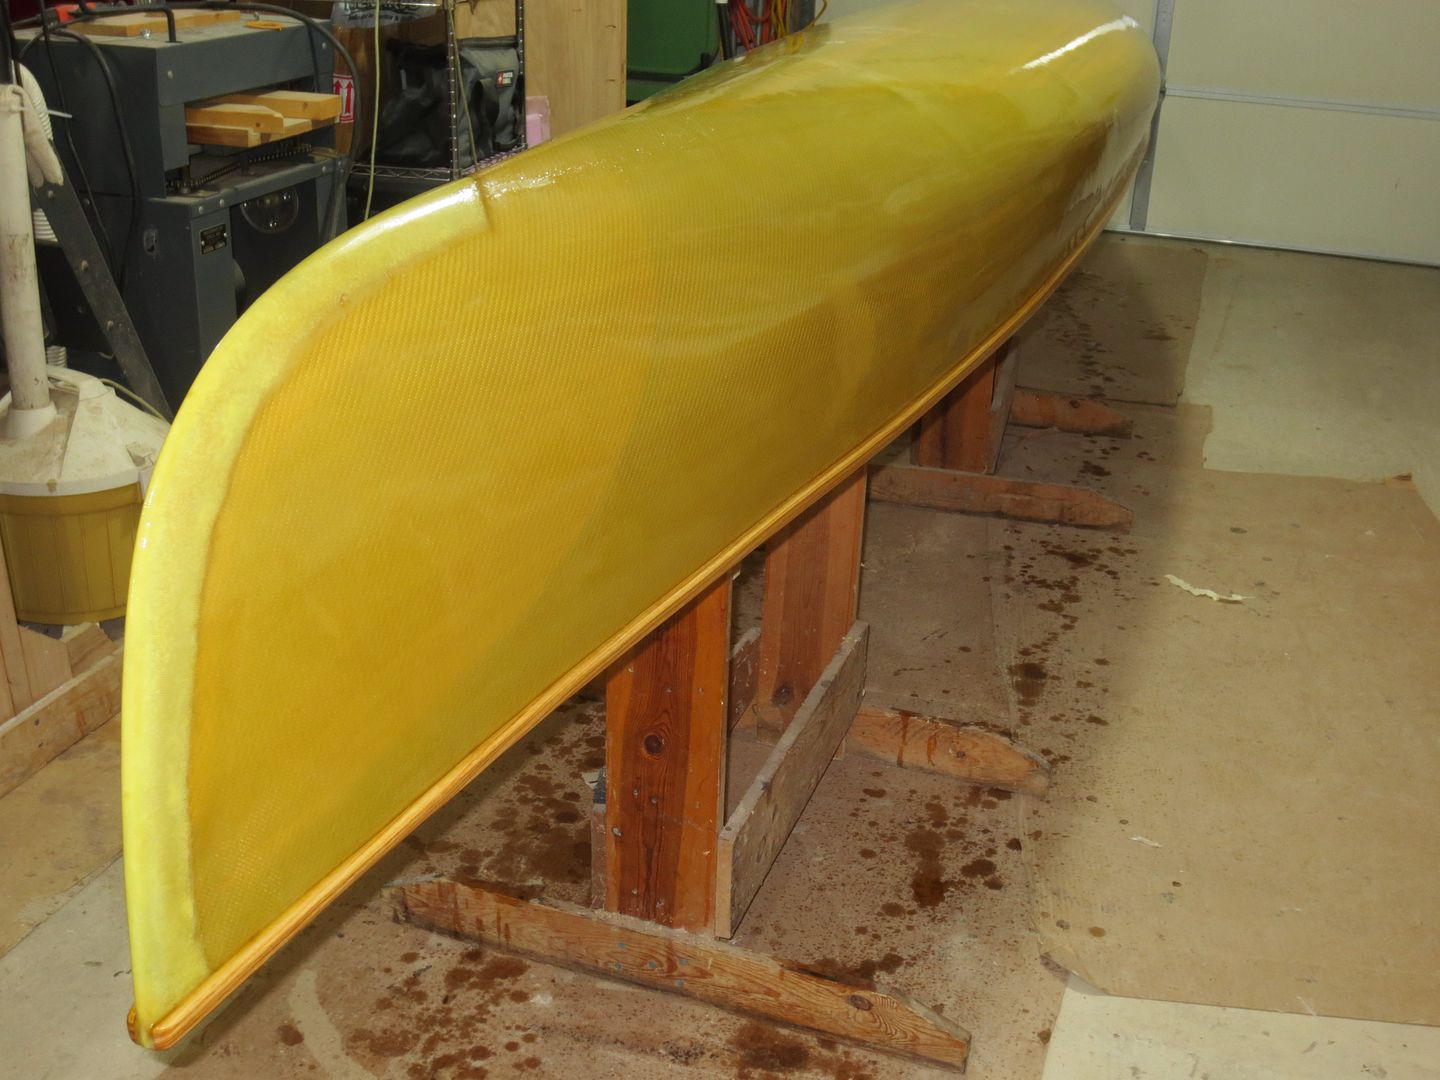
Hulls with shallow or deep V contours are prone to wear down the keel line.

Pete, I’ve seen your boat repair and outfitting work for some years now. Seriously well done boatwork, and I’ve learned a bunch. I’m still learning and hope you will photo document the Mohawk XL 13 and share it here.

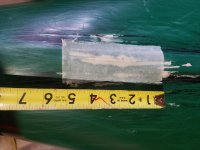
I’ve laid full length keel strips on a couple or four Mad River or composite sea kayaks vee bottoms. In that application, if the wear area is narrow enough, Dynel sleeve from Sweet Composites is much easier than cutting a narrow strip of Dynel fabric, and lays down tough as nails two layers at once. That sleeve may have been a Pblanc suggestion, and has proven useful in several applications beyond vee bottoms or skid plates.

Dynel sleeve here (scroll part way down)

https://www.sweetcomposites.com/Polyester.html

The “lightweight” sleeve is 1 ½” wide, the “standard weight” is 1 ¾” wide. The actually fabric “weight” seems the same, or at least I can’t tell the difference. Cutting a 16’ long strip of narrow Dynel from yards off fabric, with edge frays and my kindergarten-wobbly scissor work? Thanks, but no.

Wider Dynel sleeve or, better still, single layer Dynel in wider rolls, something like 3” or 4” wide, would be really useful, were there such a thing. I’m still searching.

With fabric and peel ply already in rolls the rest gets simpler and easier.

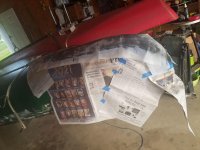
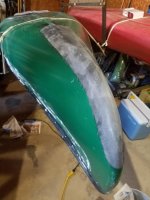
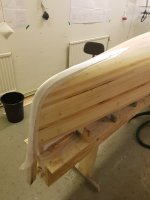
Boat taped and papered, bottom coat of epoxy painted on, cut-to-length Dynel sleeve unrolled on the epoxy, epoxy topcoat, let sit a while to fully saturate the fabric, maybe add a little leftover epoxy from the pot where needed, then covered and roller compressed release treated peel ply. Release treated peel ply in rolls!

Bless Glenn MacGrady for finding release treated peel ply in rolls, available in 1” wide to 6” wide. So freaking handy, not just for long narrow strips. A lot of the fabric repairs I do are long narrow cracks or linear slices. Cut me off a piece of that peel ply roll.

https://www.aircraftspruce.com/catal...es/peelply.php

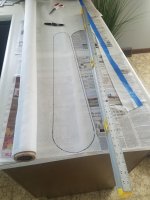
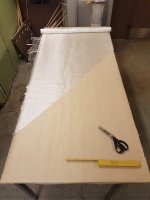
That keel strip may sound like a lot of work, but the sleeve and roll peel is simple as measure to length and make a single cut. Snip, snip, fabric and peel ply both ready to go.

I want the peel ply roll 2” wider than the keel strip epoxy width, so if I get a little catawampus unrolling it over the epoxy it will still cover the area side-to-side. When unrolling a long arsed peel ply keel strip it really pays to have a helper standing at one stem, eyeing along the keel line and calling out slight peel ply alignment adjustments as you unroll; it is hard to gauge the center line while standing alongside the hull, and better to keep true along the full length.

Peel ply in rolls is much easier than cutting long thin strips of release treated peel ply. BTW, the white peel ply that looks too much like 4oz glass (mark it as peel ply somehow, it’s hard to tell later) is easier to cut cleanly than the thinner blue stuff.

Whitewater canoes will often wear through at the center before they do at the stems. That is where the hull draws the most water in a highly rockered design, and is also where the paddler's weight is concentrated. That creates a lot of abrasion as the canoe goes over rocky ledges and shelves.

I have needed to install an exterior “football” of fabric on two old WW canoes worn near through at center, a kevlar Starburst freebie (thanks Pete Staehling), and a friend’s WW solo, worn scary thin under the saddle; not a lot of hull flexibility when grinding over rocks with paddler weight on a floor mounted saddle.

Said friend provided the fabric, something then new to me called “Dynel”. I used some thick 6oz S-glass on the first; coulda shoulda woulda used Dynel, but didn’t know there was such a thing as Dynel

Dang, this is making me long for another beater to rebuild.
 
I do not like the big chunky kevlar and dynel pads at all. They are clunky and can really slow down a fast canoe like a Canadienne or a Sawyer Cruiser. I use fiberglass tape and epoxy. Often a 3 inch roll of tape and then a roll of 2 inch. Then I sand and paint. Works well and maintains the speed and lines of a beautiful canoe.
 
I do not like the big chunky kevlar and dynel pads at all. They are clunky and can really slow down a fast canoe like a Canadienne or a Sawyer Cruiser. I use fiberglass tape and epoxy. Often a 3 inch roll of tape and then a roll of 2 inch. Then I sand and paint. Works well and maintains the speed and lines of a beautiful canoe.
A skid plate made of 5 ounce/square yard Dynel fabric is not very thick at all, especially if you use peel ply to limit resin uptake by the fibers.

Most fiberglass tapes are made of 6 ounce/square yard fabric although some are as heavy as 10 ounce/square yard. A skid plate made out of two layers of 6 ounce/square yard.fiberglass tape is going to be much thicker than one made of 5 ounce/square yard Dynel.
 
I do not like the big chunky kevlar and dynel pads at all. They are clunky and can really slow down a fast canoe like a Canadienne or a Sawyer Cruiser. I use fiberglass tape and epoxy. Often a 3 inch roll of tape and then a roll of 2 inch. Then I sand and paint. Works well and maintains the speed and lines of a beautiful canoe.

I agree about big, clunky kevlar felt. But I don’t see a properly installed Dynel slid plate as clunky, or slowing down even a fast, sharp stemmed composite canoe.

Most of the fiberglass tapes I have found have been plain weave E-glass, and there are better materials. Even thick bias woven Twaron.

But Dynel? This is too thick?

PC060024 by Mike McCrea, on Flickr

There are single layer (no pigment or graphite powder) Dynel skid plates on both the stems below, top coated white when I painted the bottom. You would have to get mighty close to tell they were there. Not clunky, not slow, dang near invisible.

P4170001 by Mike McCrea, on Flickr

P4170002 by Mike McCrea, on Flickr

Weeks of experimenting with laying up various fabrics and epoxies showed that Dynel has by far the best abrasion resistance, and if additional impact resistance was desired a second layer of anything – even E-glass – laid underneath made for an abrasion and impact proof skid/bang plate

https://www.canoetripping.net/forums...stance-results

All that experimental work, which continued with Dynel sleeve and various epoxy mixes, and this guy’s simple test was more revealing; Dynel vs 6oz S-glass, abrading the fiberglass and Dynel using the corner of a fire brick (copied from the Glen-L site)


“A 6 pound fire brick held on a 45 degree angle
The test with 6oz fiberglass cloth took 52 strokes to cut through to the wood
The 5.5oz Dynel has more than 250 strokes and is still not through to the wood

Nothing wrong with a multi-layer glass skid plate, especially if one layer is laid on the bias. But it won’t be as abrasion resistant as Dynel. If I am adding “skid” plates I want Dynel, and some graphite powder for a tougher, slippery skid.

I’d like to hear more from Recped; IIRC his canoe had multi layers (like 5 or 6, applied at different times?) of S-glass, wearing through, when he put on a layer of Dynel. I know Recped uses his boats hard, and wonder how his Dynel top layer has fared.
 
Okay thanks for update on Dynel. Kevlar pads do not get it.

PPine, if you have the opportunity on some canoe in need, give 5oz Dynel fabric, or on a narrow wear area sharp vee stem, Dynel sleeve, a try. A single layer of 5oz Dynel fabric, compressed under peel ply, can be as little as 1/32” think, or 1/16” if you top coat it with a G/flex and graphite powder mix.

On most of the more blunt-stemmed canoes a strip of 3” E-glass tape wouldn’t have come close to covering the worn areas width-wise, so those got a shaped and sized skid plate of Dynel fabric (see photos above).

Cover the epoxied Dynel with release treated peel ply and push down by hand or roller, so the epoxied Dynel doesn’t “swell like an old sweatshirt”. Epoxy/Gflex/graphite powder top coat as you wish.

If you want additional impact resistance on a more WW-ish canoe adding a layer of anything under the Dynel increases the rock slamming performance appreciably, and is still thinner, and far more abrasion-resistant, than two layers of glass tape.

Every boat we own has Dynel skid plates, and I don’t regret installing a single seemingly seamless one.
 
I attempted to patch that gouge and I'm not sure if I was successful or not. The sides of the tear did not want to lay flat so I don't know if I need to start over or if this will be fine as the skid plate will be going over top of it anyway. I used about a gumball size glob of g/flex and then covered with release tape and used a seem roller to compress. If this looks ok, I think I'll start prepping for the skids tonight
 

Attachments

  • 20210630_093349.jpg
    20210630_093349.jpg
    312.8 KB · Views: 4
If you don't like the contour of the hull as it is just apply some more thickened G Flex over it and sand it fair and flush when cured. If you are just applying G Flex to fill a crack I really don't see the need to apply release fabric over it. Any epoxy that stands proud of the adjacent hull can just be sanded off when cured. Sort of like overfilling a crack in a wood board with putty then sanding off the excess.

Peel ply is most useful when bonding fabrics. It will limit the resin uptake of Dynel and on any fabric it will result in a smoother edge of a patch. The fibers at the edge of a patch tend to swell up when wetted out resulting in a raised edge. So the peel ply will limit the amount of feathering you need to do at the edge of a patch to get a smooth result. This is especially beneficial when bonding aramid patches since aramid really doesn't like to be sanded much.
 
Just pulled the peel ply off and I must say I'm pretty happy with the results. I was initially worried I was not going to have enough g/flex to finish the job so I only did one layer of dynel, but I think I still have at least half remaining. For anyone who is nervous about undertaking this project, I'll say as someone who has never done anything like this before that it's honestly not that difficult. The long cure time of the g/flex really eliminates a lot of stress and the dynel cloth is just that, cloth, so it's very easy to handle and cut, even after I drank all the beers I was supposed to be saving for Mike and Pete. Now I just have to do a little cosmetic maintenance and I think the old girl will be ready for the water tomorrow.
 

Attachments

  • 20210630_193119.jpg
    20210630_193119.jpg
    282.7 KB · Views: 17
  • 20210701_105301.jpg
    20210701_105301.jpg
    245.6 KB · Views: 17
  • 20210630_170350.jpg
    20210630_170350.jpg
    375.4 KB · Views: 16
Looks good. The peel ply tends to leave a matte texture. If you want a really smooth abrasion plate you may need another application of G Flex. It won't take that much to fill in the texture. Then wet sand with fine paper, say around 600 grit.
 
Does it matter if you cut the peel ply on the bias or not? I am about to put Dynel strips on the bow and stern of my Kite stripper but have never done this before. The substrate is 3x4oz e-glass in the bow and 2x4oz in the stern.
 

Attachments

  • 20220819_135025.jpg
    20220819_135025.jpg
    93.7 KB · Views: 11
  • 20220819_135037.jpg
    20220819_135037.jpg
    88.1 KB · Views: 11
Does it matter if you cut the peel ply on the bias or not? I am about to put Dynel strips on the bow and stern of my Kite stripper but have never done this before. The substrate is 3x4oz e-glass in the bow and 2x4oz in the stern.
No, bias cutting isn’t necesssary as the peel ply fabric stays intact regardless of the angle of the cut.
 
I bought a 1975 OT Royalex Tripper at a yard sale for $100 and want to fix it up and sell it. Both ends had been repaired ( pretty roughly) and i sanded most of the rough spots but when i went to remove a few small places that had started to de-laminate, I discovered that though they were bonded, I could get a sharp chisel under the fiberglass and work it off without a huge amount of effort. Spent about 30 minutes and got 95% of the cloth and resin cleaned off, the rest will sand off I had some west 105 on hand and used it and some West silica filler to fill the voids up to the level of the surface at the edges of the damage. I still need to do some more filling and fairing as the thickened epoxy was not thick enough to hold its shape and sagged a bit. Once this is done i want to put some protective cloth, and G flex. I have some fiberglass on hand but is that a mistake? Dynel seems to be favored in this thread. A question is about peel ply. Without a vacuum bag, how do you get the peel ply to contain the epoxy? Does it stick on? Do you tape it? Or does it just stick to the epoxy until you are ready to remove it. Also, Is it one and done or can it be reused? The other question is about the vinyl layer. There are a few spots where I can peel it off. Can I just work some G flex into the edges to keep it from continuing to peel away? Thanks, Larry
 
Peel ply just sticks where you place it, I never have and wouldn't try to reuse it as it will be fairly saturated with epoxy. I use a silicone roller to apply pressure to ensure the dynel (or whatever) gets fully saturated and any air bubbles are removed.
 
The excess resin will be absorbed into the peel ply just like fiberglass cloth. There needs to be enough resin so that the peel ply is completely "wet out" with no voids. It will stay in place all by itself but if you're placing it on a curved stem you might have to cut darts into the peel ply as it won't like compound curves. It will conform a little better if you cut it on the bias of the weave. It is not reusable as it will be soaked with cured epoxy once peeled off.

I try not to use actual silica for a filler when I know I'll need to do further sanding unless it's very minor. The silica makes it much more resistant to sanding. But the good thing about silica is that does not tend to sag.

Microballoons is a good filler when further sanding will be required but it does tend to sag no matter how thick you mix it.

Sometimes I'll mix a little silica in with mircroballoons just to keep it from wanting to sag but it will still be relatively easy to sand.

To complicate fillers a little more I currently have some microballoons with the letters "SIL" in the name, which would lead you to believe it's a silica compound, which it isn't.

Alan
 
I bought a 1975 OT Royalex Tripper at a yard sale for $100 and want to fix it up and sell it. Both ends had been repaired ( pretty roughly) and i sanded most of the rough spots but when i went to remove a few small places that had started to de-laminate, I discovered that though they were bonded, I could get a sharp chisel under the fiberglass and work it off without a huge amount of effort. Spent about 30 minutes and got 95% of the cloth and resin cleaned off, the rest will sand off I had some west 105 on hand and used it and some West silica filler to fill the voids up to the level of the surface at the edges of the damage. I still need to do some more filling and fairing as the thickened epoxy was not thick enough to hold its shape and sagged a bit. Once this is done i want to put some protective cloth, and G flex. I have some fiberglass on hand but is that a mistake? Dynel seems to be favored in this thread. A question is about peel ply. Without a vacuum bag, how do you get the peel ply to contain the epoxy? Does it stick on? Do you tape it? Or does it just stick to the epoxy until you are ready to remove it. Also, Is it one and done or can it be reused? The other question is about the vinyl layer. There are a few spots where I can peel it off. Can I just work some G flex into the edges to keep it from continuing to peel away? Thanks, Larry
Peel ply applied on top of the epoxy will stay put, roll or squeegee until peel ply is completely saturated with epoxy. One time use.

Make dynel your last layer, fiberglass underneath is fine and has the advantage of being sandable if you are fairing the hull.

Vinyl layer peeling. Pictures might help but my instincts would be to cut away any peeling vinyl until I reached where the vinyl is still bonded to the ABS layer. I would begin my repair at that point.
 
I've read a number of posts on the site about repairing royalex and maybe I missed it but I have not seen anything about this. It has been my understanding that a layer of wax is formed on the surface when epoxy sets and must be either sande off or cleaned of with acetone. is this true or not?
 
Nope, that happens to polyester resin layups that use the wax to exclude air to allow a complete cure. Most canoe laminaters who use polyester might use the no-wax equivalent to allow an interior gelcoat or paint to stick better. Polyester stays sticky for a long time (years?), though will cure eventually because grime and other things will accumulate enough to block the air and allow eventual set. Air inhibits the full cure of polyester resins, or at least the ones I was using back in the 1970s unless they had the wax additive. I don't think wax was added to vinylesters, though it could have been. It's not something I researched back when. Epoxy that are mixed correctly should fully cure to a hard surface and not have a wax finish. Sand them anyway for a fresh surface for better adhesion. There would be no wax on the vinyl or ABS canoe hull unless added by the owner, and none if epoxy was used as a resin to repair it. Sand anyway. I don't think acetone would remove it, though any wax that was still on polyester repairs would likely have gotten scraped off in use. Sand anyway, no matter what was used. Have I said that enough yet? < GRIN >
 
100% Polyester Sweat Shirt fleece.
use it like Kevlar felt.
Sure it's not as durable as Kevlar felt !
But it can be sanded, and adds enough thickness to the stem, that it will give you plenty of wear resistance. Besides, you can get it in multiple colors !

IMG_0941_zpsuomvdl9a.jpg
 
Nope, that happens to polyester resin layups that use the wax to exclude air to allow a complete cure. Most canoe laminaters who use polyester might use the no-wax equivalent to allow an interior gelcoat or paint to stick better. Polyester stays sticky for a long time (years?), though will cure eventually because grime and other things will accumulate enough to block the air and allow eventual set. Air inhibits the full cure of polyester resins, or at least the ones I was using back in the 1970s unless they had the wax additive. I don't think wax was added to vinylesters, though it could have been. It's not something I researched back when. Epoxy that are mixed correctly should fully cure to a hard surface and not have a wax finish. Sand them anyway for a fresh surface for better adhesion. There would be no wax on the vinyl or ABS canoe hull unless added by the owner, and none if epoxy was used as a resin to repair it. Sand anyway. I don't think acetone would remove it, though any wax that was still on polyester repairs would likely have gotten scraped off in use. Sand anyway, no matter what was used. Have I said that enough yet? < GRIN >
Thanks for that Nick Not sure exactly how I came to think that epoxy formed a wax but more than likely from some friends that worked extensively with poly resin 40 +or- years ago, and I must have just attached the idea to epoxy in my alleged mind. Wherever i got the false idea, it included cleaning the "wax" off with solvent. But looking at the West Systems site it seems that "Amine blush, a byproduct of the epoxy curing process, may form under certain conditions. This waxy film is water-soluble, but many organic solvents are ineffective for removing it." In any case, sanding thoroughly is good advice, and West says not to worry too much about getting all of the dust off since it will act as filler. Reminds me of my theory that painting over spider webs "reinforces" the paint. Better than thinking I'm too lazy to remove them. LP
 
Back
Top