• Happy Apple Cider Day! 🍎🍵

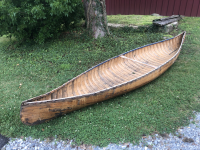
Restoration of an early Chestnut Bobs Special

Awesome job of documenting your method! Looks like a lot of work but it has to be rewarding.

Also glad that you chose to go back in and get the missed rib. IMO, that's the difference between mere proficiency and craftsmanship. Well done.
 
Update:

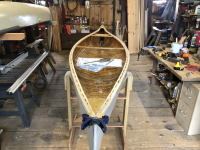
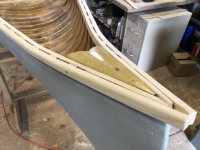
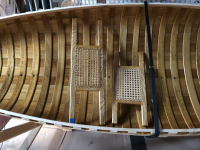
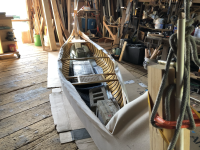
For those who may be following this long saga... I recently caned the new seat frames, installed them along with the center thwart, then canvassed and subsequently filled the canvas with Kirby's canoe filler. Traditional filler requires 6 weeks of cure time, and since my shop is unheated that means the canoe will wait until warmer temperatures in Spring for primer, paint, outwales and brass stem bands.

Ash seat frames caned in the Chestnut 6-step pattern. Before installing I did complete the couching step (the perimeter binder cane over all the holes). tempImagechNkUR.png

Wiping varnish on the outside of all planking. Pre-stretching the canvas in the background.


tempImageNdJuSS.png
Canvas on and mostly fastened; there is about 235# of weight in the canoe to keep it down fully in the canvas envelope:
tempImagefzz89Y.png
Stems overlapped and fastened, note the canvas has been scorched to remove 'fuzzies' and carbon brushed off:
tempImagevma7Az.png
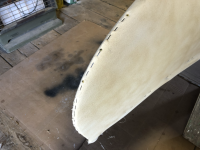
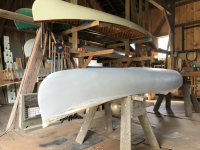
Kirby's filler applied:tempImagecaqTX2.png

Now... we wait until Spring for warmer temperatures to prime, paint, make and install inwales!
 
Nice job on the seats, what material did you use for canoeing? The canvas looks very good on the stems, nice neat job.

I have never torched a canvas or sealed the outside of a hull, but lots of people do and yours looks great.
 
Looks great, Patrick. Thanks for the update.

I have been calling this canoe a Ranger as in the 15' iteration of the Chestnut Prospector series. After working so intimately with it I now believe it is a factory-modified Bobs Special or Lightweight canoe.

Patrick, would you like me to change the thread title to Bobs Special?
 
Thanks all for your comments. Robin, the seats were caned with 3mm Medium cane. These seats are my 4th & 5th seats which I have caned, and it’s remarkable how much faster it goes with each seat! It can be tedious but rewarding at the same time.

Bob, how’s that Peterborough Lightweight project coming? Be sure to share your progress with us!

Glenn, please do change the title. Something like “ Restoration of an early Chestnut Bobs Special” would be more appropriate. Thank you.
 
Progress report, prior to priming and painting:

Outwale blanks were milled to the correct rabbet to fit the planking and canvas thickness, then steamed to fit. At the ends of the canoe, the outwales were tapered both in height and depth to arrive at a more pleasing appearance than the typical Chestnut outwales which are often left at full thickness at the ends. This early Chestnut had delicately proportioned, full length inwales which I matched with the new Spruce inwales, but the presumably factory installed Ash outwales which were unevenly shaped. In fact, I believe the factory installed one side upside down with the wider dimension on top rather than on the side. The angled cut back ends at the stem bands were also less than symmetrical. I therefore decided to make new outwales, also full length like the originals (Chestnuts often have scarfed 2-piece outwales). The rabbet was tapered back as well in the last 12" so that at the ends one doesn't see the rabbet, but just a 1/2" x 5/8" rectangular profile which was then rounded top and bottom. The outwale shaping was all done by hand with planes, scrapers, rasps, and sandpaper after the outwales were screwed to the hull.

Steaming was time consuming but entertaining, done with the steam-in-the-bag method, in four sequences for each of the four quarters of the hull.
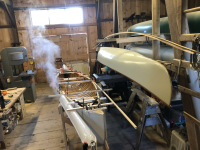
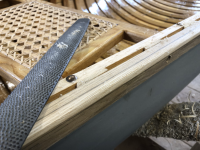
tempImage5J81rk.pngtempImageYmKjrC.pngtempImageObPjjl.pngtempImageWeFsDh.png

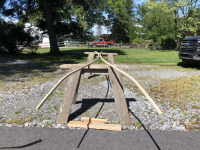
I chose to do the outwale shaping while the hull was still at the filler stage so that finish paint wouldn't be damaged by the heat of steaming. While the outwales are off the boat for priming and painting, I made a frame to hold and maintain the hard-won shape of the outwales. This is to avoid spring-back and hopefully allow re-installation on the finished hull with little to no force needed to resume it's finished shape.
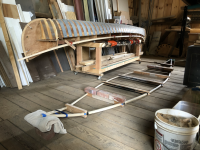
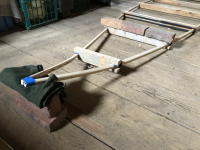
tempImagePmWK0W.pngtempImageJEpNQe.png

I can see the finish line ahead for this long project. Paint, stem bands, and varnish remain. Oh, this canoe will be painted Kirby's #13 Blind Green. It will be my first green canoe!
 
Getting close now. 4 coats of primer and one coat of color are on the hull. The outwales are fully shaped, sanded, and first coated with wiping varnish off the boat, brass stems bent and ready to install.

Tinted primer going on:
tempImageSZVayu.png
Primer sanded between coats; the light spots are high points, and successive coats fill the low spots:
tempImageupBqj2.png
Outwales first varnished:
tempImagePreiPN.png
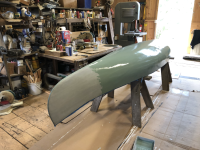
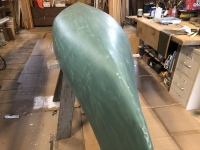
First color coat:
tempImageM3dtfo.pngtempImagekcdr93.png
I know there are lots of green canoes out there, but this is my first. I think it will be a stunner when complete. Pictures to follow when that happens!
 
Looking great! I love the color. Reminds me of British Racing Green. How many more coats? Do you seal the bottom side of the outwales against the canvas?

Bob
 
Thanks Bob. Yes, BRG was probably the coveted color for a MGB or Sprite when I was a kid!

I think one more coat of color before I install the outwales, then another carefully lapping paint onto the junction of outwales & hull to seal. The outwales will get one more full varnish coat all around before installing. Then, more varnish on interior, inwales & outwales. Last, stem bands… and maybe a celebratory single malt!

Oh, and by the way, I decided on Kirby’s #12 Bottle Green, not Blind Green.
 
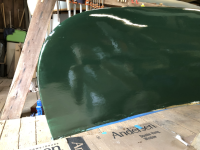
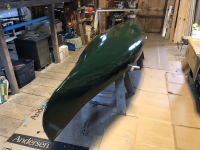
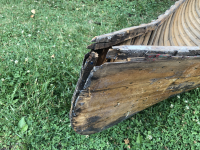
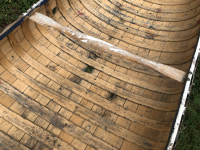
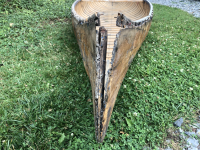
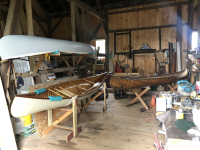
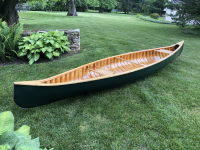
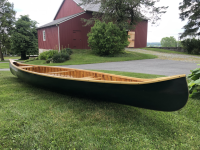
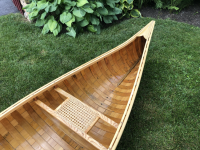
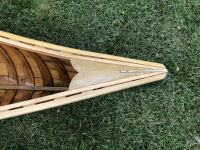
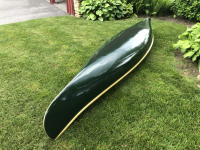
The long project is finished! I picked her up in Richmond VA, and here's how she looked when I arrived home:

tempImageYuHKVJ.pngtempImageaIAzI2.pngtempImageBQO5cI.pngtempImageoSCYut.png
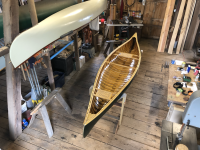
In the barn along with the completed Willow in slings, and the filled-canvas Chestnut Chum on the rack:
tempImagec7f9Id.png

And now:
tempImageXHCR4s.pngtempImageoz0vvK.pngtempImageW80NOi.pngtempImage5TK71I.pngtempImagezgMm85.pngtempImageAFPQis.png

I will look forward to having her in the water, as soon as the paint cures a bit more. I have not weighed the canoe yet but it seems a bit heavier than I anticipated... though not significantly so. The whole point of restoring this particular model was to see how Chestnut's "lightweight" canoe would behave in the water. It's my widest canoe to date by 2 inches and like my others, 15' long.
 
Wow … excellent job! I have enjoyed reading this thread. Enjoy your canoe! I would be interested in reading a write up of how she paddles.

Bob.
 
That’s a very nice looking finished product, Those new inwales are worth the effort, beautiful, and the new rib tips really stand out for a neat finished product.
Your caning job on the seats is also very impressive.
I remember the late Fitz paddling his Bobs at the WCHA Assembly, he leaned it over some and left us all behind.
Great job, Thanks for sharing this restoration, I enjoyed the thread.
(Green canoes are a thing of beauty)
 
(Green canoes are a thing of beauty)
Yep, I think you may be right. I resisted green for a long time since there are many green canoes out there, but this is really striking in appearance, especially with the bright new Ash outwales, and relatively light colored interior for contrast. I'm sure the outwales will darken over time in sunlight but will still provide contrast.
 
Back
Top