• Happy Apple Cider Day! 🍎🍵

NorthWind blowing in Fl...

Joined
Apr 4, 2017
Messages
413
Reaction score
114
Hi gang, been busy like heck, life, work, hurricane Irrma and trying to get this dang canoe built in time for watertribe ec challenge in a few weeks now and haven't been posting or lurking much, here or anywhere else. Didn't quite get to where I needed to be by EC registration deadline though, so won't be entering the challenge this year... Naturally, these projects tend to take longer than we figure, but in my case hurricane Irma damage set me back a few weeks and an unplanned 2 week business trip to Phoenix last month pretty much killed my momentum to finish this thing off. After some prodding I posted the album link the other day on watertribe, but wanted to get something on here since you guys are a lot more into the nuts and bolts of building these things and hopefully end up with a far more interactive and interesting discussion.

Enough grousing, lets get to it...

For the impatient here's the link to some photo's, not all but enough to get a sense of the process from the beginning to where I am now, which is laminating inside hull and deck after some dry fitting and initial fairing. Then I'll be on to rigging smart track foot controls and rudder, seat system yet TBD, then final fairing, uv coating and more sanding and buffing etc... https://www.flickr.com/photos/155383202@N07/albums/72157690391442752

For a little background on my experiences, I've been involved in all sorts of boat projects since the mid 70's, mostly restorations and fiberglass mold repairs, even worked for a prominent S. Fl small boat manufacturer for a few years in the mid 90's. I've done a lot of woodworking from wood longbows to kitchen cabinets, built aluminum airboats from scratch, surfboards, swamp buggies, project cars, worked with advanced paint systems starting with Dupont Imron, Ditzler (now ppg), and Awlgrip, etc, etc. Not an expert by any stretch, but have a lot of hands on with all sorts of materials, mostly red-neck endeavors, but never built a strip boat or canoe. Wanted to several times, but the stars never aligned. Recently getting hooked into watertribe and wanting to compete in something I built myself was the catalyst I needed. Having both kids out of the house and in college now helped free up some time too. :)

Anyway, this has been a lot of fun for me and I now regret not starting one of these years ago. Although I ended up with a bright deck, more on that later, I went into this build with the intention of using modern fabrics for the skins, carbon/kevlar hybrid, carbon/innegra, vectran, etc. This was primarily in the spirit of experimentation, but also for a little more toughness for expedition type durability. It costs 3-4x more than conventional e-glass but given the scale of the project its just a few hundred dollars more, far less than what I'm paying to keep two kids in college.... Another factor is my home stomping grounds along the coast are laden with hard, wave and weather sharpened coral cap rock, and/or that same cap rock encrusted in oysters. Pretty nasty stuff for thin skinned strip canoes and dangerous to even try to wade/walk in, a slight mishap could result in a bad cut or three. So throughout this whole process anytime I had to consider weight vs scratch and puncture resistance I erred on additional material.

More to the build. Before I started I created some 1'x1'x1/4" and 3/16ths cedar strip test panels and applied the various fabrics, 4 & 6oz e and s glass on its own. For the carbon/kevlar and carbon/innegra panels I added a barrier skin of 4oz s-glass. All this to get an idea of the working properties, wet out, fairing and mirror finish challenges, stiffness, puncture and impact characteristics and of course weight.

As an aside, I'm a RAKA fan, their epoxy has worked well for me on various projects and being in the same state I can generally order something before 2pm and still get it the next day at no extra cost. I used their HP 900 medium viscosity as well as the 350 non blushing and UV inhibited resins. All work as advertised and they are very helpful over the phone when needed. I've used West and MAS in the past too, but ended up trying RAKA a few years ago and between the price, performance and fast order turnaround have been with them ever since. For the carbon/innegra and kevlar I used Soller Composites, Jon is a tremendous resource even if he doesn't sell what I'm asking about. David at Sweet Composites equally as helpful. I ordered e and s-glass from them. So those were my 3 main vendors for epoxy and glass...

Using sq ft panels I could easily estimate overall canoe weight with simple multiplication of the 73sq ft hull area too. Along those lines I weighed the panels before and after each lamination, including a few epoxy only steps to test out gassing vs any weight penalty of laminating over dry wood vs pre-soaked wood. Beyond the weight measurements though I'm not set up for any kind of scientific testing, just some hammer strikes, some point loading, bending panels by hand and against my workbench table edges using a modest force and more body weight, etc. Again, mostly redneck engineering to get some idea of what I was dealing with, not a research paper on material science.

To that end, as a baseline I weighed the panels dry and regardless of apparent grain density, they all weighed between 6 and 6.5 oz raw after glue up. After scraping and fairing they dropped about an ounce to around 5.5oz +/-. So for a 73sq ft hull we're looking at about 25lbs in raw wood and glue alone, plus a little more for combing bolster, hardwood stems or any other similar additions. Getting ahead of myself a bit I can say the epoxy and fabric added between 2 and 2.5oz per layer per side for the 5.5-6oz fabrics. So as another rough approximation adding 5.5oz in glass and epoxy doubles the panel weight to 11oz or 50lbs for the canoe.

These numbers jive with Matt's plan estimation of 50-65lb hull weight depending on layup and builder experience, etc. Bottom line is this is a heavy solo canoe and not a lot of wiggle room to lighten it up and still end up with a durable expedition rig. Kruger Sea Winds are in the 65lb realm so there is some merit for comparison here, although the Kruger's not being cored are probably a bit tougher overall since they'll flex more in very hard impacts. They are also 2.5-5x the cost as well.

I wish I could give a definitive conclusion of which material combination I thought was best, but I can't, there's too many variables and objectives to simplify to that extent. In general I can say the e-glass only panels could be broken along the glue lines by hand, wasn't easy, but I could break them, ymmv. Same with 4oz s-glass, 6oz was tougher but still breakable by hand. The s-glass appeared to snap more cleanly than the e-glass too. The e/s-glass panels could easily be violated into the raw wood with modest force behind a dull box cutter/razor knife. I've repaired enough gelcoat on both powered skiffs and canoes to know oysters and a loaded canoe would not fare well with a single layer of glass, especially over time. More glass and/or thickened epoxy barrier is a must if the canoe will be exposed to a lot of hard, pointy scratchy stuff, which this one will...

The carbon/kevlar and carbon/innegra panels I could not break given the same attempts. Again not scientific but some things are obvious enough to know that having concrete numbers with 4+ decimal places of precision is merely background noise. As mentioned above, these panels also had a layer of 4oz s-glass applied on one side as a sacrificial faring and barrier layer to emulate the outside of the hull. Because of the fairing challenges I couldn't see where I would ever use these materials without the extra layer so I tested them that way. The same somewhat dull razor knife did not find bare wood with the hybrids. To be fair though, if the e/s-glass panels had the same extra layer they may have similarly resisted cutting too. In either case, given the incremental material choices we have at our disposal the transition from adequately strong to over built happens quickly.

Moving along, the 5oz 4-harness Kevlar on its own could be broken too, but was noticeably more difficult and being kevlar didn't come apart like the glass panels did. Most know this, but the take away with kevlar is you could take a catastrophic impact and the fabric will most likely hold the pieces together. You'll take on water but probably no gaping hole unless the impacted object was sharp enough to break the fabric too. I would guess this is not likely at typical canoe speeds though, either whitewater or surfing to safety along a hostile coast. I could however get into some wood through the kevlar with the razor knife. Not as easy as it was with the e/s-glass, but I could get in there a bit with some effort.

Being able to cut through the single layer of kevlar partially influenced my decision to go ahead and add the 5.7 oz carbon twill as opposed to covering with high build epoxy primer and a catalyzed urethane top coat. Another consideration was the multi-component paint system would cost a little more than twice what 6yds of 3K carbon twill with epoxy and would not have been as anywhere near as durable. That extra durability of course comes with a weight penalty, which using my 2.5oz per sq ft per side estimate along with hull only sq ft approximation of 50sq ft should add about 7-8lbs give or take.The other thing was the carbon was black and I decided that was the best contrast color against the bright deck and yellow kevlar interior. So between the cost and not having to deal with the highly toxic paint system I went with the carbon...

If I were doing this again with another NorthWind or some other canoe that I didn't care about showing the cedar and was shooting for best strength/weight I'd probably go with the the 5oz kevlar inside and out and add 4oz s-glass below the water line, then high build primer and catalyzed finish over that for UV barrier and bling. I suspect this would only save a few pounds though. As I mentioned above there isn't a lot of room to work with here unless you use a lighter form of wood or core material as well as more judicious material choice and application. Vacuum bagging/infusing too could trim a pound or so as well, but is a bit complicated to do over a 17' male plug. Might try bagging the next one...

Final comment is I probably won't be too responsive over the next few weeks until I'm about done with this dang thing, which is largely why I haven't posted about it from the outset, I knew I was in a nearly impossible time crunch to make the EC deadline and also knowing my anal retentive nature I'd be on here responding and explaining stuff instead of stripping and sanding. :)

Knowing this crowd too I'm sure there are some things I missed or didn't think of or could have done differently/better too. Regardless all comments welcome, critical or otherwise.

- eric
 
Wow !

Sounds like we've been on the same road ! Glad to here how others are building, and testing different lay ups !

Yeah, I could have used some experienced guiding on my composites ! But I'm plodding along !

Thanks for sharing your insight !

Looking to see more from you ! I checked out you Flicker page ! I'm Impressed !

Jim
 
Thanks Jim, you Alan and some of the others are the pace setters here when it comes to builds.
 
I have read this post and looked at the build photos a half dozen times now, trying to think of something other than Wow to say.

Wow

The potential for hull abuse in the Everglades, razor sharp oyster bar, limestone and worm rock, can tear a hull to pieces, so I appreciate the sensibility of the layup schedule.

Are you pushing to get the NorthWind ready in time for the 2018 Everglades Challenge?

http://www.watertribe.com/events/evergladeschallenge/

I have followed Canoe Tripping contributors in the EC in years past, via access to their SPOT or through the WaterTribe site. Kinda sorta knowing who that race name is adds to the vicarious armchair follow along thrill.

Please keep us posted.
 
Beautiful boat and really impressive work deerfly. The hull shape is really appealing (maybe even sexy)...looks like it will be fast and also turn well.
 
Nice boat and nice workmanship! I've had my mind on building one of these after I build my next boat. It looks really close to a Kruger. Do you know if the hull shape is pretty much the same? I have a friend with a Sea Wind and it seems like the perfect canoe for big lake and big river expeditions. I wouldn't want to portage one too far, but even that's not out of the question for most trips.

Mark
 
Using sq ft panels I could easily estimate overall canoe weight with simple multiplication of the 73sq ft hull area too. Along those lines I weighed the panels before and after each lamination, including a few epoxy only steps to test out gassing vs any weight penalty of laminating over dry wood vs pre-soaked wood. Beyond the weight measurements though I'm not set up for any kind of scientific testing, just some hammer strikes, some point loading, bending panels by hand and against my workbench table edges using a modest force and more body weight, etc. Again, mostly redneck engineering to get some idea of what I was dealing with, not a research paper on material science.

- eric

Sounds like a fairly through version of redneck engineering...

How did the pre-coat vs. bare wood versions turn out? Any significant weight or lamination differences?
 
thanks everyone, I'm flattered and humbled by the praise. This is probably the best paddling, canoe building and related site on the internet. Robin should be a millionaire already for starting this place. :)

I'm just trying to give back a little for all of what you guys have done here. Like I alluded to initially, once I'm closer to really being done I'll go back to the very beginning and editorialize each step with related photo's, how and why I did what I did and what I'd do differently next time, etc. Hopefully that will be a more interactive and instructive dialog that would be more useful than just looking at the pictures.

Mike, I decided not to enter the EC 3rd week of January. I needed to be beyond even where I'm at today around new years weekend to have had a chance to finish the canoe in time to be able to do some 30-40 mile training runs at a minimum before the EC launch date. Stars didn't align for me so I'll have a lot more time to train and get ready for next year. Now I'm just trying to finish the build asap. I'll be at the captains meeting and the launch in a couple weeks anyway to socialize and help my buddy that is competing get ready etc. Savage River guys are supposed to be camped with us too and I want to pick their brains some, lol...

Mark, the designer doesn't get into much detail other than to say it was inspired by the Sea Wind. Major hull dimensions are for the most part exactly the same though. Without a Sea Wind on hand to compare more closely its hard to say how much different they really are. I only know this was the only strip build I could find that was close. So I decided to give it a go.

Sailsman, from what I determined there isn't much difference in total weight between precoating or not. Still about 2 to 2.5 oz per sq ft depending on fabric weight and of course hand lamination skill.

Also, in my tests I let the epoxy cure, then sanded smooth again before applying fabric. As an example, in this one test I'm looking at the epoxy only added .668 of an oz to the raw wood weight of 6.516 or 7.148. After sanding with 120 grit to smooth the panel weight dropped to 6.992. I applied 1 layer of 5.5oz carbon/kevlar hybrid, squeegeed, cured and trimmed. Panel weight increased 2.469 oz to 9.461 from 6.992. This was just 1 side finished and glassed btw. Basically same results as my other panels with the various materials without precoating.

For me whether to precoat or not would depend more on the fabric density and the viscosity of the epoxy I was using. Low viscosity epoxy and standard 4-6oz e or s-glass there's no need for precoating. Carbon doesn't change color so precoating is a good idea if you can lay the fabric down and not have to move it around much in the wet epoxy. For medium viscosity epoxy and or denser weaves precoating will give much better wet out, but again there can be challenges moving the fabric around in the epoxy undercoat and outgasing aire trapped under the weave. Warming the epoxy can help, but the denser fabrics are still difficult to soak and also ventilate before the cure traps some air. Jim's Black Pearl adventure revealed this behavior when using the 6580 s-glass

As fer the build... I updated the album with a few new photo's. Main changes are laying up 5oz kevlar to inside hull and deck and bonding them together at 2am last night. :)

Next steps will be taping the inside seam and cleaning up the glue line on the outside. Faring the seam at the stems since I built out the hull lamination more than the deck so I need to close that up some. Then I'll be finishing the combing a lip and then on to rigging rudder controls and seat...
 

Attachments

  • photo8986.jpg
    photo8986.jpg
    260.2 KB · Views: 4
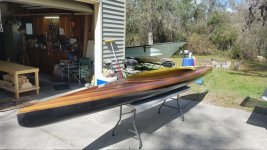
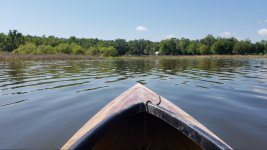
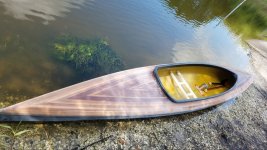
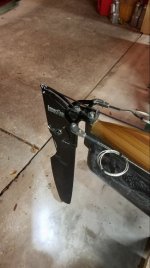
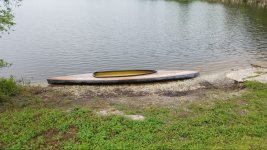
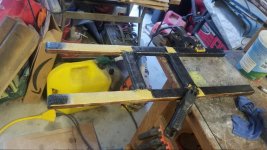
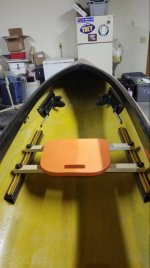
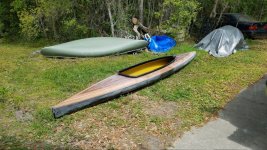
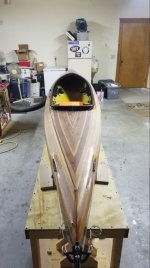
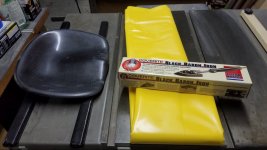
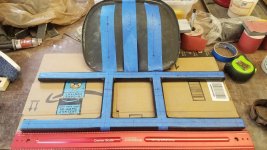
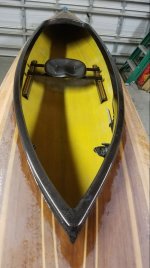
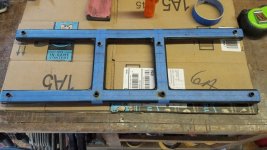
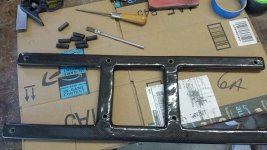
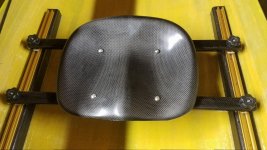
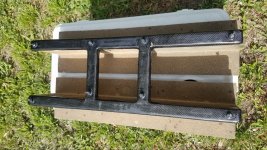
still bumbling along on this thing and figured I'd check in. It was in the water a couple weeks ago to find center of buoyancy and test various seat positions and heights. Paddles great, very well mannered when seated about 12"-15" aft of COB point, even without the rudder. Rudder control mounts, foot pedals (SmartTrack) and sliding seat supports are done. Rudder has been rigged, tested and uninstalled so I can finish finishing. :) Only fabrication left is the seat frame and that's almost done. Had a white pine prototype for testing. Final frame is built with 1/2" x 1.25" cedar board wrapped in kevlar and carbon, very stiff and light. Will have savage river carbon fiber tractor seat bolted to it. Special Bernoulli sauce applied below the waterline Sunday, Pretty much down to very thin fill coating, sand, repeat in prep for pin stripes and UV coating.

Attached a few pics here, updated album link below

https://www.flickr.com/gp/155383202@N07/2ru3Hu

registered for EC2019 today too...
 

Attachments

  • photo9414.jpg
    photo9414.jpg
    180.8 KB · Views: 11
  • photo9415.jpg
    photo9415.jpg
    235.6 KB · Views: 8
  • photo9416.jpg
    photo9416.jpg
    115.4 KB · Views: 8
  • photo9417.jpg
    photo9417.jpg
    320.1 KB · Views: 9
  • photo9419.jpg
    photo9419.jpg
    323.2 KB · Views: 9
  • photo9418.jpg
    photo9418.jpg
    225 KB · Views: 10
  • photo9420.jpg
    photo9420.jpg
    115.9 KB · Views: 8
  • photo9421.jpg
    photo9421.jpg
    385.1 KB · Views: 9
  • photo9422.jpg
    photo9422.jpg
    152.3 KB · Views: 10
  • photo9423.jpg
    photo9423.jpg
    122.9 KB · Views: 10
How did I miss this?? Great info, nice build. Can you give a lamination schedule again, for hull and deck? I think I got lost in the experiments...
I'm surprised you didn't include Dynel in your lamination tests, it's got fantastic abrasion resistance. I like the cleats for the sliding seat, I bet it was a pain to make and mount them. I've tried to make cleats like that, but the hulls profiles in my attempts prevented me from doing a nice job (or a nicer job?).
Anyway, beautiful work, and I'll bet you're going to build another fairly soon!!
 
SG, lamination schedule evolved a bit, but main objective was scratch and puncture protection followed by indestructibility. :)

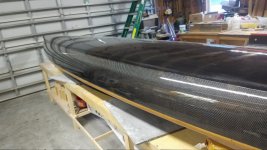
What I ended up with was 2 layers of 4oz s-glass on the deck. Initially thought 1 4oz layer would be enough, but was too flimsy for my liking to survive inside scraping and fairing so I added the extra layer of 4oz. On the inside of the deck is 1 layer of 5oz 4 harness kevlar with 2" kevlar tape down the herring bone seam. The hull has 1 layer of 5oz 4 harness kevlar inside and out, with 2" kevlar tape along the herring bone seam along the keel. Then one layer of 5.7oz carbon twill 2x2 weave over the kevlar. The football below the water line is medium viscosity epoxy blended with graphite and cabosil.

Like I said above the full wrap carbon was over kill, but is how I ended up getting to black. What I concluded was one layer of 5oz 4 harness kevlar inside and out and a scuff layer of 4 or 6oz s-glass below the water line was the lightest and strongest combination for an expedition canoe built with .205" thick cedar strips. I figured the .205 would give me enough margin for fairing and end up in the .187 or 3/16ths realm. Using somewhat lighter strips combined with the fact that I had more grain run out on many of my strips than I liked drove me to the stronger cloth too. If I built another one with perfect grain wood or not this is the schedule I'd follow and I'd use high build epoxy primer and Awlcraft or facsimile for the catalyzed topcoat and UV clear coat.

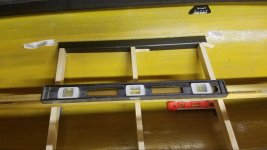
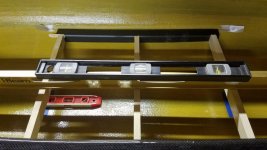
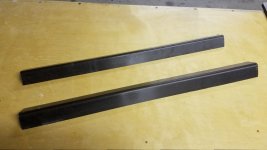
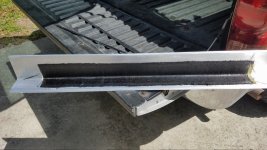
On the seat and rudder cleats, very observant of you. They were very easy to make using a 4' section of 3" x 4" structural aluminum angle as the form, sanded to 400 grit and topped with mold release wax. The lamination sandwich is 1 carbon, 2 kevlar, 1 carbon. Very light (2.3-6oz each), very strong and much stronger tacked to the hull with 1" e-glass tape. The hard part as you mentioned was shaping them to fit the curvature of the hull and at the height they needed to be. Also the hull had to be shimmed up perfectly level in order to place the cleats level side to side and front to back. Took the better part of a weekend and the rest of the week to fabricate and install the cleats.

As fer dynel, I have a few yards and tested it a bit. Definitely tough, but didn't like the resin saturation and difficulty to fair it. So I'm staying with the graphite and will add some 4" e-glass at the stems for now with the expectation I'll be redoing them at least once a season. We'll see how it goes after 6 months or so. If the e-glass isn't holding up well enough then I'll revisit the dynel.

back to sanding and fairing....
 

Attachments

  • photo9440.jpg
    photo9440.jpg
    192.1 KB · Views: 6
  • photo9441.jpg
    photo9441.jpg
    205.7 KB · Views: 6
  • photo9442.jpg
    photo9442.jpg
    151.8 KB · Views: 6
  • photo9443.jpg
    photo9443.jpg
    225.6 KB · Views: 6
  • photo9444.jpg
    photo9444.jpg
    205.2 KB · Views: 6
I like it. I like it a lot. The dimensions, sliding seat, cockpit length, lamination schedule and everything else. Well freaking done.

I may have missed this in future plans, but. . . .

Deck bungees? I like some bungee runs on both decks. On the front deck, where wave wash spray gets thrown up in my face, used to secure nothing taller than a paddle blade or map case. None the less having a place to stuff the blade of a spare paddle and hook on a map case wins out on the front deck.

If I really need off season storage room I put the lightweight sleeping pad under the stern bungees, in a custom fittedheat sealable dry bag.

Actually, I stuff the pad under the bungees and then belt and suspenders lash it down with a webbing strap and buckle, holding it smushed tight to the deck. I cannot see the pad on the stern deck back behind me, and would hate to arrive at camp with the dry bagged TheramaRest dislodged from under the stern bungee, bobbing about unknown miles ago.

Painter line attachments? A canoe, any canoe, even a decked canoe, without accessible painter lines, gives me the willies. Even just in setting camp security. I prefer to spring line my boats while in overnight repose, with bow and stern lines pulling in opposite directions, so the windborne hull cannot move, much less flail around at the end of a single tether.

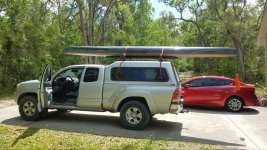
For tying the boat down on the roof rack, eh, I would not cartop a boat without an OH crap SHES BLOWING SIDEWAYS bowline indicator visible through the windshield.

Carry toggles or stem loops at the stems? When arriving at camp having a hand kindly toggle or stem loop and painter line to grab is beyond merely convenient, it verges on a safety thing.

With that decked and ruddered tripper beauty you might appreciate the easypeazy way to make custom sized and custom tapered dry bags from heat sealable fabric. I love having tapered dry bags for stuffing lightweight gear up in the stems, think also gear storage flotation. But dang tapered bags are pricey, and the few tapered choices are usually less than a perfect fit in a decked canoe.

We made a dozen variations of those heat sealable dry bags years ago, for sleeping pads and camp chairs and even backcountry guitars and banjos that live strapped to a back deck. Those instruments see 100+ days use a year back deck exposure are still going strong. The simple iron down heat seal fabric really works, and really lasts.

There are lots of online tutorials for making DIY dry bags with heat sealable fabric. Materials available here:

http://www.seattlefabrics.com/Heat-Sealable-Nylons_c_80.html

DIY heat sealabe dry bags makes for a fun and easy project, with lasting rewards.
 
thanks mike and good info as always.

I'm still pondering the deck stuff. My instincts after years of noodling around swamps and coastal mangrove estuaries is to minimize snagglee's as much as possible. With this canoe and especially for coastal jaunts I don't want anything on the decks. If I can't get all my gear below then I either have too much stuff or need to re-pack and re-organize. Even with 30" float bags at the stems or permanent bulkheads (pondering this right now) there's tons of room for gear in this design, which I think is rated for 500lbs.

That said there may be no other choice for the foredeck bungee array to quickly stuff a paddle or have an alternate 2-blade handy when spray skirted in and dealing with challenging conditions.

Even here though the wheels are turning. I've been thinking about making a clamp on thwart that can fit across the spray skirt in front of me that I could clip or lash a spare paddle or secure the one I'm using to free my hands to read a map or something. I can also use this to mount a gps, spot/inreach device and/or compass, tether a waterproof map case, etc

I could also use the thwart to horizontally lash a two blade with paddle floats on each end as temporary aka/amas for self recovery or as additional stability when stopped to rest somewhere where landfall isn't possible or convenient. I can envision doing this several times going through the everglades leg of the Everglades Challenge without needing to book as many chickee's or camp sites or even none at all saving me a trip to the ENP visitor center entirely. This is also why I have as much travel on my sliding seat and the cleats are a bit more than shoulder width apart. I want to be able to drop a hook, slide the seat back and lay down in the bilge on a torso length foam pad and sleep for a couple hours or stand and stretch my legs, make a hot beverage or meal in the jetboil, etc. For the watertribe events you're paddling 12-16hrs a day, sometimes longer, so being able to safely crash for a bit almost anywhere along the way is a big deal.

For painter lines there's a 5/16's hole through the hull at the bow stem. Before I attached the deck I cut the wood away from the glass on the hull about 1.75" back from the stem and about 11" down, made a temporary dam and filled it with medium viscosity epoxy and shredded graphite fibers. Insanely tough gloop. Then I drilled a 3/8's hole and epoxy puttied in a carbon tube with 3/8's od and 5/16's id for a clean finished hole all the way through to minimize abrasion to the line. I can push a barge or tugboat now if I need to as well. :)

Not much need or even ability for lining a canoe in most places where I paddle, but I'll probably have an eyelet or two somewhere on the back deck in front of the rudder control line exit points to attach a stern line or just one in the center without interfering with the rudder and control lines. Don't see that getting used much, about the only thing that comes to mind is getting in and out at a chickee and keeping the canoe parallel to the ladder.

On the carry toggle, I would just use the bowline loop attaching the bow line for that. Also, the apex of the combing riser makes for a great lifting and holding point.

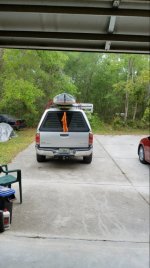
For long trips I would have the bow line on the canoe tied to the front of the truck, but the first trip was a 10 minute drive down a dirt road to a local lake.

Funny you should mention the heat seal fabric, I received some 70d from seattle on wednesday and the iron on friday :) I'm going to try and use it for a cockpit cover and maybe evolve it into a spray skirt. More of an experiment at the moment, but I could see making my own bags and what not too. I think I book marked that thread you posted here about that.
 

Attachments

  • photo9457.jpg
    photo9457.jpg
    195.9 KB · Views: 4
That said there may be no other choice for the foredeck bungee array to quickly stuff a paddle or have an alternate 2-blade handy when spray skirted in and dealing with challenging conditions.

Copy that. The best method I have come up with is a simple vee run of bungee on the front deck.


Even here though the wheels are turning. I've been thinking about making a clamp on thwart that can fit across the spray skirt in front of me that I could clip or lash a spare paddle or secure the one I'm using to free my hands to read a map or something. I can also use this to mount a gps, spot/inreach device and/or compass, tether a waterproof map case, etc

Something like this perhaps, without the sail mount .

PC290267 by Mike McCrea, on Flickr
 
Funny you should mention the heat seal fabric, I received some 70d from seattle on wednesday and the iron on friday :) I'm going to try and use it for a cockpit cover and maybe evolve it into a spray skirt. More of an experiment at the moment, but I could see making my own bags and what not too. I think I book marked that thread you posted here about that.

Funny you should mention the heat sealable fabric, I have a couple yards waiting in the wings for when the shop is boat empty again.

At one time I had photos on a DIY dry bag thread, now long gone. If the post you bookmarked was on CanoeTripping the apostrophes and quotation marks will have turned to gibberish. FWIW I will try to fix it and repost below.

DIY dry bag project, Day 1

I ordered heat sealable Oxford and Packcloth from Seattle fabrics. And then read every online article on DIY dry bags I could find.

The best of the online guides I found was this one by Chuck Holst

http://www.paddlewise.com/topics/boatequip/drybag.pdf

There are also a couple of articles in old issues of Sea Kayaker as well if you can find them, Spring 1990 and June 2002

Neither Joel nor I are especially good at following instructions, and the formulas on page 4 of those instructions gave me a headache. We spent a half hour reading various instructions before deciding to wing it best we could and learn from our mistakes.

Tools and materials

Large flat work surface. In this case a 4x8 sheet of reinforced plywood on sawhorses.

Heat sealable dry bag material from Seattle Fabrics. We tried both the 220 Denier Oxford cloth and the heavier 430 Denier Packcloth. Each was equally easy to work with.

Large framing square, it helps to trim the material edges square before starting, so the heat sealed edges meet straight and true

Scrap material from trimming the edge straight. We cut an inch off the end of the fabric, more than we needed, but we wanted the scrap piece to experiment with ironing temperature and time before we started on the first bag.

Cloth tape measure, it was easier to measure around the circumference of things like sleeping pads than to perform the math equations on page 4 of the instructions

A thick wooden yardstick. Any piece of straight lumber with a right angle edge would do. We clamped this in place 1 inch away from the edges of the fabric to be ironed as a guide fence, so that the heat sealed edges were straight and uniform. For the long chair and Thermarest we used a 6 foot long piece of wood as the clamped straight edge.

Clamps for above.

Scissors. We tried using a razor blade to cut the fabric, but scissors worked better.

An iron. The cheapest one I could find was all of 6 bucks. Having been in the doghouse for using the wifes iron to seal Melco tape on a neoprene project it was time to buy one just for shop use.

Fastex buckles, the ones with double ladder locks for no sewing.

A piece of thick cardboard to put between the heat sealable fabric and the plywood table. An ironing board is too soft and the wood table top too hard. We put the cardboard under the fabric before ironing and it was just right.

Paper clips. Once the edges were laid even we used the paper clips to hold them in place before installing the fence and ironing.

A magazine. It helps to press something down atop the heat sealed edges immediately behind the iron. It is a touch warm for the bare hand.

The first attempt. Joel and I had previously read the various instructions several times. We read them again in the shop. We looked at the formulas and equations and decided that bit was beyond our weak math skills.

We read the more puzzling parts aloud to each other and were still confused, The top flap of the shorter piece stiffens the mouth of the bag to help it stay open.

Huh? What? What shorter piece? We are only going to have one piece of fabric, cut to size and shape and folded over heat sealable shiny side to heat sealable shiny side. Ah, screw it, lets just cut the first piece and learn from our mistakes as we go.

We elected to make the first attempt using the longest and thickest Thermarest, figuring that if we effed up our nonformulaic measurements it could always be used for one of the shorter, thinner sleeping pads.

Measuring around the most bulbous valve-end of that pad gave us a 26 inch circumference. Add an inch for wiggle room, so it is not a struggle to get the pad into the dry bag. Add an inch on each side for ironing the heat sealable material edges together. 26, 1, 1, 1 equals 29 inches.

The big Thermarest is 31 inches long when rolled, and the Oxford cloth is 58 inches wide. We know we need an extra inch of fabric at the closed bottom end to iron together, and some unknown inches at the top to fasten the webbing and buckles and to roll down at least 3 times.

No sense in cutting the 58 inch width just yet, we can just cut it full length, seal the bottom and sides and trim the top as needed.

Ironing the material was easy. The thick yardstick fence helped immensely at keeping the 1 inch heat sealed overlap straight and even.

Sweet, we have a long waterproof envelope sealed along the bottom and sides. But we are still confused about how to install the webbing and fastex buckles.

The top flap shape and design is tricky to describe or visualize. Omitted below several paragraphs that failed to describe the top shape and cuts.

Having successfully figured out the simplest form of DIY dry bag for a Thermarest we decided to try making another tall cylinder, this one for a camp chair. Pretty work, another custom fit, and getting faster and easier with practice.

Feeling more confident in our dry baggery skills we tackled something trickier, a dry bag for Joels Banjo. This one would be a tapered bag, and required considerable contemplation. That contemplation eventually produced a paper template for the oddly angled piece, and the template allowed us to check the symmetry of the piece by folding it in half to assure that the heat sealable edges aligned properly.

That shape, once ascertained, required an epic amount of material for a tiny instrument, and I was pleased that we had first made the template and not misscut the fabric trying to eyeball the shape.

By golly I think we have got the hang of this. We have a couple more to make, one for Joels guitar and a couple more Thermarest bags.

If we can do this well on our first attempts anyone can make a custom dry bag.

DIY Dry Bags, Day 2

Day 2 of our DIY dry bag making saw our routine better practiced, and comprehending the intricacies of instruction with additional clarity.

Step one. Square up the ends of the material that Seattle Fabrics cut from a roll. Their cut is not even close to square. No complaint since they cut the yard length 40 inches long.

We learned that is easier to make a full sized template of the needed material, including the oddly shaped top cuts, and test fit that before tracing on the material and cutting. Duh.

This part of Chuck Holsts instructions, The top flap of the shorter piece stiffens the mouth of the bag to help it stay open, suddenly made sense, especially if you substitute shorter side for shorter piece.

For a ThermaRest you need a piece of material 3 inches wider than the diameter of the rolled pad, valve end.

Lengthwise you need 1 inch to iron together at the bottom, plus a minimum of 9 or 10 inches of extra material at the top to make the long and short side flap cut outs. This makes much more sense once you folded over and ironed the first piece.

Once the tops convoluted cuts, notches and webbing sleeve fold over were completed and aligned all that remained was to iron seal the bottom, the side and the top, always in done that order worked best.

One and done in that method was so easy we made two more identical Thermarest dry bags. Practice quickly made perfect. Two more done to near perfection.

Time to tackle something trickier, a bag for Joels Martin backpacker guitar.

Joel measured the size and shape and was confident in his dimensions. I was less so; we only have enough material left to cut this piece once, otherwise it becomes an odd sized tapered bag that does not quite fit a tiny guitar.

Another template to the precautionary rescue. We cut a paper template to Joels calculated dimensions and, oh crap another template miscalculation, it is a couple of inches too narrow at the mouth. Using that incorrect paper template we were able to discern the taper angle error. A new template cut and presto, a custom fitted, lightweight, waterproof guitar case.

Template gooood. Winging it baaaad.

We put a grommet through the material on the bottom for an additional tie down point. Ironing over triangular a dog-ear flap of material on the bottom corners provides plenty of sealed space for a grommet. Even the 200 Denier Oxford cloth was tough to punch a grommet hole through.

We finished up the day by making a few test strips of ironed over material, 200 Denier Oxford cloth and 430 denier Packcloth . Even at 30 seconds of iron pressing time that stuff was impossible to pull apart

Biggest lesson learned on day 2, always make a template. We now have templates for different ThermaRest pads and instruments.

The adventure continues as soon as we place another order with Seattle Fabrics. Should be a lot easier now that I have cut out templates for a half dozen shapes and sizes.

It was. I did another production run of custom bags all by my lonesome. Which is truly an invitation to screw up. And I did not.
 
Thanks Mike that was very helpful, I'm like you and your boy tho, will end up getting after it and learning from mistakes. I snipped off a few scrap pieces from my material (its the 200D not 70D as I thought) and did some folding and ironing. Very easy, very strong. I can see a lot of possibilities here. Like you say laying out the patterns is the worst of it. I'll probably have go at the cockpit cover this weekend, but need to keep going on the final finishing.

Sliding seat is done...
 

Attachments

  • photo9476.jpg
    photo9476.jpg
    245.2 KB · Views: 5
  • photo9477.jpg
    photo9477.jpg
    118.6 KB · Views: 5
  • photo9478.jpg
    photo9478.jpg
    227.5 KB · Views: 5
  • photo9479.jpg
    photo9479.jpg
    173.9 KB · Views: 5
  • photo9480.jpg
    photo9480.jpg
    271.5 KB · Views: 6
  • photo9481.jpg
    photo9481.jpg
    352.6 KB · Views: 6
I snipped off a few scrap pieces from my material (its the 200D not 70D as I thought) and did some folding and ironing. Very easy, very strong. I can see a lot of possibilities here.
I'll probably have go at the cockpit cover this weekend, but need to keep going on the final finishing.

Deerfly, that heat sealable stuff is dang tenacious once ironed together. I have been thinking about the cockpit cover possibilities using heat sealable fabric, and it would pose some not insurmountable challenges.

With the curves of an oval cockpit shape making an ironing fence would be tricky, so you might have to freehand the ironing. Your smaller surface Sailrite iron would be a lot handier for that than my full sized WalMart cheapo.

For some tricky dry bag pieces, when iron sealing at the top flap around the webbing strap we left only the folded together top pieces on the table, with the excess exposed heat sealable fabric side draped 90 degrees off the tables edge.

So, a simple cockpit cover, or a spray cover with skirt?

Bungee cord inside an open heat sealed hem sleeve around the coming attachment? That bungee rand in sleeve could be tricky, and because of the no stretch nature of the heat sealable fabric may have to be made a little droopy to slip over the coming edge and snugged into place below.

BTW, with any decked canoe cockpit cover in camp I just prop the hull at a sideways drainage angle, so it if rains overnight I do not have a gallon puddle, or worse an imploded cover and water in the boat soaking all my paddling gear.

I have a fresh supply of heat sealable fabric in the shop and am looking forward to seeing what you figure out.

FWIW, I found that Wilderness Systems storage covers for the Pamlico 145T and Pamlico 160T fit well over a variety of our decked canoes. You can probably find a rec kayak storage cover that works. Or possibly even a solo rec kayak spray cover with skirt that fits with the Northwind seat position.

http://www.sealsskirts.com/sizing/sizing.php

FWIW II, from an old post, clean up with broken photo links removed.

Cockpit dimensions on the retrofitted decked canoes:

The Klepper Kamerad TS is 98 inches long by 22 inches wide at the outer edge of the cockpit coming. By rough multiplication 2156, a number which unfortunately does not reflect the actual cockpit shape and rand dimensions. But close enough for a starting point.

Klepper Kamerad 98 x 22 equals 2156
Hyperform Optima 79 x 21 equals 1649
Phoenix Vagabond 96 x 23 equals 2208
Mad River Monarch 90 x 23 equals 2070

I measured the cockpit dimensions from a couple of early generation Pamlico tandems, those dimension have changed slightly over the years with subsequent redesigns

Pamlico 160T 90 x 24 equals 2160
Pamlico 145T 84 x 22 equals 1848


There is some excess bungee on the Pamlico storage covers than can loosened, or tightened, for a more custom cockpit fit.


For Monarch owners, and maybe Loon owners, a first generation Pamlico 160T storage cover fits a Monarch with a bit of sag. A second generation P-160 storage cover fits nice and snug.
https://www.amazon.com/Harmony-Pamlico-145T-Cockpit-Cover/dp/B003N8CKPE

And a P145 solo spray cover with tunnel skirt fits a Bell Rob Roy seat placement and DougDs soloized Hyperform Optima.


That those Harmony/Wilderness storage covers fit many decked canoes is a wallet saving boon.

Hard to beat 60 bucks for a readymade storage cover, or another 20 bucks for a full deck with spray skirt.

https://www.harmonygear.com/products/10087/Harmony-Pamlico-Solo-Sprayskirt-Clerance.html
 
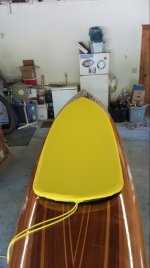
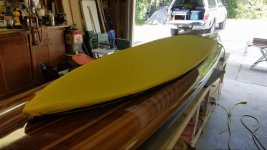
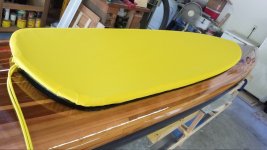
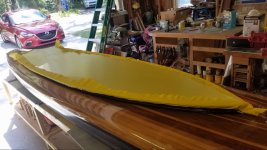
its a bit hideous, but ok for a first try at a rain/dew cover and should work as intended. As Mike pointed out reading instructions, blogs and vlogs only goes so far. At some point you have to pinch your nose and jump...

The way I approached this was to invert the fabric and lash it under the combing riser via bungy cord and stretch, fold and iron my way around. I found it best to do a few inches on one side then switch over to the opposing side to do a few inches and repeat. Still need to clean up the inner trim line a bit, it looks like I cut it with a piece of broken beer bottle :), before final ironing.

Now that I've done this I know how to do the next one better, It took several days to figure out how I was going to do it and then get the courage to pick up the scissors and plug in the iron. Probably have about 3 honest hours of labor cutting, fitting and ironing. I'm sold on the DIY aspect to this. I won't be putting Seal-Line out of business anytime soon, but starting to learn how to work with this fabric is beyond enlightening and very practical.

Right now I'm contemplating whether to leave this as is or cut a big hole in the middle and iron in a riser to cinch around my lower chest for a spray skirt....
 

Attachments

  • photo9511.jpg
    photo9511.jpg
    95.8 KB · Views: 5
  • photo9512.jpg
    photo9512.jpg
    176.6 KB · Views: 5
  • photo9513.jpg
    photo9513.jpg
    158.1 KB · Views: 5
  • photo9514.jpg
    photo9514.jpg
    198.4 KB · Views: 6
Back
Top