• Happy Mathematics Day! ❌📐♾️

Northwest Passage Solo

No Title

Sorry about the upside down picture. I pretty much have the seat fitted, 4" from the center of the canoe, 7" to the top of the seat.

Funny thing when I first tried to fit the seat I couldn't get it in I had to spead the gunwales about 2 1/2" because of thumblehome. No cracks so that is good!!
 

Attachments

  • photo6353.jpg
    photo6353.jpg
    250.5 KB · Views: 1
Funny thing when I first tried to fit the seat I couldn't get it in I had to spead the gunwales about 2 1/2" because of thumblehome. No cracks so that is good!!

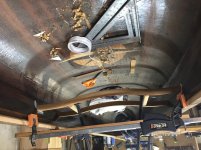
Yup ! characteristic of a tumblehomed hull.
I even have to remove my thwart in order to get enough flex, to get the seat in.

If your seat is deep enough, you can just slide back further, if you need to trim your bow up.
Generally a little bow lightness, aids in steering.

You will find out as soon as you get it in the water !

Your seat contour looks comfortable !

Jim
 
Hey Jim where do you get your hanger bolts? I was thinking of using all thread, I need about 6" long.
 
I ordered mine from Mcmaster Carr: https://www.mcmaster.com/#

Lots of styles and lengths to choose from. Since I was putting in an order I made sure to order enough to keep me covered for a long time. And of course I'm almost out already.

Alan
 
Hey Jim where do you get your hanger bolts? I was thinking of using all thread, I need about 6" long.
We have a Fastenal store, that my youngest son, gets a discount, so I order from them. I too ordered a bunch. Funny How they keep running out ? Ha !
Alan has a good source.
I ordered a set from Ed's canoe 10-24 stainless, with washers, and lock nuts, to fit a Bell canoe. They were $20.

I buy 1/4"-20 6" stainless.

Now here's what I used to do, and it worked fine. I would take 1/4" carriage ZINC plated bolts, and hit the tops with a a gas torch, and a bronze rod. They looked great. I would even polish them. More time, and cheap. I know everyone is on the Stainless Steel wagon. But these still look great on my earlier canoes.

Jim
 
Ok I had a new thought. What if I fixture the seat in place and use the boat and the seat as a mold for a fiberglass angle bracket. Basically fixture the seat, turn the boat on its side lay some Saran Wrap down and them 10 layers of 8oz cloth. Next day clean it up and do the other side.

Sounds pretty easy.
 
I love experimenting. Some times I win, sometimes I lose. But I always gain knowledge either way.

I can see where it will work ! If not, I think you can fix it !

I'd go for it !

Jim
 
Would these brackets be epoxied to the hull and go under the seat? What would be the advantage to doing that over using wood cleats?

Alan
 
Yup basically just cleats made from glass instead of wood. Not much advantage if any, maybe a little smaller than a wood cleat. Also, I like the idea of using the canoe as a mold so everything fits perfectly (and it's something different). I was originally going to hang the seat but I couldn't bring myself to drill holes through the gunwales.
 
I remember the post, I'm not worried about the strength of the wood. Just debating trying something different. And I get to use sandbags for my layup never did that!!

Do you think the fiberglass will crack over time? I was thinking to not use any gussets, if the wood from the seat goes all the way to the hull the cleats should only see shear loads. The mounting bolts just keep the seat from falling out on portages (more or less).
 
You wouldn't have to worry about wood cleats rotting, if you made it from glass and resin.
Jim
 
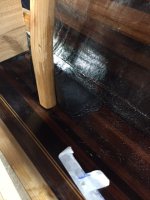
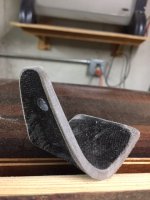
Well here's where my experiment is so far. Seems pretty good I just need to trim to shape and epoxy in place. I used Black Chalkline to make the epoxy black. There are about 12-14 layers of 8oz fiberglass, maybe 3/16+" thick. Seems very strong. Wet it out on Saran Wrap on the bench, after all the layers were stacked I used a roller to squeeze the excess epoxy out. Then I covered the top with more Saran and took the sandwich to the canoe, held in place with a hot water bag.


IMG_5439.JPG
Here I just pulled off the saran Wrap, dried the puddle from my Ziploc bags which I used for weights. Looks pretty good and being black it doesn't stand out.

IMG_5440.JPG
Here you can see the indent where the seat frame cross member fits.

IMG_5441.JPG
The Other side

IMG_5442.JPG

This is about what the final shape will be.

Any advice on what to cut it with? I know I can used my bandsaw but I think it's pretty tough on blades.
 
Pretty neat. Nice work. Hope it continues to go so smoothly.

I cut my stuff on the bandsaw. I have a dedicated "composite" blade, which is just a dull blade that's no good for cutting wood anymore. You're right that cutting composites will dull them in a hurry.

Alan
 
I'm amazed how much the Black Chalkline makes it look like carbon ! Might be a good trick to use on Dynel !(Alan)
A small 4" angle grinder should cut it with ease.
Will you cover the edges, so you don't get cut by the edge ?

I like how you didn't just glue it into place, you still have options !

Like !

Jim
 
Yeah the black chalk works pretty well and it's cheap (like me)! After I cut it to shape I plan on feathering the side that is glued to the hull, then I'll seal it with another coat of epoxy. That should soften any sharp edges. Overall I like the process, I have about an hour into this side so far. All in I'm guessing three hours total (spread out over a few days). Best part is the seat is located so I know the cleats will be placed perfectly.
 
IMG_5445.JPG

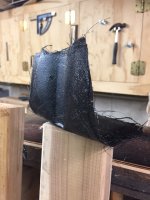
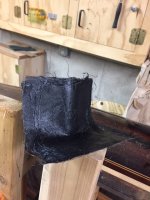
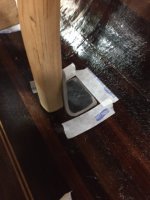
Here is the bracket cut to shape and sanded. I used my old bandsaw with the crappy blade. Cut like butter, tried the angle grinder NG smelly and slow.

IMG_5444.JPG

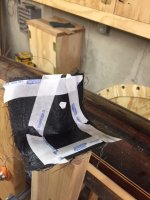
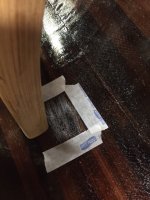
Made a tape mask to keep it clean so I could add some fillets.

IMG_5446.JPG

Roughed up the old epoxy glue surface

IMG_5447.JPG

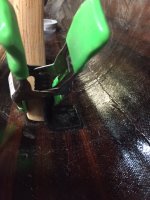
In place, I added more black to the epoxy to wet the sanded edges. Then added thickener to epoxy to the hull and make the fillets.

Sweet!!
 
That looks great. You had more imagination than I did. I didn't foresee it looking that nice.

Alan
 
I like it too ! Takes the stress off the gunnels, and looks durable.
Nice !

Jim
 
Back
Top