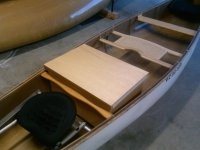
I portaged wannigans in Temagami as a kid, and the w/c canoes were even heavier. But those dang canvas tents were never really tied up properly and always wanted to come unfolded as you schlepped them along. THEY were the real gumption trap.I saw kids portaging wannigans in Temagami. Way too much weight for them and they were struggling
-
Happy Old Rock Day! 🌍🪨💎
You are using an out of date browser. It may not display this or other websites correctly.
You should upgrade or use an alternative browser.
You should upgrade or use an alternative browser.
Chuck Box anyone?
- Thread starter Dagger
- Start date
The kids were wearing rubber raincoats on a hot humid sunny day. (So they wouldn't be carrying them) one kid was wheezing and blue around the mouth. The counselor said they had given the kid his inhaler.
I was furious They were not drinking water. (Center Falls portage. One of a string of ports. ). The counselor said the kids did not need water. I was studying for medic exams that trip and was portaging textbooks (!)
This was pre PLB days. I managed not to kill the counselor and get the kid to test in the shade sans raincoat and get some water in. No nebulizer around. Humidity and moisture is key to breaking up mucous plugs
Ever since I've looked askance at heavy kitchen kit
Love the wannigan idea. I think I'll give building one a try.
Anyone have a suggestion for thickness of material? 1/2" plywood for outside walls and 1/4" for interior walls?
Anyone have a suggestion for thickness of material? 1/2" plywood for outside walls and 1/4" for interior walls?
- Joined
- Mar 20, 2013
- Messages
- 3,356
- Reaction score
- 972
No Title
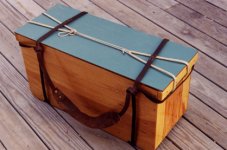
1/4 all around! No ned to build them of heavy stuff. I use baltic birch ply, 1/4" thick, I edge glue the box together around the light cedar frame bottom that is cover by 1/4" ply. when the glue is cured, I took some epoxy that I sickened and did some fillets at each meeting corners, so 8 totals, 4 horizontal one at the bottom to side junction, and 4 vertical one at the junction of the sides. When that is all nice and dry, I fitted a lid and handles.... Few coats of varnish and done.
1/4 all around! No ned to build them of heavy stuff. I use baltic birch ply, 1/4" thick, I edge glue the box together around the light cedar frame bottom that is cover by 1/4" ply. when the glue is cured, I took some epoxy that I sickened and did some fillets at each meeting corners, so 8 totals, 4 horizontal one at the bottom to side junction, and 4 vertical one at the junction of the sides. When that is all nice and dry, I fitted a lid and handles.... Few coats of varnish and done.
Attachments
-
 photo2990.jpg100.2 KB · Views: 6
 -
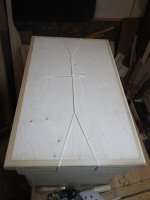 photo2989.jpg81.2 KB · Views: 6
 -
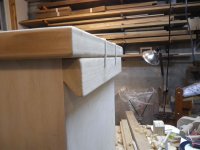 photo2991.jpg120.6 KB · Views: 6
 -
 photo2992.jpg111.7 KB · Views: 6
 -
 photo2993.jpg77.2 KB · Views: 6
 -
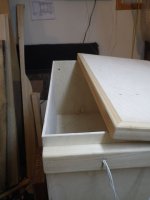 photo2994.jpg82.6 KB · Views: 6
 -
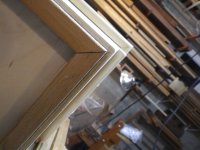 photo2995.jpg111.2 KB · Views: 6
 -
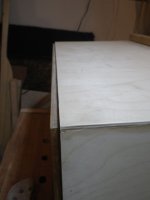 photo2996.jpg61.8 KB · Views: 5
 -
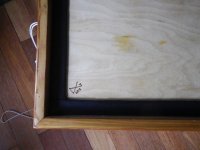 photo3139.jpg106.2 KB · Views: 6
 -
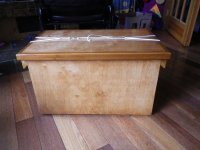 photo3140.jpg130.7 KB · Views: 6
 -
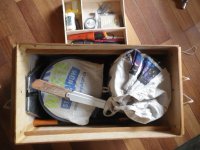 photo3141.jpg130.8 KB · Views: 6
 -
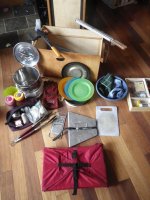 photo3142.jpg154.4 KB · Views: 6
 -
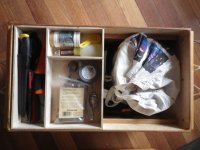 photo3143.jpg134.6 KB · Views: 6
 -
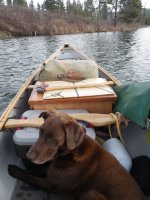 photo3156.jpg172 KB · Views: 6
Nice photos Canotrouge. That's a sharp looking box, and looks good in the canoe.
I've only seen them built on a canoe form. Pick where you want it to fit in the boat bend three or four ribs. Plank as you would a cedar canvas canoe. Take off the form and varnish. Add a top
Canotrouge, some impressive and inspiring woodworking for sure! Great idea using fiberglass to reinforce joints. I love the photo with the box (and the dog) in the canoe.
Yellowcanoe, bending ribs for a nice wannigan-to-canoe fit sounds great. I'll reserve that idea for subsequent wannigan(s) ;-).
Off to buying building supplies...
Yellowcanoe, bending ribs for a nice wannigan-to-canoe fit sounds great. I'll reserve that idea for subsequent wannigan(s) ;-).
Off to buying building supplies...
- Joined
- Mar 20, 2013
- Messages
- 3,356
- Reaction score
- 972
the advantage of a flat bottom box, compare to a form fitting box, is you can use it in any canoe you own or want to use. the other plus is that the bottom never sit in the little water that can be in the boat.
No Title
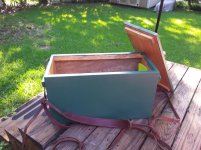
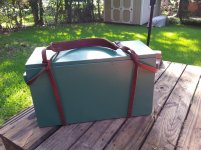
Can't pass up an opportunity to show off my rudimentary carpentry skills, equaled only by my poor photography and complete inability to tie a knot. The owl was dashed off by my wife in about 30 seconds -- she's the one in the family with talent.
Can't pass up an opportunity to show off my rudimentary carpentry skills, equaled only by my poor photography and complete inability to tie a knot. The owl was dashed off by my wife in about 30 seconds -- she's the one in the family with talent.
Attachments
I followed a similar pattern in materials and fastening method as Canotrouge this spring as I built a couple boxes. I put a strip of birch at each end (bottom side) and toughened it up with thickened epoxy & fiberglass tape to keep wear to a minimum and no worries about setting a wood box down in a puddle or two.
Mine will see more usage during hard water season with my winter sled. Still detailing the lids and strap/tie down hardware. The grunt factor is noticeable between the 1/4" ply and heftier wood thicknesses and metal fasteners, as with my old box. Additionally, a high temperature silicone bakers sheet was cut to fit the top so that I can put down hot pans and not burn the finish or paint.
Mine will see more usage during hard water season with my winter sled. Still detailing the lids and strap/tie down hardware. The grunt factor is noticeable between the 1/4" ply and heftier wood thicknesses and metal fasteners, as with my old box. Additionally, a high temperature silicone bakers sheet was cut to fit the top so that I can put down hot pans and not burn the finish or paint.
No Title
For the unskilled and for the price, unfinished, I don't think you can beat this (I have two of them myself):
http://poleandpaddle.com/merchandise/wannigans
For the unskilled and for the price, unfinished, I don't think you can beat this (I have two of them myself):
http://poleandpaddle.com/merchandise/wannigans
Attachments
Last edited:
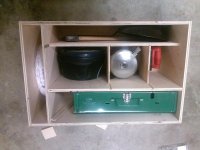
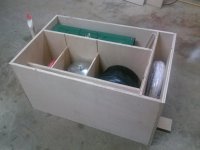
That is a good price indeed. Although, I felt so inspired by the guys here making their own, I ran out and got me some 0.41" sanded finished plywood for $30 a sheet of 4x8, and started building my first wannigan. It is a work in progress (see photos), but I intend to finish it tomorrow. I left enough space for a 10" silverware tray and maybe another homemade 10" x 8" x 3" tray for spices, can and bottle opener..etc.
Attachments
- Joined
- Mar 20, 2013
- Messages
- 3,356
- Reaction score
- 972
Looking great!!
Well done Dagger.
I really need to get the wannigan project to the top of the list. I don't want to build a particularly huge one but I'm hoping I can get my cooking accoutrements as well as my food in it and still be able to carry it.
I really need to get the wannigan project to the top of the list. I don't want to build a particularly huge one but I'm hoping I can get my cooking accoutrements as well as my food in it and still be able to carry it.
Well done Dagger.
I really need to get the wannigan project to the top of the list. I don't want to build a particularly huge one but I'm hoping I can get my cooking accoutrements as well as my food in it and still be able to carry it.
I'm trying that now with my Barrel, I might be on a diet this trip.
- Joined
- Mar 20, 2013
- Messages
- 3,356
- Reaction score
- 972
I guess ut depends how long you are planning to go for and how many people... I Travel with my wife and daughter most of the time and usually an other family.
So we need a bit more cooking stuff than if I were to go solo. like larger pots, more of everything... But we don't cary a stove, so that is a lot of weight and bulk that we save assuming we would use a 2 burners propane type stove. We do carry a fire box that is quite heavy but really compact!!
I'll make an other waging just for the food.
We're prepping for 6 people, 6 nights and I have most of the common gear. I'm seeing another bag going on this trip.
No Title
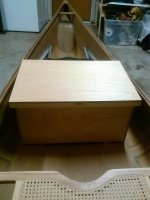
OK here it is...
That was so much fun I might just make another one. I already have some ideas what I can improve on. Thanks again guys for all your great suggestions!
In one of the photos you see the cluttered clear plastic box in the background I'll be replacing.
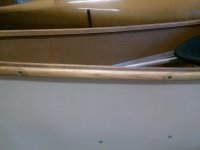
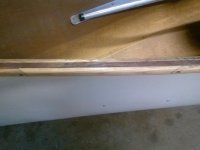
Also, a while back I asked for some advice on wooden gunwale repair on my Wenonah Spirit II, I fixed that too while wood working...
Attachments
- Joined
- Mar 20, 2013
- Messages
- 3,356
- Reaction score
- 972
Nice work all around, the box the gunnel... I suspect you have a bit more woodworking skills than you told us about ...
...
Similar threads
- Replies
- 17
- Views
- 3K

