-
Happy Birthday, Nostradamus (1503-1566)! 🔮🌃♐
You are using an out of date browser. It may not display this or other websites correctly.
You should upgrade or use an alternative browser.
You should upgrade or use an alternative browser.
Basalt/innegra prospector 17,5' built
- Thread starter David A
- Start date
After tripping many years, mainly in the Côte nord du Québec and in Labrador on Royalex canoes, I am going towards paddling exclusively on composite canoes. For extrended wilderness canoe trips, I always thought Royalex was the choice. It slides well on rocks and when equiped with a spray deck, many obtructions can be lined. Since it can be wrapped and fixed in the field, it first seemed the only choice 20 years ago. As I started to gain experience, I was going lighter and lighter on my trips. It became obvious that an Esquif Canyon weighting 90 lbs with a spray deck was not anymore a good choice. Not only its weight was not acceptable anymore for me, the dragging was not either.
Looking at what's on the market, basalt-innegra seemed a great choice. Since the fabric is 2,5 times cheeper weight to weight than kevlar, I realized I could make a tandem tripping boat for less than 900$ (CAN).
The basic idea for me was to optimise every hour of work I am putting on my canoes. I will likely have built 5 composite canoes by the end of the next year. After about 20 days of paddling on my first basalt-innegra canoe, I am now selling all my Royalex ones. I just can't paddle my plastic boats anymore. For now, I am focusing on two models; a prospector 17,5' designed from the original Chesnut propector 16' and a solo prospector 14' similiar to the Swift prospector 14 . Different laminates of these 2 models will meet most of my needs. Since the prospector is certainly the most versatile, the choice was obvious for me.
Building foam plugs the Moran's way doe not seem a good choice for me. Going the conservative way, I decided to build light cedar strip canoes and keep them as my male plugs for composite ones. This way, I can easily keep and store my molds. Until I build lighter kevlar versions, my cedar strip canoe are usefull. Now that I gain experience, the next male plug will likely be made of pine strips covered with a 6 os glass and polyester resin. It will be a plug only.
Nice, David - I'm looking forward to seeing some of your builds.
Sound reasoning David. Especially if the plan is to pull more hulls off the male mold.
I've found I use my Composites a lot more, because of their lighter weight ! I worry less about scratching them too !
What are you using for a release on your molds ? My last composite I did for a White water hull. I used plastic over the football, and Partal on the sides. Lifted off like a feather, and the cloth held tight to the tumblehome, that was coated with Partal.
Did you just stretch the forms of the 16' Prospector, to get it to 17.5' ? How does it handle?
Looking forward to more !
Jim
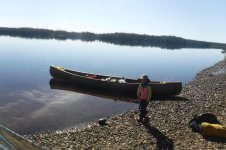
So for my first built, I was looking for a tripping canoe. I wanted a canoe large enough to carry gear and food for extended trips with my wife and my 2 daughters, yet small enough to be able to paddle it tandem. I wanted it fixable in the field in case of a wrap, wanted to be able to nest it with a 16' canoe for float planes, as light as possible, as cheap as possible. For most of my builts, I have tripping projects in mind before I start the built. For this one, I had a familiy summer trip in mind in the Bay du Nord wilderness reserve and later trips in the Nunavik. Last summer, we started our family trip with 21 days of food and all the gear. We had more than enough room. My daughters are 2 and 4 years old.
At the end, 2 laminates were of interest for me. The first one was a similar laminate Souris river uses. A high tensile strenght fabric (for keeping the pieces together in case of a wrap) sandwiched in two layers of kevlar, one layer of (probably) S glass on the outside. The second laminate was all basalt-innegra, a heavier laminate. Northstar, with their IXP laminate, and Nova Craft with their Tuff Stuff laminate influenced me going towards basalt-inegra. It is also a cheaper alternative.
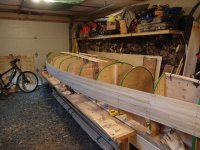
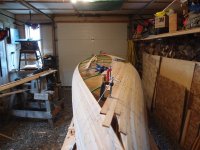
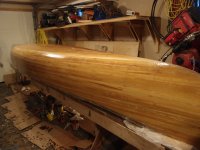
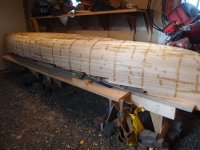
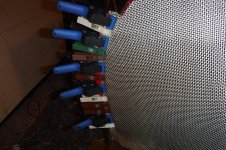
First, I wanted to make a light cedar strip hull. I used the propector plans in Canoecraft. I kept the same lines, same rocker and modified the stems forms to keep the original lines. For strips, I always make them myself. I prefer using local wood. Here, in Newfoundland, I have once found eastern yellow cedar, my prefered choice. It's lighter than western red cedar, and works better with staples. My second choice is to look into Home Depot's pile of cedar (WRC) decking to find the better boards, dry them and put them into 3/16 strips. Lenghts will vary, but it's very easy to join the strips together. Strips are 3/16+ in the football, 3/16- on the sides.
Jim I have used only shrink wrap to released my last 3 hulls. It worked well, released like a charm. It leaves some wrikles inside the composite hull close to gunwales, but it's hard to notice once the canoe is finished. To make sure the fabric held tight to the tumblehome, I tried, on me second hull, to add a extra gunwale to the plug so I could staple the fabric before applying the resin. At the end, I think it's a better way to laminate. More of that later with photos and details...
Attachments
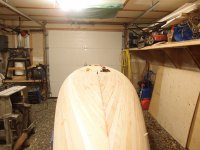
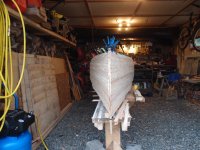
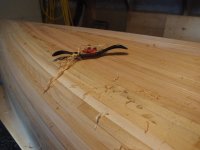
Next step is to remove staples, work on the hull with a spokeshave, fill the staple holes with thinkenen epoxy, sand everything before fibreglassing. I am using 4 oz E glass on the outside, 4 oz E glass on the inside with a 4 oz E glass on the football and some other reinforcements. I am not investing in S glass or carbon to save a pound or two, I am keeping ressources for a kevlar version. This canoe is not fully finished yet, I still need to add outside gunwale, seats and yoke. Expected finish weight is 51-52 lbs with the third seat. After the fiberglass is layed, I applied one thin fill coat everywhere and 2 thin coats under the 6 inch waterline. I wait 4 hours between coats to have a good chemical, almost no sanding at the end. For all my constructions, I am using 14-02 Citadel epoxy. It's a resin made in Québec by a local business, Les équipements chimiques Citadel. I have been using the 14-02 in the last 20 years and had consistant results. It's a much cheaper resin than the usual West System.
Attachments
Making a cedar strip is long, but I like it. I like to take it slow, a little bit at the time. Laying up is more stressful, but very quick. Preperation is eveything. After making several carbon paddle, I came to realise how weak the link between two layers of composite is if there is solely a physical bond. Since I want to make sure my money and time invested is giving good results, it seems to me the only way to lay the hull is all at once. In my opinion, it will not only make a hull less prone to delamination under great stress, but the weight ratio resin/fabric will be lower.
Finding the right lamination receipe is a challenge. Since I don't want to try different laminates until I find the right one, I decided to replicate what manufacturers are doing. I decided not to go with the Northstar IXP lamine (no reinforcements in the football, only layers of fabric). A flexible bottom is attractive, but heavy. It is also difficult to predict how many layers in the football are needed in order to avoid oilcanning. Alan Gage, with one of his beautiful builts, convinced me not to go that way. Thank you Alan! I decided to use Nova Craft as a reference. I only used the advertised weight of their expedition tuff stuff prospector 17'. Now, manufacturers tend to advertise a weight that is not always honest. I don't know about Nova Craft, but many paddlers I know experienced this; you buy a 50 lbs canoe and when you put it on the scales, it actually weights 54! I decided to use the advertise weight. I extrapolate what the weight of my 17,5 prospector should be, taking in considaration that I am certainly not using gel coat (I still wonder why Nova Craft does on a whitewater boat), my seats, yoke and gunwales are lighter and I will have an excess of resin in the inside of the canoe. At the end, my target was 65 lbs for a finished boat, including a third seat.
After making severa tests, I concluded a 8 oz basalt/innegra layer weight in average 56g/ft2 when 4 layers are laminated. I concluded that 4 full layers and 1 layer at the football would do.
For reinforcements, I like how Souris river are doing it. Simple ribs on the footfall only and flexible sides. No foam core.
Attachments
That's right Jim. I'm basically using the technique explained in Canoecraft in order to get a good chemical bond between layers. Afer 4 hours at 20 C, the resin I'm using becomes sticky but firm enough to stay in place. After mixing a small amount, I quickly take the resin from the pot to the hull using a small brush. With a sqeegee, I make sure the coat is thin and uniform. It takes about 120 g to cove the entire hull, not much. It's important to work the resin as little as possible as the resin tend to take a milky color, at least the type of resin I'm using, not sure about other brands.
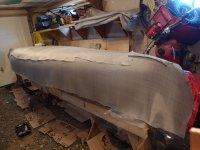
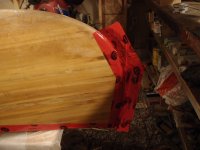
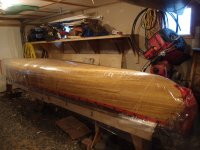
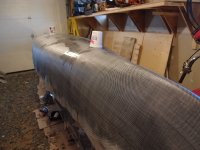
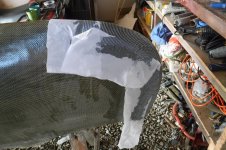
It's now time to apply window plastic. I start by carefully sealing the stems with tuck tape. The canoe will remain sticky once the tape is removed, but I don't want to run the chance resin reach the cedar canoe by using clear tape. I run double sided tape on the gunwales and stems. I apply the plastic and seal it starting from the center going towards the end. I managed to have wrikles only close to gunwales. Any wrikle on the plastic will create wrikle on the composite hull. While heating the plastic to shrink it, I recommand being very carefull not to overheat it. It's possible to pach a hole with clear tape, but I had poor results with patches. In my case, resin made its way in the patch. In my area, window plastic is available in two thinkness. I strongly recommand using the thicker one (sorry, I don't have the exact thickness).
Attachments
I'm having trouble viewing your pics.
If it is just one, it shows up. Multiples I get a blank screen . ??
Your hull doesn't look like it has much for tumblehome.
On mine, I tilted the strongback and just wet out one side. Once it cured enough not to move, I tipped the strongback the other way and wet out the other side . I worked fine to keep the cloth tight to the tumble home.
Wrinkles on mine, filled with resin, and were mostly resin. That easily scraped, after curing..
Enjoying this thread ! You are moving right along !
Jim
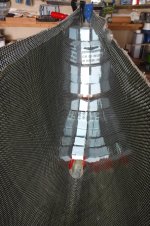
Now my strategy is wet out 5 layers of basalt (plus reinforcements) all at once and saturate it with resin. It has to done very quickly so I have enought time to remove any bubble in the layup using a little bubble roll, and removing all excess resin with a sqeegee before resin's viscosity become too high. I am not even using a slow curing resin system, it's a medium one.
After running different tests, I came to the conclusion that basalt/innegra fabric wets out easily, unlike kevlar does. Even better, the fabric lets bubbles go through easily, unlike kevlar, who seems to trap any bubbles.
I decided to start with a full layer of BI and a football layer dry on the plug. I would pour the resin derectly on it and oversaturate the first two layers while adding reinformement (creating internal skid plates). I would apply a full third layer and remove any wrikles by hand. Once the third layer would be in place, it would be easy to apply the fourth anf fifth layers dry before pouring resin on top of everything. I budgeted about an hour to complete the entire process!
I order to be fast, everything needs to be in place and ready. I am using 600 mL batches at the time. Part A is carefully weighed and placed in yogourt countainers (585 g for 500 mL). Part B is poured directly in pots on the scale (100 mL of part by weight 92 g). Refinforcements are precut, full layers are cut to lenght and rolled.
I am working with my wife to complete the layup. Having a third member would help. Mixing the resin is so crutial that I never wanted anyone else than me to do it!
I made a schedule so we could keep track of time and see while we were in it if we would make it in an hour.
Attachments
With E-glass I always had trouble laying large pieces on a wet surface. It sounds like the BI is not a problem.
Your Epoxy must have a longer pot life than what I'm used to.
All 5 layers in an hour ? Wow. Yeah I'd have a third set of hands, if they were skilled.
With three or four layers over the first, and football layer, it should hide the edge of the football layer.
So a 5 layer hull, plus the football layer ? What is the weight of the BI per yard ?
Keeping my fingers crossed !
Thanks !
The pot life of my epoxy is pretty short. With large amounts mixed at once (600 mL),it's even shorter. I try to get it out of the pot in less than 5 min. Once the resin sprayed out, I had no problem sqeegeeing the resin after an hour. I am aiming for a temperature of 18C. Of course, if I would buy more expensive resin like System three of West system, I would use a slow kit. Less scary!
Layer 1 is full, layer 2 football only, layers 3, 4 and 5 are full. I believe it's a 8,4 oz/y2. Everywhere I looked, it was available only in 8,4 oz. The football layer is almos not noticable. When you portage the canoe in the sun, you can see the football layer, but otherwise, no one could tell.
Not sure about you Jim, but for me, I am hesitant having a third assistant. Too much supervision for me and there are tasks that I want to do it myself. It may sound like a great idea to have a third member mixing the expoxy for example, since there would be no supervision, but the result would be catastrophic if one batch would not be mixed correctly. I made two other hulls since this one and now, I am only working with the garage door wide open and lots of ventilation. It means I have to wait for a perfect day at around 18C. Harder to gather a big crew on short notice!
You are right Jim, it hard to lay a full layer on a wet surface. Layer 3 is the hardest one to put. The best technique I found was to cut the fabric the right lenght and lay it in my living room (clean the floor before). With a sharpy, I marke the center of the piece on both sides, and I roll the fabric on a 4'' tube. The problem with a wet surface comes with the fact that the fabric sticks to the surface right away and it's very hard to move it afterwards. I put a tensioned string 4'' higher than the center of the plug that follows the center line of the canoe, stem to stem. When I apply layer 3, me and my partner unroll the fabric, one in each side, and we make sure the sharpy line follow the string, my center line. It takes few seconds and layer 3 is on the plug and when it's done, it's already centered. Starting from the centre and using our hands, we lay the fabric and remove wrikles. Layer 3 gets almost saturated with resin just by laying it. At this point, it's important not to add any resin. It would make it a pain to put layer 4. Best to to put layer 4 and layer 5 the normal manner. Since layer 3 is not oversatured with resin, it's faily easy to put layer 4, and very easy to lay layer 5. Afterwards, it will be easy to wet out layers 3, 4 and 5 all at once with rollers and a little bit of pressure. I don't even boter cutter the excess fabric from layers 3, 4 and 5. I apply resin right away in order to be done within an hour.
Not sure Jim why you can't see my pictures, I can see them all right.
Sounds like a good plan Daved.
I usually work alone, and another set of hands would definitely be a benefit !
I can see your pics in your post, just when I click on them to enlarge, they don't show up.
It may be my computer. Who knows?
Thanks for sharing !
Jim
I usually work alone, and another set of hands would definitely be a benefit !
I can see your pics in your post, just when I click on them to enlarge, they don't show up.
It may be my computer. Who knows?
Thanks for sharing !
Jim
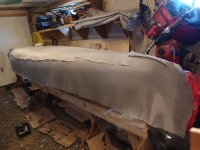
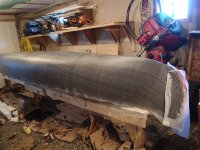
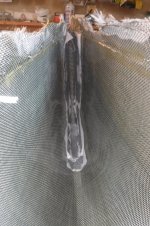
My notes are informing me we needed a total of 2:15 to complete the laminate. That includes 40 min of squeejee time. Garage temperature was 18C and I used a total of 17 pots of 600 mL (at the end we wasted about 3 full pots). It took 30 min to rool layers 1 and 2, 45 min to place and soak layers 3, 4 and 5. While my wife was removing bubbles with a bubble roller, I was working on the stems. Decided to use peel ply on the stems, but it was unnecessary. Once all excess resin was removed, I put a small amount of resin every 4 hours (about 100 mL) and spred a film of epoxy with the resin (it means getting up at least once un the middle of the night). I put two layers of resin on the entire canoe and 2 extra layer under waterline. I wanted to achieve a smooth finish where the canoe touches the water for abrasion resistance and hydrodynamic. I feel it's unnecessary to add more resin on the sides. The hardest part of the whole lamination process was certainly to resist the temptation to pull the hull out of the plug!
Attachments
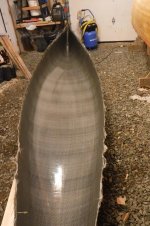
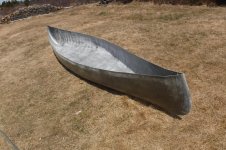
It was fairly easy to pull the canoe out of the mold. The inside finish is excelent. There are very few bubbles. Unlike kevlar, it's fairly easy to remeve bubbles trapped between layers. It looks like the air goes throught the fabric and get out. With kevlar, I had to push the bubble out with a large squeejee and still had several bubbles left at the end. I was worry that with several layers, I would experience bubble problems, but it wasn't the case at all. Around the gunwales, I had some waving issues. The fabric tends to wave and it was hard to get rid of it. I came out with a solution on my second BI built. More of it later.
Attachments
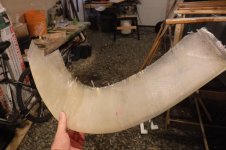
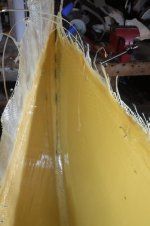
I ended up closing the stems by molding a fibreglass piece on the mold, glueing it to the hull before adding 2 layers of 45 degrees strips of BI on the outside (with peel ply). I then removed the fibreglass piece and added a third layer of BI from the inside. I don't recommand this method. To me it seemed an easy way to go at first, but it's time consuming and results are not as good as it could be.
Attachments
In my opinion, a much better solution for finishing stems is to mold the shape of it during the layup. You end up with the stem shape right away. It's faster and avoids all the frustrations I encountered with the first method. The shape will be more accurate too. Molding the stems is the very last thing I do during the layup. Using plastic where needed, the stems don't stick in the middle. I can remove the hull and have my stems in the same shape they were before.
Attachments
Yes the stems can be a pain to get them to look perfect.
On an earlier build, I used some Pink construction foam, and tried to shape as a stem mold. To me, not the best, as how I did it, anyway.
A trick I picked up from an old glass Bell canoe. Was a Kevlar strip, laid on the Inside. Once the Gel coat, and glass on the stem wore off, the Kevlar was there to stop any more wear. I thought this was a great idea, as opposed to adding Kevlar to the Outside.
Nice progress David !
Similar threads
- Replies
- 14
- Views
- 856

