• Happy 1st Sighting of Pacific Ocean by Lewis & Clark (1805)! 🧭

10 pound challenge

Looks great Traveler Congratulations !

One under the belt, Your next will be better !

Yeah weight and keeping it down is tough. But a heavier canoe has it's advantages, mostly in the durability department.

One of my biggest beefs with double blade paddles ? Is the amount of water they tend to bring into a canoe.

Jim
 
Thanks guys. Jim, I agree that double-blading can be a wet paddle, but it doesn't have to be. Paddle length helps a lot (mine is 240 cm, but 250 might be better), especially when combined with a low angle, close-gripped stroke. With a little attention to your stroke you can pretty well eliminate drips, until it becomes second-nature. Although I haven't quite figured out how to really pick up the pace and motor without moving to a high angle stroke and bringing some water on board. Thankfully I don't have the fitness level to keep that up for long so its usually a pretty short-lived annoyance.
 
Last edited:
Glad to see this done and on the water, looks great.

If you are getting wet with the double blade, you likely need to look at the "how" you are doing it. First, you need to get a low angle canoe paddle (the pic looks like a short kayak twin), second you need to stretch that thing out to 250-270 cm ... the ones I make are 260 cm and I don't get wet at all.

They need to be fitted some, just like a single blade ... then your stroke gets adjusted away from the deep, dig a kayak uses to a longer sweeping used for a canoe.


Brian
 
Thanks Brian - it feels good to have it done. Yup, when I finished this canoe I was in a bit of a hurry to get it on the water and went looking for the longest, low angle paddle I could find locally (I have a couple of Greenland paddles that I made, but they are definitely not recommended if you want a dry ride even in a kayak). The one I found is only 240 cm, with a bit of a fat blade, but it actually is not that bad. I can move along at a good pace quite nicely without any water if I pay attention to maintaining a low angle stroke. Trying for speed though is another matter.

So not a disaster. I can live with it for now but totally agree that it is far from optimal. I was in one of my frequent "ready, fire, aim" modes and did not research enough, including the good discussion on this forum which I read after my response above. Yesterday I browsed the Werner website and they have a couple of adjustable low angle paddles that can extend from 240 to 260 cm, and anywhere in between. They look pretty good but pricey (converted to Cdn$ some of them start getting pretty close to what I spent building the canoe). Probably will take a few months of winter day-dreaming to convince me to pull the trigger on one of those, but it could very well happen.

The only double-bladed paddle I can find specifically sold for a canoe is from Bending Branches I think, but again not available locally and they seem fairly heavy, approaching 2.5 to 3 pounds. Do you have any details on the ones you make?

Thanks
 
Well done. Flag Blue looks terrific. I would love any details on the use of hinges for the detachable yoke.
 
I will be posting a build on the paddles I made this year (twins, beavertail and ottertail), so maybe your next project could be a custom devil blade just
for you.
 
"Devil blade" - gotta love it.

DaveO, making a detachable yoke with hinge and pins was something I got from reading an older post by Muskrat on this forum, so not a new idea, and I think Jim Dodd mentioned somewhere that he had done it in his early builds. Although I don't see it referenced a lot elsewhere, it is a pretty simple and effective solution.

I wanted the yoke ends to rest on top of the gunnels to bear most of the weight once the canoe is on your shoulders, and something that would drop the connection point below the gunnel top so there wouldn't be anything sticking up to snag on things when the yoke is removed. Found theses hinges with a 90 degree bend on one plate at Lee Valley - they are reversible hinges so made such that the pin is loose and easily removable, although removing the pins is not difficult to do on pretty well any hinge you could buy.
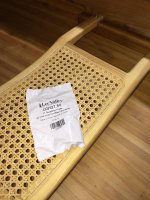
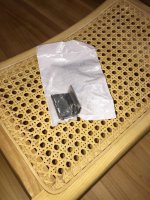
Click image for larger version  Name:	IMG_1433.JPG Views:	0 Size:	355.3 KB ID:	116696 Click image for larger version  Name:	IMG_1435.JPG Views:	0 Size:	377.4 KB ID:	116697

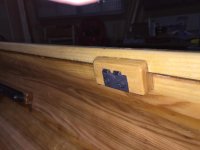
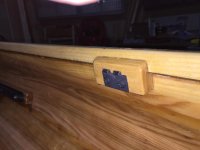
Mounted the flat plate to blocks made from the cut-off ends of the too-long basic ash yoke I bought, using t-nuts on the back side to let me thread some small bolts through the hinge plate, and shaping them so that they attached to the hull and wrapped around the gunnel from below for additional strength in the epoxy bond.
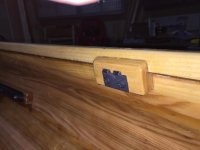
Click image for larger version  Name:	IMG_1431.JPG Views:	0 Size:	184.9 KB ID:	116705

The other, bent hinge plates I simple bolted on the yoke ends, using stainless through-bolts and nylocks. Separately bought a couple of r-pins (or r-clips, or hairpin cotter pins - there's a million names for them) to replace the pins that came with the hinges. Still have to cut off the bolt ends protruding above the nylocks so I don't gouge myself, and it is a good idea to use a short piece of line to tie the pins to the yoke plates so they don't get lost, which I also haven't done yet.
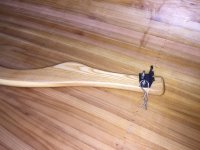
Click image for larger version  Name:	IMG_1432.JPG Views:	0 Size:	345.5 KB ID:	116699J

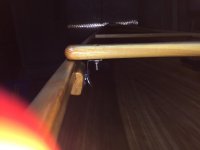
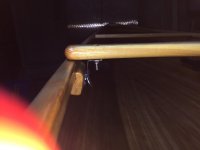
With a little care to dry fit and align as you construct things, the yoke simply drops in with the hinge plates lined up, letting you snap the r-clips through to hold it all together. Almost instant on and off, and very solid attachment (sorry for the poor quality of the second photo below).
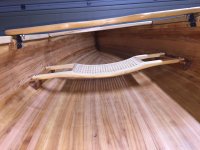
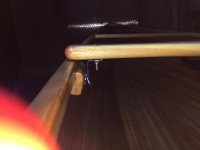
Click image for larger version  Name:	IMG_1430.JPG Views:	0 Size:	288.8 KB ID:	116700 Click image for larger version  Name:	IMG_1429.JPG Views:	0 Size:	121.0 KB ID:	116703

The hinges I bought only came in shiny stainless steel, so I painted them and the bolt heads flat black to tone things down. The paint likely won't last long at the hinge connection points but can always touch them up if it starts to bother me. I think that's about it - all the best.

Tony
 

Attachments

  • IMG_1431.JPG
    IMG_1431.JPG
    184.9 KB · Views: 10
  • IMG_1431.JPG
    IMG_1431.JPG
    184.9 KB · Views: 10
  • IMG_1429.JPG
    IMG_1429.JPG
    121 KB · Views: 10
  • IMG_1429.JPG
    IMG_1429.JPG
    121 KB · Views: 10
Last edited:
Sorry for the duplicate photos that I seem to have attached above. Not sure how that happened.
 
Back
Top