• Happy Birthday, Grandma Moses (1860-1961)! 🎨🖌️🖼️

Stambaugh Sailing Skiff Build in Virginia Mountains

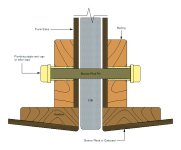
You can see the centerboard of my boat protruding below the hull in the designer's drawing.
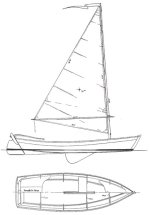
sailingskiff_15.jpg

The centerboard goes through a hole in the bottom of the hull. The centerboard case, or trunk, keeps the water on the outside, and also provides structure to take the lateral force of the board.

The centerboard pivots on a pin (1/2" bronze in this case) and can retract into the hull. It will be raised and lowered by a lanyard, and will have a lead weight to keep it underwater. There are several advantages to this arrangement:
  • The boat can operate in shallow water (4" for this boat) without running aground
  • Because the centerboard is free to move, it can retract into the hull if it hits an obstacle
  • The centerboard can be partly raised to fine tune the steering
  • Raising the centerboard makes it easy to get the boat on and off a trailer.
 
Nice work, U.
I'm guessing by the size of that trunk that you plan to use a swing keel.
I built my K19 per the plans with a drop in centerboard.
I have since found out that to be less than ideal.
It's awkward to deploy and retract.
It drafts nearly 4-1/2 ft when fully deployed, there is no easy way to adjust the depth of engagement.
It's a tight fit in the centerboard trunk, great for performance, not so great if I hit a submerged erratic! Which I did, damaging my centerboard and breaching the centerboard trunk.
I have yet to repair the damage, other projects have taken priority ...AND, I'm deciding whether or not to modify my hull to have a swing keel.
Hmmm...


ADCreHfQJFomxnwfQI3sF2DAVnP3eNTqs7MFNFY6OzxQtDH_d8QCHF19WN3tIPNN2s-8uNVpwB4yMA7pnZvzdsz_fSyeDrk5iNss1muhIvbLTEHBZDmS4cbqTighgb6fYZoKbuWeRKLcmBZyfNYGRqYfiOUg7w=w651-h868-s-no


0
 
Last edited:
Thanks for that tutorial on the centerboard. Would you typically have it fully deployed at maximum depth while under sail in deep water?
 
Yes, Glenn.

Stripperguy, I just found your building thread and discovered that you also have a Shopsmith. And your workmanship is so much better than mine!

The awful crunching sound you experienced is one reason I decided to build a boat with a pivoting centerboard.

If you are able to contact the designer, ask for advice about the conversion. Be aware that the case will occupy a lot more space inside the hull than the tiny daggerboard case. You will also need a substantial thwart to take lateral loads, and hefty bedlogs. You boat may not be quite as fast.

Here is a detail for the pivoting pin, similar to my construction:

Ofer CB pivot detail.jpg
I bored the necessary holes in the board and case oversized, and filled with epoxy to prevent water intrusion, then redrilled to the proper diameter.

More later. The weather is too nice to stay inside, and I'm off for an afternoon of paddling
 
I've only had one boat with a (pivoting) centerboard, my other dinghies used a (drop in) daggerboard. One had a daggerboard that was curved aft, it was inclined to pop up when grounded. That would change the balance if not original, but it was original to the Melonseed I had. That board also had several holes drilled so that a peg could be inserted to raise it partway.
 
John, Melonseeds are great boats, and an outstanding traditional design.

Boatbuilding stagnated for a long time, after I discovered that the centerboard case would not fit the boat. I built the case with a straight bottom, when it should have had a slight curve. My attempts to correct this mistake included a trip to the local farm co-op for an oversized pulley which I installed on the bandsaw. The little Shopsmith saw still did not have enough power to trim the case easily and accurately. Trimming the case led to the realization that the whole thing was gonna come out too short. Nothing to do but start over and make a whole new centerboard case.
 
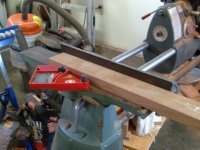
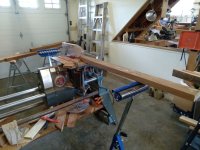
There was no dressed lumber of the correct dimensions for the new case on hand. I had to joint, rip, and plane rough cut lumber using the old Shopsmith.

resized jointing with new guard 20240310_152441.jpg


resized ripping w_shopsmiith 20240310_152044.jpg
 
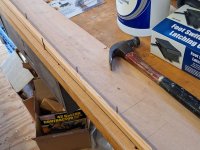
The members at the bottom of the centerboard case are called "bedlogs." I made a pattern to match the curve of the boat's bottom.

resized pattern layout 20240401_174857.jpg


Then I cut out the new bedlogs with the bandsaw, and planed them to match.

resized planing bedlogs 20240404_144853.jpg
 
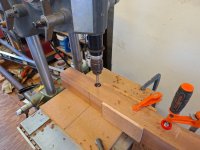
The bedlogs needed matching holes for the centerboard pivot pin, drilled with the Shopsmith.

resized drilling pin hole 20240413_154239.jpg


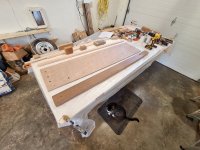
Parts for the new case cut out and trial fitted, ready for assembly. Mickey, the feline shop helper, is assisting.


resized dry fitting case 20240429_121654.jpg


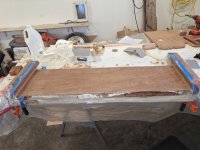
Applying fiberglass cloth and epoxy to the case interior.

resized glassing case interior 20240502_173323.jpg
 
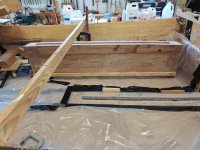
New case ready to install, here sitting upside down so epoxy can be applied to the bedlogs.

resized ready for goo 20240525_152627.jpg


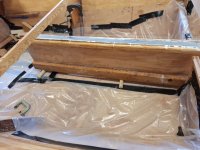
To minimize epoxy mess, I then stood the case upright on rollers. These were simply large dowels, wrapped with packing tape so epoxy would not stick to them.

resized case on rollers 20240525_152754.jpg

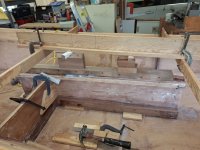
Centerboard case in place for installation. Small pieces of scrap were hot glued to the boat's bottom, serving as temporary chocks to align the case. Downward clamping force was applied using wedges and blocks, bearing on a beam clamped to temporary "cross-spalls" on the boat's frames. Keen observers will note that this photo shows a trial run, without epoxy and without plastic sheeting to contain the mess.

resized chocks and wedges 20240524_112910.jpg
 
A shot from starboard gives a clearer view of the clamping arrangement.

resized chocks and wedges starboard 20240524_112946.jpg


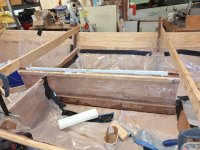
The centerboard case is finally installed! Not shown is the boatbuilder underneath the boat, driving expensive large bronze screws while trying (mostly successfully) to avoid expensive dripping epoxy. Plenty of cleanup and putting away tools still needs to be done.

resized case installed with mess 20240525_193143.jpg
 
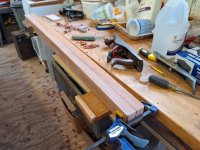
With the centerboard case in place, it's now time to make the center thwart. Like thwarts in a canoe, this component is an important structural element that keeps the sides from spreading apart. In this boat it also stabilizes the centerboard case and serves as a seat.

The plans specify a width for the thwart of 12-1/2". Lacking suitable lumber that wide, I used two pieces.

I made patterns following the method in Greg Rossel's excellent book, Building Small Boats. I will describe the process in detail, but right now it's past my bedtime. Stay tuned for more in the morning.
 
The Rossel method for making thwarts is pretty cool. It saves a lot of trial and error, and prevents wasted lumber.

The thwart is ash, made from a tree on our property that was killed by the Emerald Ash Borer.

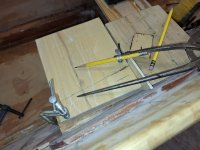
The "risers" that the thwart attaches to are glued and screwed to the sides of the boat. I made the patterns from short pieces of the ash, about 8" long. First, I clamped a pattern piece to a riser and used a compass to draw a line parallel to the planking.

resized pattern layout w_compass 20240814_115434.jpg
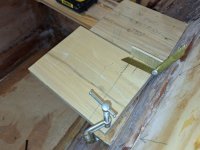
Then I used a small bevel gauge to measure the angle between the thwart and the planking.

resized pattern layout taking off bevel 20240814_115549.jpg

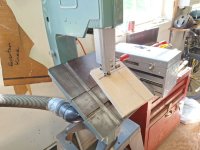
I used the bandsaw to cut the end of the pattern, matching both the bevel and the curve of the sides.

resized pattern cutting on bandsaw 20240814_120155.jpg
 
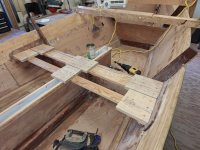
Now I have a pattern for each end of the thwart, which I clamped to the risers. The middle of the thwart connects to the centerboard case, so a short pattern piece was needed there. Then I bridged between the pattern pieces with scraps of 1 x 4 or 1 x 3.

resized thwart pattern_08_20240823_154011.jpg

You will just have to imagine the next step, as there are no photos. I flipped the patterns upside down onto the ash planks. Then I could accurately draw the curve of the ends onto the planks. I cut the curved and beveled ends with the bandsaw.

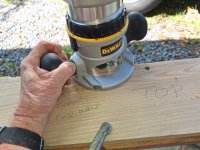
I used a router to round over the edges of the thwarts. Removing sharp corners will prevent injuries.

resized router 20240824_142904.jpg

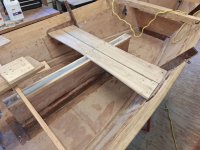
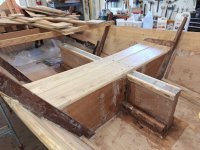
And the thwart halves are installed. Easy Peasy!

You may notice a slight curve in the aft edge of the aft thwart half. There was a gnarly knot right on the edge of the board. I used a batten to draw a curved line around the knot. I sawed along this line with the bandsaw, dressed the cut with the belt sander, and rounded the edge with the router. Now instead of a nasty knot we have an elegant but subtle detail that adds visual interest to the boat.

resized thwart installed_01_20240824_163854.jpg

resized thwart installed_02_20240824_163908.jpg
 

Similar threads

G
Replies
8
Views
1K
Guest
G
Back
Top