No Title


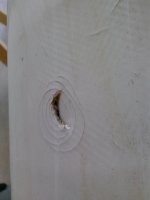
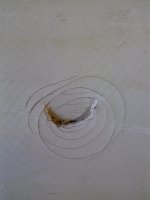
I would start by removing any and all damaged gel coat from around the hole including the cracked stuff. After you do this you will be better able to judge the extent of damage to the structural fabric (aramid in this case) where the hole is. Hopefully, the damage will be limited to the hole you already see, but not necessarily. Sometimes significant damage can underlie cracked gel coat that is still mostly intact.
Once you see the extent of damage to the structural fabric, plan to remove all gel coat from an area extending 2 inches beyond the damaged fabric in all directions. Depending on the nature of the damage, you can make this area round, oval, or rectangular depending on what works best. At the edges of the area you have denuded of gel coat, feather the edge of the remaining undamaged gel coat. You will wind up with a "dished out" area where you have removed the gel coat. This will work to your advantage since it will result in your external patch not "standing proud" off the adjacent hull once you have completed your repair. You should clearly see the fibers of the aramid fabric after removing the gel coat. You need to sand down to fibers to get a good bond with your patch. I would again attempt to feather or bevel the cut edges of the fabric around the edges of the hole. This is a bit tricky with aramid because it tends to fuzz up when sanded or abraded, but it can be done using coarse sandpaper and then trimming the raised fibers with a sharp knife.
I would debride any obviously broken fabric from around the hole. You can do this by grabbing the edge and trimming away the shards with a sharp utility knife. After doing this you should be able to judge the extent and depth of the damage to the rib foam. I would not be surprised if the foam is dirty from water exposure and you may need to clean it up or even sharply debride a little of it to make sure your epoxy bonds well.
If the defect in the foam is not very large or deep you can fill it in with epoxy thickened with silica gel powder as suggested by Peach Canoe. If the defect is larger I would fill it in using progressively larger patches of fiberglass and epoxy until you have filled the defect nearly flush with the undamaged hull fabric. I would then apply a patch of 6oz/sq yd fiberglass over the filled in area that slightly overlaps the edges of the structural fabric that you have beveled. After the epoxy of that patch cures, I would use thickened epoxy to fill and fair the area over and around the patched hull to get is as smooth as possible and even with the contour of the adjacent hull. West Systems makes special fairing compound additives that makes this easier because they sand very well, but silica powder (cab-o-sil) will work. It just takes a bit more effort to sand.
Once you have things nice and smooth, apply a larger 6 oz fiberglass patch to almost fill the area from which you have removed the gel coat. You want to try to blend the edge of this patch in with the surrounding undamaged gel coat. Fill the weave of that patch completely with one or more additional coats of epoxy. You will then likely need to do a little more filling and fairing to get the patched area flush with the undamaged hull. Let that epoxy cure very well, sand it with something like 220 grit paper and wash it well. Find a spray paint or automotive brush on touch up paint that closely matches the color of you gel coat.
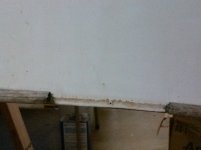
As for the wood gunwales, I have found that it is difficult to judge the soundness of the wood from a photograph. Sometimes, the wood can be very severely darkened or grayed and still be plenty sound enough to refinish. The only way you can make this judgement is to start sanding the discolored wood. When the wood is severely weathered, it is often easier to just take the gunwales off to refinish them. If you find the wood is sound, you could simply scarf in a repair segment. This does require some work, but a lot less than re-railing the whole boat. Finding 16+ foot long ash is getting pretty difficult, and even if replacement gunwales are available from the manufacturer, shipping costs are prohibitive unless you can have new gunwales shipped to a Wenonah dealer when that dealer receives a shipment of boats. You would have to wait for the gunwales to be shipped and then go pick them up at the dealer.
If that does not sound practical and you find the gunwales are still sound, you can buy an ash gunwale splicing segment from Harmony Gear:
http://www.harmonygear.com/products/...tion-4-ft.html
I have used these and they are good quality ash. They come radiused but will almost certainly be larger in cross-section than your gunwales, so they will require some shaping and sanding for a good fit. Harmony sells these "kerfed" (rabbeted) or non-kerfed. If you don't know what that means, take a close look at your gunwales. Either the inwale or the outwale (probably the outwale) will have a little "lip" that extends over the top of the hull and hides it. If the lip is on the outwale side you want the kerfed variety.
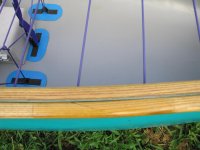
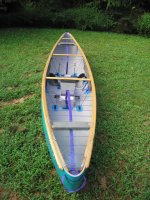
Here are some photos of a Royalex canoe I repaired and reoutfitted for a friend. Believe me when I say that when I got it, the wood gunwales looked every bit as bad as those in your photo. On the port side towards the stern, both the outwale and a long segment of inwale was rotted through and beyond salvage. I used 2 of the Harmony splicing segments to replace the stern portion of the outwale, and spliced in a new segment of inwale. In the first photo if you look closely, you might be able to see one scarf joint on the left outwale and 2 on the left inwale. Actually, these scarfs are pretty easy to see since I reinforced the joints by wrapping them with a layer of fiberglass. The fiberglass prevents the underlying wood from taking up oil so it shows up as a different color. Also, this being a Royalex boat, the inwales and outwales are "sandwiched" without any kerf overlying the hull like on composites. This is a whitewater boat for which strength trumps cosmetics. That is why I reinforced the scarfs with fiberglass. For a flat water boat I would not have done so.
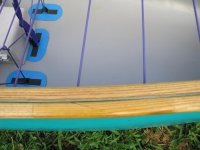
The second photo is a closeup of one of the scarf joints. Although many recommend long scarf joints of 7:1 or 8:1, I have found that shorter scarfs of 3:1 as shown are perfectly strong enough. I use epoxy to bond the wood segments together. The shorter scarfs are less likely to overlap gunwale screws, or on the inwale side, screw holes for mounting thwarts and seats.

