• Happy Birthday, Marlene Dietrich (1901-1992)! 🔷😇🦵🏻

Nokomis Wood Workers First Canoe Build

Joined
Feb 14, 2015
Messages
4,347
Reaction score
1,269
Location
Iowa
A plan has come together here in Humboldt !
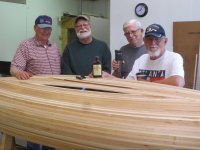
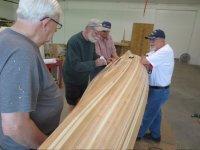
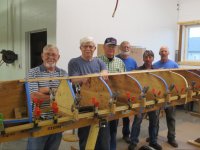
Last night,Seven members of our local wood workers club, joined me to start the Construction of a canoe.

The canoe is a modified Arkansas Traveler, originally designed by Henry Rushton.

For those that know me, hang on to your seat ! This build will be Stapleless, unless I can't stand it any more, in which case, we will Graduate to using staples !

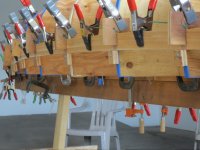
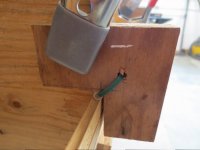
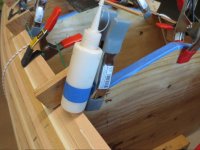
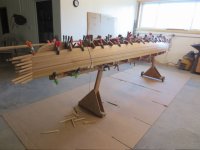
The inner tube clamps I made awhile back, are working AWESOME ! I also added some 1/4" OD plastic tubing to the L- brackets. They help protect the coves on the strips.
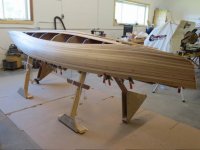
Here's some pics.
IMG_2210_zpsctxwuj48.jpg

IMG_2312_zps8sqclafc.jpg

IMG_2312_zps8sqclafc.jpg

IMG_2312_zps8sqclafc.jpg

The hope is to raffle this canoe,when finished, to help support our Club !

Jim
​​​​​​​
 
Very nice! Good luck with the staple-less build! Do you use bungees to hold the strips in place?
 
Hi Mike

Actually the inner tubed spring clamps, do a great job of holding the strips tight together, the L- brackets, are just necessary to keep the strips against the forms.

Other than the extra time. I only get about six strips a day. I could get more, it's just how it's been working out.

The only thing I had trouble with, was the shear strip, that I stapled to the forms, would come loose. I solved this problem with little blocks screwed to the forms.

The glue joints are tight !

Time will tell once I get closer to the bilge, how well this system works ! As others have advised, I may need bungees to keep everything tight to the forms.

Thanks !

Jim
 
Well we are making progress ! The main group shows up Wednesday evenings. But during the week, I and another builder, come in the mornings for about an hour. It's been a lot of fun !!!
This build started out STAPLELESS. We resorted to staples, only when we couldn't keep the strips true to the forms. Besides the extra time, keeping the strips true to the forms, is the biggest challenge of stapleless !!!

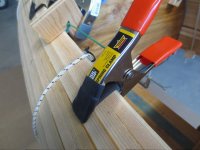
We strip with the coves up. To protect the fragile coves, I came up with adding 1/4" plastic tubing to the Spring clamps, the L-brackets, and the Bungee cords, that stretch over the strips.
As always, I like to let my pics say more than I do !

IMG_2326_zpsijwgjjwx.jpg - Click image for larger version  Name:	IMG_2326_zpsijwgjjwx.jpg Views:	1 Size:	143.2 KB ID:	81186

IMG_2326_zpsijwgjjwx.jpg - Click image for larger version  Name:	IMG_2326_zpsijwgjjwx.jpg Views:	1 Size:	143.2 KB ID:	81186

IMG_2326_zpsijwgjjwx.jpg - Click image for larger version  Name:	IMG_2326_zpsijwgjjwx.jpg Views:	1 Size:	143.2 KB ID:	81186

IMG_2326_zpsijwgjjwx.jpg - Click image for larger version  Name:	IMG_2326_zpsijwgjjwx.jpg Views:	1 Size:	143.2 KB ID:	81186

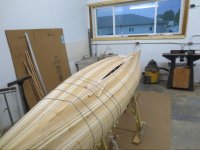
We are ready to fill in the football. We will strip past center, cut the centerline, and will be left with only 5 strips to fit, before closing up the hull. I will do a post at a later date on ALMOST Stapleless construction.

Thanks !

Jim

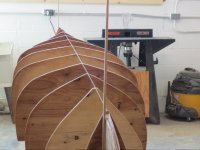
I wanted to add one more pic of the STEMLESS construction.
IMG_2324_zpsf2a197zw.jpg
 
Last edited:
Man! That is looking nice Jim! I often find myself staring at a pile of cut, beaded and coved strips stored in my garage wondering where I can store all of the stuff too clear out enough space for a strong back! For now, your pics are gonna have to do! Thanks,

Jason
 
Thanks !
We're Lucky to have so much space !
Hope to cut the center line tomorrow.

Jim
 
Jim,

Looks great as always!

The group build looks like great fun too. What a great way to make new friends and share your knowledge!

I think my next build will be staple less, and I need to make some of those clamps with the inner tubes. I think I might use hot melt as well like Nick Schade did on the micro bootlegger build he is currently working on. I think a combo of the two methods could be a great way to go staple less.
 
I have some thoughts to share on the clamps. Some of the strips did a Wave thing on us. Not sure if it was operator error, or the nature of the clamp. I do like the bungees, that can be made from old inner tubes !

Jim
 
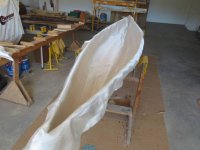
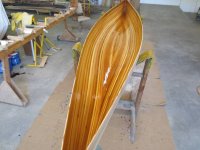
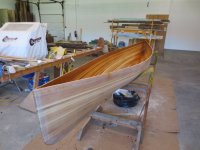
Glassing time !

We started Wednesday morning, about 7:30.
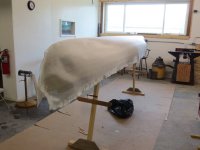
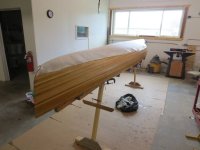
No seal coat. In one of the pics you should see a Ghosting in the wetted cloth. I believe this is because we didn't seal coat. I've seen this on others canoes. They all skipped the seal coat. So for you anti seal coat guys, this is what I see happening.

Everything worked out other than that.

Time schedule. Cloth was finished wetted out at 9:00 AM Wednesday, using Cigar foam rollers. Squeegeed, and went over it with a dry foam roller.

At 6:00 PM we applied extra bottom layer, and two Bias strips on each end.

10:00 PM applied fill coat, with foam roller.
1:00 AM Thursday another fill coat, again with foam roller
4:00 AM final fill coat, again with foam roller.
If you count the fill coat when we added the extra layer, that is 4 fill coats, about 3 hours apart. Hull was still tacky before adding fill coats..
Weave filled.
A few pics.
IMG_2359_zpsfhlromlt.jpg

IMG_2359_zpsfhlromlt.jpg

IMG_2359_zpsfhlromlt.jpg

IMG_2359_zpsfhlromlt.jpg


IMG_2359_zpsfhlromlt.jpg
 
WTH!!

Started at 7:30 AM, last coat started at 4:00 AM??
What, are all you guys still in your 20's??!!
Nice work, but that schedule would not work for me...
Boat looks great, BTW.
 
WTH!!

Started at 7:30 AM, last coat started at 4:00 AM??
What, are all you guys still in your 20's??!!
Nice work, but that schedule would not work for me...
Boat looks great, BTW.

Actually I did the late night fill coats, and yes it's not a picnic !
My biggest fear, was a local policeman pulling me over for something, and I'd have to explain what I was doing ! Ha !

Jim
 
Got to watch those retired people. They out at all hours of the night trying to supplement their income.... ha.

Great looking job.

Sent from my SM-G900V using Tapatalk
 
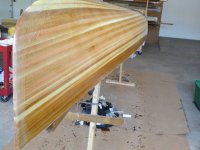
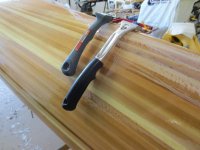
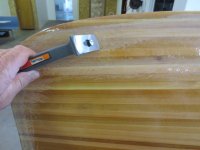
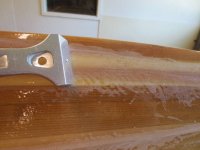
Scraped the partial layer, and the Bias strips, the day after glassing.
The soft epoxy, and sharp scrapers made it a breeze !
Hopefully Thursday is sand day !
A few pics !

IMG_2377_zpsfuohxa2t.jpg

IMG_2379_zps1aybuocr.jpg

IMG_2379_zps1aybuocr.jpg

IMG_2379_zps1aybuocr.jpg
Jim
 
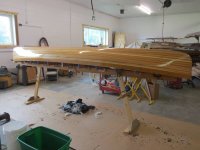
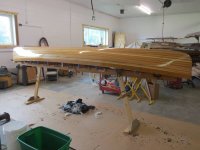
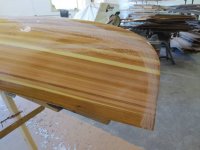
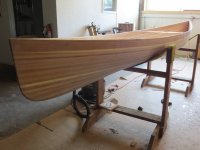
Off the forms ! Outside sanded, and just finished a scrape, and inside rough sand.
I'm really liking the Bosch, variable speed ROS. It hooked up nicely to the shop vac.
What amazed me about the combo! I had 1 1/2 Ice Cream pails, full of sawdust, after sanding the outside of the wood hull


IMG_2411_zpslgxedo92.jpg
 
Jim,

you are are cruising along on this one. Does that mean you have not been working on your own personal builds?

just out of curiosity, did you weigh the sawdust? I would be curious to know how much you took off with the outside sanding!
 
Yeah, I'm pressed for time, but today I'll get the outwhales on my Pearl. Black Pearl is really on the back burner.
The club's canoe has some what of a dead line.

I didn't weigh the dust, and I still can, but I would guess in the 1 # range ?

Jim
 
Jim,
Are the guys from the previous pics actually getting hands on experience? If so, do you create some hiccups for them, to give them a taste of what happens when thing turn sour?
When I show a newbie all about glassing, I intentionally leave a few wrinkles (literally) that they will nedd to work out...I've found that the learning goes deeper that way.
 
Back
Top