• Happy Mathematics Day! ❌📐♾️

The Other Tremblay

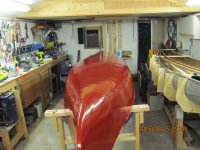
Nahhh, she pretty much stays out of my way unless I ask for help. And takes pictures as you can see.This boat has been a big challenge due to the poorly done work that came before us getting our hands on it. Lots of doing things over 2 or 3 times until we got it right, or at least better. A lot of lovin for a Tremblay.
 
I either have the radio on a country station mostly or if the mood changes to classic rock. Christy prefers one of the Pop stations. Radio wars. I go out to work and change the station first.

So we wrap the stems tonight, then maybe Mildewcide Wednesday night, rain for a bit after that, then filler Friday, or, M on Friday, Filler on Saturday. I will mix a batch of filler Friday though either way.

Get this one on the rack to cure for a month and get back onto the Morris as time allows. Still trying to track down the wood for the inwales.
 
Two banged up wrists and one ankle fracture on the mend.
Most people kick back and try to relax. Christy kicks it into gear and restores a canoe. Way to go there. It's looking good!
One of these days I'm gonna ask a bunch of questions about the history of filler. Mihun, you mentioned on a post somewhere that filler has changed through the decades. Maybe I'll pester you with these questions round the fire in August.

-radio wars - lol
 
Stems are funny things, take perfectly good canvas and slit it lengthwise so you can wrap it around the stem. Do try to cut it straight or the lap gets off from the start and it is downhill from there. We actually had to re-cut it twice before getting it right this time round. Patience helps much. I think Robin did a much better job on the OTCA than we did tonight, but it will do.

So, slit it, pull it tight and staple down the one side, keeping it taut in all aspects to avoid wrinkles on the sides too.

Then, trim the canvas tight to the side of the stem and repeat with the second layer, then trim that tight to that side without cutting the canvas underneath.

The filler will take care of the puckers et al, and any wrinkles we have can be pulled out after the stems are done and we flip the boat back up.


Tomorrow eve we do the other end, then pull staples and wrinkles and get ready for... rain Wednesday and Thursday, sunny window Friday for Mildewcide, then rain Saturday and Sunday. Must be a long weekend. Anyway, all day air out Friday then back into the shop Saturday for filler.
 
This will make my filler...

Reprinted from Wooden Canoe #16 (no lead)
o 43 ounces boiled linseed oil
o 21 ounces mineral spirits
o 34 ounces enamel paint
o 2 ounces Japan drier
o 6 1/4 pounds 300 grit silica (400 is all we could get)
o 2 ounces spar varnish

I'm going to cut down on the linseed oil and thinners since the last two batches were too thin, I think mostly due to the paint having a different viscosity than when the recipe was created in the early 1960's. It is getting very difficult to find oil based paint, even cans marked as oil based you need to read the label since it is usually an acrylic oil paint.

I'm just going to go by feel this time...


The bathroom scale is for weighing out the silica flour.
 
Pre-filler it weighs 47 pounds and this is without the seats in it. Filler on tonight, ready to finish in 4 weeks or so.
 
Ok, so, 3 coats of filler are on now. Putting the filler on is the easy part, rubbing it out is the not so much fun part. I equate rubbing in the filler being equal to sanding the interior of a stripper build, but both are necessary evils. The faster I can get the rubbing done the better, but if I do a crappy job of it, I will suffer later with the sanding. Why suffer? Well, consider the biggest ingredient in the filler is silica sand. So, when the filler cures you end up sanding, well, SAND. Try it some time, it isn't much fun. So, the smoother you get the filler when it is wet, the less sanding of sand you have to do. It is still a chore to sand once cured but much less filling needs to be done if you get it smooth now.

Here is the difference...


Rubbed...
 
I use my bare palm to smooth the filler, takes a week or so to get it completely out from under the fingernails, but a small price to pay for a smooth finish.
 
Robin, I did that on the first one a few years ago, but now I cannot be having the chemicals absorbed into my skin so try rubbing with a glove on. I have suffered too much over the years from thinners, lead based paint, et al destroying my central nervous system.
 
No Title

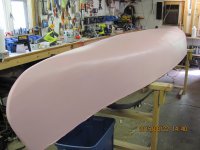
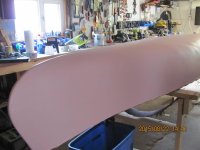
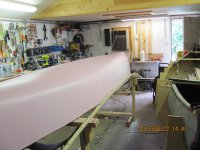
I am finally back to working on this old relic and hae the third coat of paint on. Since it is just primer coats I use what is awailable and that turns out to be red and white, mixed, to gibe me, you guessed it....pink. Maybe I should finish it in pink real tree. The object to this exercise was to introduce a bit of red so that when it is painted red it will coer better. I'm getting there.
My hand is all super buzzy too after sanding gunwales with the orbital sander. It seems like this one does not want to leawe here at all, it is just taking so long to get it all done. Luckily it is a rainy day so the boat is getting some attention. Perhaps some arnish on the outers while I wait for the paint to dry.

Christy
 

Attachments

  • photo2875.jpg
    photo2875.jpg
    210.5 KB · Views: 0
  • photo2876.jpg
    photo2876.jpg
    232.7 KB · Views: 0
  • photo2877.jpg
    photo2877.jpg
    265.1 KB · Views: 0
I don't dislike the colour. Whoever buys that boat would almost certainly have the only pink canoe in their town. I think a Pink realTree finish will fetch you a very handsome reward for the hard work.
 
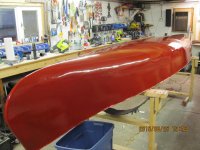
And now for something a little more traditional. Third coat of colour. This boat reminds me of my favourite snack....Ripple chips. It is certainly usable, it just is not pretty with all the ripples in the planking. Its pretty from the inside though and that is where most people sit when using it.
 
No Title
 

Attachments

  • photo2888.jpg
    photo2888.jpg
    238.3 KB · Views: 0
  • photo2889.jpg
    photo2889.jpg
    240 KB · Views: 0
As you already know (after the 3rd coat) "clear" colours, like that red, don't hide well (cover underlying colour). But when you've built up enough layers of pigment...the bright colour really pops!! That Tremblay is popping Iskweo. Really nice. A bright shiny stem band is gonna make anybody looking it over weak in the knees.
 
So, on Friday we ripped the new outwales for this boat and cut the rabbet, but it turned out the lip was too tall so needed an easy way to cut it down a bit rather than trimming all the planking and canvas to suit. Table saw was out again so I came up with a jig for the router that would allow me to do both at the same time and take the oopsy possibility out of the equation. All made from scraps and we don't have many since we burn them as fast as we usually make them.

I allowed some space between the rails so they wouldn't potentially jam up and kept them tight in the rig with tongue depressors with a tapered edge to jam into place. Do a section, un-clamp and slide the jig down the bench, repeat several times. Worked like a charm and now I have a totally useless jig until the next Tremblay floats by.

Other photo is the space created for the new build. We moved the Morris, on the strong-back et al, out to the boathouse for the time being.


Last edited:
Clever Idea ... I love this thread, I can't wait to see the canoe finished, she is going to be one hot little number!

Bob.
 
The outwales are milled but need to be soaked before bending them on the boat. The ends will need to be steamed still to make the sharp up-curve but that will come after soaking. Normally we have used a couple sections of eavestrough as a soaker for this purpose, but this time around we apparently used a section on the house and the duct taped 3 sections I tried leaked horribly so we needed a new solution. We use these a lot so a purposed set was required. Now, having 16-20 feet of eavestrough dedicated to the use is difficult at best to store and usually means two sections that need to be sealed each time we need them, sooooo, I took it upon myself to reserve a portion of shop wall. We acquired 2 lengths of inexpensive brown, 4" alum eavestrough, a half dozen 4" angle brackets and 17 feet of wall space. This should work for most of our needs and I have kept the remaining piece should I need to extend it for longer rails, like on the Morris and it means we needn't ever have to keep separate pieces or try to move a long section without damaging it.

The concrete pieces holding the rails down are only needed until they suck up enough water to stay down on their own.

 
Although I have many C Clamps I never seem to have enough. I finally have a bit of money saved and wanted to buy a dozen or so more but am having difficulty finding them. Even Home Depot no longer lists them online. Apparently the crappy plastic F clamps are taking over. I will find more eventually though. Spring clamps are fine for a lot of things but just not for this kind of work.

 
Back
Top