PeteStaehling I picked up a couple of boxes of SAMs At Canadian Tire a few years ago that worked well. I had them for a couple of years and they still lite well. Thunderbirds(?)
-
Happy "Killer Rabbit" Attacks President Carter in His Paddle Boat (1979)! 🚣🏼♂️🐇
You are using an out of date browser. It may not display this or other websites correctly.
You should upgrade or use an alternative browser.
You should upgrade or use an alternative browser.
Svea 123
- Thread starter PaddlingPitt
- Start date
Strange. Just yesterday I got out some of my old stoves, getting ready for a Leanto Rescue trip this weekend to build a new publicly accessible leanto shelter in the adirondacks. The weather promises to be cold and rainy, possible some light snow, so I need to move on from my summer use propane/butane small stoves to a liquid fuel one for reliability in the cold. Alcohol stoves do not work well in the cold either so I bypassed my trangias. Next out came my very old Otimus 8R, that has not seen flame in probably 20 years. I have an accessory pump for it, but it did not pump any air out. I took it apart and blew it out so the pump works now. The stove fired up as I remember it, but the tank does not stay in place on one side and I decided not to take it. Next in line was my MSR whisperlite. The pump kept coming apart and I couldn't get the stove easily working with a proper flame. Next was my Coleman Peak 1. I bought this at the time BSA was using these almost exclusively. With fresh fuel it seemed to work just fine, so it is going with me for the cold rainy weekend to get some work done.
I had a similar stove lineup in the 80s and 90s: Svea, MSR Whisperlite and Peak 1. I still have the Sigg cookset, fuel bottle and cap with a (plastic) spout. The Svea and Peak 1 are MIA, I don't know what happened to them. I still have the cookset and fuel bottle and cap, which still get some use with the MSR Pocket Rocket or a Peak 1 Dual Fuel 533 stove I now have. However, I am planning to bring the Whisperlite back into service (needs a new pump assembly). I wish I still had the Svea though...
Pressurized vs non-pressurized never occurred to me until recently. I was viewing a sailing video in which the gentleman (Roger) demonstrated his old non-pressurized alcohol stove made for boats and RVs. They no longer make that particular single burner model unfortunately. I checked. Besides being unpressurized for greater safety it also is unspillable as it contains a large interior wick which soaks up the fuel and feeds the flame. More boat safety there. Roger even picked the unit up and tipped it on it's side to show how fool-proof it was. This small stove top has slim bars which swing out to hold pots and kettles firmly in place on the flame, so you can brew up that mug of tea whilst under sail. Cool. Roger keeps this small alcohol stove in it's own compartment within the galley box which is lined with some kind of flame-proof material so the stove need never be removed to be used. Other compartments contain non-perishable food and with all cookpots and kettle nesting on top of the stove. A removable lid/tray is locked down with a rope handle. Quite the compact kitchen box! It all reminded me of a wannigan. Ingenious. From what I gather boats and RVs are moving away from alcohol stoves entirely and opting for (pressurized) propane. I guess that's the future. Some days I hanker for the past. There are some good ideas and designs still in use from not so long ago that can still find a place in our lives. That Svea 123 of yours Pitt might be one of them. Good luck with the refurbishment.
Pressurized vs non-pressurized never occurred to me until recently. I was viewing a sailing video in which the gentleman (Roger) demonstrated his old non-pressurized alcohol stove made for boats and RVs. They no longer make that particular single burner model unfortunately. I checked. Besides being unpressurized for greater safety it also is unspillable as it contains a large interior wick which soaks up the fuel and feeds the flame. More boat safety there. Roger even picked the unit up and tipped it on it's side to show how fool-proof it was. This small stove top has slim bars which swing out to hold pots and kettles firmly in place on the flame, so you can brew up that mug of tea whilst under sail. Cool. Roger keeps this small alcohol stove in it's own compartment within the galley box which is lined with some kind of flame-proof material so the stove need never be removed to be used. Other compartments contain non-perishable food and with all cookpots and kettle nesting on top of the stove. A removable lid/tray is locked down with a rope handle. Quite the compact kitchen box! It all reminded me of a wannigan. Ingenious. From what I gather boats and RVs are moving away from alcohol stoves entirely and opting for (pressurized) propane. I guess that's the future. Some days I hanker for the past. There are some good ideas and designs still in use from not so long ago that can still find a place in our lives. That Svea 123 of yours Pitt might be one of them. Good luck with the refurbishment.
Since you brought up alcohol stoves... I have used a few different types of alcohol stoves with satisfaction in the results. They were all unpressurized.
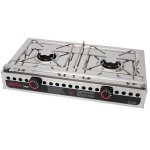
I think maybe the first (I lose track of the dates) was the Origo that I used on one of my sailboats. Mine was a two burner, but they also make a single burner. I don't think I'd carry one for canoe tripping as it was fairly large and heavy and not really designed for that, but it wouldn't be out of the question. It is a nice stainless affair.

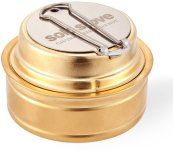
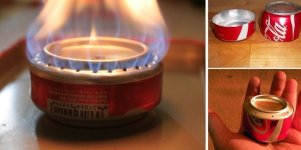
The second was the Trangia a simple brass unpressurized burner popular for backpacking and bike to uring. I only briefly used one since I preferred a home made version made from pop cans. I have used the pop can stoves a lot for backpacking and bike touring. They are the lightest option I have found when fuel can be restocked frequently. They are not great for simmering, but I have managed to cook on them for multi month week and multi month trips. Other options become lighter when you need to carry fuel for longer without resupply due to the higher energy per weight of other fuels. On a bike trip I find I can buy a 12oz. bottle of Yellow Heet in pretty much any town when I run low.


I'd say that the major reason that I chose alcohol (weight when carrying only a few days or less of fuel) would not apply for canoe tripping so I am less likely to use alcohol for a canoe trip. Most folks just won't care about counting grams to that extent on a canoe trip. On the other hand alcohol spills are less obnoxious if they get into your other gear and I am generally used to using the alcohol setup, so I wouldn't rule it out myself.
- Joined
- Aug 21, 2018
- Messages
- 1,775
- Reaction score
- 2,097

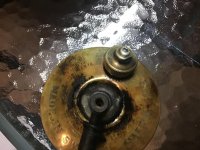
I just couldn’t stay away. This stove is gnawing at my guts. As you can see in the image, I removed the jet from the vaporizer. I then pre-warmed the stove and opened it up. Nothing came out of that hole. So obviously my problem is not one of a clogged jet.
if you were able to peer into that hole, you would see a smaller hole near the base of the vaporizer. I assumed that the regulator key opens and closes this hole. But that is not the case. It is always open, even when the key is fully closed. The hole never changes in size. Is the key supposed to alter the size of the hole? If yes, and if the hole is always open, then this could explain why no pressure builds up. If the regulator key has somehow become disengaged, I don’t see any way to re-engage it.
Any thoughts?
Take a look at the parts diagram from this site (http://www.oldjimbo.com/survival/svea.html) to see how it works. The adjustment key adjusts the height of the needle valve (part 2468). Pulling the orifice out, you should be able to see the needle going up and down. Taking the needle out, you won't see anything opening, just the toothed adjustment part (2189). The teeth on 2189 engage the needle valve, sort of like a rack and pinion (I know there's a name for it, just escapes me). I think adjusting the key to "off" just seats the needle valve and closes off the tank. The way the stove works is that the fuel wicks upward through the cotton wick in the tank, then the heat of the pre-heat process, and subsequent fuel burning, vaporizes the fuel as it wicks from the tank. Thus, very little pressurization is used, just from the eventual warming of the whole stove and the vaporization. If you're not getting any fuel anywhere, then you may need a new wick. Or, the path from the wick to the generator may be occluded. Personally, I'd probably just take the whole danged thing apart and start over, checking the status of the wick, making sure the pathway is clear, checking the seating of the needle assembly, etc. I took mine apart many years ago to replace the gasket on the valve. I don't remember is there's any type of sealant used (I'd guess Teflon tape would melt). If it leaks after reassembly, since it's brass it would be easy to solder the parts to ensure a good seal.
Take a look at the parts diagram from this site (http://www.oldjimbo.com/survival/svea.html) to see how it works. The adjustment key adjusts the height of the needle valve (part 2468). Pulling the orifice out, you should be able to see the needle going up and down. Taking the needle out, you won't see anything opening, just the toothed adjustment part (2189). The teeth on 2189 engage the needle valve, sort of like a rack and pinion (I know there's a name for it, just escapes me). I think adjusting the key to "off" just seats the needle valve and closes off the tank. The way the stove works is that the fuel wicks upward through the cotton wick in the tank, then the heat of the pre-heat process, and subsequent fuel burning, vaporizes the fuel as it wicks from the tank. Thus, very little pressurization is used, just from the eventual warming of the whole stove and the vaporization. If you're not getting any fuel anywhere, then you may need a new wick. Or, the path from the wick to the generator may be occluded. Personally, I'd probably just take the whole danged thing apart and start over, checking the status of the wick, making sure the pathway is clear, checking the seating of the needle assembly, etc. I took mine apart many years ago to replace the gasket on the valve. I don't remember is there's any type of sealant used (I'd guess Teflon tape would melt). If it leaks after reassembly, since it's brass it would be easy to solder the parts to ensure a good seal.
That sums up what I know about the stove pretty well. I'd add that I never heard of anyone using any teflon tape or other sealant. It apparently isn't generally required or advised. The closest thing to sealant is the carbon packing washer.
I'd avoid soldering threaded connections if possible, but maybe as a last resort. If there is a crack or something then that is the likely fix.
I am no expert on these stoves though, so take this all for what it is worth.
- Joined
- Aug 21, 2018
- Messages
- 1,775
- Reaction score
- 2,097
Mason,
I think you might have identified the problem. When I turn the adjustment key with the orifice (jet) removed, no needle goes up and down. I’m thinking that it goes through the hole that I can see near the bottom of the vaporizer. The needle must have come disengaged from the key. I’m going to finish my cup of tea, and then have another go at it.
I think you might have identified the problem. When I turn the adjustment key with the orifice (jet) removed, no needle goes up and down. I’m thinking that it goes through the hole that I can see near the bottom of the vaporizer. The needle must have come disengaged from the key. I’m going to finish my cup of tea, and then have another go at it.
- Joined
- Aug 21, 2018
- Messages
- 1,775
- Reaction score
- 2,097
Mason,
That needle that goes up and down, I think, is for the Svea 123R. It is an internal jet cleaner, that did not come with the original Svea 123. I took everything apart on my stove. I cleaned everything, and even pulled out the wick, which was in good shape, and wet, even up into the vaporizing unit. Put it all back together, but still no pressure. I think I’ve lost the battle.
That needle that goes up and down, I think, is for the Svea 123R. It is an internal jet cleaner, that did not come with the original Svea 123. I took everything apart on my stove. I cleaned everything, and even pulled out the wick, which was in good shape, and wet, even up into the vaporizing unit. Put it all back together, but still no pressure. I think I’ve lost the battle.
Yeah, the 123R has the cleaning needle. The earlier 123 doesn't. I'm not sure what to tell you--sounds like you're getting fuel to the vaporizing unit. I just fired mine up, and during the preheating process, I can hear the fuel inside the vaporizer heating up, pretty subtly. FWIW, I pour fuel down from the top burner, filling the preheat cup and dowsing the vaporizer. Thus, the whole thing is on fire (and sometimes the tank, too!) when I light. I let all the fuel burn up, and then light immediately (if I'm lucky, I can time it so that the preheat fire lights the burner). With time, the tank warms up which increases stove output, thus an insulating pad below the stove helps in cooler temps. Sounds frustrating on your part--it's a pretty simple system. I don't know the passageway from the wick through the vaporizer--any chance there's a clog in the vaporizer below the valve which prevents fuel from passing from the wick to the vaporizer? It seems to me, if you have fuel into the vaporizer, and you have heat around the vaporizer to vaporize the fuel, then you should have vaporized fuel coming out the jet orifice. So I'm assuming after all your preheating, you have no vaporized gas coming out of the orifice whatsoever? Even with the burner screwed off? The burner acts to spread the flame out, and probably also increases turbulence which might increase the burning rate of the fuel. With the burner off, with adequate preheating, with the fuel adjustment barely on, you should get a small flame at the orifice. Turn up the fuel and it will probably go out, at least until the whole stove is warm. Also, when you're preheating, do you have the fuel adjustment key totally off? You should, as that allows pressure to build up. Open it only at the very end of the preheating.
Good luck.
Good luck.
Ooops, I should have said that! Wasn't thinking clearly and it has been a LONG time since I have taken one apart. Mine doesn't have the needle so I should have known and said something. Mine is the regular 123 (not R).
Similar threads
- Replies
- 23
- Views
- 3K
