G
Guest
Guest
It has all come out quite nicely, but a small oversight at the beginning of laying out the final coat of FG has cost me another step.
Perhaps in the way deer hunters get buck fever, I suppose I had patch fever as I was 2 minutes into mixing up the epoxy. Earlier that day I had determined there was sufficient carbon powder on hand to add to the epoxy and give me UV protection and no need to paint.
However, the carbon powder came to my mind after the hull had been painted and the cloth wetted out.
I think we’ve probably all had buck fever while working on a boat or outfitting.
I recall a friend who regunwaled an asymmetrical tandem and reversed the bow and stern seat positions. Another friend (or maybe the same one, I’m not telling) who installed a contoured kayak seat facing in the wrong direction. A Canoe Tripping poster who got as far as posting photos of his newly truss hung seats before realizing the trusses were all upside down.
Not that I myself have ever done anything like that. Nooooo, not me. Although, the last patch photo looks a lot like some of my fiberglass patch installs.
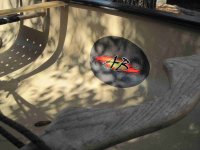
I often use a Sharpie to mark cut-out shapes on glass cloth and the last photo looks very much like some of my own work, especially when epoxying odd shaped cloth patches or pads. The visible Sharpie lines are easy to see when I am cutting, and not an issue if I am black pigmenting the epoxy, adding graphite powder or top coating with paint. But I gotten buck fever and left those Sharpie marks on unadorned cloth, to remain a forever fugly reminder under the resin.
If I am cutting a rectangle or square along the weave I can get away with lightly using a #2 pencil, which leaves little trace, but that pencil imprint is barely discernable when marking/cutting more complex shapes and tugs at the fabric along the bias areas.
A question for more experienced fiberglass cloth cutters. How do you mark your cloth for cuts and shapes?
Related question, how the hell do you mark carbon fiber?


