• Happy Birthday, Marlene Dietrich (1901-1992)! 🔷😇🦵🏻

FlashFire Outfitting and Repair

  • Thread starter Thread starter Guest
  • Start date Start date
I made violent progress as the sun went down on this heat-advisory and (poor) air quality alert day.

I remembered the trick of using tape as a measuring device. I cut six strips of blue tape 12" long, and applied three on each side adjacent, so that they give me a reference line 6" below the inwale. Sanded the 12" by 1/2" area where the mounting blocks will adhere, with about a 1/4" bleed out on either side of the 1/2" area, for the adhesive to flow to.

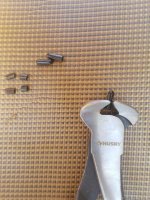
The Kydex worked like a charm! I will post some pictured tomorrow of how the sanding goes.

Then, I will set up the "h" frame, set the canoe in the grass, and double check that I measured everything correctly and thought everything through.

I am inclined to gflex the mounting blocks in initially, with a minimal amount of gflex to start, let it set, and then work from there on how to strengthen it appropriately.

Glenn, thanks for the thoughts and pics on the wenonah footbrace mounting solutions. I still think the stud idea was a good one, as one can switch out different (better, lighter, replacement) footbraces if and as needed. My poor execution was the problem.

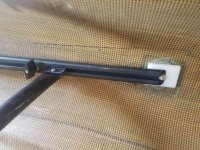
I like that the wenonah footbraces let your feet get close to the hull when resting on the bar. That is where my feet usually are. The one possible drawback of the northstar footbar is the mouning blocks stick out about 2" from the hull. This forces the foot away from the hull when resting on the bar. Time will tell whether that is an issue for me. Even if it is, this footbar ain't going anywhere.

Due respect to Wenonah but, with regard to its latest style of footbrace, either I got a defective one, or the engineering is defective. The one I have won't stay put. Very irritating.
 
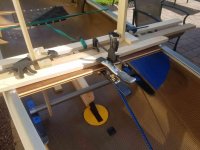
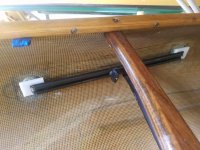
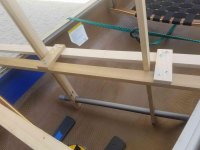
Then, I build an "H" frame. The scrap wood piece closest to the camera is just ​a spacer from the thwart. Spring clamps hold the two vertical parts

I have gone in the other direction when installing foot braces, and when installing glassed-in utility thwarts. I tape marked exactly where the foot brace rails or butt ends of the thwart were best located, and then “built” a small platform (boxes, 2x4’s, couple wedges if I needed some angle) off the bottom of the hull to elevate the foot brace bar or thwart at the proper height.

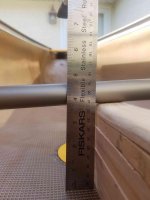
Northstar suggests as a general rule to locate the mounting blocks 8" down from the inwale. I quickly found that 6" was about right here for 4" from the hull.

Kinda depends on the height of the sheerline, and depends more on the size of your feet. On some of our loaner canoes I installed the foot bar rails at a slight angle, so the foot brace would be lower when adjusted closer to the seat and higher if further away, on the theory that shorter folks often have smaller feet. Of course I left it at the just-right-height for my size 12’s with the foot bar where I wanted it positioned.


According to Northstar the "SuperBond" does not require extensive surface preparation.

I wonder if “SuperBond” is the same/another name for Plexus, which I believe is what Bell once used for their foot brace installations.


I appreciate Northstar's efforts to make this simple and not intimidating, but I wonder if I might be better served by using gflex and even a strip of fiberglass?

On the utility thwarts that are glassed between the cockpit coamings on our composite decked canoes I cut and shaped the thwart to fit precisely, including any ) curve at the butt ends. To hold it firmly in place before I lapped glass tape over the top and bottom along the coaming edge I stapled a butt end shaped piece of kevlar felt (hey, a use for kevlar felt), saturated the felt with epoxy, built my usual platform and smushed the thwart into place. Once the epoxy cured the thwart was nice and firm and I could lay the glass tape on top, wait, flip the hull over and lay glass tape on the bottom.

Those glassed-in-place utility thwarts are solid as a rock, but that was a lot more work, and a lot more time than simply using SuperBond or Plexus.

The wenonah footbrace slips. I have read that one needs to put in a rubber washer to help it hold. It is relatively heavy.
Due respect to Wenonah but, with regard to its latest style of footbrace, either I got a defective one, or the engineering is defective. The one I have won't stay put. Very irritating.

I have Wenonah’s adjustable foot brace in almost every one of our canoes, and have heard that complaint about Wenonah’s adjustable foot brace from several people.

I think my feet are braced solidly against the foot bar, but none of ours have slipped in normal use. It may be that the combination of back band and knee bumpers eliminates some pressure on the foot brace.
 
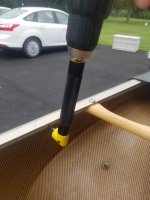
I discovered several miscalculations. I corrected them. I rethought some of the specs I wanted, I redid matters accordingly. The heat drove me inside before I could execute the first gluing of the mounting blocks.

I had hoped the H frame would help in several ways. I hoped it would provide reference distances and make the installation more precise. I wanted easy reference distances, for example, from the mounting blocks on each side to the bow, from the mounting blocks to the inwale, and the mounting blocks to each other. It did not really work out that way. There is too much play in the structure, especially since the vertical pieces are held by one clamp.

Click image for larger version  Name:	h fame before clamp and mounitng blocks IM.jpg Views:	0 Size:	357.0 KB ID:	114655

Click image for larger version  Name:	rube goldberg IM.jpg Views:	0 Size:	371.1 KB ID:	114657

Click image for larger version  Name:	rube goldberg IM.jpg Views:	0 Size:	371.1 KB ID:	114657

Shims were essential.

Click image for larger version  Name:	h fame before clamp and mounitng blocks IM.jpg Views:	0 Size:	357.0 KB ID:	114655

The H frame helps, but not nearly as much as I thought it would.

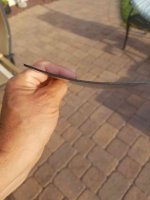
Similarly, the kydex thermoform plastic worked to get a replica of the hull curve:

Click image for larger version  Name:	h fame before clamp and mounitng blocks IM.jpg Views:	0 Size:	357.0 KB ID:	114655

But, it did not help much in practice, as the mounting blocks are not at all perfectly perpendicular to the hull. The H frame is somewhat helpful in keeping the bar, and by extension the mounting blocks, in the correct vertical orientation to the hull.
 
I am guessing that the SuperBond is some type of plexus. Still not sure whether that, or gflex, or gflex/fiberglass, is better here. Probably does not make much practical difference. My fiberglassing efforts have turned out far from elegant, to put it mildly.
 
The one possible drawback of the northstar footbar is the mouning blocks stick out about 2" from the hull. This forces the foot away from the hull when resting on the bar. Time will tell whether that is an issue for me.

About the protruding edges of those mounting rails, I too like my feet near the edge of the hull at times, and think those hard edges would quickly prove uncomfortable pressed against my delicate ankles. I’d be tempted to soften those edges with something; some black vinyl tubing or even the narrowest black foam pipe insulation I could find.

It would match the split foam pipe insulation on the foot bar cushioning my tender tootsies (ball of foot actually).

I am guessing that the SuperBond is some type of plexus. Still not sure whether that, or gflex, or gflex/fiberglass, is better here.

I can attest that the Plexus Bell used was plenty strong.

My friend Ed bought a used Bell magic with that same style foot brace, with the side rails Plexus adhered. The seller put the Magic on his roof racks and drove to meet Ed half way.

Well, not actually on his racks; he had the Magic strapped on a set of kayak J-cradles. At a 45 degree angle and, because of the not-meant-for-canoes J cradles orientation, facing open side out.

Well, not just strapped, ratchet strapped. Ratchet strapped tightly. Tightly enough to snap one of the foot brace side rails clean in half as the hull compressed under ratchet strap pressure. The part that was Plexused on stayed attached to the hull. That is some serious adhesive.

Mr. Ratchetstrap did some other damage to the Magic with that idiocy, but it was proof of the strength of Plexsus.

The heat drove me inside before I could execute the first gluing of the mounting blocks.

T’aint fit out for man nor beast. Only mad dogs and Englishmen attempt outside boatwork when it is 95f and high humidity. I have the blessed AC unit blasting in the shop office, or I couldn’t work inside either. Sweat dripping off my nose into rapidly curing SuperBond is probably contraindicated.

BTW, nanny nanny boo boo - It is 69F in my shop office with the window AC unit on. Still 10 degrees warmer in the shop proper, but dropping with a fan on. I can even duck outside to do yard work; step out for 30 minutes, back in the office and towel off the sweat dripping down my bald head.

Maybe have a beverage. Summer in Maryland, my least favorite season.

At least it is not buggy hereabouts; the Pocomoke River area is having a banner year for greenhead flies. Clouds of them, flail for hands around your head and swat dozens with every swing.

A couple weeks ago my son tried taking a hike there. Straight up not the smartest decision in the July swamps. His record was catching three in one hand. And popped them; you can’t just swat greenheads, even appearing swatted wings akimbo and half flattened they will shake it off. Tough little buggers.

He had to shower the smushed greenhead goo off his head, neck and hands when he got back to camp.
 
So, here is my Rotoloc stud and plexus footbrace installation on my Magic, from last fall. I am not very pleased with it. I could do it much better a second time.

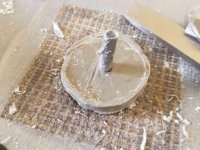
Crude forming the rotoloc base to match the hull curve:

Click image for larger version  Name:	Magic stud hammer IM.jpg Views:	0 Size:	274.1 KB ID:	114665

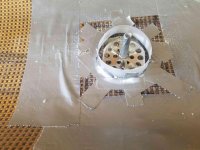
Rotoloc dam with milk carton plastic ring:

Click image for larger version  Name:	rotoloc dam IM.jpg Views:	0 Size:	314.3 KB ID:	114667

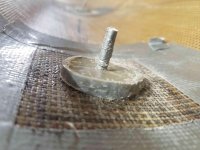
Plexus MA 830, especially includes metal bonding. Smells bad:

Click image for larger version  Name:	Plexus Magic IM.jpg Views:	0 Size:	295.7 KB ID:	114671

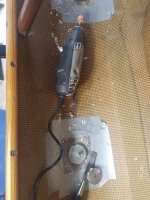
OK, but needs some dremel help:

Click image for larger version  Name:	rotoloc dam IM.jpg Views:	0 Size:	314.3 KB ID:	114667

Click image for larger version  Name:	Plexus Magic IM.jpg Views:	0 Size:	295.7 KB ID:	114671

Click image for larger version  Name:	Magic stud hammer IM.jpg Views:	0 Size:	274.1 KB ID:	114665

I can live with it:

Click image for larger version  Name:	Plexus Magic IM.jpg Views:	0 Size:	295.7 KB ID:	114671

Click image for larger version  Name:	Plexus Magic IM.jpg Views:	0 Size:	295.7 KB ID:	114671
Initially, I planned to fiberglass the rotolocs on, which explains some of the artifact markings on he hull. Fiberglassing might have been a better plan.

Much better than no footbrace. One of these days, I will toy with a more aesthetically pleasing set up.

At least I have never messed my Magic up with some kind of rack idiocy. Just shop idiocy, nyuk, nyuk, nyuk.

I will never understand why a manufacturer would choose to not install a footbrace on a sitter tripping canoe like a Magic.

I like working in the heat. It is like an accelerated work out. But, I have my limits.
 
Last edited:
I spent the hot day on (and in) the Brandywine river (Delaware/Pennsylvania) in rental canoes with 2 seven year olds, which is about perfect. Water levels were below normal, so it was bony, and I am glad we were in rentals. Highlights were two water snakes, and a non-breeding plumage Wood Duck. No thunderstorms for several days, so the water is clear, the better to see the smallmouth bass and giant carp.

Slowed progress on the flashfire, but I managed to get the mounting blocks for the footbrace mounted. I am pleased with the functionality, not so much the aesthetics.

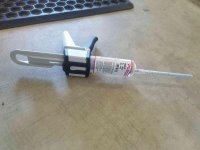
The "Superbond" from Northstar was woefully inadequate in volume. Plus, the working time is stated as 4-6 minuted at 72 degrees. At 7 a.m. this morning, having already used 3/4 of it, the mixing nozzle froze up in the time it took me to flip and bungee the canoe to the sawhorses.

After the Superbond cured, I finished the job with gflex. I've got to get it together, and listen and learn how to mix in some UV protection for the gflex. I suppose I will have to varnish, or paint, where the gflex shows.
 
The "Superbond" from Northstar was woefully inadequate in volume. Plus, the working time is stated as 4-6 minuted at 72 degrees. At 7 a.m. this morning, having already used 3/4 of it, the mixing nozzle froze up in the time it took me to flip and bungee the canoe to the sawhorses.

With such a rapid cure time, and obviously needing to apply the adhesive to both foot brace rails, I’m surprised that NorthStar doesn’t provide two small tubes of SuperBond, or at least a spare nozzle.


After the Superbond cured, I finished the job with gflex. I've got to get it together, and listen and learn how to mix in some UV protection for the gflex. I suppose I will have to varnish, or paint, where the gflex shows.

Mixed in? I believe graphite powder add some UV protection, and pigment may as well. Paint or varnish on the edges shouldn’t be too onerous.

WallyWorld sells packs of tiny brush nylon bristle brushes, 30 each for 97 cents in the craft aisle. I use the crap out of those.
 
Flash Fire is a popular boat for FreeStyle.. Ie paddling in various movements on a pond. Its quite common to see hulls used that way in great shape. I suspect that the enemy of this boat was 18 years in damp storage. We had a number of FS people in the South like Louisiana have issues with storing boats re wood rot. There never was any outfitting added as folks needed to move around the boat. Sometimes all the thwarts were taken out!
Now it has a different life!
 
DaveO.... why wouldn't you have just rivited on.... I have a 2003 goldenglass Magic and installed that footbrace with the rivits that came with the footbrace. Quick and very strong.... And I tighten those wing things with a cheap leatherman knock off and it never slips
 
Last edited:
Mike: I would prefer to mix in some UV resistance to the gflex because I can foresee forgetting to re-varnish, and paint here would not probably not be a look good, if I even had quality black paint on hand.

Harbor Freight sold, for years, some relatively high quality chip brushes for next to nothing. I stocked up. I will be sad when my stash runs out. Those little metal brushes that West sells leave a trail of bristles, unwanted to say the least.

Yellowcanoe: I was aware that a number of folks covet this boat for freestyle. I Might have hesitated a bit more to make these mods if not for all the needed repairs in the first place. This is one of those craigslist bargains that you just can't pass up. It will have a good, but yes different, life, I assure you.

canube: There is no way I would ever drill four holes below the waterline in a sweet black gold boat like this. I am doing enough damage to it, as it is, harhar.

With regard to the airbags, I ordered those sewable D rings and intended to use them. I reconsidered and changed my mind. I did not like the way they fit on the gunwale. Moreover, the stress caused by the paracord would have been 90 degrees to the vertical orientation of the D ring. I looked again at the metal coated clips from Mohawk (see my post # 14). I don't know why I was assuming they were galvanized steel. They are aluminum. I installed them. My only hesitation is they might hang a pack up when tripping. Drilling out and re-riviting was a cinch. Thanks to all for the advice in that regard (and for all the advice freely given in this thread, for that matter)

I have absolutely loved throwing this baby around while working on it. It's a dream light weight. I have high hopes of tripping in it. I went from 220 to 190 lbs, so with a, say, 50 lb trip load, total weight 240 lbs, I would be at the outer end of the design load.

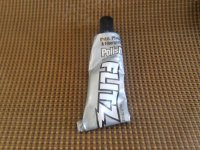
I cleaned the gunwale corrosion with Flitz Multi-Purpose Polish and Cleaner Paste.

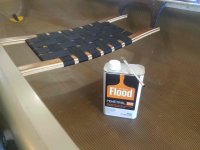
I bought some Flood Penetrol today at Lowe's.

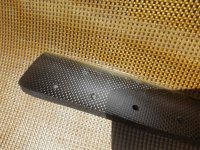
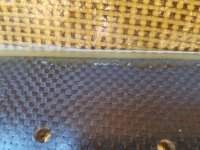
My final problem is an area of the hull on which I "violently" sanded, and then changed my mind as to the location for the mounting blocks for the footbar. It left some irritating little numbs of kevlar sticking up. I tested adding a light gflex coating, but it did not solve the problem. Never should have used 80 grit but it was there. I have some ideas on how to address it. Any suggestions would be most welcome.

I will put up some pictures of my masterpiece when ready for the water.
 
Last edited:
Harbor Freight sold, for years, some relatively high quality chip brushes for next to nothing. I stocked up. I will be sad when my stash runs out. Those little metal brushes that West sells leave a trail of bristles, unwanted to say the least.

I use chip brushes as well. For stuff like epoxy or contact cement I like the disposability. I flappity-flap the dry bristles and run them through my fingers first to help remove the worst of the loose lost bristles.

The little craft brushes I was referring to are these tiny things:

https://www.walmart.com/ip/Kids-Craf...Pack/126993790

Great for when I need to paint a small bead of something.


I looked again at the metal coated clips from Mohawk (see my post # 14). I don't know why I was assuming they were galvanized steel. They are aluminum. I installed them.

That’s good. I recently found some galvanic corrosion on aluminum pop rivets attaching stainless steel and brass fittings on a boat that sees a lot of salt water use. The pop rivets had corroded to the breaking point inside the fiberglass hull material and the fittings snapped off.

I hose off my boats after salt water use, but I guess the flush with clean water doesn’t get to the rivet pin inside the hull material.

My final problem is an area of the hull on which I "violently" sanded, and then changed my mind as to the location for the mounting blocks for the footbar. It left some irritating little numbs of kevlar sticking up. I tested adding a light gflex coating, but it did not solve the problem. Never should have used 80 grit but it was there. I have some ideas on how to address it. Any suggestions would be most welcome.

Hard to say, and photos probably wouldn’t show the issue with any clarity. Sight unseen I’d lightly sand (120 or 220) the kevlar nubs, recoat the area with regular epoxy (G/flex is overkill) and lay some peel ply on top. Might have to do that a couple times.

There is no way I would ever drill four holes below the waterline in a sweet black gold boat like this.

I figure that, on Royalex hulls, I am squeezing the flange head pop rivets hard in the foam core to compress everything leak proof. None the less I put a little dab of sealant around the rivet head before I seat the rivet and wipe off whatever excess squeezes out.

On some thin walled composite hulls I have had concerns about the integrity of the material withstanding the sheer forces from the foot brace, and have laid a strip of glass inside the hull where the foot brace rails are positioned.

Next time I do that I’ll use the Dynel sleeve. Probably don’t even need a full rail-length piece, just a little square where the pop rivets will be seated.
 
I flappity-flap the dry bristles and run them through my fingers first to help remove the worst of the loose lost bristles.

I too was once a flappity-flaper who finger pinched and pulled at chip brush bristles to avoid the errant bristle hair in my touch-ups. Someone taught me years ago that a few seconds against a revolving scratch wheel (wire brush) does a better job of dislodging loose bristles. It doesn't hurt to give the brush a blow with an air gun at 80psi either.
 
I now see that optimum load is up to 220 lbs, so unless I lose more weight, I will need to trip with about 30 lbs. Doable for a long weekend in the Adirondacks.

One of the advantages of posting a project like this is it forces one to put ideas and thoughts in writing, which ultimately clarifies matters and challenges assumptions.

Bell Flashfire Specs:

BlackGold - 31 lbs.

Length: 13'
Length/width ratio: 6.1

Rocker:
Bow 2.5"
Stern 2.5"

Shear:
Bow: 17"
Mid: 12"
Stern: 15"

Width:
Gunwale width - 26"
Max width - 29"
3" WL width - 25"

Displacement:
2" WL - 120 lbs.
3" WL - 200 lbs.
4" WL - 380 lbs.

Capacity:
6" Freeboard: 550 lbs.
Optimum Load: 110-220 lbs.
 
One of the advantages of posting a project like this is it forces one to put ideas and thoughts in writing, which ultimately clarifies matters and challenges assumptions.

Very much agree. If I take the time to write out the process I am also thinking out the process, and thinking about sequential steps and steps ahead, and sometimes catch myself “Whoa, whoa, I better do this before that

Even posting photos helps. I will see things in a photo that I have somehow missed spotting while standing beside the hull looking at it firsthand. Not sure why that happens, but it is common enough for me.

And of course the community discussion of the rebuild and occasional tangents leads to new ideas. Occasionally ideas that should have occurred to me long before. To wit:

Someone taught me years ago that a few seconds against a revolving scratch wheel (wire brush) does a better job of dislodging loose bristles. It doesn't hurt to give the brush a blow with an air gun at 80psi either.

FWFW the old Bell catalog prose:

FlashFIRE is symmetrical, carrying above waterline flare to shouldered tumblehome. A dry hull with firm final stability, significant rocker allows Flash to flat turn and increases speed. “V” in the stern helps tracking. The small hull reduces skin friction aiding quick acceleration, and allows Flash to paddle with surprisingly little effort at touring speeds.
 
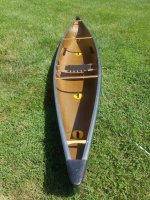
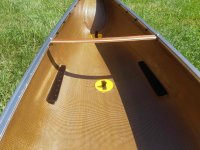
Here is the flashfire before installation of the air bags:

Click image for larger version  Name:	Finished IM.jpg Views:	0 Size:	938.9 KB ID:	116305

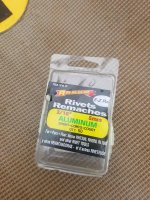
The riveting of the clips went smoothly enough. Used aluminum 3/16" diameter "short" (1/8") rivets:

Click image for larger version  Name:	Finished IM.jpg Views:	0 Size:	938.9 KB ID:	116305

Click image for larger version  Name:	Finished IM.jpg Views:	0 Size:	938.9 KB ID:	116305

Click image for larger version  Name:	Finished IM.jpg Views:	0 Size:	938.9 KB ID:	116305

The footbrace works well enough. The mounting plates could be trimmed down at least ¾”. I will probably do that next time:

Click image for larger version  Name:	Finished IM.jpg Views:	0 Size:	938.9 KB ID:	116305

Click image for larger version  Name:	Finished IM.jpg Views:	0 Size:	938.9 KB ID:	116305

Click image for larger version  Name:	Finished IM.jpg Views:	0 Size:	938.9 KB ID:	116305

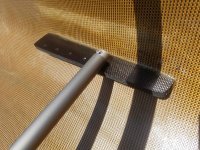
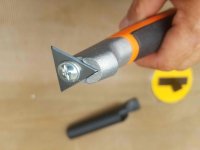
This Bahco 625 triangle carbon scraper, 25 mm (1”, No. 449) triangular blade is outstanding!

Click image for larger version  Name:	Finished IM.jpg Views:	0 Size:	938.9 KB ID:	116305


This baby will scrape anything, literally. It was amazing at trimming down and leveling my sloppy attempt to cover, with gflex, the inadvertently sanded area of the hull that had some Kevlar fuzz.

Flood Penetrol did indeed stop the water spotting on the inside hull. Only downside is it off-gasses quite a volume of VOCs while drying:

Click image for larger version  Name:	Finished IM.jpg Views:	0 Size:	938.9 KB ID:	116305

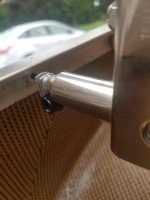
Covered the exposed machine screw ends with these round caps from McMaster Carr:

Click image for larger version  Name:	Finished IM.jpg Views:	0 Size:	938.9 KB ID:	116305


The Filtz worked well polishing the thick corrosion on the aluminum inwales:

Click image for larger version  Name:	Finished IM.jpg Views:	0 Size:	938.9 KB ID:	116305

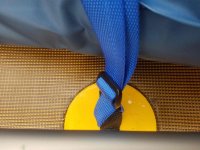
The keeper strap is 1” polyester webbing secured with tri-glides and aluminum biners:

Click image for larger version  Name:	Finished IM.jpg Views:	0 Size:	938.9 KB ID:	116305

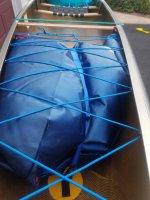
The air bags pooch a but I am confident the bag will hold. The cage is polyester paracord.

Click image for larger version  Name:	Finished IM.jpg Views:	0 Size:	938.9 KB ID:	116305

The suggestion to add a few drops of black acrylic paint to gflex for the stem repair, for UV protection and looks, was terrific:

Click image for larger version  Name:	Finished IM.jpg Views:	0 Size:	938.9 KB ID:	116305
 
Last edited:
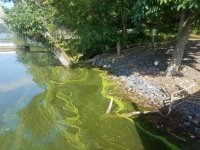
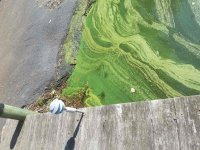
Nasty and dangerous green algae in the local river:

Click image for larger version  Name:	Green algae 1 IM.jpg Views:	0 Size:	690.6 KB ID:	116313

Click image for larger version  Name:	green algae IM.jpg Views:	0 Size:	921.1 KB ID:	116314

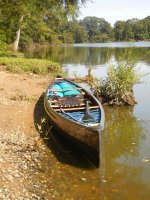
It finally abated with the onset of lower temperatures and less rain, allowing me to get out with the Flashfire:


Showing off my 70’s throwback hair:

Click image for larger version  Name:	Green algae 1 IM.jpg Views:	0 Size:	690.6 KB ID:	116313

Click image for larger version  Name:	launch 1 IM.jpg Views:	0 Size:	597.3 KB ID:	116315

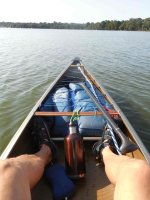
The footbrace is positioned lengthwise pretty much perfectly for me, just under the front thwart:

Click image for larger version  Name:	Green algae 1 IM.jpg Views:	0 Size:	690.6 KB ID:	116313

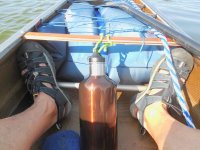
The overly-wide mounting blocks splay my feet a bit more than would be perfect, but not enough to complain about. My size 11 feet just fit, but could be a bit of a problem with boots on:

Click image for larger version  Name:	Green algae 1 IM.jpg Views:	0 Size:	690.6 KB ID:	116313

Notice the Kleen Kanteen, courtesy of McCrea and REI. Um, yum, cold water on a hot day.

The Flashfire felt great with the seat 6" off the bottom and the footbar 4" off. It had surprising glide. It did not require as much course correcting as I was expecting. It was not overly twitchy at all. I need to paddle it in the snot, and with a load, but overall, I think I will be falling in love with this baby.
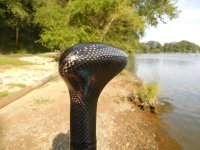
I was using a 50" BB Black Beauty. For my hands and style, the best handle on the market. Much better than the bulbous Wenonah bent carbon grips.


Click image for larger version  Name:	Green algae 1 IM.jpg Views:	0 Size:	690.6 KB ID:	116313
 
Last edited:
I am a fan of installing thread protectors on the exposed shank ends of machine screws and such, for air bag and dry bag and flesh protection.

Same action, the thread protectors are usually too long for the hardware ends I want to cover, so I nip them down to size before gluing them on.

That giant KleenKanteen needs something. Maybe a Reflectix coozie, so it doesn’t become hot to the touch, or a custom Yoga block canoe console for quicker sipping.
 
Back
Top