• Happy Caesar Crosses the Rubicon (49 BC)! "alea iacta est" 🎲

Aluminum Rails for a Rob Roy

I missed that measurement in your first post. That sounds longer and wider than the ones I've seen. I've had them on a couple Wenonah canoes I've owned as well as some I bought from Northwest Canoe in St. Paul. Those were all quite skinny for boats like the Prism or MN II.

I thought the cockpit of the Rob Roy looked it had a good deal more flare than the bow of something like the Prism:

I still think the Rob Roy rails look like they have a lot more flare.

Alan, very cool photo comparison.

I wonder how the end cap flare on one of Wenonah’s wider “Sport & Leisure” canoes like the Fisherman or Kingfisher stacks would stack up.

http://www.wenonah.com/Canoes.aspx?id=109

http://www.wenonah.com/Canoes.aspx?id=110

Using an end cap that fit and matched the outwale profile would be the easiest way resolve the issue of covering the bow ends of the aluminum gunwales.
 
Using an end cap that fit and matched the outwale profile would be the easiest way resolve the issue of covering the bow ends of the aluminum gunwales.

When I needed caps for that prospector I put aluminum rails on I made my own from fiberglass and painted them black. Unfortunately I don't remember how I did it. Nor can I believe I was even able to do it. I didn't have a clue what I was doing back then, which may have helped. I'm pretty sure they were laid up in place. I think I cut out a cardboard template for support and taped it to the top of the rails. Then I probably used either tape or plastic or both to cover the template and sides of the canoe to keep the resin from sticking. Then I just wet out multiple layers, probably one per day, and let them hang over the edges. They didn't fit perfectly to the outside of the hull but not awful. After they setup I trimmed them, spray painted black, and riveted in place. Should have used a few more layers. Not the prettiest but they worked. The fact that the Wenonah rails don't really have much of an outside profile made it much easier.

Alan
 
When I needed caps for that prospector I put aluminum rails on I made my own from fiberglass and painted them black.
Not the prettiest but they worked. The fact that the Wenonah rails don't really have much of an outside profile made it much easier.

If there is no end cap with a wide enough flare to fit there might be an easier way that a full on DIY. Take the widest end cap available, cut it down the middle, flare out the two halves to fitted size and fill the narrow void in the middle with a couple strips of fiberglass and black pigmented epoxy.

Or maybe yet another way. I just pulled out two big plastic deck plates I have in the shop, an Old Town and a Mohawk.

https://www.google.com/search?q=old...=X4PYVo_1AoyDmQGwtZywCQ#imgrc=nWyEwnFmUD059M:

The Old Town looks like the A6 in the photo above. Cut down to a 7 ½ inch length like the Wenonah end cap that Old Town deck plate is 6 inches wide outer edge to outer edge.

The Mohawk, which is off an old whitewtater canoe, is 7 ¼ inches wide.

Neither outwale profile on those deck plates is a perfect match for the piece of Mad River aluminum gunwale I have, but the Old Town deck is not all that far off.

Hey Doug, did you save any old vinyl deck plates from past rebuilds?
 
I actually do have a set of decks from an OT Camper that could be shaved/cut down but I do like the idea of full head on DIY. Remember all that carbon fiber cloth I have? Do I dare!!???
 
I actually do have a set of decks from an OT Camper that could be shaved/cut down but I do like the idea of full head on DIY. Remember all that carbon fiber cloth I have? Do I dare!!???

Might has well do carbon over foam gunwales while you're at it. $25 will get you a 4x8 sheet of XPS foam at the lumberyard. If you have a fancy yard that carries something heavier than the standard 2lb/cu. ft. density then get that. Cut out your rails, epoxy them to the hull, and wrap them with a couple layers of carbon fiber. Then fill coats and sand and fill coats and sand and fill coats and sand. Nothing to it! :rolleyes:

Alan
 
I believe I have a line on them from, hopefully, Charles River Canoe in Boston.

Well hell, BMO is an hour twenty away for me and still worth the trip a couple of times a year, especially when I look at what supplies I’m short on for a project and don’t want to wait a week for an on-line order.

Granted, the trip to BMO isn’t driving an hour into freaking Boston, but I gotta wonder what other goodies Charles River carries.

Just in the P-parts. . . Peel ply? Pad eyes? P-clips? Pigment? P’minicel (the P is silent)

I’m curious about what Charles River Canoe and Kayak is like, especially in terms of outfitting parts and pieces. Having an outfitter, even one a couple hours away, that carries a wide variety of canoe repair and outfitting parts and pieces is a godsend.

Checklist:

Extension ladder for gunwale transport (and red flag for overhang)

Bell thwart to query L-bracket installation

Rope/electrical tape to secure aluminum thwarts to the extension ladder

Maybe a hacksaw, just in case Chas. River is willing to sell you a single gunwale. If the 18 feet of floppiness is still concern even with the extension ladder platform you could always cut one gunwale in half for unwanked transport surety.You would still have a couple feet of excess once trimmed from 9 feet to 6 ½ foot Rob Roy length, leaving you plenty of scrap gunwale to play with for rivet sizing and etc.

Template or measurements for possible end cap. Seriously, even if the end cap is a bit too narrow cutting it in half /|\ and glassing it back together with a wider flare would be easy enough , a couple strips of glass tape and black pigmented resin, and that would assure that the cap profile fits perfectly around the odd Wenonah outwale shape.

List of other parts and pieces you are running short on. I play “Stump the Outfitter” at BMO, and they usually win that game.

Supply of “You #%$@er!” and “Freaking moron!” for Boston traffic.

I am confident that the aluminum gunwales are going to work, and I’m looking forward to a photo write up of the process, starting with 18 feet of aluminum gunwale overhang flailing around on I-93 northbound.
 
So the saga continues. Yesterday I ventured to Charles River Canoe and Kayak in Waltham, MA to pick up some aluminum gunwales. Had to buy a pair as they wouldn't split them up. I screwed up on my end as I didn't inquire as to whether they were black or silver. Silver it was, I can live with that. At 80$ for the set I thought it was a good deal compared to having them shipped at a couple hundred bucks.

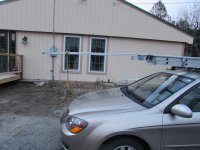
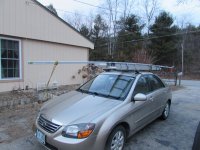
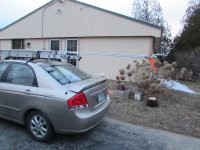
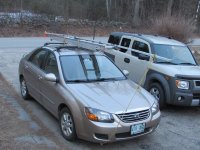
Since they were 18 feet long I strapped my extension ladder to the roof racks extended out to close to the length of the car to strap the gunwales to. In the past with wooden gunwales I've just strapped them to the racks and tied off the ends but I didn't want to bend these and crimp them. What I didn't count on was the noise. Yup, that ladder whistled at high speeds down I-93. I couldn't get the radio loud enough to drown it out. Hell, it was only a 4 hour round trip! The ladder did work well though despite that high pitched sound. The gunwales were wrapped in plastic so I opted to using Gorilla Tape and electrical tape to secure them to the ladder which worked perfect for the ride back to the Humble Hovel. I will say that Mass drivers are perhaps some of the worst. It must be that any car sold in the Bay State doesn't come with turn signals, drivers don't know how to read a speed limit sign even in residential areas, are completely comfortable with not being able to see your rear bumper and like to try a Daytona 500 pass on a regular basis! I started looking for a lot of back roads for the return ride home!

Once home I unwrapped them and saw how thin the slot was that fits on the sheer line. I guess I'm going to have to spread them a little to get them on and did a little bit of a bumming out session. In the end I would rather have it be a hair tight rather then too wide. Seeing how's I have 36' of gunwales to play with I plan on cutting off some experimental pieces first before I go for the gusto and put them on! Should be interesting!

After all the hulls I've re-gunwaled I can not believe how this boat is kicking my arse! Once those aluminum gunwales are on they are NEVER coming off! More to come!

dougd

IMG_0769.JPG IMG_0768.JPG IMG_0770.JPG IMG_0775.JPG
 
Last edited:
I will say that Mass drivers are perhaps some of the worst. It must be that any car sold in the Bay State doesn't come with turn signals, drivers don't know how to read a speed limit sign even in residential areas, are completely comfortable with not being able to see your rear bumper and like to try a Daytona 500 pass on a regular basis! I started looking for a lot of back roads for the return ride home!

dougd


Those drivers sound exactly like the ones in Manitoba, mind you we have more rednecks who think they are in NASCAR daily. I call them trailers since they get so close and do so when the roads are sheets of ice. The speed limit is 100kph, we regularly see them going 140 even when it is snowing. I'll have to ask my brother what it is like since he lives in Boston.

Any reason why you didn't extend the ladder further to lessen the chance of bending the rails? Too much stress on the racks perhaps?
 
After I put the gunwales up I was ok with the extension of the ladder so just left it that way. If the gunwales started swaying I would have pulled over and taken care of it but they rode just fine. I'm sure I'm going to piss someone off about MA drivers but just calling a spade a spade!
 
We have a special word for some Mass drivers. But we have some nice seasonal neighbors from Mass. Some have a sense of humor and some think it isn't funny.
 
I drove through Mass. a few years back. I was avoiding interstates and stuck to blacktops. What I remember is that I don't think I went over 45mph the whole time I was in the state. You'd leave town and before the speed limit could get back to 55mph you were already driving into the next town. Over and over and over again.

Alan
 
Once home I unwrapped them and saw how thin the slot was that fits on the sheer line. I guess I'm going to have to spread them a little to get them on and did a little bit of a bumming out session. In the end I would rather have it be a hair tight rather then too wide. Seeing how's I have 36' of gunwales to play with I plan on cutting off some experimental pieces first before I go for the gusto and put them on! Should be interesting!

Looking at the profile of the Wenonah aluminum gunwale I would think that there is enough “spring” in the hull channel opening (AKA the throat) to allow it to open a bit as the gunwale is seated along the sheerline. You might need to open only a short area of the throat to help get it started.

https://www.google.com/search?q=Wen...ei=HGTcVtxCh96YAf6wjugI#imgrc=PFMcvxOIzYT_4M:

(BTW, I think that photo actually shows installation of a pad eye, not a P-clip, which you may want for attaching the front straps of the Rob Roy band)

Reading Mad River’s aluminum gunwale instructions I see that they suggest using a putty knife (2?) s a guide sleeve to help seat the throat over the sheerline.

http://www.madrivercanoe.com/us/experience/faq/content/aluminum-gunwale-replacement-composite-hulls

Those instructions are for installing Mad River’s pre-bent aluminum gunwales, so your technique will probably vary. When we forced the (unbent) MRC gunwales on the Royalex Fantasy we used two 3 inch wide metal bladed putty knives, one inside the hull, one outside, moving them along as guide sleeves to help open the too-small throat.

That worked on the less flexible throat of the MRC gunwale profile, even onto an RX hull, so the thinner kevlar sheerline of the Rob Roy should be easier.

Reading through that MRC tutorial they also suggest marking the bottom edge of the gunwale on the outside of the hull, so you have a visible line to check that the material is in fact fully seated in the throat. That sounds wise, since you could not otherwise tell if the gunwale was fully seated when drilling the rivet holes.

I’d start by cutting the two 6 ½ ish foot pieces of gunwale you need from one 18 foot length, take the remaining 5 foot section, cut off a 6 inch piece and use that to slide along the sheerline and mark that “fully seated” line on the outside of the hull.

Once you have marked that fully seated line stick a thin piece of lauan or the like in the throat in that scrap, check your rivet size and pop in a couple of practice pop rivets. Practice is good.

More practice makes perfect. Take the remaining 4 ½ foot length of gunwale and try some test fits using different installation techniques. Staring back to front or front to back, using putty knives, etc. MRC suggests starting in the middle, which may not work with the Rob Roy.

They also suggest holding the gunwale down in place using tape, but I’d have a bunch of clamps handy just in case.

Some technique, test fitted various ways using that excess gunwale, will prove best, especially if you are doing the install solo. A second set of hands during the actual install would be worth a case of beer helper bribe.

If only we lived closer. No Bud Lite.

I like the idea of using aluminum tubing to replace the wood Bell thwart, and maybe add a short carry thwart up front. I’m sold on the value of having a carry thwart hand hold, at least up front. It is more often a “drag thwart” for pulling the boat over beaver dams or up onto a sandy beach, but it is a lot more comfortable to grab a short thwart than pull than a rope loop. And it would provide a place to stash a bowline under a bungee

I know you have some black anodized tubing left over from the Pamlico rebuild. It would be easy to cut the lengths of tubing needed, crimp the ends flat in a vice, drill the holes and pop rivet them in place.

I wouldn’t paint the gunwales black. Any paint is just going to scrap off on the roof racks and look like silver streak on black hell without constant touch up.

Black thwart, black carry handle and black end cap would still look nice even with silver gunwales. If you found silver tubing it would be equally easy to replace them; just drill out a couple of pop rivets and reinstall.

If you really want matching trim I know that BMO sells silver Wenonah thwarts. I hear there’s a place in Boston too.

BTW, the replacement Wenonah aluminum thwarts come nicely pre-crimped and pre-drilled in a variety of lengths.

I may have to make the scenic drive to BMO soon. Nanny nanny boo boo.
 
I drove through Mass. a few years back. I was avoiding interstates and stuck to blacktops. What I remember is that I don't think I went over 45mph the whole time I was in the state. You'd leave town and before the speed limit could get back to 55mph you were already driving into the next town. Over and over and over again.

A lot of long developed, small town New England is like that. I’d still prefer it to metro area highways and beltways. Over the course of a couple dozen cross country trips I have driven a lot of the worst. Boston is right up there.

Others in the running with their own regional flavors:

Los Angeles. Seriously, some of those metro highways are 7 and 8 lanes wide. Or at least were in the 70’s, picture a ’67 VW camper bus trying to cross 6 lanes of traffic. Gawd knows how many lanes wide they are like today. And I don’t want to find out.

The Atlanta beltway. It’s not just that it carries the sprawling metro area traffic; it also carries the other-side-of-the-loop continuations I-75, I-85 and I-20. Add to that an unmatched preponderance of muscle cars and drivers who live Walter Mitty NASCAR fantasy lives. Never, ever, again if I can help it.

Washington DC. Again, heavy population density, tons of suburban commuters and multiple interstate highways feeding the loop. Washington’s driver claim to fame is a vast foreign national population. While I doubt they all have diplomatic immunity they all drive like they do. Also never again if I can help it; I take the longer scenic Rte 301, further east across the Potomac.

NYC is its own special Hades in commuter population density. I refuse to even get close. Going to Maine? I’ll happily add a few hours road time and head NE through Pennsylvania, well to the west of that hell on earth that stretches across four States.

OK, the whole freaking eastern seaboard, from Boston to Richmond and creeping beyond. Not just weekday rush hour; any “Time to visit the family” holiday is a nightmare. Don’t even get me started on I-95 over Thanksgiving or spring break.

Those holiday are educational. Thanksgiving = families packed into too-small SUV’s, festooned with luggage racks and hitch platforms, all heading to visit Grandma. There appears to be far less storage room in a Ford Explorer than one would think.

“GOD DAMMIT I’LL TURN THIS CAR AROUND…..”

Spring break is even more comical. Wayyy more comical; 18 -25 year olds making a road trip. Think seriously big loads of crap, poorly tied on; rec kayaks and surf boards and gear in wind tattered garbage bags strapped to the roof. Think stop and go traffic, kids popping in and out like a Chinese fire drill to switch seats or drivers. Or play Frisbee in the median ‘til the traffic moved again.

Most memorably; a young woman exited the passenger door, scurried to the trunk and grabbed a couple of sodas from the cooler. Just when traffic started moving again.

She elected to hop in the trunk. Just as the driver belatedly hit the gas. She rolled out of the trunk onto the pavement, holding a diet Coke in each hand. The driver stopped. She ran back to the passenger door with her road rash prizes in hand, held them up trimphulantly and unscrewed the cap on one.

Which, well shaken, foamed up like a Mentos rocket. Spring Break along I-95, don’t miss it.

Rant over. Apologies, but living along the east coast megalopolis has its population challenges. I do like that it’s a day’s drive north to the Adirondacks or Maine, and a day’s drive south to the Carolinas or Florida, but dang there’s a lot of people to avoid along the way. Iowa sounds better all the time, and the elbow room out west more so.

Other locales may be as bad. I’ve been passed through Chicago and Dallas and all of the I-70 cities, but most often timing it as far off peak as possible. Midnight to pre-dawn is good.
 
I do like that it’s a day’s drive north to the Adirondacks or Maine, and a day’s drive south to the Carolinas or Florida, but dang there’s a lot of people to avoid along the way. Iowa sounds better all the time, and the elbow room out west more so.

Mostly empty roads, and lots of them, is nice around here. Until you want to hike somewhere there aren't roads, then you're SOL. Nearly the entire state is gridded up into 1 mile sections of mostly gravel roads. Just a couple miles from my house is a 2x2 mile section with no roads (except for the private one built a couple years ago). It's mostly crop and cattle pasture but there are also some heavily wooded (oak) ravines and ponds nestled back there too. Beautiful area with low rolling hills; too bad it's all private. In the middle of that section is probably as remote as you can get for 100 miles or more.

I've driven out to the east coast (downeast Maine) a couple times. I've mostly avoided the most heavily populated areas but even then I still found the sheer number of people quite off-putting. Some really beautiful areas though. I don't plan to head east of the Mississippi again anytime soon.

Alan
 
Update on the Aluminum gunwales. Last weekend I started to try to get these on solo. Since I had an 18' piece I sacrificed a six inch piece to see how it would all fit and I wanted to mark where the bottom of the gunwale would sit and I marked it with tape. Pencil marks just wouldn't hack it. Once that was done I measured 6 times and then made my cut. OK, due the bend in the cowling I had to cut twice but I was expecting that. Now keep in mind I was trying a dry fit. I had it in my pea size brain that this would just slide on slicker then a wet fish but this was the devil on one shoulder and the angel on the other talking to me. The devil won telling me I was dreaming that it would work first shot!

No matter how hard I tried to bend this into place the compound curve plus the outward flare of the sheer line kept popping the gunwale off. I put my weight on it to bend it gently which worked to a degree but it was the throat that was the problem. I could not get it to hook up to the sheer line! I tried for 2 hours starting from here there and everywhere. No go! There is not a lot of wiggle room to get the lip/opening of the throat of the gunwale on to the cowling. Please keep in mind this is 6'2" of metal to twist and bend. I could not get the metal to bend at the first bend in the cowling, it kept away and outward by a good 1/4". A rather large blood blister and a couple of metal cuts later I called it quits and emailed a friend who is going to generously donate his time to see me get pissed off again when it doesn't work! I promised him I wouldn't throw anything but swearing is going to happen.

I do have a plan Z, that is how far down the alphabet I am at attempts on these danged gunwales. More to come I guess!
 
Since I have a little experience with aluminum gunwales this is when I started laughing:

Last weekend I started to try to get these on solo......I had it in my pea size brain that this would just slide on slicker then a wet fish

I don't envy your task. That forward curve looks pretty severe considering the short length of the gunwales. I seem to remember mine taking on some pretty distorted shear shapes when trying to make that compound curve. But then you get it and all of a sudden it's a normally shaped canoe again. Hopefully having one person to hold it in place while you keep working on the other end will make all the difference.

Alan
 
Doug,
Just sell that aluminum gunnel material on craigslist and follow Alan's suggestion of carbon over foam gunnels!
You're stuck fighting the relatively high moments of inertia in two planes...I've been there but with mahogany, it usually doesn't end well, at least not for me.
I'll be hoping for the best outcome for you, curious to see if you can manhandle it into place.
 
Take a couple of closely spaced trees... slip rail into gap... pull on long end until you get desired curve... repeat as necessary.
 
Doug,
Just sell that aluminum gunnel material on craigslist and follow Alan's suggestion of carbon over foam gunnels!
You're stuck fighting the relatively high moments of inertia in two planes...I've been there but with mahogany, it usually doesn't end well, at least not for me.
I'll be hoping for the best outcome for you, curious to see if you can manhandle it into place.

Well, SG you were correct! The compound angles defeated us! My buddy who does a lot of metal work came over and we worked on it for a long while but the bottom line is that the gunwale at one and a quarter inches at the top just couldn't bend enough for the upward sweep of the cowling without the whole piece twisting out to some ungodly angle. So, now I'm on to Plan Z:

http://topkayaker.com/index.php?main...oducts_id=1606

I want to get this boat back on the water so am going this route for now. I may want to change this down the road after a new shop is built but for now it will do. Not real happy about it but it is what it is. There is no way in heck I'm going to try to upgrade to an Alan level of boatbuilding. If you've read my history of working with resin you'd totally understand. Sometimes the path of least resistance is the best path...for now. Time for a can of liquid courage!

dougd
 
Last edited:
Well at least you know that Plan Z will work to cover the sheerline edge*, even with the challenging short-space sweep and curve of the cockpit coming sheerline.

Maybe glass in a deck plate and thwart behind the seat for some stiffening (and a place to attach the back band straps). I think even that 6 foot long cockpit is going to need some stiffening. Maybe not so much for boat entry/exit as for tying it down to the roof racks.

*Plastic rec kayaks that use that trim edge on a similar size cockpit have a molded S coming that provides a little structure, but that S deforms and squashes a bit under tie down pressure. I’d be leery of stressing that lazy L shape in thin kevlar when tied inverted on the roof racks.

One possible solution would be to build some roof rack cradles and transport the hull upright.

Which would necessitate finding a storage cover. Which would necessitate figuring out a way to attach the rand of a cover with that bass-akwards angle on the back of the cockpit. AAARRRGGHHH!

$300 and a case of Pabst.

EDIT: OK, here’s a solution for the coming edge flimsiness using just the trim edge.

If you glassed in a stern thwart, and a bow thwart, in locations approximate to where the inverted hull rests on your roof rack crossbars that would provide enough rigidity to tie down the belly lines for transport.
 
Last edited:
Back
Top