• Happy Founding of The Wilderness Society (1935)! šŸ”ļøšŸœļøšŸŒ²

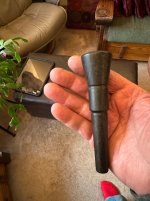
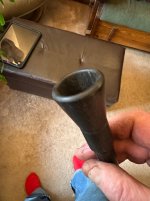
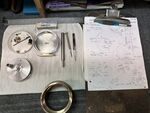
Fly rod and Rod tube winter project

Thanks for the kind words guys; from where you sit; it probably looks like i know what im doing. šŸ™„

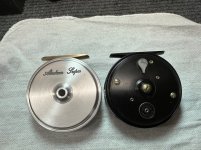
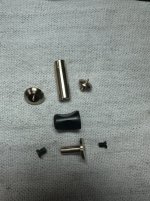
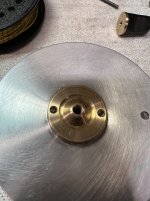
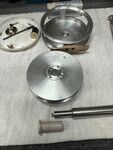
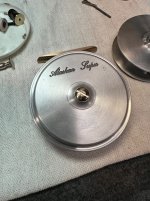
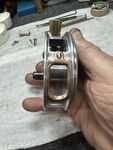
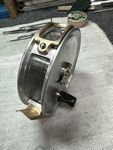
Still waiting for materials; today i finished the last two things i could. Knowing i wanted a way to identify the reel i pulled out my electro/chem etching machine; which hasnā€™t been used in ages and dug thru the stencils looking for something remotely applicable. Lo an behold, i had an ā€œAlaskan Super Gradeā€ and by removing Grade it fit well. I guess going forward this reel will be my ā€œAlaskan Superā€. Itā€™s not entirely suitable as the name would lead you to believe this was a King Salmon reel; actually itā€™s only a lowly 3/4wt. Reel! But it looks cool and thatā€™s all that really matters!
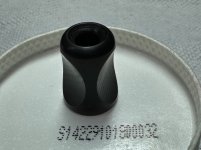
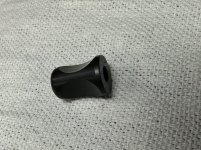
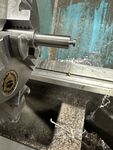
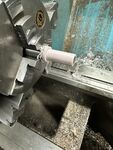
Then on to the Ratchet knob. (spool to Americanoā€™s) The J.W Young 3 panel grip knob is handā€™s down the most comfortable IMO and no self respecting Pirate would leave the good stuff behind, so I used Delrin for mine.
 

Attachments

  • IMG_3689.jpeg
    IMG_3689.jpeg
    381 KB · Views: 10
  • IMG_3691.jpeg
    IMG_3691.jpeg
    221.7 KB · Views: 10
  • IMG_3692.jpeg
    IMG_3692.jpeg
    330 KB · Views: 9
Last edited:
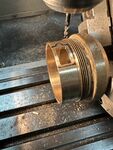
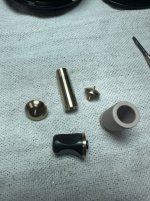
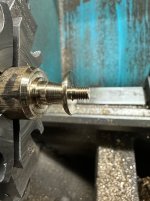
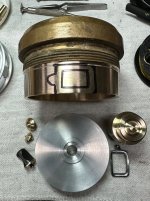
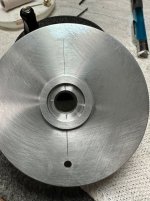
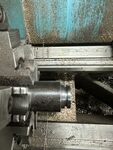
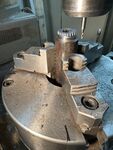
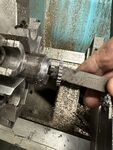
Today i finished up the hardware that makes the crank knob complete now. Probably donā€™t look like much but at 74 those threads look pretty small while single pointing them on the Lathe. I also put the spool billet in the lathe and roughed quite a bit of stock off. It can set a day or so incase thereā€™s any internal stress squirming around in there trying to get out!
For perspective that first screw that looks like a ā€œplow boltā€, is only a 10/32!
Im still having fun. Iā€™ll move over to the Mill and slot those 2 round head screws tomorrow.
 

Attachments

  • IMG_3720.jpeg
    IMG_3720.jpeg
    323 KB · Views: 8
  • IMG_3719.jpeg
    IMG_3719.jpeg
    407.5 KB · Views: 8
  • IMG_3717.jpeg
    IMG_3717.jpeg
    204.2 KB · Views: 8
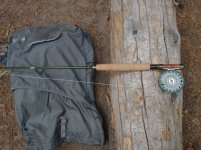
A decent fly rod is worth protecting. Years ago I bought an Eagle Claw combo rod for spinning and fly fishing. It has short sections and came with an aluminum case. It is a crummy rod but I have taken on the back of horses and mules, down the Grand Canyon, and on plenty of canoe trips. The fishing can be spectacular out where other people rarely go, and that rod has always been there. I have a fancy fly rod that I use for day trips and in power boats and the drift boat, but some of the best fishing experiences of my life have been with that old crummy Eagle Claw rod.

One of the best was wading in shorts in a big creek in the Sierra Nevada mountains on a pack trip. I had some beat up flies a friend tied for me. I was catching golden trout every third cast for about an hour. There was no one around. The fish were only the size of brook trout. I put them all back, but it was maybe the best day of fishing in a life of fishing.
 
Like ppineā€™s Eagle Claw combo fishing rod, I have an old fiberglass Fenwick combo rod that went all over Alaska when I was a young man. It even went to Japan with me so I could fill out my life list of all of the Pacific salmon species.
Since I retired with time to do it , I have bought a S-type fiberglass, graphite and bamboo fly rod blanks. Plus the Tennessee handle grips and rings, guides, threads and finishing coatings to build my own combo rods that are mainly used as fly specific rods. I know they are functionally better than the old Fenwick rod, but donā€™t provoke all the great memories that the old rod brings back to me whenever I see it.
ā€¦ā€¦..BB
 
Last edited:
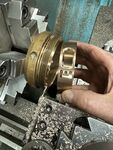
Rods iā€™ve built or repaired always seem to find their way into the ā€œfavorite categoryā€.

Had a pretty good day today but had to cut it short to start on an Ebony mouthpiece for a friends Alphorn.šŸ˜³

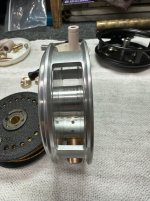
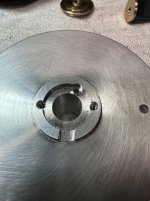
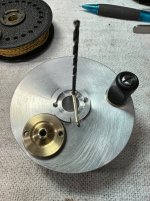
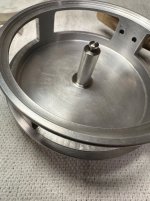
The spool is staying absolutely true so i finished the outside profile and the bushing bore. On the crank side i still have the latch recess and mill work, on the opposite side some turning to accept the check gear.

That ugly packing follower will provide the material for my line guard.
 

Attachments

  • IMG_3721.jpeg
    IMG_3721.jpeg
    272 KB · Views: 5
  • IMG_3728.jpeg
    IMG_3728.jpeg
    290.8 KB · Views: 5
  • IMG_3726.jpeg
    IMG_3726.jpeg
    245.7 KB · Views: 5
  • IMG_3727.jpeg
    IMG_3727.jpeg
    279.2 KB · Views: 5
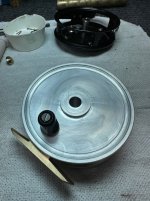
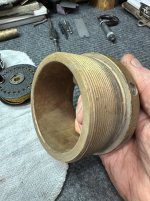
That ugly packing nut cleaned up fine and will make nice line guards, however i had to buy a smaller corner rounding mill so the guard will get screwed on later.
The latch recess in the spool is done as is the latch cover. It was left on the stump for easy holding in the mill.

šŸ™„the Alphorn mouthpiece is done too And makes noise, which is good i guess? Now my buddy can give the Ricolla cough drop guy some competition!
 

Attachments

  • IMG_3731.jpeg
    IMG_3731.jpeg
    212.6 KB · Views: 6
  • IMG_3732.jpeg
    IMG_3732.jpeg
    192.1 KB · Views: 6
  • IMG_3733.jpeg
    IMG_3733.jpeg
    347.2 KB · Views: 6
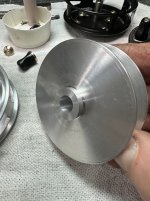
Todayā€™s focus was on some of the small spool parts.
The pictures show where i started and how i ended up. It seems like the farther i go the more little things i need, tooling components; longer 3-48 screws etc, and being the holidays my progress will come to a halt directly while i wait for the mail. Once the last of the machine work is done thereā€™s gonna be some butt time while i wait for the spool and frame to be Anodized.
No problem, im still having fun and it will certainly get fished this spring!

If you donā€™t hear from me for a couple days, you folks have a Merry Christmas!
Mike
 

Attachments

  • IMG_3736.jpeg
    IMG_3736.jpeg
    316.4 KB · Views: 5
  • IMG_3739.jpeg
    IMG_3739.jpeg
    307.4 KB · Views: 5
  • IMG_3737.jpeg
    IMG_3737.jpeg
    356.8 KB · Views: 5
  • IMG_3738.jpeg
    IMG_3738.jpeg
    302.6 KB · Views: 5
Today was a good day!
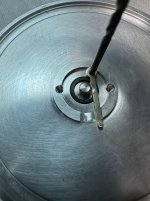
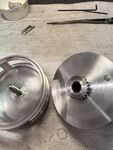
The bushing end of the shaft was machined a little tight to the bushing then the O.D of the bushing was machined to a snug fit in the spool while it was still on the shaft; with the aid of double sided tape and a live center. This insures good concentricity once assembled. When everything comes back from the plater the bushing will be installed in the spool, which will make the shaft too tight. At assembly the shaft will be polished to a good running clearance.
The end of the shaft was machined to accept the retaining latch and a small recess was machined in the cage. Once the shaftā€™s done and assembled that little shoulder will be flush with the inside of the cage.

Once my parts reel shows up i can fit the checkā€™s and springs then it will be ready for some color! While the cage and spool are at the plater i can take care of the remaining loose ends.

 
Thanks Bob, im having fun.

Today being Christmas eve i didnā€™t get too carried away but i did make a little progress! The shaft and itā€™s retaining bolt were finished and i made a dummy bushing (delrin) so i could mock up everything and check the latch function. Good thing i did because i needed to open itā€™s window of travel a skosh! That latch is one i pulled for the test, iā€™ll get a new one built before final assembly.
 

Attachments

  • IMG_3754.jpeg
    IMG_3754.jpeg
    256.5 KB · Views: 5
  • IMG_3753.jpeg
    IMG_3753.jpeg
    358.7 KB · Views: 5
  • IMG_3751.jpeg
    IMG_3751.jpeg
    296.2 KB · Views: 5
Last edited:
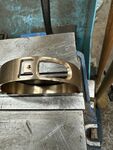
Today i had a good day and got the line guard roughed in. Thereā€™s still a little file work and some polishing but itā€™s pretty well there.
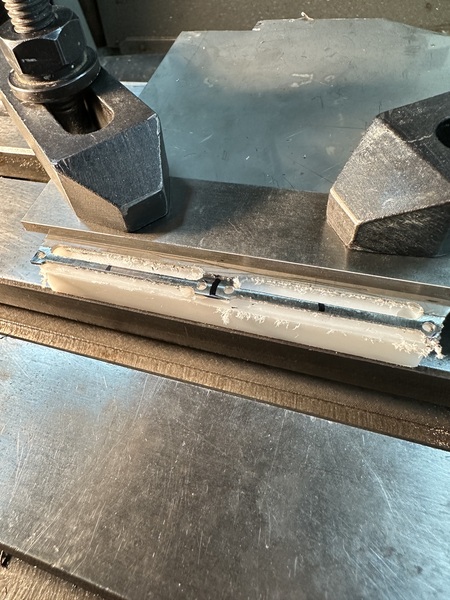
Once lined up in the mill and using the Digital readout i did everything i could and now all the work is in the center and lines up well. From the mill back to the lathe where it was parted off the stump and both sideā€™s got the proper angle, making sure the concentricity stay consistent. The good part was sawed off the blank and at the moment of truth, it all fit. Whats left is all hand work! And im still having fun.
Iā€™ve decided to make the check gear rather than pillage the parts reel (which still isn't here yet). I may get started on that this afternoon.

 
Good job getting a consistent chamfer on that curved rectangular cutout. I'd have to give that setup a lot of thought. Did you file it or machine it? Rotary table on edge?
 
Last edited:
Thanks fellas, yea a lot of this project was done on the mill; in a dividing head, rotating to cut both the windows on the frame and this piece.
 
Thanks for the kind words i certainly appreciate the adulation but this is just me having fun! I went on line and plugged in Bench Made fly reels and after viewing some of them, now when i look out there at the tools in the shed, i realize; ā€œim not the sharpest tool in the shedā€! What ability i do have the good Lord had to have given me! I have no formal training at this other than a bunch of patient folks who provided the OJT in the early years. My very first Machinist job was acquired in Odessa Texas. Fresh there from the East to make my fortune in the oil field and i saw an add for Machinist and traineeā€™s in the paper; so i drove over there and ask them to define ā€œtraineeā€. They said ā€œyou'll do; have you had lunch yet?ā€ And, after lunch i went to work for $2.00 an hour! That was in 1974 and i spent all those yearā€™s in that industry while living in Texas, North Dakota and Alaska.
 
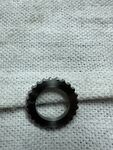
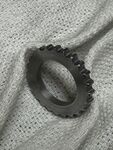
My check gear is done and itā€™s more of a sprocket than a gear but im confident it will run smooth! Iā€™m about .100 larger diameter which accommodated my cutter and still gave me 24 teeth; OEM was 28 on the pattern reel.
I roughed a blank from 4340 ht before going to the mill to generate teeth. That went well and it was polished both in the Lathe and on a rag wheel to give a smooth slippery surface. Using a 3/32 cutter i plunged it .045 deep leaving a full radius with no sharp sides. I will generate checks from several materials and decide what i like. Without buying anything iā€™ve got some flat 954 Alum Bronze and some left over PEEK plastic. This isnā€™t the best application for the PEEK but im sure it would last a long time. Iā€™ve also got some Delrin 500af Brown in the mail which is used for other fly reel components and should work well.
I mentioned early on that at some point a project like this becomes a collection of compromise which is surely the case now! It will look kinda, sorta like a J.W Youngs Beaudex on the outside but internally im ending up with a lot of guts like you'd find in a modern reel.


Today I cleaned up some loose ends and at the end of the day the reel will stand on her own two feet! The check work is next.
Early this morning i set up and made spool latches, then the spool went back in the lathe to fit the check sprocket. Lastly i drilled the frame for the line guard.
By the time i assemble and dis-assemble this thing another 100 times iā€™ll be nearly done! Fitting the newly machined latch took some time making sure my spool is in the middle of the frame windows!


lovely work. one day, vintage reel enthusiasts will be on the forums asking about the extremely rare Alaska Supreme, beautifully made and seemingly unique..
;-)

on the fly rod thing, really the only rod you need is a 8.5' 6wt Fenwick fiberglass, it does everything.
meantime I may have lost count of my rods, or pretend to to give myself plausible deniability..
did build a 3wt this year, for my favorite fishing which is remote high country creeks. Not sure how many more years I have that I'll be able to get up there, but I'm ready for it..

hiero heddon 300.jpg
 
DougK you are 100% correct on everything thing you wrote. Except for a few inches in rod length that neither of us would probably notice.
I like nothing better than a trout freshly caught, cooked to perfection on an open fire, with a nice view near or far of the nearby water body.
 
Back
Top