• Happy Founding of The Wilderness Society (1935)! 🏔️🏜️🌲

Fly rod and Rod tube winter project

Joined
Sep 25, 2022
Messages
294
Reaction score
577
Location
S. Central Alaska
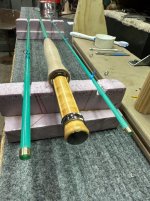
Now that the Canoe up-grades and Dip net projects are done for the year, i’m starting on a Glass fly rod and Kevlar rod tube.
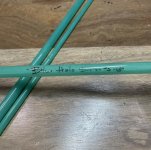
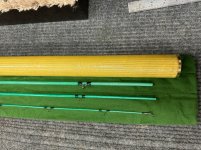
I recently picked up this 7’6” 3wt. Fiberglass blank and am excited to have this project. Ive made numerous Rod tubes so that’s the easy part.
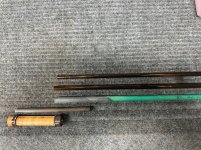
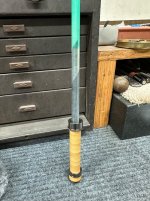
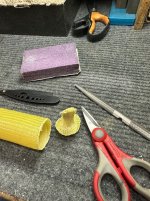
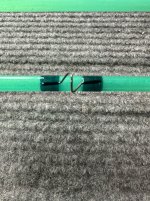
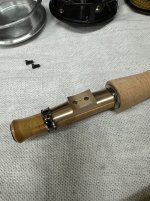
First thing was to fit the reel seat to the butt. It was larger than the bore in the reel seat so i cut 4 inches off the blank and made a carbon stent to join the seat to the rod. The short brown piece was taken from out in the middle of the brown rod section in the 2nd pic, and all was assembled with 105/207.

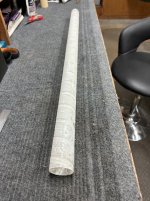
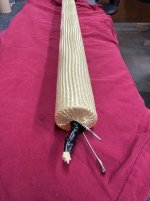
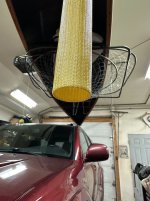
Now that im waiting for the remaining fly rod components i started on the Rod tube. Most of the ones i’ve made were carbon fiber but im using Kevlar on this one. Starting with a T12 bulb protector i roll wrapped it with some 2oz glass tape and rasp/sanded it smooth, before slipping the Kevlar sleeve in place.
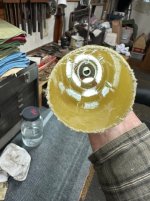
Knowing the difficulty of finishing Kevlar neatly, i out thunkit this time by bunching the sleeve at the top and turning the fabric in on the bottom. The Machined ends will go over or into the finished tube and give a nice neat look. I never sand my Carbon tubes, preferring the textured finish which this one will have as well.
I’ll go over it again this afternoon with some more epoxy and move on to Machining the end fittings tomorrow.
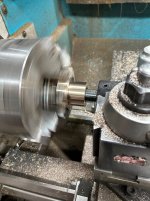
I’m using brass for these versus the Aluminum i typically use on Carbon tubes.
 

Attachments

  • IMG_1008.jpeg
    IMG_1008.jpeg
    308.1 KB · Views: 35
  • IMG_3522.jpeg
    IMG_3522.jpeg
    473.9 KB · Views: 32
  • IMG_3523.jpeg
    IMG_3523.jpeg
    323.5 KB · Views: 31
  • IMG_3524.jpeg
    IMG_3524.jpeg
    319.4 KB · Views: 31
  • IMG_3525.jpeg
    IMG_3525.jpeg
    312.2 KB · Views: 33
  • IMG_3529.jpeg
    IMG_3529.jpeg
    220 KB · Views: 34
Last edited:
That is a fantastic rod. My wife had one built for me a couple of years ago (same 7’6” 3wt).

It’s one of the 4 rods that live in my rod vault now n top of the truck (and I’ve got 35-40 rods!). I have a problem.

It gets fished a lot. My “home stream” here in RI is the Wood River. I may not be able to jump across it, but not far off. It will handle drys, small to med nymphs, and dry droppers all day. Unweighted streamers too.
 
That is a great project, sure beats my crude pvc black pipe and fittings. Looks very nice, must be very light weight too. Fly rod building is good way to while away winter. I have found that as far north as we are, fly rod building and fly tying with a full spectrum lamp does away with symptoms of seasonal affective disorder.
Looking forward to seeing your finished fly rod & tube.
 
Do you pull the plastic bulb protector out after doing all the layups or does that stay in?
Thanks for posting this, it is an interesting project.
Jim
 
The bulb protector stays in “the lay-up” and then becomes a nice slick, liner that is not susceptible to corrosion from moisture, as some aluminum ones aquire.

Here’s a (funny to me) story of the evolution of these projects.
When i started making these i went looking for a form that was around 1 5/8 diameter and just used a spent fluorescent bulb for the first one. It was waxed to prevent adhesion and once the first layer was solid i simply smacked it on the work bench and dumped out the glass. When i relayed this story on my fly fishing forum all the various laws id broken were pointed out to me; sending me skulking back into the bushes.😉
Along the way one of the respondents pointed out these tube protectors and to this day i’m very grateful for this tip.
I guess the moral of this story is “even when your in the stocks and they are winging tomatoes at you; there can be a teachable moment if your paying attention”!
P.S - i’m still very sorry for breaking that bulb.
 
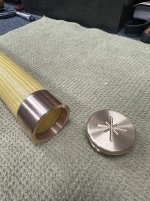
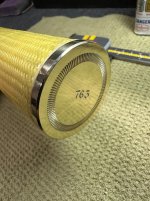
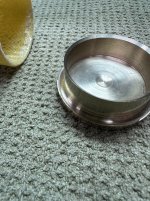
The tube is done and im happy with the effort. Trimmed up the ends and wiped out the inside. On the bottom plug i plunged a little radius into the shoulder, knowing this would look better than just butted up to the shoulder.
The socket for the top, in the Lathe and a shot of each end; ready for the rod.
 

Attachments

  • IMG_3543.jpeg
    IMG_3543.jpeg
    399.5 KB · Views: 17
  • IMG_3535.jpeg
    IMG_3535.jpeg
    266.5 KB · Views: 15
  • IMG_3541.jpeg
    IMG_3541.jpeg
    261.6 KB · Views: 15
  • IMG_3534.jpeg
    IMG_3534.jpeg
    357.3 KB · Views: 17
  • IMG_3532.jpeg
    IMG_3532.jpeg
    261.8 KB · Views: 18
  • IMG_3531.jpeg
    IMG_3531.jpeg
    426.8 KB · Views: 19
Last edited:
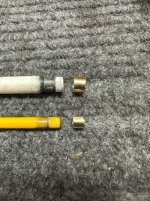
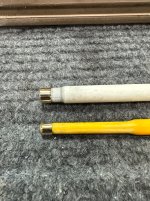
Picking up on the rod now, some progress has been made. Im in the middle of winding on the eyes and today machined a couple brass ferrule bands. Once machined and parted off i made a couple glass mandrels to fit a little snug, allowing me to chuck up the mandrels and finish rounding the edges and polish the bands. This is a lot easier than doing the finish work on the rod blank.
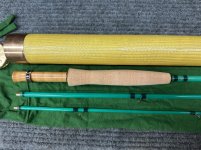
Ive still got some wrapping to go before the finishing. Should be done inside of another week. Then it can crawl inside that nice tube and hibernate for the next 6/7 months.🙄
 

Attachments

  • IMG_3634.jpeg
    IMG_3634.jpeg
    344.6 KB · Views: 7
  • IMG_3631.jpeg
    IMG_3631.jpeg
    478.6 KB · Views: 7
  • IMG_3632.jpeg
    IMG_3632.jpeg
    426.4 KB · Views: 7
Last edited:
I haven't been a serious fly fisher for over 30 years. I'd like to start again, still have all my fly tying stuff.
Nice job on the case, but I have to ask some questions about the rod.
Has there been a shift in the thinking about fly rods, or have i always just been a knuckle head? Back in Nova Scotia, the smallest rod I ever saw was an 8'6" fenwick, and I'm not even sure if you could buy 3 wt line. I thought all the fish in Alaska were these great big lunkers that you would need max capacity for......or has flyfishing evolved like paddling, where light weight composites can out perform the old heavy standards.
I dunno, I started off with a bamboo rod that was 9 foot 6, wish I still had it. I've got a nine foot sage with 6 wt line right now, and it feels like a toy compared to my old rods.

Anyway, my apologies, just hoping maybe you dedicated fly casters can get me up to speed before I spend more moolah.
 
Beautiful rod case! Well done.
Anyway, my apologies, just hoping maybe you dedicated fly casters can get me up to speed before I spend more moolah.

I believe all new and older rod materials are relevant and specific to your style and type of fishing. Bamboo and glass rods are heavier and require a slower casting style, but that can be preferable when throwing small delicate flies. I also like the aesthetic and how they feel. This is coming from someone who prefers to paddle wood and canvas canoes so take that for what it’s worth.

Many times I use weighted lines when throwing streamers and prefer 7&8wt 9-10’ graphite rods. This set up is great for trolling when on a canoe trip as well. I use “action discs” on my leader when trolling to impart some movement of the fly.

They make rods down to 0wt, but I personally don’t see why and I think it would over play any decent size fish. I am predominantly catch and release so that comes into play for me.

I wouldn’t hesitate to use your older Sage rod. I would get a new line and some leader material and enjoy it.

Bob
 
Thanks for the kind words.
Lets start by dispelling the myth about “Alaskan Lunkers”; many years of pressure, especially on water along the road system has greatly reduced both the size And numbers of fish caught these days. You will work very hard to catch a Trout that exceeds 4lb’s or an 18 inch Grayling. Even the Northern’s seldom break 10lb’s. You can however fly out to numerous camps costing over $5,000 per week and catch those fish that make us famous; or fish in the Salt water!

Fly fishermen now days tend to be in the Carbon (graphite) camp and rods such as your Sage are still very popular and desirable and make up the lions share of new tackle being sold. If it has no warts that would hamper fishability; id agree with Bob in telling you to put a new line on it and get back after it.
The folks in the Bamboo/glass camp’s tend to be your more dedicated or some might say the purest in the sport. These guys can talk your leg off citing all the technical details of which i have zero interest. I’m sort of a collector with a small group of a dozen of so Phillipson glass rods from the 60’s and early 70’s. Most of which i’ve never fished🙄
Hailing from a northern clime you understand a fella’s need for a project or two to “get us thru” and for me these many varied things in “my content” are just that. With my Wife's failing health i sold the ocean boat and am never away overnight these days. That curtails a lot of Alaskan endeavors so I've adapted and spend the available time fishing local lakes and a couple small streams each summer. The high point of my summers is the 2 week period in June when i can load up the “dip ship” and drive 10 minutes to that stream with the Red run!

This 7’6” Glass 3wt. Is a delicate thing and will be a pure joy to fish these small streams for resident Rainbows. On my fly fishing forum a lot of folks will post these tiny fish, many under 10 inches and talk about “the purity of the pursuit” and fawn over tons of details that completely bore me! Im just doing the best i can with what ive got so i slink around learning every rock in a particular stream and just smile as i wade among them “like i really know what im doing”! As a Machinist people have ask me “so i bet with your level of patience, you probably only shoot muzzleloaders?” And i laugh, telling them i still prefer an M-60!
 
Last edited:
I carried a M-60 around for a year when I was a boy, spent many long, dark hours snuggling it near the top of the perimeter berm. Hope never to see one again.
I made a couple of black power fire firearms NW Trade Gun smooth bore 20 gauge & a Trade Rifle in .62 caliber. Both were enjoyable builds to while away the long dark nights at 64 degrees North latitude.
 
Thanks for the kind words.
Lets start by dispelling the myth about “Alaskan Lunkers”; many years of pressure, especially on water along the road system has greatly reduced both the size And numbers of fish caught these days. You will work very hard to catch a Trout that exceeds 4lb’s or an 18 inch Grayling. Even the Northern’s seldom break 10lb’s. You can however fly out to numerous camps costing over $5,000 per week and catch those fish that make us famous; or fish in the Salt water!

We're in luck boys and girls, we can still find the good fishing by canoe tripping.

Nice rod and tube. I never thought about a three weight. I could see where it would make for a nice light presentation, among other things.
 
Im done with this part of the project now and with another 6 months of winter to endure have decided to make a fly reel as well, so I've ordered in some materials and will take in on it once material gets here. This will be a simple click/pawl reel; nothing too Buck Roger’s’ish!

And i want to offer an apology to @Boreal Birch if my mention of the M-60 drug up any unpleasant memories. My intention was simply to show my-self as a “not patient” person.

P.s ours hung on the sides of our helicopters! (Phu-Loi 7 Di-an.)
 

Attachments

  • IMG_3643.jpeg
    IMG_3643.jpeg
    367.2 KB · Views: 5
  • IMG_3644.jpeg
    IMG_3644.jpeg
    403.3 KB · Views: 5
  • IMG_3641.jpeg
    IMG_3641.jpeg
    456.4 KB · Views: 7
Last edited:
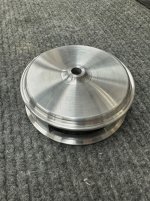
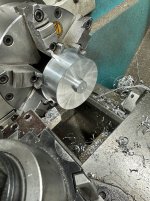
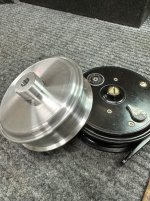
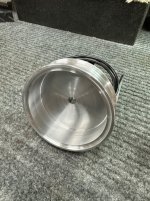
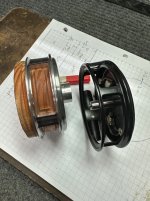
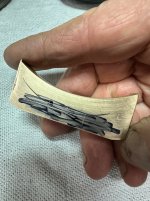
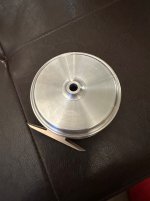
Today i took off on my reel hoping to get the cage roughed in and the windows machined and that was a wee bit too optimistic! Tomorrow i should get the windows cut in and if i don’t scrap it during that part; it will be pretty straight forward after that.
Im still waiting for the remainder of my materials so i’ll be at the “hurry up and wait part” directly.

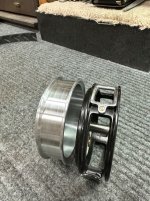
Im happy with how this is going. I’m just pirating a J.W Young Beaudex reel, “making something look like something else; isn’t bad at all. I am using modern (space age) Vesconite center bushing material and all the trim will be Aluminum Bronze for both a material up-grade and some bling.
 

Attachments

  • IMG_3658.jpeg
    IMG_3658.jpeg
    355.5 KB · Views: 7
  • IMG_3660.jpeg
    IMG_3660.jpeg
    357.1 KB · Views: 7
  • IMG_3661.jpeg
    IMG_3661.jpeg
    364 KB · Views: 7
  • IMG_3662.jpeg
    IMG_3662.jpeg
    341.1 KB · Views: 7
Last edited:
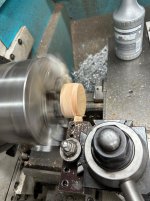
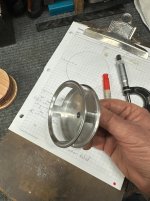
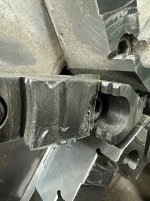
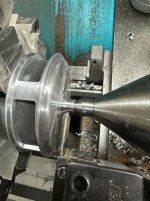
Over the years i’ve proven to myself that Procrastination is always the best policy! Wifey wouldn't agree! Not getting to the Mill yesterday proved my point as the night to sleep on it provided a very workable solution.

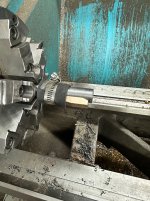
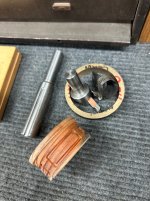
I drew a circle on a 2x4 and jig sawed a sorta round plug then moved to the lathe and “made it fit”. This allowed me to hold this fragile part while finishing this important step! The issue with something like this is tool chatter and being able to hold it securely without distortion.

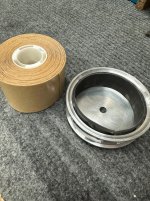
To finish the back side i relied on a rubber liner to chuck on and double sided tape on the jaw face to both protect and to drive the thing without slippage, adding a center in the end made it quite stable. The tape was a good bit of work to get off the jaws!

At this point i can add the holes in the back where the check support screws go, then wait for the rest of my stuff to show up!
Im having fun!
 

Attachments

  • IMG_3665.jpeg
    IMG_3665.jpeg
    247.6 KB · Views: 14
  • IMG_3666.jpeg
    IMG_3666.jpeg
    323.5 KB · Views: 13
  • IMG_3667.jpeg
    IMG_3667.jpeg
    307.2 KB · Views: 13
  • IMG_3668.jpeg
    IMG_3668.jpeg
    270.5 KB · Views: 14
  • IMG_3671.jpeg
    IMG_3671.jpeg
    410.4 KB · Views: 9
  • IMG_3670.jpeg
    IMG_3670.jpeg
    299.1 KB · Views: 9
  • IMG_3669.jpeg
    IMG_3669.jpeg
    301.1 KB · Views: 9
  • IMG_3672.jpeg
    IMG_3672.jpeg
    381.3 KB · Views: 10
Last edited:
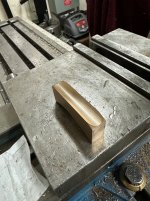
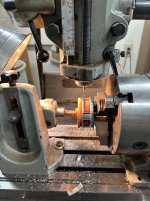
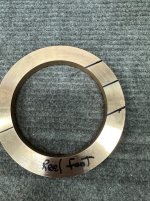
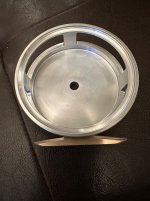
Today was spent building a reel foot, most of the day was occupied with “the special tooling” needed to do this. As that pile grew i started thinking, i may want to do this again someday?
Most of today wont look like much to you so this will be a microwave version, lots of hours for such a small part!
 

Attachments

  • IMG_3677.jpeg
    IMG_3677.jpeg
    397.6 KB · Views: 11
  • IMG_3678.jpeg
    IMG_3678.jpeg
    334.8 KB · Views: 13
  • IMG_3679.jpeg
    IMG_3679.jpeg
    289.5 KB · Views: 13
  • IMG_3683.jpeg
    IMG_3683.jpeg
    365 KB · Views: 14
  • IMG_3685.jpeg
    IMG_3685.jpeg
    307 KB · Views: 13
  • IMG_3684.jpeg
    IMG_3684.jpeg
    392.6 KB · Views: 13
  • IMG_3687.jpeg
    IMG_3687.jpeg
    202.8 KB · Views: 11
  • IMG_3688.jpeg
    IMG_3688.jpeg
    251.8 KB · Views: 11
Back
Top