• Happy Birthday, U.S. Marine Corps (1775)! 🇺🇸 🪖

New Paddle build 2023

Joined
Apr 25, 2022
Messages
205
Reaction score
337
Location
Southeast Wisconsin
Well, as Brian (AKA "Cruiser") pointed out in his thread: https://www.canoetripping.net/threads/building-some-new-wood-composite-paddles-for-2020.120222/ with every new canoe comes the need for a couple new paddles. Having completed my first stripper build in late fall, I felt the need to build a couple paddles. What originally started out as a plan to build two straight shaft, and two bent shaft, in the same build was actually broken down into two separate builds, back to back. I did this, since it was my first paddle build, I decided I'd rather mess up two than four. I did the straight shaft first, then the bent shaft.

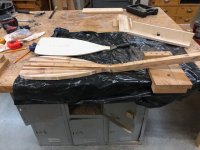
I'm not going to go into much detail on the processes I used from Brian's thread. The information there is awesome. I did make a few "tweaks" based on my equipment, and thoughts I had along the way. I'll go into a bit more detail on my individual modifications. Nothing special about the blades; I'm saving crazy blade designs for another build, now that I feel fairly confident in my process. Here's the finished paddles, then I'll go through how I got there. I made these for myself and my wife. I'm 5'-9", she's 5'-5". Mine are both 34" shaft, hers are 32" (straight) & 32.5 (bent).
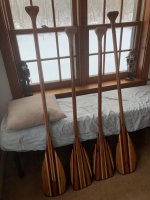
IMG_2732.jpg

Not going into a lot of detail on shaft sizing, primarily because I'm not an expert. My normal paddles are all about 5 hours away, and I wasn't sure when I'd see them again, and I was anxious to start the build, so I forged ahead with best guess, and measuring the shaft on the head method, with both arms at 90 degrees like a goal post. I came up with 34" for me, 32" for my wife. I added a 1/2" to the length of her bent shaft because I shortened her blade a bit. Next, I decided on blade design. I prefer a shorter blade for general paddling, and found an "ashes" guide blade design that I liked. For the bent shaft, I looked at sizes of a variety of blades out there. Going off of several Bending Branches blade sizes, I drew my own.
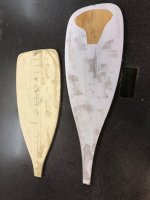
IMG_2714.jpg

To do my own blade design, I started with a centerline running the length of the blade, marked the width of the shaft, the max width of the blade, and the desired length. I set my max width at 8 1/4", length of 19 1/2". I then marked off lines at 1" spacing, across the blade, perpendicular to the center line. I drew the rough shape of the blade, using a combination of curves, and the profile of the guide blade as a starting point. My target was 120 sq. in.

Once I had the rough shape, I measured from the center line to the profile, at approximately the center of each 1" space. I used a dial caliper, for accuracy, and to get all measurements in decimal inches. After I measured all the spaces, I added all measurements, multiplied by 2, and this gave me a very close approximation of blade area. I tweeked design until I was at 120 sq. in.
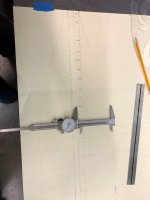
IMG_2612.jpg

So bent shaft blades ended up being 19 1/2", Straight shaft blades 24". I decided to make all shafts 62" long rough, to allow for trimming later.

Given I realized I could probably sell these for pretty close to McDonald's wages, when I gear up for mass production this shaft size will allow for most single blade paddles for me. If I get into beaver tail or otter tail, I'd have to adjust accordingly. Time to make the shafts.
 
Nice work
Very pretty
What sort of tip protection did you use?
I’m assuming you glassed the blades, what weight cloth?
Have you weighed them?
 
Stripper: You're jumping the gun. you'll have to wait. Just kidding, I used the same method Cruiser used in his thread. I affectionately call it "gunk tips". I color epoxy with wood flour, add short glass fibers to reinforce, then add more flour to soak up any excess epoxy juice. I glassed the blades, 4 oz cloth. A bit of over kill, but I had it. I weighed the straight shaft at 40 ounces for the pair. I haven't weighed the bent shaft yet. All paddles still need final buffing and varnish. I'll do that in the next couple days, and get a final weight.

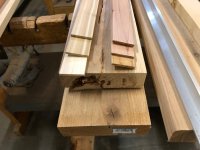
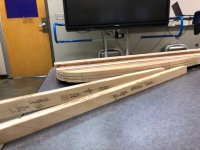
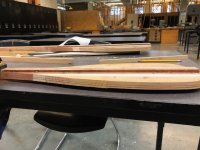
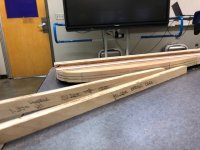
For the shafts, and much of the blades, I started with 2 * 8-8 foot "cedar" from the local big box store. Bought 4, looking for color variation, and noticeably lighter pieces. I cut 62" off of two of these with the most color variation. I used a table saw for all ripping, and ripped these into strips about 1/8" thick. I wasn't too exact on thickness, just wanted them to be fairly pliable. So my strips were about 1 3/8" wide, 1/8" thick.
IMG_2710.jpg
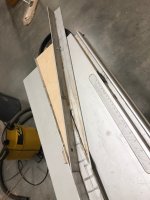
I have a pretty good supply of aluminum angle, 1 1/2" by 1 1/2" by 1/8" thick. used this for camping jigs for both straight and bent shafts. For the bent shaft, I cut a wedge out of baltic birch set at 12 degrees.
IMG_2607.jpgIMG_2613.jpg
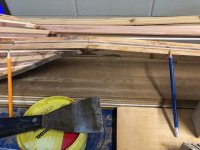
The brown goop shown is a heavy coating of paste wax. I learned on the first straight shaft epoxy does indeed stick to aluminum fairly well. Waxing before glue-up fixed that problem. I "shuffled" the strips from the two different piles. This minimized the effects of knots, and gave an interesting color pattern.

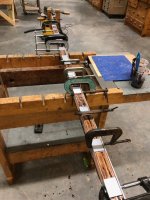
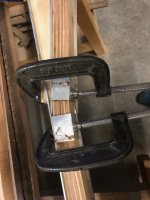
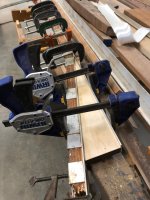
I painted both sides with epoxy, then thickened & colored with wood flour. Coated one side, then into the clamps. I lightly clamped down to align the strips, then clamped in. As soon as the "in" clamps were snug, I could remove the "down" clamps. Notice the strips are vertical in the clamping jig. This doesn't matter for the straight shaft, but this allows the strips to bend easily for the bent shaft.

The bent shaft I clamped close to the bend, each side first, then worked my way out.
IMG_2564.jpg
Here's the straight shaft glued up. There were "down" clamps at each clamping location. These were removed as soon as the "in" clamp was snug.
IMG_2609.jpg
This is a dry fit clamping. just wanted to make sure the strips would make the bend nicely. I used enough strips to make a lamination 1 1/2" high, relative to finished paddle, shown side-to-side in the picture. Finished shaft gets ovalized and tapered to 1 3/8" by 1 1/8"
IMG_2617.jpg
Here's the bent shaft glued. Again, unthinned epoxy, followed by thickened with wood flour. If you want to buy stock in epoxy companies, I'll let you know which one I use. I certainly got a bit heavy on the epoxy. Doing the shafts the way I'm doing them, that squeeze out isn't going to matter much. I did scrape off the top while it was still green, but after the first one I didn't do that.

IMG_2634.jpg
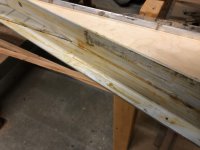
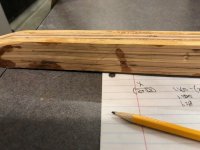
Here's the face of the shaft that was the bottom, up against the aluminum angle. The squeeze out ended up very flat and smooth, which is great for the next step.
IMG_2635.jpg
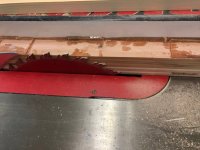
With the smooth face against the fence, I ripped the first edge clean, and straight. I then ripped two pieces for the shaft. I'm puting a center spine of cherry-walnut-cherry, total width 3/16" down the middle of each shaft, so each rip of the cedar laminations is a bit under 1/2". These I calculated, and measured exactly, to end up with finish width of 1 1/8". Then I glued the shaft back together, again using epoxy.
IMG_2655.jpg
Probably a bit of over-kill time wise on the fabrication of these shaft, but I'm not doing it for $$$, and it worked well for me. I don't have enough secure space in my heated shop to build a canoe, so what the heck.
 
Oh, and I forgot. I removed the shafts from the clamping jig while they were still green, so I kept them clamped to a flat table for a couple days. Not sure if I needed to, but I'd rather do it and not need to, than skip it and regret it. IMG_2622.jpg
 
I discovered several unintended benefits of this shaft design as I progressed with the build. I'll talk more about them later, but these lamination layers make a great refference for symmetry, material removal, blade attachment, grip attachment, etc.
 
Blade design wasn't much special. The straight shaft are simply a straight glue-up of a variety of woods, with some width variation as well. The width variation was mostly due to the thickness of the stock. I took the stock I had, ripped it to 1 1/2" wide, flipped the pieces on edge, and glued them together. Straight blades are: Eastern Red Cedar, White Pine, Each of the same WRC used in the shaft, and Cherry on the edge.

The bent shaft use the same woods with a couple changes. I decided to make my wife's paddle using the WRC that has a pink tint, and mine using the WRC with more of a tan tint. So, at a glance I'll be able to tell the difference. In hindsight, I wish I had made my grip out of walnut to help distinguish them at a glance. I haven't finished the grips yet, so I may use a dark oil on mine.

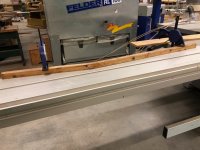
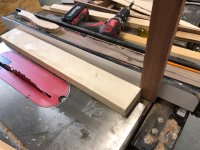
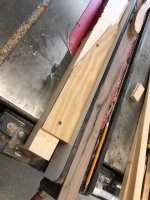
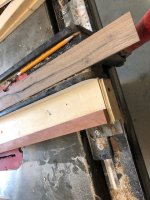
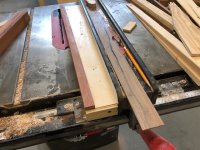
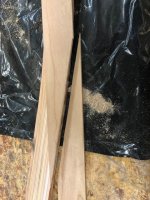
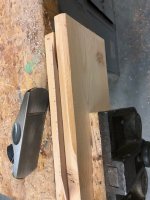
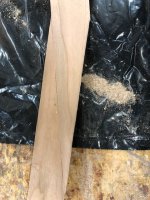
Cutting all of the tapers for the bent shaft blade is pretty easy if you have a table saw. I use this technique for tapering the shafts, tapering the gunwales on my canoe, and any time I want to cut a straight taper.
1. Cut a piece of scrap (1 by 6, plywood, anything relatively flat & straight) to the same length as your piece.
2. Move the fence away from the blade to use as a guide.
3. Leading corner tight to the fence
4. Trailing corner away from the fence by the amount you want to cut your taper. For the blade tapers, I just put my stock between the scrap and the fence.
5. temporarily screw a piece of plywood tight to the fence, to hold the scrap in place.
6. rip this scrap piece.
7. Remove the plywood.
8. I add an end stop to the back of my rip guide, so the strip doesn't slip. On longer pieces, you might have to come up with a clamping solution. I did when I ripped the tapers on the canoe gunwales.

IMG_2623.jpg
IMG_2624.jpg
IMG_2625.jpg
IMG_2626.jpg

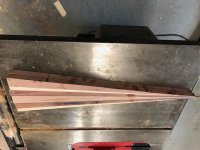
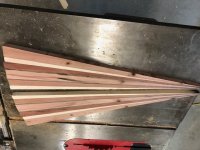
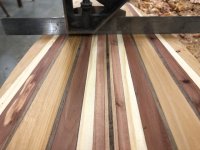
I don't have any pictures of the glue-up of the blade blanks, but glueing tapers isn't a quick & easy. Make sure you dry fit first, to make sure your clamping solution works. I made some gator teeth, which are tapered on one side, stepped on the other to provide flat areas for the clamps.
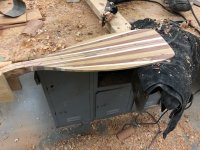
The glued up blanks are resawn down the middle, and opened up like a book (book matched) for two identical sides of the blade. Mine come to a point, due to all of the tapers. This length is about 4 1/2" longer than the blade.
IMG_2627.jpg
IMG_2628.jpg
 
Brian: You're going to "steal" an idea from me? That's rich. Virtually this whole build is based on yours. I did come up with a blade edge layout a bit different from yours that worked really well, especially if your rough blades get a little out of whack attaching to the shafts. I'll post that later today. House full of visitors, and my wife is giving me the evil eye for sitting in front of the computer.
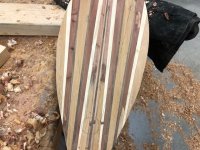
 
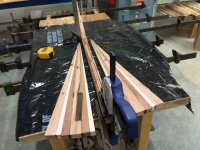
Attaching the blades, I started with focusing on the important geometry. What I mean is, the shaft gets ovalized. Not only for comfort of grip, but as a method to ensure you're gripping the shaft square to the blade. With this in mind, I wanted to ensure the blade ended up square to the long axis of the yet to be ovalized shaft. It seemed to me this was especially important on the bent shaft. The pictures below are for the bent shaft, but I did the same for the straight shaft.

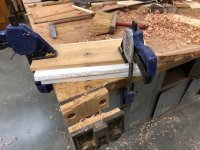
The blades are glued in place. I used epoxy & thickened epoxy. Prior to glueing, I clamped the shaft square to the work bench. Checking and adjusting for square at the throat (where blade ends, shaft starts) and at the grip end. I cut a few shims to raise the two blade halves up to the center of the shaft. Look close, and you'll see a combination square just past the blade. Can't see the grip end, but it is squared to a neighboring bench.
IMG_2647.jpg
IMG_2629.jpg
Here's one of the blades glued on. This shaft is made with a 12 degree bend. I discovered with this build, I could easily use the same shaft and change the angle by 2-3 degrees either way (so could be 9-15 degrees) by changing the attachment of the blades.
IMG_2633.jpg
After the epoxy set, I used the blade template, traced, and cut close to the line, then sanded right up to the line.
In checking my blades, even though they still seemed to be square to the shaft, and centered, I wanted to make sure they stayed that way throughout the shaping of the blades.

Once again, I clamped them to a workbench, making sure the SHAFT WAS STRAIGHT, AND SQUARE TO THE TABLE. I then measured from the table to the center of the blade. I ripped two strips on the table saw. One, center height + 3/32". The second, center height - 3/32". This gives me a difference between the two of 3/16". With the shaft clamped in place, I used these strips to trace the two edge profile lines. The first photo shows the clamps removed, but they were still in place when I traced the lines.
IMG_2567.jpg
IMG_2568.jpg
In this photo, you can see the lines aren't exactly in the center of the rough blade. They are on the other side. Either the blades slipped during glue-up, or somehow they were'nt square. This fixes that. If I had scribed a set distance from the edge of the blade, I think the blade would have ended up out of true (all in one plane, square to the ovalized shaft).
 
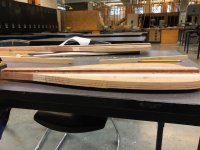
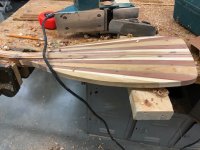
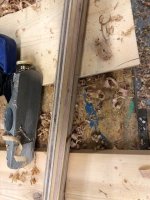
I shaped the blades before tapering and ovalizing the shaft, or attaching the grip. Just like Brian's thread, this is to make clamping much easier. I used a power plane, hand block plane, and a 1/4 sheet palm sander with 60 grit. wanted to leave a slight raised rib from throat to approximately 3/4 of the length of the blade. I've been using a power plane for quite a while. I was still quite nervous on the first blade. It really goes quick and easy. Just keep an eye on the lines, approach them evenly, and don't cross them.IMG_2662.jpg
IMG_2686.jpg
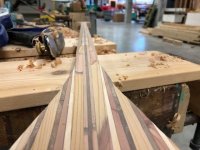
I planed just outside the line, then went the rest of the way with the palm sander and 60 grit. On the softwood it goes pretty quick. If you look at the laminations in the shaft, they're a pretty good indicator it's staying fairly symmetrical.

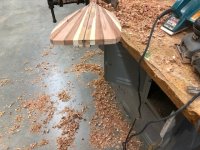
Doing the power side of the blade goes much quicker. No spine, means simply plane it flat, except for the thicker area at the throat. I'm going to tune it so it is slightly concave, but I start by just planing flat.
IMG_2666.jpg
IMG_2669.jpg
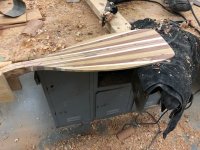
Once I've got it flat, and close to the line, I start about where the taper from the throat ends, and work out to the edge with a jack plane. Here I've got a circle drawn, and lines with arrows. This is the area I wanted to have a slight concave. I drew the lines, planed them away, checked it, drew them again, removed them again, and repeated until I had the concave I wanted.
IMG_2667.jpg
This is a bad angle, and bad lighting, but I stopped when I had about 1/16" concavity in the center of the blade.
 

Attachments

  • IMG_2687.jpg
    IMG_2687.jpg
    53.2 KB · Views: 3
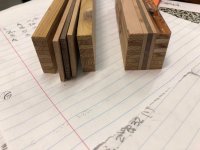
I just realized I didn't explain the shaft spines very well. On both shafts I added a 3 layer spine (cherry-walnut-cherry). For the straight shafts, these were simply full size layers, that ran the full length of the shaft. Each layer was about 1/16" Thick.

For the bent shaft, I needed to get the spine to follow the bent laminated shaft. It went much easier than I thought it would. I laid a full length spine piece on the blade side of the shaft. Traced the angle of the handle side. cut on this line, flipped the "cut off" over, and perfect fit. A light planing of the joint, and It fit really nice. Next layer, I started on the grip side of the shaft, and the cut off went on the blade side. Third layer was the same as the first. Here's a sketch of the joint off-sets:
IMG_2709.jpg
IMG_2637.jpg
Here is one of the cherry layers laid on the blade end, cut along the angle for the handle end.
IMG_2639.jpg
A light planing of the cut edge
IMG_2638.jpg
Here's the final seam.
IMG_2657.jpg
After a little bit of clean-up you can barely see the joints in the spine layers. I've got pencils pointing them out so you can see how far offset they are. Pretty good overlap, this combined with the continuous bent laminations eliminates any concern of a weak spot at the bend.
 
The blades get sanded to final shape, only down to 80 grit. I'll go to 150 before glassing the blades, but I'm going to reinforce the blade edge, and that will require clean-up, so there's no reason to go any finer at this point.
IMG_2666.jpg
IMG_2670.jpg
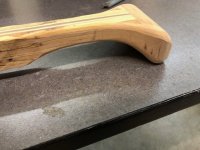
I decided on asymmetric grips, so I attached the rough stock now, and did very rough shaping. Before attaching the grip stock, I cut a taper on the shaft. At this point, the shaft stock is a bit over 1 3/8" high, 1 1/8" wide. I used the table saw and ripped a taper on the grip end, so the grip end is 1 1/8" square. The taper ended about 6" before the throat. I did this because, well Brian (Cruiser) did it on his build, and he's absolutely right. I really like the way this transition ends up looking, and yeah, it saves a bit of weight.
IMG_2673.jpg
Prior to glueing the stock on, I verified I had enough extra with my template. I used Cherry for all grips. In hindsight, I would have used Walnut for my grips, Cherry for the wife's. The paddles for me are slightly longer, blade slightly bigger, and grip slightly larger. Being able to differentiate at a glance would be nice. I'll probably apply darkened oil as first coat to my grips.

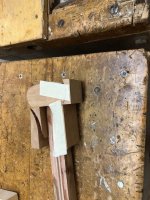
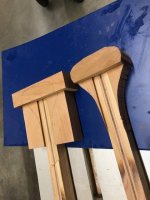
The top chunk is 8/4 by 2" wide. The two side pieces are 7/8" by 1 1/8" wide. I used TB 3 wood glue for attaching the grips. Two reasons: This makes the seams less visible, and I didn't have to wait as long. The top chunk joint is primarily edge grain-end grain. I glued the two side pieces on first. After an hour, I did a light trim on the miter saw so the side pieces were clean and flush with the shaft.

For the end gain glue joint, apply glue to both surfaces liberally. push the two pieces together by hand (no clamps). Pull it apart immediately. Much of the glue on the end grain is pushed into the pores. reapply a light layer, and clamp in place. Some people thin the first coat with water so it soaks in better. I do not. Adding too much water drastically weakens the joint. Pushing the pieces together and pulling them apart forces the glue in. If I'm using an open grained wood, I'll do this 2-3 times. Closed grain, like cherry & walnut, once is good.
IMG_2569.jpg
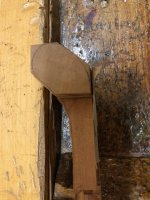
I traced the face profile, and cut to shape using the bandsaw. I didn't try to be exact. DON'T CROSS THE LINE. What was important, I wanted to keep the cut-offs in useable pieces. I taped these back on top and bottom, so I had a flat surface to trace the side profile on, and a flat face to rest on the table of the bandsaw.
IMG_2674.jpg
IMG_2677.jpg
Side profile is cut using the bandsaw.
IMG_2683.jpg
At this point, I ROUGH sanded the profile of the grip. Final shaping & sanding will come later. I just wanted to get it close enough to blend the shaft into the grip when I ovalize the shaft.
 
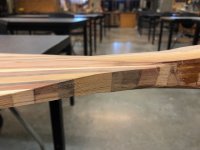
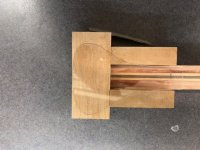
To shape the shaft, it helps to fully understand where the shaft is at, and where you want it to end up. These shafts are currently 1 3/8" high by 1 1/8" wide. I use "high" to mean perpendicular to blade face. So if the blade is flat on the table, the long direction of the shaft rectangle is up. They taper down to 1 1/8" square at the grip. I want the cross-section to be an oval at the throat area, and a circle at the grip end.

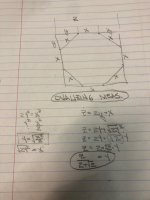
I want to start with an equillateral octagon (equal sided) where it will be a circle, and a stretched out octagon where it will be an oval. Here's how I did the measurements. I used a dial caliper for all measurements. Take the face width, divide by (2 + sq. rt. 2). I derived this on the sketch, if you're into math derivations. If you don't care about math, just take the face and divide by 3.414
IMG_2653.jpg

IMG_2680.jpg
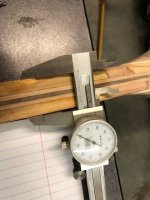
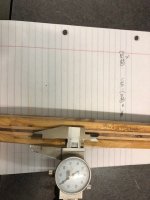
So I measured the width of the face. Divided by (2 plus square root of 2).
IMG_2681.jpg
Set the caliper to this measurement, and mark the face from each edge. REMEMBER, IF YOU'RE LAYING OUT A TAPERED SHAFT, THE MEASUREMENTS WILL BE DIFFERENT ON EACH END.
IMG_2682.jpg
Here you can see the lines drawn on two faces near the grip end. Also note, the lines are very close to the lamination lines. Those came in handy as I started shaping. I was able to easily montior progress, and make sure I was staying consistent.

For the shaping, I like a combination of a block plane, and a little finger plane. Use whatever you're comfortable with. remove the material down to the octagon lines.
IMG_2684.jpg
IMG_2685.jpg

After it's shaped to an octagon like shape, just soften the 8 corners a little bit. Don't go crazy. I just did a couple strokes with the block plane on each corner. Now we need to sand it to the ovalized & tapered shaft. Again, more than one way to do it. Here's what worked for me.

IMG_2690.jpg
I clamped the blade down between two layers of styrofoam, and a scrap 1 by 8 on top. I didn't try it, but I'm not confident you wouldn't mess up the blade just clamping it down. the foam and scrap 1 by 8 made sure the blade didn't get damaged.
IMG_2691.jpg
The grip is just kind of hanging out there. I planted this firmly in my gut while I was sanding, so the shaft wouldn't flex, and to minimize stress on the blade.
IMG_2693.jpg
For the sanding, I used a 1 1/2" by 60" belt grinder belt. I like the longer length. any belt would be fine. I do like the skinnier width, just seems to make it easier to control where the pressure is applied. Again, use what you're comfortable with. If you've got 4" belts, and want them skinnier, rip 'em lengthwise. I looped the belt over the shaft, so it was hanging as shown. I grabbed each end, pulled them snug, and separated my hands by about a foot so the sanding was hitting roughly the top third of the oval. Using a sawing motion, I worked from one end to the other, with overlapping strokes.

Here, think of tightening lug nuts on a car when changing a tire. Don't do one side all the way. Think of a clock (old school, with hands. Not digital). I started with belt touching shaft at 12:00, hands towards 6:00. Then I simply worked my way around. Using hand direction, I went 6:00-12:00-3:00-9:00. Then, 2:00-8:00-4:00-10:00. Keep an eye, or more important, feel, on progress. Stop when it looks & feels right.
 

Attachments

  • IMG_2682.jpg
    IMG_2682.jpg
    62.4 KB · Views: 0
These details and pictures are encyclopedic, Kliff. I'm sure this thread will be a valuable reference source for many others in the future.
 
Back
Top