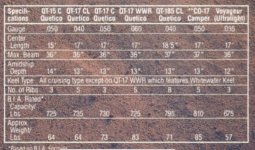
I have been rigging a Alumacraft QT17C for racing. This one this specifically the Texas Water Safari. But this can be used in any race as far as I know as there are no exterior hull modifications. As far as which aluminum canoes work best. The Alumacraft Vouyageur is the sought after canoe. With its lowest weight out of Alumacrafts lineup. But they are only produced every so often. See the chart to see the weight difference between models.
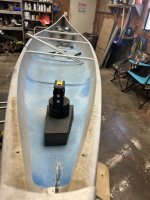
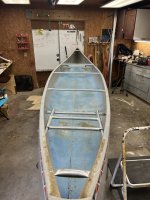
The first thing I do is strip the canoe of everything inside. Taking a 3/16” drill bit and drill out the rivets on the decks and the seats. Parts of the decks will be reused so do not toss those just yet. Seats can be set aside will not really be using them. Take the thwart and yoke off with generally a phillips and a wrench. Now left with the bulkheads I take an old flathead screwdriver that I have sharpened. And work the tabs away from the canoe walls and then turn the screwdriver perpendicular to the tab and slice the tab down to the rivet. Then work it out and around the rivet. Do this for all the tabs. Then remove the foam. I had timelapse all this but my phone died and I guess in the process did not save the video. This is the best picture I have of the blank canoe.
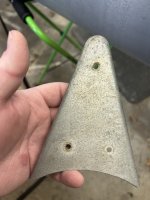
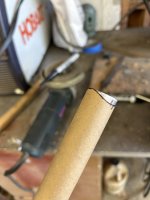
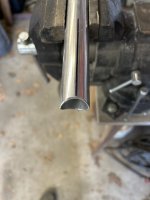
So now I start with cutting down the decks and installing those. You want to find something to create a smooth arc like in the picture. And go ahead and attach those with some 3/16” pop rivets.
At the time of building this canoe. Wenonah did not have any sliding seat frames or foot braces. I generally weld the sliding frames anyway but for people looking to buy or use the measurement that I’m using. Beware that if you buy from Wenonah then your measurements will be different.
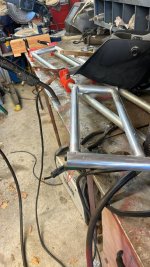
I use 1” x .058 6063 aluminum tubing for most of the rigging. The side tubes the “slide” are 1.25” x .058. The 1” saddled tubbing is set up 6” center to center for the Wenonah bucket seats. I also like a 16” center to center wide spacing on the sliding rails. Ample room for the legs up front in an aluminum. I get everything cut and preped for the slides. Then weld them. And I’m no professional, I know the welds look like a dirtdobber.
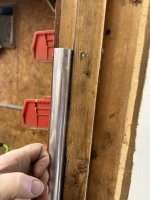
Next we will cut the rails and the cross supports along with the thwarts and yoke. After getting them cut you will want to heat the ends up that need to be flatten with a propane torch to anneal them. If you do not the ends will crack when you go to flatten them. You can also cut 4-2” long pieces of angle from one of the seats. The picture below is what I use. But like I said beware and adjust if using different sliders.
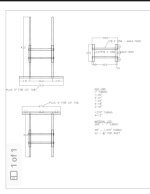
For the thwarts and yoke I use 1/4” rivets. I like a pretty smooth top gunnel and do not like bolt heads sticking up. Each ends of these will obviously be flatten about 1.5”. The thwarts will need to be trimmed at a slight angle.
The cross supports will have each end flattened. And you will also add the a piece of angle to each end that you cut earlier. The rails that the seat slide on will have one end flattened about 2”. The other end will be left alone and will rest on top of the cross support. Below is a Timelapse of me putting together the bow seat frame and installing it in the canoe. I also use solid rivets so the camera moves a little when I’m hammering them in.
Here is the canoe as it sets now. The original weight before working on it was 76#. As it is now is 63#. So the goal here is to make it comfortable, functional for a multiple day race and hopefully lighter. We still need to add the bucket seat, floatation foam/jug holder and foot brace. When I install these other things I’ll add on to this post. Until then if you have any question let me know.

The first thing I do is strip the canoe of everything inside. Taking a 3/16” drill bit and drill out the rivets on the decks and the seats. Parts of the decks will be reused so do not toss those just yet. Seats can be set aside will not really be using them. Take the thwart and yoke off with generally a phillips and a wrench. Now left with the bulkheads I take an old flathead screwdriver that I have sharpened. And work the tabs away from the canoe walls and then turn the screwdriver perpendicular to the tab and slice the tab down to the rivet. Then work it out and around the rivet. Do this for all the tabs. Then remove the foam. I had timelapse all this but my phone died and I guess in the process did not save the video. This is the best picture I have of the blank canoe.

So now I start with cutting down the decks and installing those. You want to find something to create a smooth arc like in the picture. And go ahead and attach those with some 3/16” pop rivets.

At the time of building this canoe. Wenonah did not have any sliding seat frames or foot braces. I generally weld the sliding frames anyway but for people looking to buy or use the measurement that I’m using. Beware that if you buy from Wenonah then your measurements will be different.
I use 1” x .058 6063 aluminum tubing for most of the rigging. The side tubes the “slide” are 1.25” x .058. The 1” saddled tubbing is set up 6” center to center for the Wenonah bucket seats. I also like a 16” center to center wide spacing on the sliding rails. Ample room for the legs up front in an aluminum. I get everything cut and preped for the slides. Then weld them. And I’m no professional, I know the welds look like a dirtdobber.


Next we will cut the rails and the cross supports along with the thwarts and yoke. After getting them cut you will want to heat the ends up that need to be flatten with a propane torch to anneal them. If you do not the ends will crack when you go to flatten them. You can also cut 4-2” long pieces of angle from one of the seats. The picture below is what I use. But like I said beware and adjust if using different sliders.

For the thwarts and yoke I use 1/4” rivets. I like a pretty smooth top gunnel and do not like bolt heads sticking up. Each ends of these will obviously be flatten about 1.5”. The thwarts will need to be trimmed at a slight angle.
The cross supports will have each end flattened. And you will also add the a piece of angle to each end that you cut earlier. The rails that the seat slide on will have one end flattened about 2”. The other end will be left alone and will rest on top of the cross support. Below is a Timelapse of me putting together the bow seat frame and installing it in the canoe. I also use solid rivets so the camera moves a little when I’m hammering them in.
Here is the canoe as it sets now. The original weight before working on it was 76#. As it is now is 63#. So the goal here is to make it comfortable, functional for a multiple day race and hopefully lighter. We still need to add the bucket seat, floatation foam/jug holder and foot brace. When I install these other things I’ll add on to this post. Until then if you have any question let me know.

