G
Guest
Guest
The Malecite is a weird canoe. I am not sure why MRC put heavy IQ1 aluminum gunwales on a UL kevlar build, but I do like the Malecite as a big boy solo, and even like some of the better designed IQ accessories.
The plastic seat pan itself is as comfortable as any bucket I have ever sat in, and still comfortable hours later, especially with the addition of some RidgeRest foam.
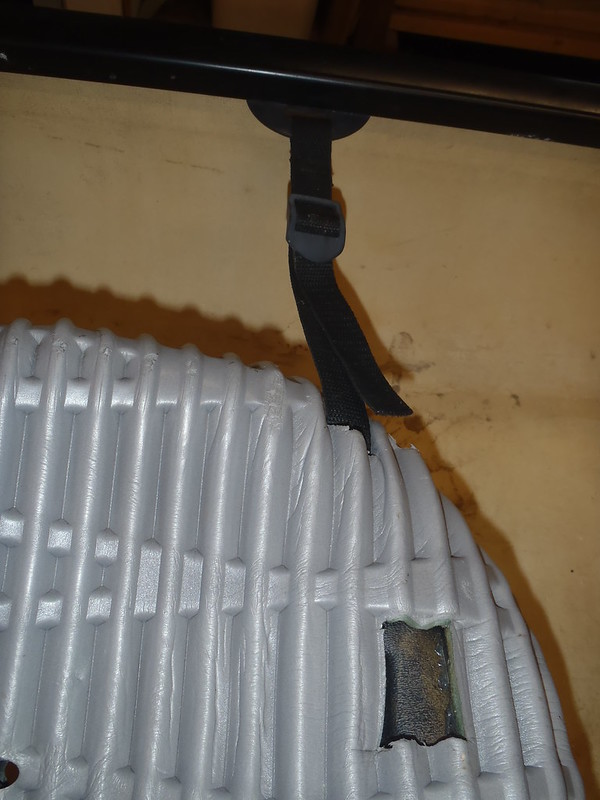
In the OEM design the seat placement could be adjusted fore and aft, and up and down, by means of a movable rear thwart, wing nut positionable seat cant and webbing sliders inside an inwale channel.
 P1270480 by Mike McCrea, on Flickr
That trickiness was handy to fine tune the soloized seat position, depth and cant angle of my best seat location, but moving it around from that sweet spot once found would have been an unnecessary PITA. Plus I did not trust that plastic slider and webbing ladder locks alone to hold the seat in place without slippage, much less prevent some future catastrophic failure.
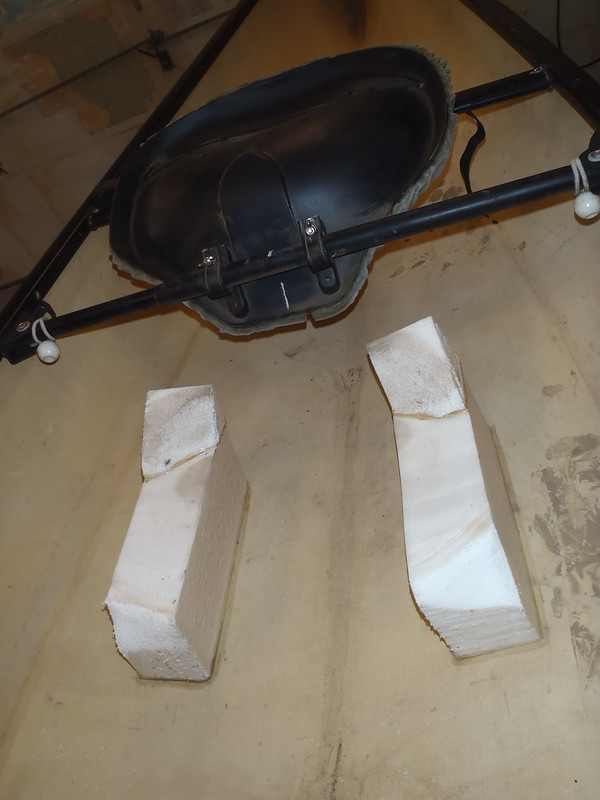
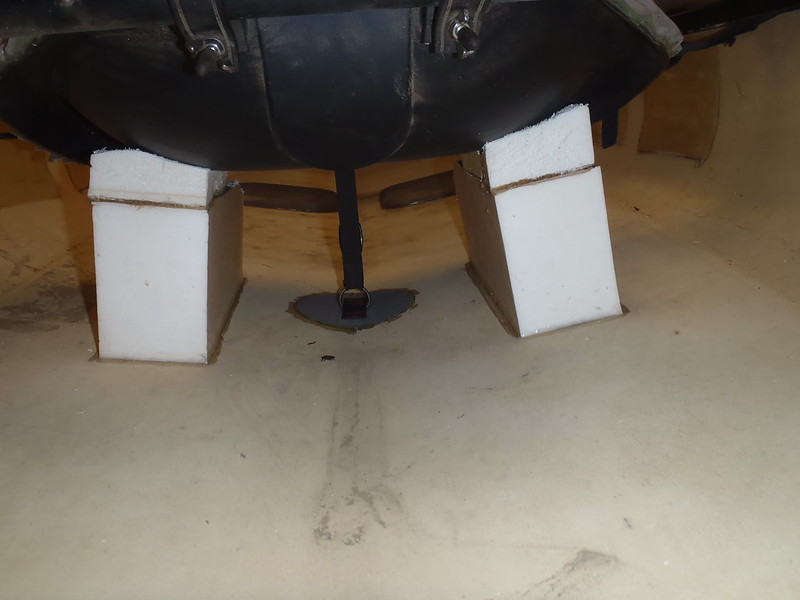
I glued a couple of minicel seat pillars in place as back up seat supports a few years ago. Crudely shaped, but they have proven to work well in conjunction with the webbing and seat back attachment.
 P1270482 by Mike McCrea, on Flickr
I had not improved those crude pillars, or filled in the oddly convoluted triangle of missing minicel on that base, and wanted the pillars to fully conform to the bottom of the seat.
That is one weird seat pan bottom shape to cut and carve from minicel, but I had a go at it.
I contact cemented oversized filler pieces in place and incrementally took them down to shape. Not even that incrementally, at first I used a coping saw to hack off large pieces, then a belt sander with 80 grit, before finishing work with Dragonskin for an allover custom fit.
 P1290487 by Mike McCrea, on Flickr
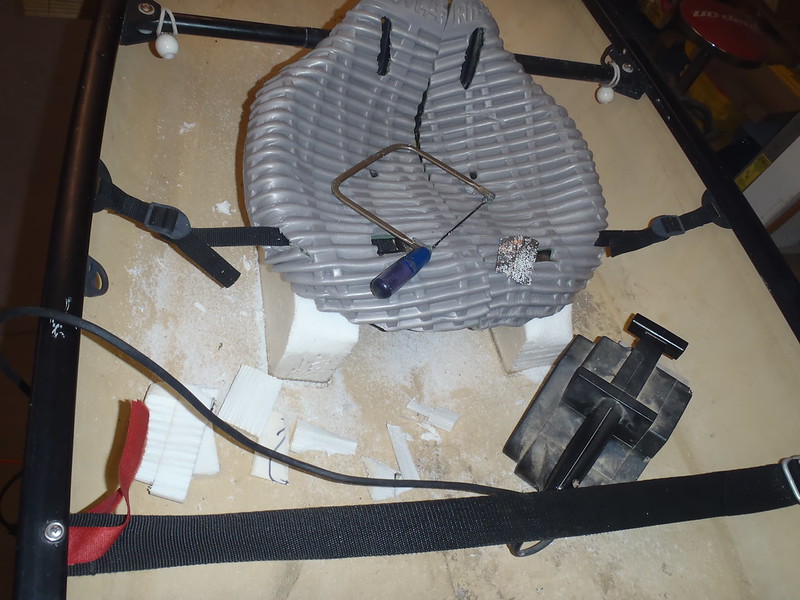
The IQ seat is a pain in one other regard, when carried and sliding onto the storage or roof racks the adjustable webbing allows the seat pan to flop down in the way of the crossbars. My original plan was to simply contact cement the bottom of the seat pan to the minicel pillars.
On reflection that would not be conducive to any future adjustment using the wing nut elevation connection to the rear thwart, as the seat would then be firmly adhered in place. I am not ready to lose that simple elevation and cant angle adjustment. Excuse my dust, I was not able to wash the Malecite before work.
 P1290491 by Mike McCrea, on Flickr
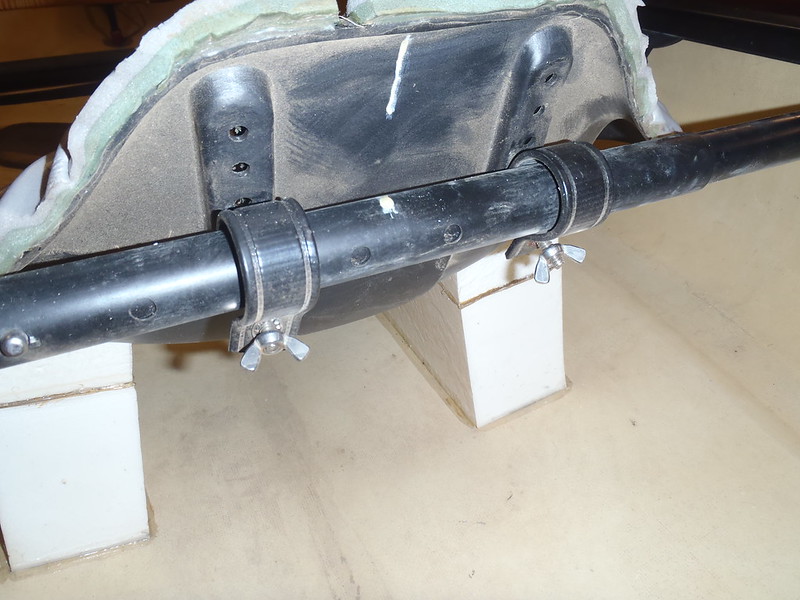
All I want to accomplish is holding the seat down in place with the canoe inverted on my shoulders or being slid on or off the racks. Instead of a permanent adhesive solution I Gflexed a D ring on the floor under the seat. A short length of webbing and ladder lock and presto, the seat is held down firmly, but I can still make future adjustments.
 P2010496 by Mike McCrea, on Flickr
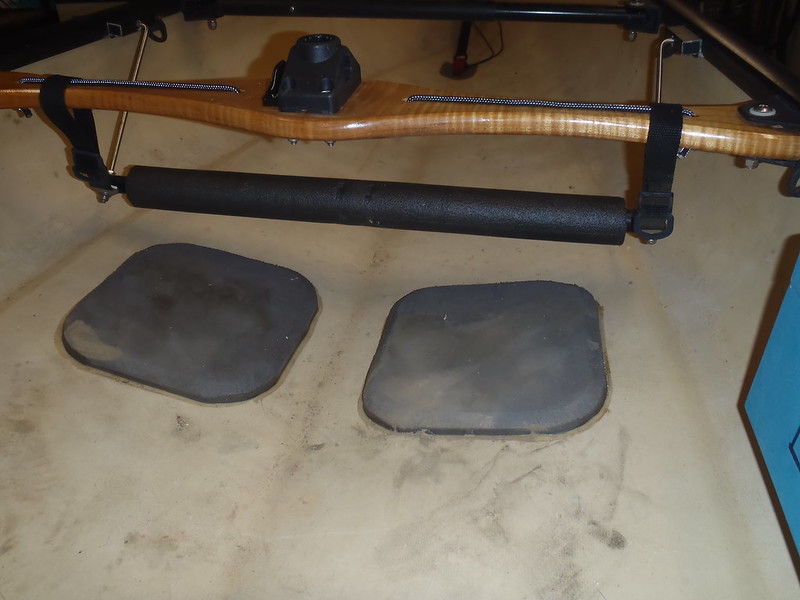
Those minicel pillars improved the original IQ bucket seat suspension by miles. And adding bit more foam for floatation does not hurt. The Malecite has no end tanks, and although it is outfitted for end bags I would rather have some always there permanent floatation. Floatation now includes split pipe foam insulation on the foot brace, minicel heel pads and now chunky seat pillars.
 P2010497 by Mike McCrea, on Flickr
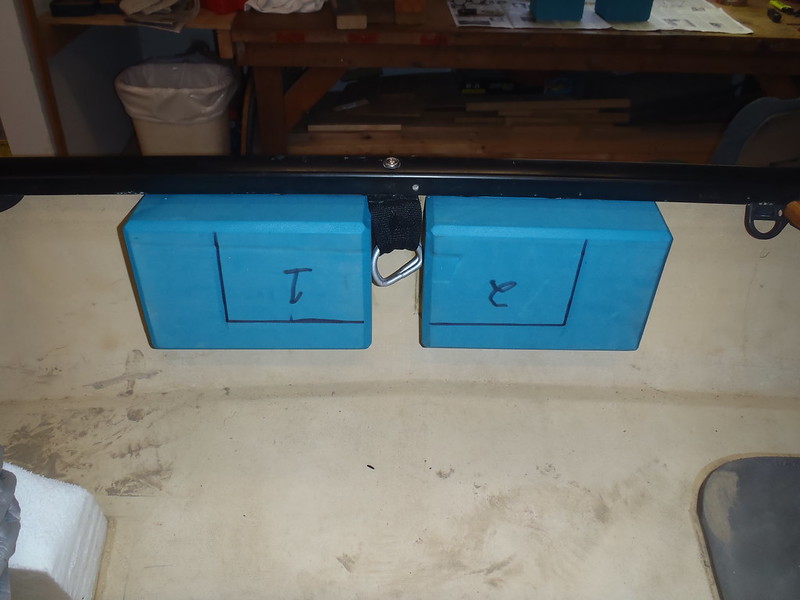
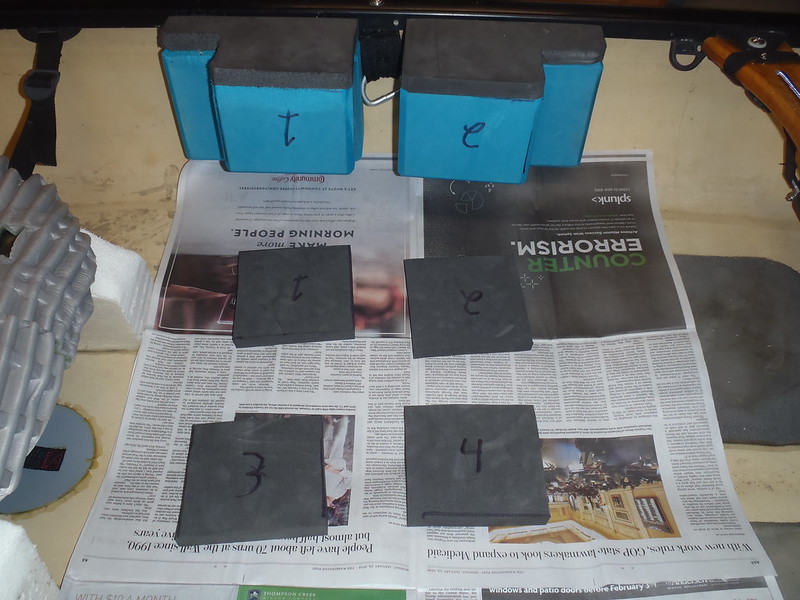
And more minicel. The Malecite is 33 inches wide at center, and I know my preferred leg spread for knee bumpers is more like 24 inches apart. I pulled out some 1 inch and 2 inch minicel and went with, you guessed it, 3 inch thick yoga blocks for the oddball base.
It had to be an oddball base. Sitting in the canoe on a thick foam pad on the shop floor I discovered that my preferred knee placement was right at the edge of the strap yoke.
How did that happen? On every other soloized tandem with a seat positioned for my preferred bow light trim, the knee bumpers started well in front of the strap yoke.
This requires more thought. Split knee bumpers.
 P2010498 by Mike McCrea, on Flickr
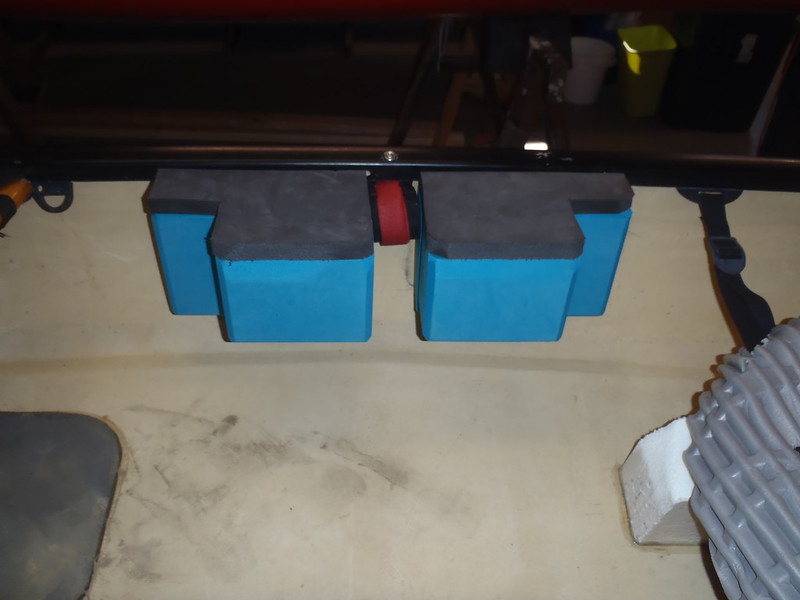
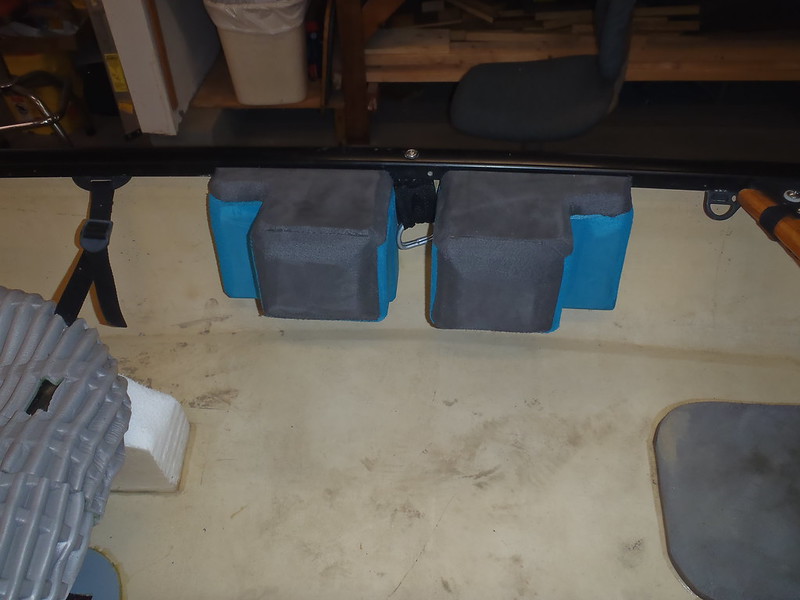
That first minicel stage only brings the knee bumpers out 2 inches from under the inwale on each side. Stage two, more contact cement work and clamping to stack on additional depth of minicel.
 P2020503 by Mike McCrea, on Flickr
I would prefer that the knee bumpers top edge be even with the top of the gunwale for additional leg support. I have some 1 inch thick minicel. Cut to four measured L pieces that fills in the top edge. Two tone split knee bumpers.
 P2030507 by Mike McCrea, on Flickr
I am not sure I like the Tetris shapes. Another test fitting sit on the shop pad, is that the fourth trip to the floor pad?
Oh my, that is already wayyy more comfortable. Almost there, but I need another inch of minicel depth on each side to most comfortably brace my knees.
 P2030509 by Mike McCrea, on Flickr
I still did not like the aesthetics of the Tetris L right angles on an otherwise shapely hull. A little edge rounding with Dragonskin softened the abrupt transitions to something more pleasingly curvaceous.
 P2030512 by Mike McCrea, on Flickr
One more trip to the floor pad for a sit. Comfy as could be. That will do.
The plastic seat pan itself is as comfortable as any bucket I have ever sat in, and still comfortable hours later, especially with the addition of some RidgeRest foam.
In the OEM design the seat placement could be adjusted fore and aft, and up and down, by means of a movable rear thwart, wing nut positionable seat cant and webbing sliders inside an inwale channel.
P1270480 by Mike McCrea, on FlickrThat trickiness was handy to fine tune the soloized seat position, depth and cant angle of my best seat location, but moving it around from that sweet spot once found would have been an unnecessary PITA. Plus I did not trust that plastic slider and webbing ladder locks alone to hold the seat in place without slippage, much less prevent some future catastrophic failure.
I glued a couple of minicel seat pillars in place as back up seat supports a few years ago. Crudely shaped, but they have proven to work well in conjunction with the webbing and seat back attachment.
P1270482 by Mike McCrea, on FlickrI had not improved those crude pillars, or filled in the oddly convoluted triangle of missing minicel on that base, and wanted the pillars to fully conform to the bottom of the seat.
That is one weird seat pan bottom shape to cut and carve from minicel, but I had a go at it.
I contact cemented oversized filler pieces in place and incrementally took them down to shape. Not even that incrementally, at first I used a coping saw to hack off large pieces, then a belt sander with 80 grit, before finishing work with Dragonskin for an allover custom fit.
P1290487 by Mike McCrea, on FlickrThe IQ seat is a pain in one other regard, when carried and sliding onto the storage or roof racks the adjustable webbing allows the seat pan to flop down in the way of the crossbars. My original plan was to simply contact cement the bottom of the seat pan to the minicel pillars.
On reflection that would not be conducive to any future adjustment using the wing nut elevation connection to the rear thwart, as the seat would then be firmly adhered in place. I am not ready to lose that simple elevation and cant angle adjustment. Excuse my dust, I was not able to wash the Malecite before work.
P1290491 by Mike McCrea, on FlickrAll I want to accomplish is holding the seat down in place with the canoe inverted on my shoulders or being slid on or off the racks. Instead of a permanent adhesive solution I Gflexed a D ring on the floor under the seat. A short length of webbing and ladder lock and presto, the seat is held down firmly, but I can still make future adjustments.
P2010496 by Mike McCrea, on FlickrThose minicel pillars improved the original IQ bucket seat suspension by miles. And adding bit more foam for floatation does not hurt. The Malecite has no end tanks, and although it is outfitted for end bags I would rather have some always there permanent floatation. Floatation now includes split pipe foam insulation on the foot brace, minicel heel pads and now chunky seat pillars.
P2010497 by Mike McCrea, on FlickrAnd more minicel. The Malecite is 33 inches wide at center, and I know my preferred leg spread for knee bumpers is more like 24 inches apart. I pulled out some 1 inch and 2 inch minicel and went with, you guessed it, 3 inch thick yoga blocks for the oddball base.
It had to be an oddball base. Sitting in the canoe on a thick foam pad on the shop floor I discovered that my preferred knee placement was right at the edge of the strap yoke.
How did that happen? On every other soloized tandem with a seat positioned for my preferred bow light trim, the knee bumpers started well in front of the strap yoke.
This requires more thought. Split knee bumpers.
P2010498 by Mike McCrea, on FlickrThat first minicel stage only brings the knee bumpers out 2 inches from under the inwale on each side. Stage two, more contact cement work and clamping to stack on additional depth of minicel.
P2020503 by Mike McCrea, on FlickrI would prefer that the knee bumpers top edge be even with the top of the gunwale for additional leg support. I have some 1 inch thick minicel. Cut to four measured L pieces that fills in the top edge. Two tone split knee bumpers.
P2030507 by Mike McCrea, on FlickrI am not sure I like the Tetris shapes. Another test fitting sit on the shop pad, is that the fourth trip to the floor pad?
Oh my, that is already wayyy more comfortable. Almost there, but I need another inch of minicel depth on each side to most comfortably brace my knees.
P2030509 by Mike McCrea, on FlickrI still did not like the aesthetics of the Tetris L right angles on an otherwise shapely hull. A little edge rounding with Dragonskin softened the abrupt transitions to something more pleasingly curvaceous.
P2030512 by Mike McCrea, on FlickrOne more trip to the floor pad for a sit. Comfy as could be. That will do.