• Happy National Canoe Day! ┃ 𓄢 𓀌 🪵🛶

Strip canoe delamination

Joined
Apr 21, 2015
Messages
823
Reaction score
414
Location
Livingston, Montana
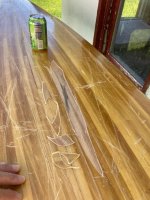
Well, not really delamination since the layer of wood cells came with the glass and epoxy. This is my Kite, built in 2016 and documented on this site. This canoe is well used, and well taken care of for the most part. In the years since I built it, the canoe has probably seen 30 days of tripping use each year in the US and Canada, and all the scrapes, knocks and collisions with submerged obstacles and dragging over logs you would expect to encounter on routes that aren't well traveled. It also gets close to that many days of use in the area where I live, mostly paddling cobble/gravel bed rivers. Late last summer I did a trip to northern Saskatchewan and the canoe got shredded a little, mostly shallow scratches, but also a deeper gouge here and there. This spring I did a good sanding and varnish job on the bottom.

One month ago I headed to Minnesota and spent 2 weeks in the boundary waters, then went up to Wabakimi for another 10 day trip. Right off the bat I noticed a dark area forming on the bottom, which I knew was water intrusion. Later I could see water was trapped there, but could also see another area bulging up that had no water intrusion. At some point I paddled over a submerged rock and was able to see the fiberglass was ripped in the dark area, so I slapped on a strip of gorilla tape and forgot about it until I returned yesterday.

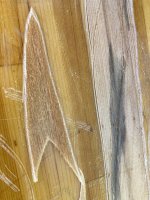
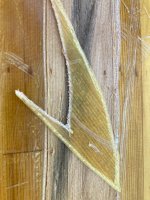
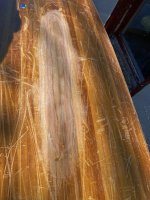
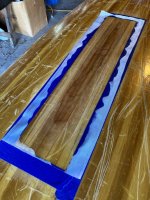
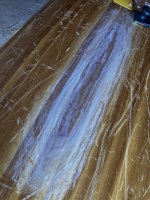
The pictures below tell the story. My assumption is that all the impacts have essentially made the wood fail beneath where the epoxy had penetrated, which is almost nothing by the way. Does anyone know if this a common mode of failure with strip canoes? My repair solution will be to simply build up epoxy and glass to fill the spots, but I'm wondering if I should add a new layer of glass to the bottom afterwards. As built, I have a 6oz and 4 oz layers of e-glass there already. The new layer would be 4oz s-glass.

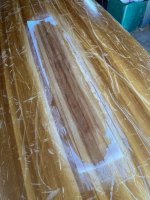
I am pretty sure I got all the delaminated glass off in this section, but there are at least 2 more areas I have yet to cut into. Any suggestions or observations from you guys?

Thanks, Mark
delam1.jpg
delam2.jpg
delam3.jpg
 
I've had a similar failure under a seat cleat. (Similar to what's shown in This post) In my case, I think it was due to a sharply applied peel load that flexed the hull. I've only just repaired that one a few weeks ago, so take the following with a grain of salt.

I'd probably approach the repair thus:

  1. Sand/strip the finish back a few inches from the area.
  2. Feather the edges of the glass down. Give it a ~2" transition border.
  3. Cut a 6oz glass patch to cover the feathered transition.
  4. Cut a 4oz patch that's a couple inches larger in all dimensions.
  5. You can cut down on the fraying edges by pulling a couple of strands from each edge
  6. Lay the whole thing in at once with your normal resin
  7. If you have peelply, great. If not, your local fabric store probably has some really cheap, slippery polyester fabric, like the stuff used to line suit jackets. It wicks resin just enough that you won't have to worry about a fill coat, and peels off pretty easily from green epoxy, a little more difficult if it's hard cured. Much easier cleanup later.
 
I would call that unusual, I have completely split a canoe on the inside and the glass did not do that. What kind of epoxy did you use?
 
Just to be clear, I have already cut the glass away to the edge of where it was "delaminated". I cut it at a very sharp angle, so all along the edge is a bevel. The bottom of this hull has been lightly sanded and varnished a number of times over the years, and at this point the entire surface is shallow indentations from rocks and wood etc., so there really isn't a place anywhere that hasn't been impacted in some way. The scratches and gouges have scratches and gouges. My recent varnish makes it look decent. Prior to that, after my last trip, it looked like someone had sanded it with 20 grit paper.

Thanks Sailsman, I think that is roughly what I had in mind. Mem, I used Raka epoxy, but like I said, it technically isn't delaminated, it's more like the wood fibers pulled away from each other just below the penetration depth of the epoxy. An extra layer of glass would add unwelcome weight to this canoe that I overbuilt in the first place, or so I thought.

Mark
 
The bond looks fine.
Things happen ! Especially with that kind of mileage !

There is an old saying . " If you built it ? You know how to fix it !"

A friend's canoe split, in the keel, from Oil canning. While ,in the BWCA. Duct tape got him home too.
He was very proud of how light his canoe was, until that point.. Too light !

I don't know about your canoe ? But his, with an extra layer of cloth , over the football, would have saved him on that trip !

If you go through my build threads ? You will see, I'm a big fan of a double layer of cloth, up to about the 3" waterline..

Lay ups can be done in several configurations.

S-glass is a great option.

In your situation ? Portaging is a big part of your trips ! Saving weight is another.

Double layer the patch.
The Black wood is rotted, with no strength.
The double patch should be enough extra strength, if worried ? Go three layers.

Jim
 
I reskinned a Polyester resin built canoe for a friend.

I had a few spots, that had rot, after sanding.
I filled those areas with, up to six layers of cloth.
Reglassed with 6 oz E-glass, with an extra layer over the football, with 4 os S-glass.

The hull was actually slightly lighter, when I was done.
I did nothing to the inside.

That was several years ago. The canoe is still going strong !
If you get on Youtube ? Look up Nibimocs, Larry Ricker

By the way ! That is one heck of a lot tripping already this year ! Looking forward to some trip reporting, and video !

Jim
 
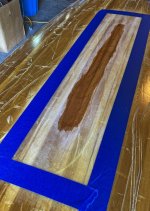
Just an update on how I repaired this damage. I started by cutting out all the existing fiberglass that wasn't adhered to the wood as shown in some of the photos from the original post. Then I used a RO sander with 60 grit to bevel through the 2 layers of existing glass as shown in this photo. Then used 120 grit to remove some of the visible sander marks and the layers of remaining varnish that were inside the area I intended to apply the new epoxy.

repair1.JPG

After taping off the area, I put down a coat of epoxy on the bare wood, then mixed a little thickened epoxy to apply along the edges to ease the transition between the bare wood and existing glass so that the glass would lay down flat.

repair2.JPG

I laid down 3 layers of 4oz e-glass, with each successive layer smaller than the previous.

repair3.JPG

Peel ply went on top of all of it after getting rid of any air bubbles and squeegeeing out excess epoxy, then let it sit overnight. All those dark lines are just where the utility knife cut into the wood when cutting through the existing glass.

repair4.JPG

With the epoxy still soft, the next morning I used a scraper to bring down all the overlapping glass to the level of the surrounding hull. After scraping the area I found the center was still a little low. I'm sure I was eating into the bare wood with the edge of the sander, so I decided I could lay in 1 more strip of glass to get it closer to the surrounding area.

repair5.JPG

This last photo shows the last strip of glass in place with peel ply on top.

repair6.JPG

After this sets up I'll remove the peel ply, scrape the new glass down and put down one coat of epoxy. After a week or so I'll sand it all smooth and put down some coats of varnish.

Mark
 
Thank you for posting your repair so thoroughly. I'm starting a similar repair on our stripper, so this post is timely and helpful. Our "de-lamination" is identical to what you showed, however damage is on the hull interior.
 
Back
Top