G
Guest
Guest
Moved to DIY, continued from another thread.
https://www.canoetripping.net/forums/forum/general-paddling-discussions/general-discussion/125173-shop-partner-fun
Still sea kayak repairs and repainting, still materials and technique transferable to canoes.
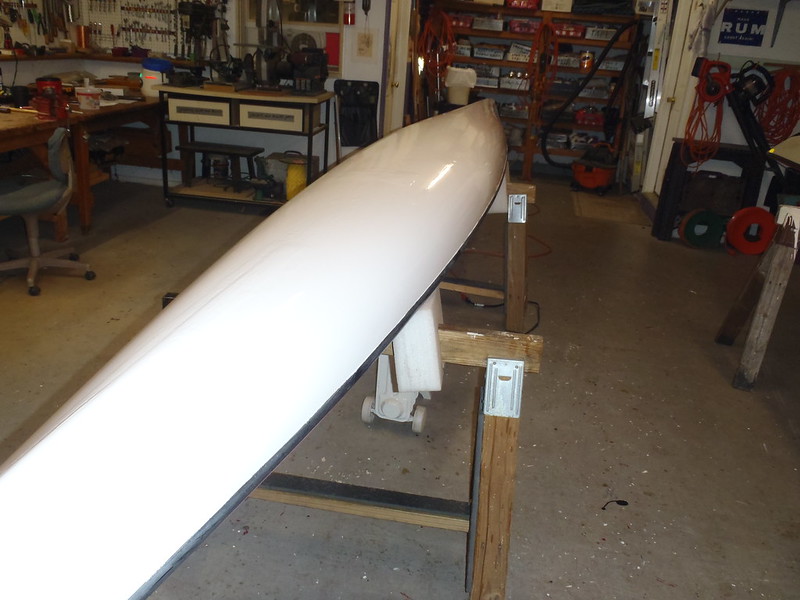
In preparation for a 2[SUP]nd[/SUP] coat of EZ-Poxy paint I wet sanded the Nomad. 400 grit wrapped in a dish sponge to provide some foam contouring on the everywhere rounded hull bottom. Wet sanded twice, once “all over”, then rinsed. After rinsing any spots I missed sanding are distinctly visible; the water will bead up on the still glossy un-sanded spots, not on the sanded areas.
 P5270001 by Mike McCrea, on Flickr
Spot sand those missed areas and rinse again, done de-glossing, no spots still water beady. Quick and easy work wet sanding that hull; the Nomad may be 19’ feet long (18’ 10” not including the rudder), but it is only 21 ¼” wide, and unlike a canoe I only had to sand the bottom.
Water “streaky” areas are sanded, water beaded spots still need attention.
 P5270004 by Mike McCrea, on Flickr
Hooray for wet sanding! Easier, faster, more thorough and less aggressive than dry sanding a painted surface. And, (this will become more important when sanding the epoxy with graphite powder) no dust.
Even that light touch sponge wrapped 400 grit wet sanding cut through the first layer of paint where there were raised imperfections from previous epoxy “patches”; I need to convince Joel to always use peel ply when he does repairs.
 P5280007 by Mike McCrea, on Flickr
Back inside and right side up first for deck inspection. Remember
Sure enough.
 P5280005 by Mike McCrea, on Flickr
The only way to paint the top of the Nomad would be to spray. Rolling and tipping would involve removing all of the deck lines and fittings, and paint would puddle settle in the dimpled reveals. Looks like Joel gets to buff and wax 19 feet of deck.
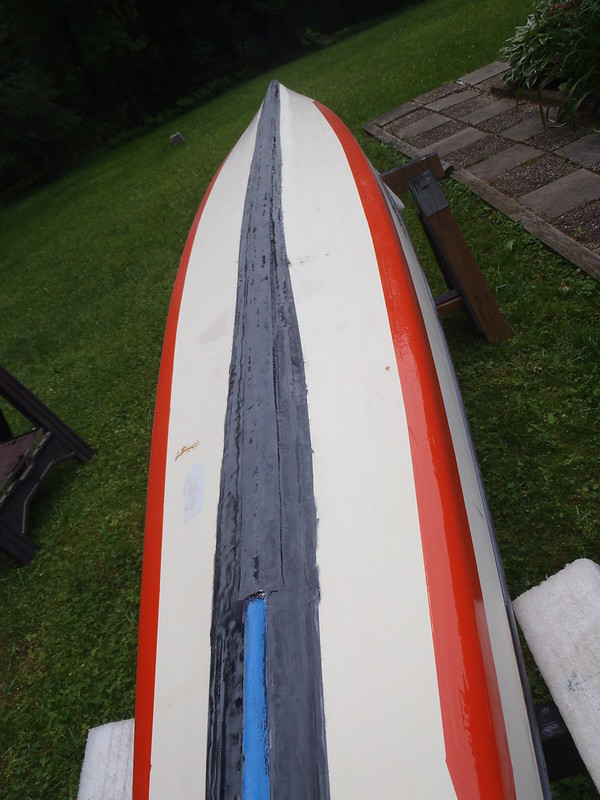
The bottom of the Nomad gets a 2[SUP]nd[/SUP] paint coat soon, and probably a 3[SUP]rd[/SUP], but first there is some work left on the Caribou’s vee bottom and side stripes. The peel ply compressed Dynel sleeve needs a thin topcoat of epoxy, pigment and graphite powder, so more taping and papering. Without Joel around I had to do that work myself.
The cut ends of the Dynel sleeve, as always, even with peel ply roller compression, stood a little proud, but a couple minutes of work with a file beveled down those abrupt ends.
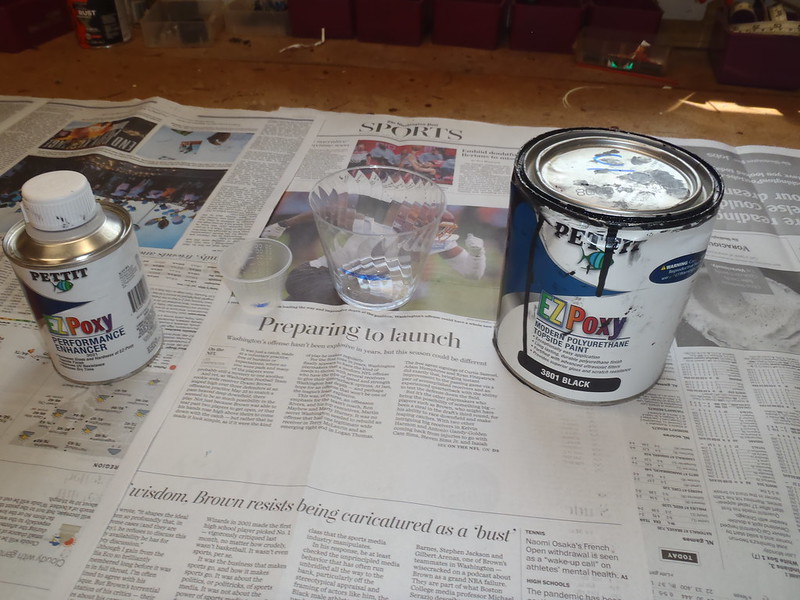
The top coat of epoxy, again 105/206, black pigment and graphite powder, this time with some G/flex added. No peel ply needed, so the surface should turn out smooth and glossy.
A hint about taping a hull for epoxy or paint. Curves are tricky and there are curves to both the bottom black and side orange stripes on the Caribou. Taping, like tipping out, is an acquired “feel”. Once you get going and get comfortable, keep going. Might as well tape the orange stripes for a 2[SUP]nd[/SUP] coat while I’m at it.
 P5290009 by Mike McCrea, on Flickr
Don’t forget to leave folded over pull tabs on one end of the tape, and think strategically about which pieces of tape will come off first (HINT – the upper non-gravity drip side is the place to start). It took a few lessons but Joel finally got that crap down.
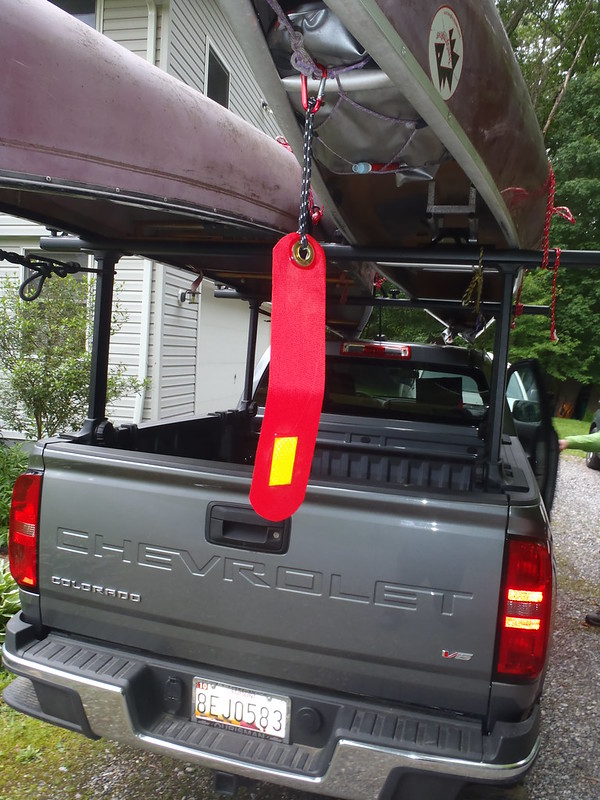
While the tape was out I needed to mask the Nomad seam, and cover the brass HIN plate so that it remains readable. Painting a hull with the HIN etched into the gel coat I would opt to DIY stamp the HIN on a strip of aluminum, or etch it in the paint. Or, a bit classier, have a brass “dog collar” ID stamped. Maybe skip the “If found return to. . .”.
Joel thoughtfully covered that HIN plate. After the shop supervisor pointed it out. Post wet sanding I needed to cover it again. He even taped the High Intensity reflective tape on the stern, precious discontinued stuff. Joel expressed the same appreciation for that reflective tape as I; he can shine a flash light at the boats before going to bed and be assured that all are present and accounted for. There is no reflective tape on the Nomad bow, and I have a few pieces left. And I can do anything I want.
Preparatory for an epoxy top coat I needed to paper mask the Caribou center stripe, a run of newsprint with little pieces of scotch tape, another run of painters tape.
Walking back and forth and back and forth to fetch newpaper and little squibs of Scotch tape is stupid, and I am kinda slow to recognize my own stupidity. I recently watched Joel do just that, and I’ve done similar.
This time I put the newsprint and tape on the handy shop cart and pulled it along as I went. Wayyyyyy faster; a couple minutes per side to paper and retape. Love that shop cart, but I really liked having a shop monkey to boss around for that kind of no-brainer work.
 P5290018 by Mike McCrea, on Flickr
Actually it isn’t really no-brainer work. In taping curves, even hull length gentle curves, there is some indefinable technique that works best. Starting with “Lay 6 inches of tape at a time, adjust to the curve and then shuffle along, all in one continuous tape stripe”.
But even then, starting at one end and working to the other, the hull curves continually, and about the time you have the stem-to-center slightly curved tape application down satisfactorily you reach the middle of the hull and the curve starts to bend in the opposite direction.
It is semi-maddening, and is easier to do with 1” painters tape than wider stuff. I used the wider tape where there was no need to install a newspaper mask to catch drips but wanted a wider drip edge.
All taped, masked and ready for action.
 P5290020 by Mike McCrea, on Flickr
I will say I have gotten really good at estimating how much of what epoxy mix I will need for a particular job. I used every drip and dribble of epoxy mix top coating the Caribou’s Dynel center stripe, with not enough left to be worth swiping on something else
 P5290024 by Mike McCrea, on Flickr
Still a might cool and damp to paint the second coat of EZ-Poxy on the wet sanded, taped and waiting Nomad. I want the doors and windows (all screened) open for that and an exhaust fan running. No rush, I’ll be here all summer, tip your waitresses.
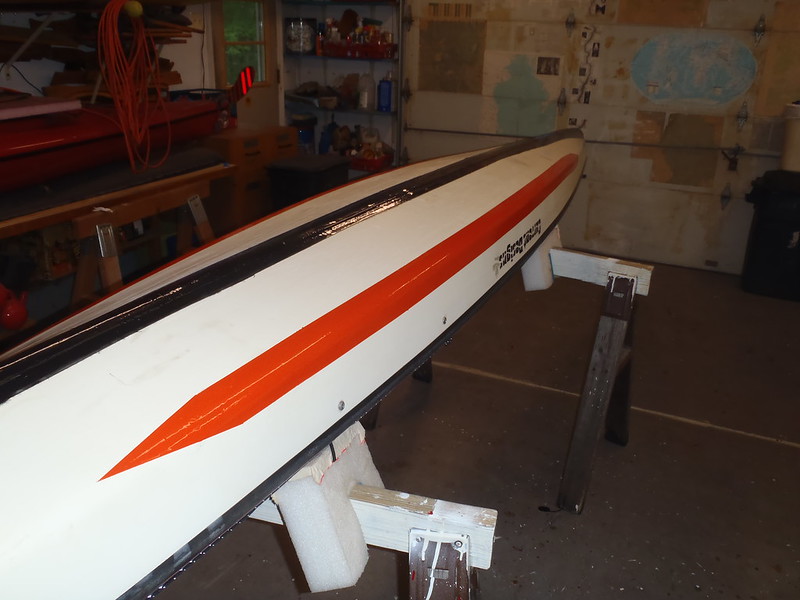
But I can topcoat already taped orange side stripes. Much better looking with a second coat of orange enamel, hiding more of the scratches and dings. I still have plenty of orange paint left, and that stripe is easy enough to tape. Looks like it will get a third coat.
As usual (eh, usually, not always) I remembered to run the tape strategically, so the first tape runs to be removed are on top, not buried under other tape. And, as always - ‘cause gravity - I could pull the top runs of tape immediately after painting.
 P5290025 by Mike McCrea, on Flickr
Looking good, and will get better.
 P5290028 by Mike McCrea, on Flickr
It warned up enough to paint, and I was ready to roll and tip the 2[SUP]nd[/SUP] EZ-Poxy coat on the Nomad when the shop door opened and yet another friend stopped by for a visit. Had he arrived 20 minutes later I’d have had to shoo him of out the shop rudely and abruptly; once you get started rolling and tipping you need to finish.
He brought beer, so I let him stay. I may have still been rude.
Second coat of EZ-Poxy will have to wait ‘til tomorrow.
https://www.canoetripping.net/forums/forum/general-paddling-discussions/general-discussion/125173-shop-partner-fun
Still sea kayak repairs and repainting, still materials and technique transferable to canoes.
In preparation for a 2[SUP]nd[/SUP] coat of EZ-Poxy paint I wet sanded the Nomad. 400 grit wrapped in a dish sponge to provide some foam contouring on the everywhere rounded hull bottom. Wet sanded twice, once “all over”, then rinsed. After rinsing any spots I missed sanding are distinctly visible; the water will bead up on the still glossy un-sanded spots, not on the sanded areas.
P5270001 by Mike McCrea, on FlickrSpot sand those missed areas and rinse again, done de-glossing, no spots still water beady. Quick and easy work wet sanding that hull; the Nomad may be 19’ feet long (18’ 10” not including the rudder), but it is only 21 ¼” wide, and unlike a canoe I only had to sand the bottom.
Water “streaky” areas are sanded, water beaded spots still need attention.
P5270004 by Mike McCrea, on FlickrHooray for wet sanding! Easier, faster, more thorough and less aggressive than dry sanding a painted surface. And, (this will become more important when sanding the epoxy with graphite powder) no dust.
Even that light touch sponge wrapped 400 grit wet sanding cut through the first layer of paint where there were raised imperfections from previous epoxy “patches”; I need to convince Joel to always use peel ply when he does repairs.
P5280007 by Mike McCrea, on FlickrBack inside and right side up first for deck inspection. Remember
in Florida there are said to be only two boat colors, white and turning white.
Sure enough.
P5280005 by Mike McCrea, on FlickrThe only way to paint the top of the Nomad would be to spray. Rolling and tipping would involve removing all of the deck lines and fittings, and paint would puddle settle in the dimpled reveals. Looks like Joel gets to buff and wax 19 feet of deck.
The bottom of the Nomad gets a 2[SUP]nd[/SUP] paint coat soon, and probably a 3[SUP]rd[/SUP], but first there is some work left on the Caribou’s vee bottom and side stripes. The peel ply compressed Dynel sleeve needs a thin topcoat of epoxy, pigment and graphite powder, so more taping and papering. Without Joel around I had to do that work myself.
The cut ends of the Dynel sleeve, as always, even with peel ply roller compression, stood a little proud, but a couple minutes of work with a file beveled down those abrupt ends.
The top coat of epoxy, again 105/206, black pigment and graphite powder, this time with some G/flex added. No peel ply needed, so the surface should turn out smooth and glossy.
A hint about taping a hull for epoxy or paint. Curves are tricky and there are curves to both the bottom black and side orange stripes on the Caribou. Taping, like tipping out, is an acquired “feel”. Once you get going and get comfortable, keep going. Might as well tape the orange stripes for a 2[SUP]nd[/SUP] coat while I’m at it.
P5290009 by Mike McCrea, on FlickrDon’t forget to leave folded over pull tabs on one end of the tape, and think strategically about which pieces of tape will come off first (HINT – the upper non-gravity drip side is the place to start). It took a few lessons but Joel finally got that crap down.
While the tape was out I needed to mask the Nomad seam, and cover the brass HIN plate so that it remains readable. Painting a hull with the HIN etched into the gel coat I would opt to DIY stamp the HIN on a strip of aluminum, or etch it in the paint. Or, a bit classier, have a brass “dog collar” ID stamped. Maybe skip the “If found return to. . .”.
Joel thoughtfully covered that HIN plate. After the shop supervisor pointed it out. Post wet sanding I needed to cover it again. He even taped the High Intensity reflective tape on the stern, precious discontinued stuff. Joel expressed the same appreciation for that reflective tape as I; he can shine a flash light at the boats before going to bed and be assured that all are present and accounted for. There is no reflective tape on the Nomad bow, and I have a few pieces left. And I can do anything I want.
Preparatory for an epoxy top coat I needed to paper mask the Caribou center stripe, a run of newsprint with little pieces of scotch tape, another run of painters tape.
Walking back and forth and back and forth to fetch newpaper and little squibs of Scotch tape is stupid, and I am kinda slow to recognize my own stupidity. I recently watched Joel do just that, and I’ve done similar.
This time I put the newsprint and tape on the handy shop cart and pulled it along as I went. Wayyyyyy faster; a couple minutes per side to paper and retape. Love that shop cart, but I really liked having a shop monkey to boss around for that kind of no-brainer work.
P5290018 by Mike McCrea, on FlickrActually it isn’t really no-brainer work. In taping curves, even hull length gentle curves, there is some indefinable technique that works best. Starting with “Lay 6 inches of tape at a time, adjust to the curve and then shuffle along, all in one continuous tape stripe”.
But even then, starting at one end and working to the other, the hull curves continually, and about the time you have the stem-to-center slightly curved tape application down satisfactorily you reach the middle of the hull and the curve starts to bend in the opposite direction.
It is semi-maddening, and is easier to do with 1” painters tape than wider stuff. I used the wider tape where there was no need to install a newspaper mask to catch drips but wanted a wider drip edge.
All taped, masked and ready for action.
P5290020 by Mike McCrea, on FlickrI will say I have gotten really good at estimating how much of what epoxy mix I will need for a particular job. I used every drip and dribble of epoxy mix top coating the Caribou’s Dynel center stripe, with not enough left to be worth swiping on something else
P5290024 by Mike McCrea, on FlickrStill a might cool and damp to paint the second coat of EZ-Poxy on the wet sanded, taped and waiting Nomad. I want the doors and windows (all screened) open for that and an exhaust fan running. No rush, I’ll be here all summer, tip your waitresses.
But I can topcoat already taped orange side stripes. Much better looking with a second coat of orange enamel, hiding more of the scratches and dings. I still have plenty of orange paint left, and that stripe is easy enough to tape. Looks like it will get a third coat.
As usual (eh, usually, not always) I remembered to run the tape strategically, so the first tape runs to be removed are on top, not buried under other tape. And, as always - ‘cause gravity - I could pull the top runs of tape immediately after painting.
P5290025 by Mike McCrea, on FlickrLooking good, and will get better.
P5290028 by Mike McCrea, on FlickrIt warned up enough to paint, and I was ready to roll and tip the 2[SUP]nd[/SUP] EZ-Poxy coat on the Nomad when the shop door opened and yet another friend stopped by for a visit. Had he arrived 20 minutes later I’d have had to shoo him of out the shop rudely and abruptly; once you get started rolling and tipping you need to finish.
He brought beer, so I let him stay. I may have still been rude.
Second coat of EZ-Poxy will have to wait ‘til tomorrow.