• Happy Halloween! 🎃🎂

Merlin II wood gunnel repair advice

Joined
Jun 22, 2017
Messages
879
Reaction score
393
After all the discussion on FartherWest's boat and thwarts I would really appreciate any ideas and advice on best way to repair the holes in the wood gunnels on my Merlin II.

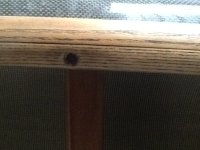
I attached a pic of the machine screw heads that attach the seat to the gunnels. You may not be able to see the head of he machine screw because it has been slowly burrowing in for 18 years. If I try to back the screw out it looks like it will try to split the gunnel a little bit...the screws will not back out cleanly. I was thinking that maybe I should use some sort of countersink bit to open up the hole diameter a bit. What do you guys think about best way to get these machine screws out without chewing up the gunnels? Then what do you think I should do to refill the holes in the gunnels so they are solid again so I can redrill and rehang the seat and maybe the thwarts too? I'd like to keep everything in the original positions.

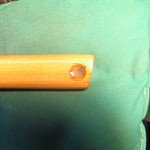
I will definitely use finish washers as shown on the pic of my Yellowstone solo. The new Northstar canoes now use finish washers on their boats with wooden gunnels (as Bell should have done!).
 

Attachments

  • image.jpeg
    image.jpeg
    156.1 KB · Views: 1
  • image.jpeg
    image.jpeg
    180.4 KB · Views: 1
How about a small forster bit to create a relief around the head, just don't drill too far, or you will damage the bit. Then seal the bottom of the hole, and fill the hole with thickened Expoxy and re-drill.
 
I attached a pic of the machine screw heads that attach the seat to the gunnels. You may not be able to see the head of he machine screw because it has been slowly burrowing in for 18 years. If I try to back the screw out it looks like it will try to split the gunnel a little bit...the screws will not back out cleanly. I was thinking that maybe I should use some sort of countersink bit to open up the hole diameter a bit

I would try by hook or by crook or any means necessary to back the screws out before I enlarged the holes. Even if they chew up the wood gunwale a little bit the best plan would be to fill and reuse that same inwale hole anyway, and having a smaller void to fill would be good.

In removing old machines screws I have mangled some Phillips heads. Most* of those I was able to take out with one of those “stripped head screw remover” bits/kits.

A more common problem is that the machine screws themselves, besides being sunk in place, may be bent.

A bent machine screw is a recalcitrant machine screw; that wobble alone will prevent the screw from turning on extraction attempt. If the machine screws are wanked you’ll want to replace them anyway, so (carefully) cutting the shanks between the gunwales and thwart will help eliminate the impossible wobble.

(BTW, sometimes a naked not-in-the-saw hacksaw blade is your friend; just wrap some duct tape around the ends)

Then what do you think I should do to refill the holes in the gunnels so they are solid again so I can redrill and rehang the seat and maybe the thwarts too? I'd like to keep everything in the original positions.

I will definitely use finish washers as shown on the pic of my Yellowstone solo. The new Northstar canoes now use finish washers on their boats with wooden gunnels (as Bell should have done!).

I’d tape up the bottom of the hole and syringe in some G/flex, a little at a time, and allow (days) to cure. It will be honey colored, but will work. See Glenn M repairs on this board.

I’d definitely use flange washers, despite the bump-bump when sliding a boat on the racks. Depending on the width of your inwale you might need to look for small flange washers, or even stainless steel cup washers (higher profile, and louder bump-bump, but they still spread the load a bit).

*Hardest two boats I have ever re-gunwaled were both “Shenandoahs”, Blue Hole hull trimmed by Shenandoah, They used massive square oak gunwales. . . . .and did not use stainless steel screws. All screws countersunk in the outwales thankfully.

Impossibly rusted, not a single screws was coming out, hook or crook be danged. I had to cut the outwale every 6 inches between the screws and use that chunk of wood to manually twist off (or break) every single gunwale screw.

Those old Blue Hole hulls were some fantastic thick Royalex though.
 
Last edited:
Thank you very much for the advice guys. I expect to tune it up over the winter since it's functional and getting regular use right now. This task should be pretty easy compared to full gunnel replacement! The fasteners are straight and fine, it's just that the gunnels seem to be healing up around them. I really appreciate the feedback and advice.

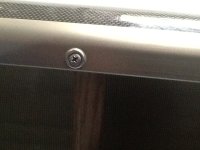
For fun attached is a pic of my 1995 Blackhawk with countersunk (nice!) carriage bolts (strong but heavy). The seat bolts stay nice and tight.
 

Attachments

  • image.jpeg
    image.jpeg
    184.3 KB · Views: 1
Just make little beauty discs ala Marilyn Monroe mole out of black walnut and glue on top of the screw

That's what I did on another wood gunwales boat. Sorry I can't post pictures.
 
Last edited:
It might be possible to enlarge the hole that the screw head is in just slightly, so the screw will turn and back out cleanly without splitting the wood... this worked once by finding a flat head screwdriver with the right diameter (a tiny bit larger than the hole) and turning it gently so that it reams out the edges of the hole just enough to allow the screw head to back out cleanly.

If there's no right-sized flathead screwdriver, maybe fabricate something out of metal and ream out by hand. There are reaming bits available for hand drills but you'll have to be careful they don't wreck the screw head so that it still accepts the screwdriver. Also various Dremel tool bits but be careful.

I'd fill the hole with a little epoxy thickened with a lot of fine sawdust, or more accurately, sanding dust. I collected some very fine cedar dust after sanding the inside of my stripper, and that makes great wood filler.

Some of the above terms and Mike's description of the recalcitrant screw sort of reminds me of college girls that hadn't had quite enough to drink on a weekend. Those were the days, glory days... this old geezer needs to get back to work.
 
Fill and soak the hole with thinned linseed oil for a couple of days, apply gentle upward pressure on the bottom of bolt (with nut removed) and back it out.
 
Fill and soak the hole with thinned linseed oil for a couple of days, apply gentle upward pressure on the bottom of bolt (with nut removed) and back it out.


I like that idea to loosen things up.

Any compatibility issues if the hole needs to be filled with epoxy?
 
It is normal for ash to swell with exposure to moisture over time such that properly countersunk holes will no longer be big enough to cleanly remove gunwale screws or machine screws attaching thwarts or seat frames.

I doubt you will be able to use a countersink or drill bit to enlarge the opening if the screw is still in place. The hardware will probably not allow you to. I have usually used a sharp, thin blade like an Exacto knife or scalpel to carefully shave the opening large enough to back the screw out.

G Flex epoxy works very well to repair or fill in holes in wood as Mike suggested. If you are set on using finish washers instead of countersinking the holes for the machine screws, I would fill in the entire hole with G Flex, and when it has thoroughly cured just drill the appropriate sized hole through the cured epoxy. The finish washer will probably completely cover the G Flex. Of course, you may need to get longer stainless machine screws if you go that route.

If you plan to keep countersunk hardware but the wood feels soft or punky, I would debride any soft wood, then fill in the hole with G Flex, drill, and countersink when fully cured.
 
Wow. Thanks again for all the great ideas. I will try the thinned linseed oil idea for sure (it's also what I use to oil the gunnels). Some time ago I tried using an exacto knife for gentle reaming but it didn't work. I do have a dremel tool and my fair share of screwdrivers and since I've never used Gflex I'm more comfy with epoxy...and I can create a small pile of ash dust to mix with the epoxy easily with odds and ends laying around from seat trimmings. Not sure what punky wood is but the boat has always lived inside so I think I'm OK. I had wondered about jamming a piece of small diameter hardwood dowel in and then glue but sounds like epoxy and ash dust would work fine.

Thanks!
 
Is Gflex available at marine boat shops? We do have a good one here in St Joseph.
 
G Flex is epoxy. It is made by West System which also makes conventional epoxy. If you already have conventional epoxy it will work. An advantage of G Flex is that it can be mixed up in very small batches, 1:1 in volume by eye. G Flex is more tolerant of inexact mixing volumes than most conventional epoxies. The ability to mix up very small batches without the need for scales or mini-pumps is extremely convenient when it comes to jobs like filling in small holes in wood. To completely fill a small hole with epoxy will often require multiple applications since the epoxy will tend to settle into the grain of the wood.

G Flex can be purchased mail order in small quantities in kits for about $30 from places like Jamestown Distributors or Northwest River Supplies. I have also seen it for sale from vendors on Amazon.com

This photo will give you an idea of what a hole in an ash thwart filled in with G Flex (without additives) looks like:

dateposted-public
14992946867_2a838b1b83_q.jpg
 
Last edited:
Back
Top