• Happy Birthday, Grandma Moses (1860-1961)! 🎨🖌️🖼️

Fiberglassing a hard shoulder chine on a cedar strip

Joined
May 4, 2023
Messages
15
Reaction score
7
Location
Winnipeg-ish, Manitoba Canada
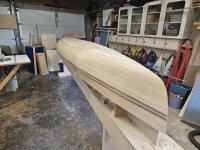
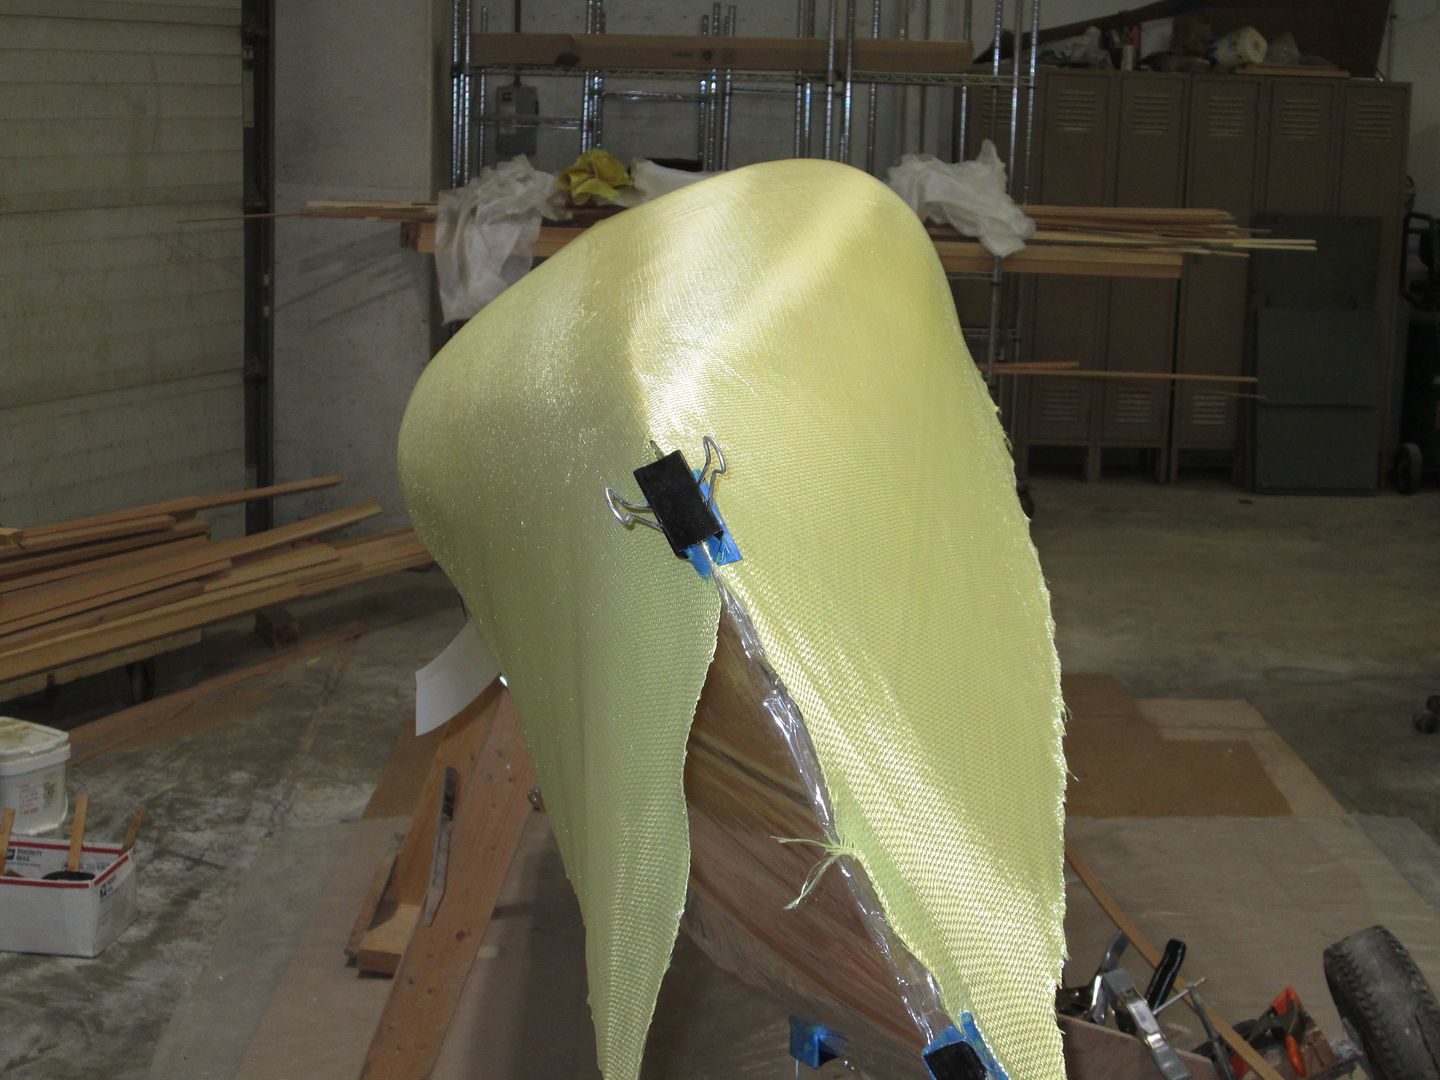
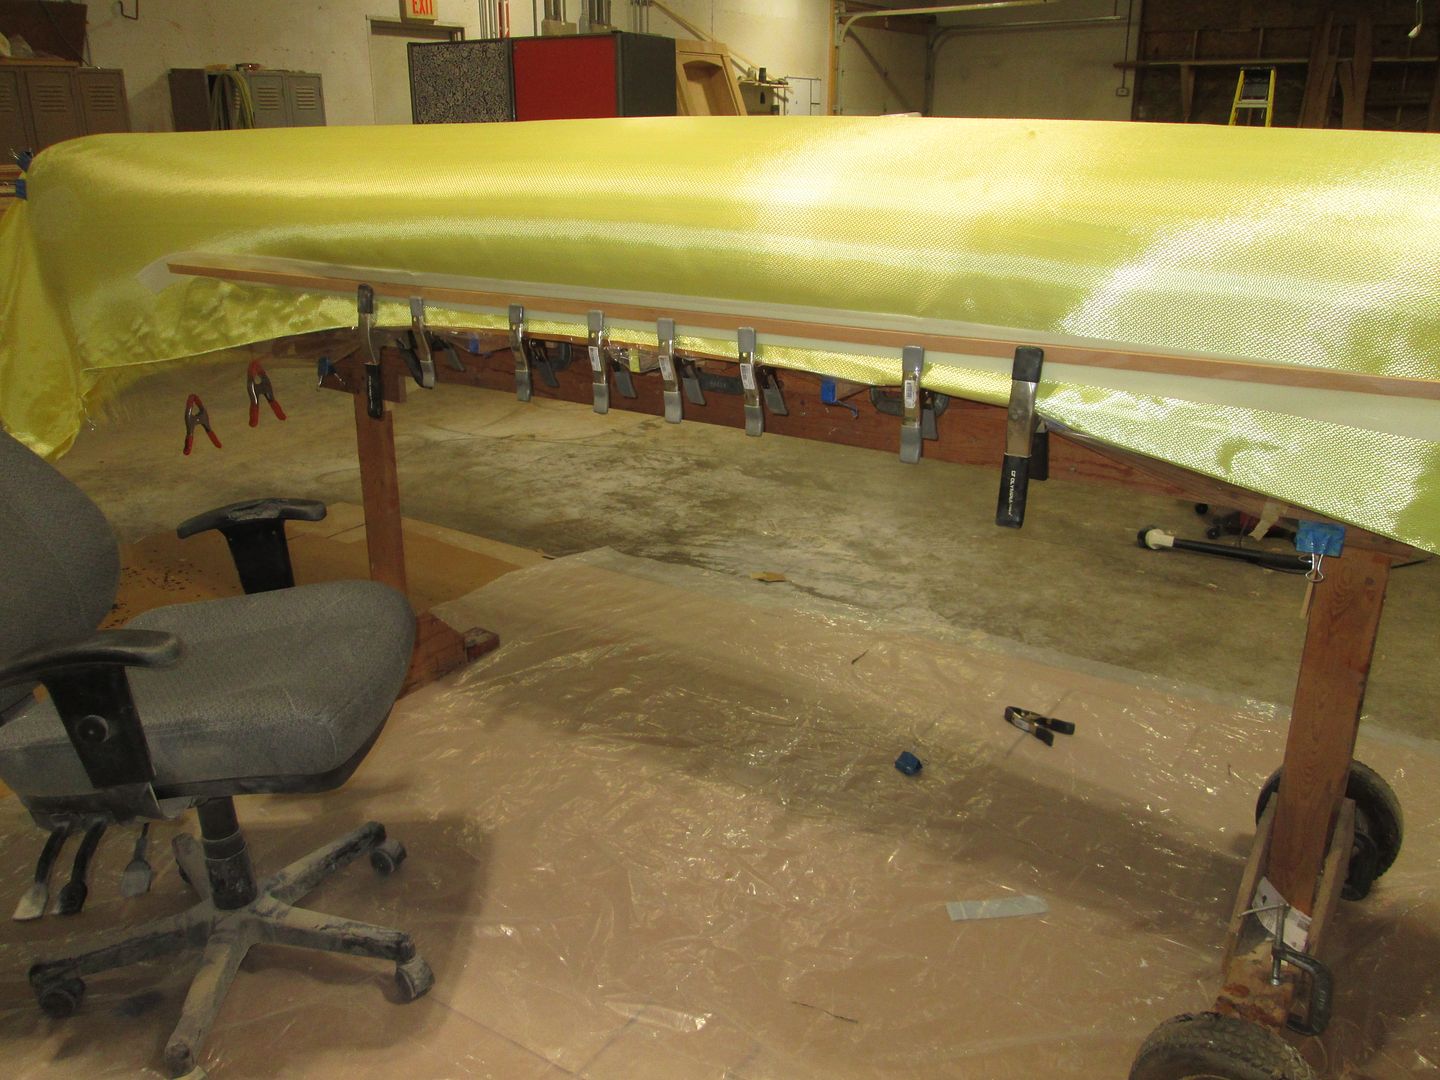
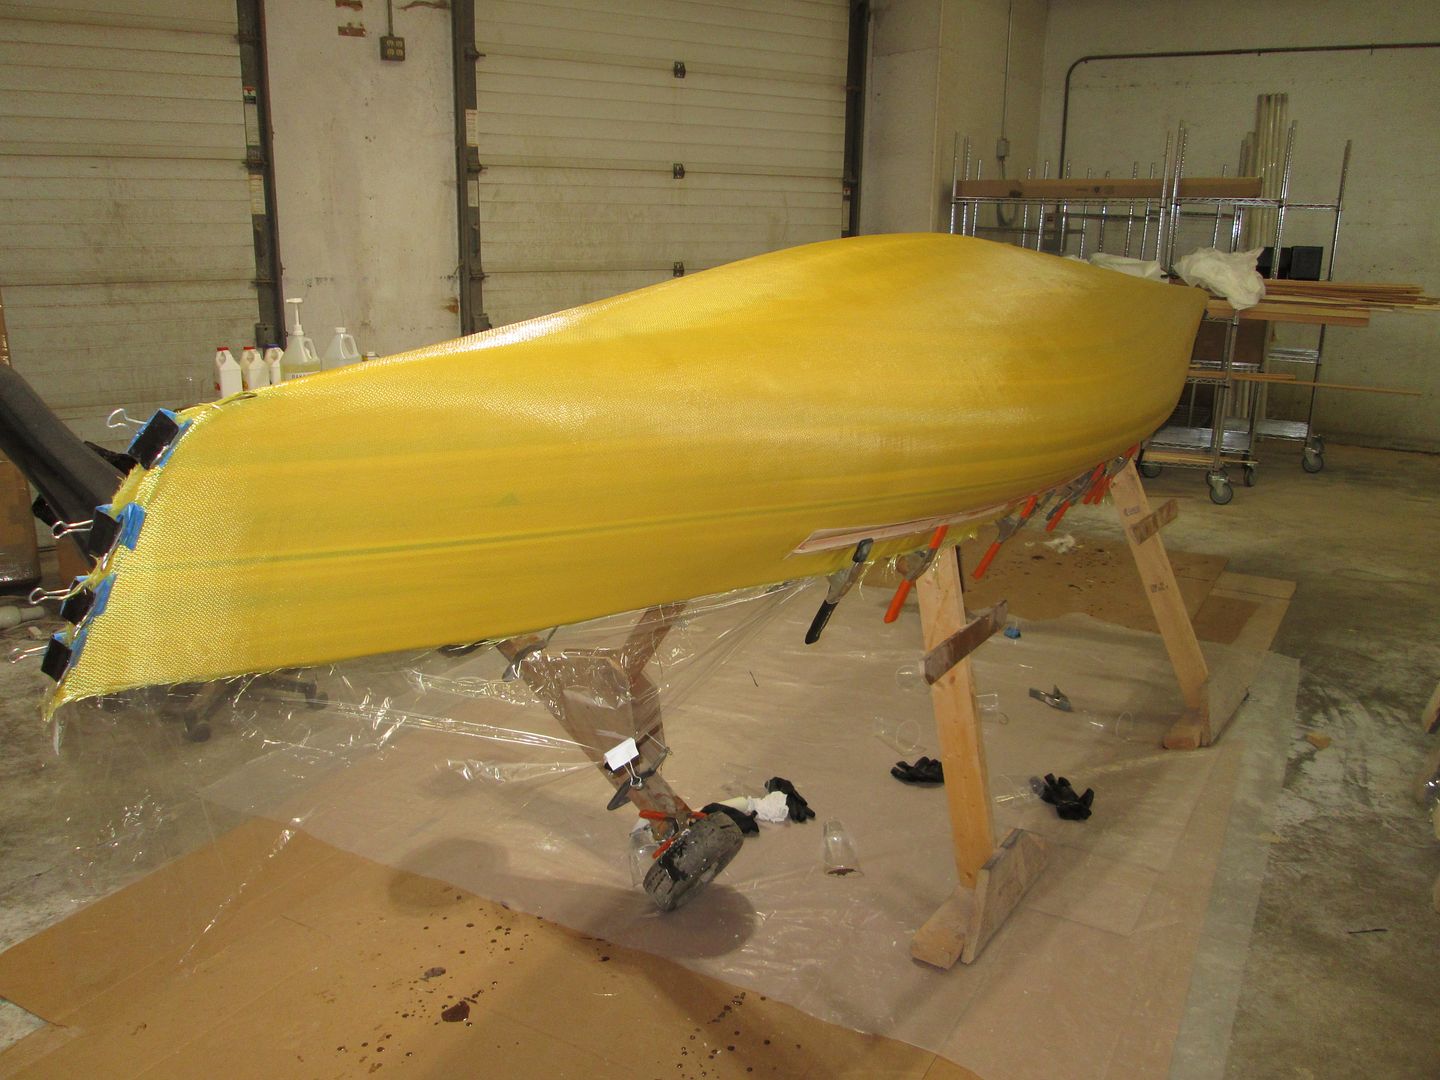
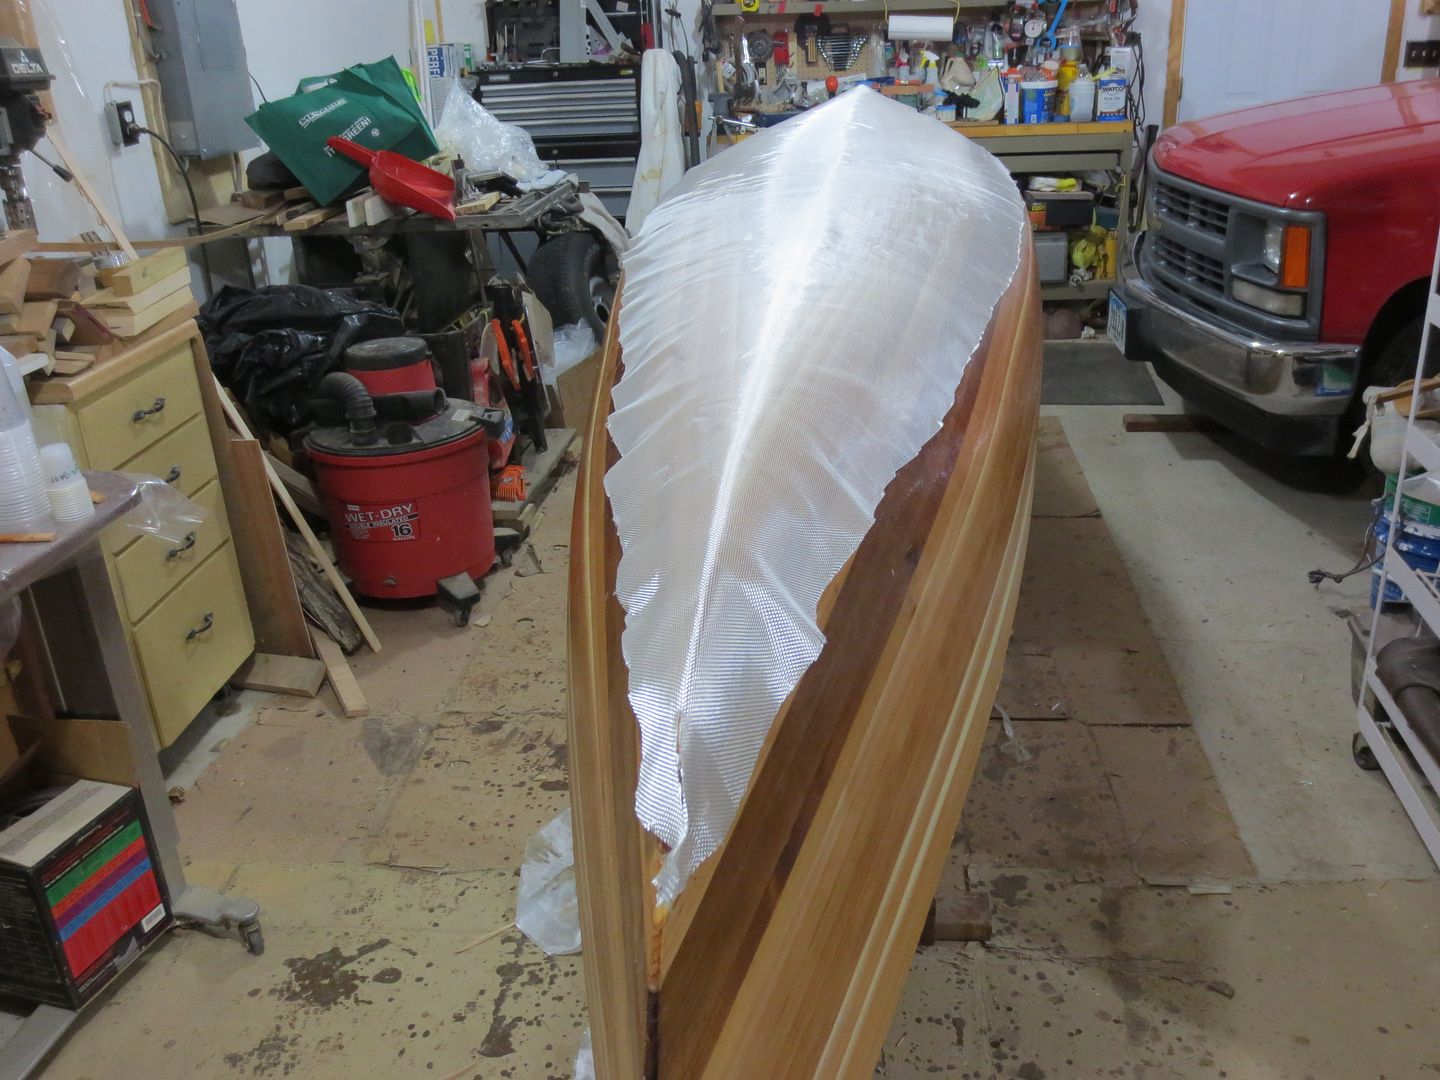
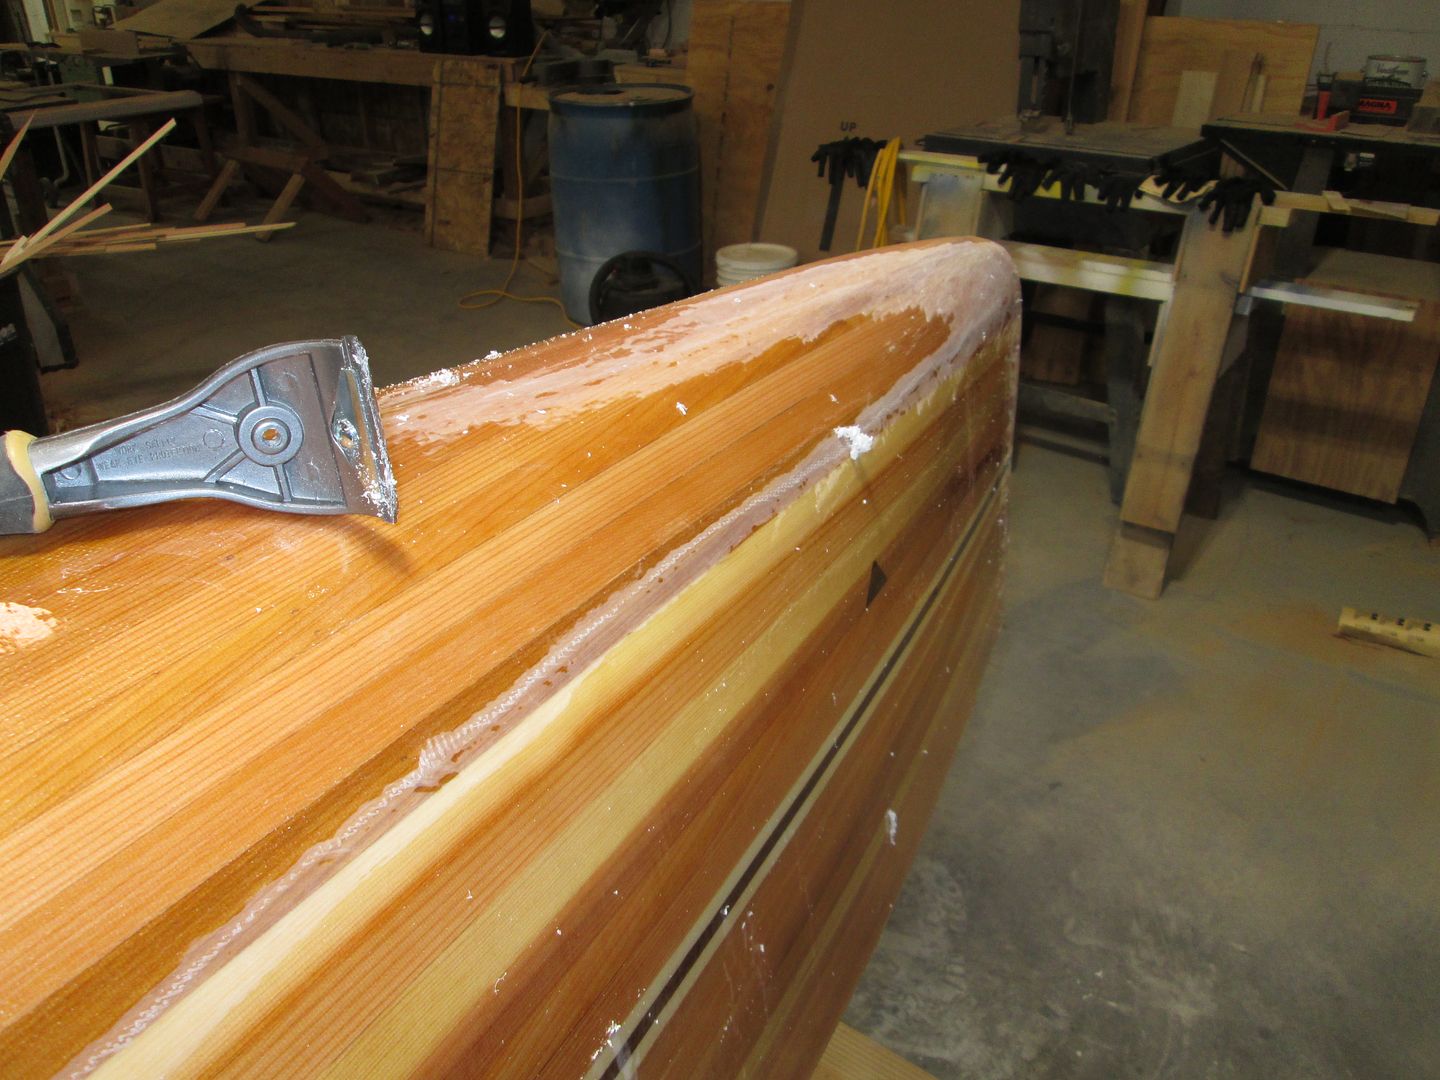
So I built this solo canoe with a hard chine and now I really don't know what kind of problems I might run into trying to fiberglass into that tumble home section. I'm concerned the fiberglass either won't make the corner around the chine or that it won't lay flat against the tumblehome.

The angle at the chine is probably similar to the kite, around 45°, but is then curved inward instead of just a straight. I will round it over a little bit as the last step before fiberglassing, which should help, but I'd like any suggestions on how I can make this as successful as possible.

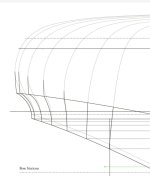
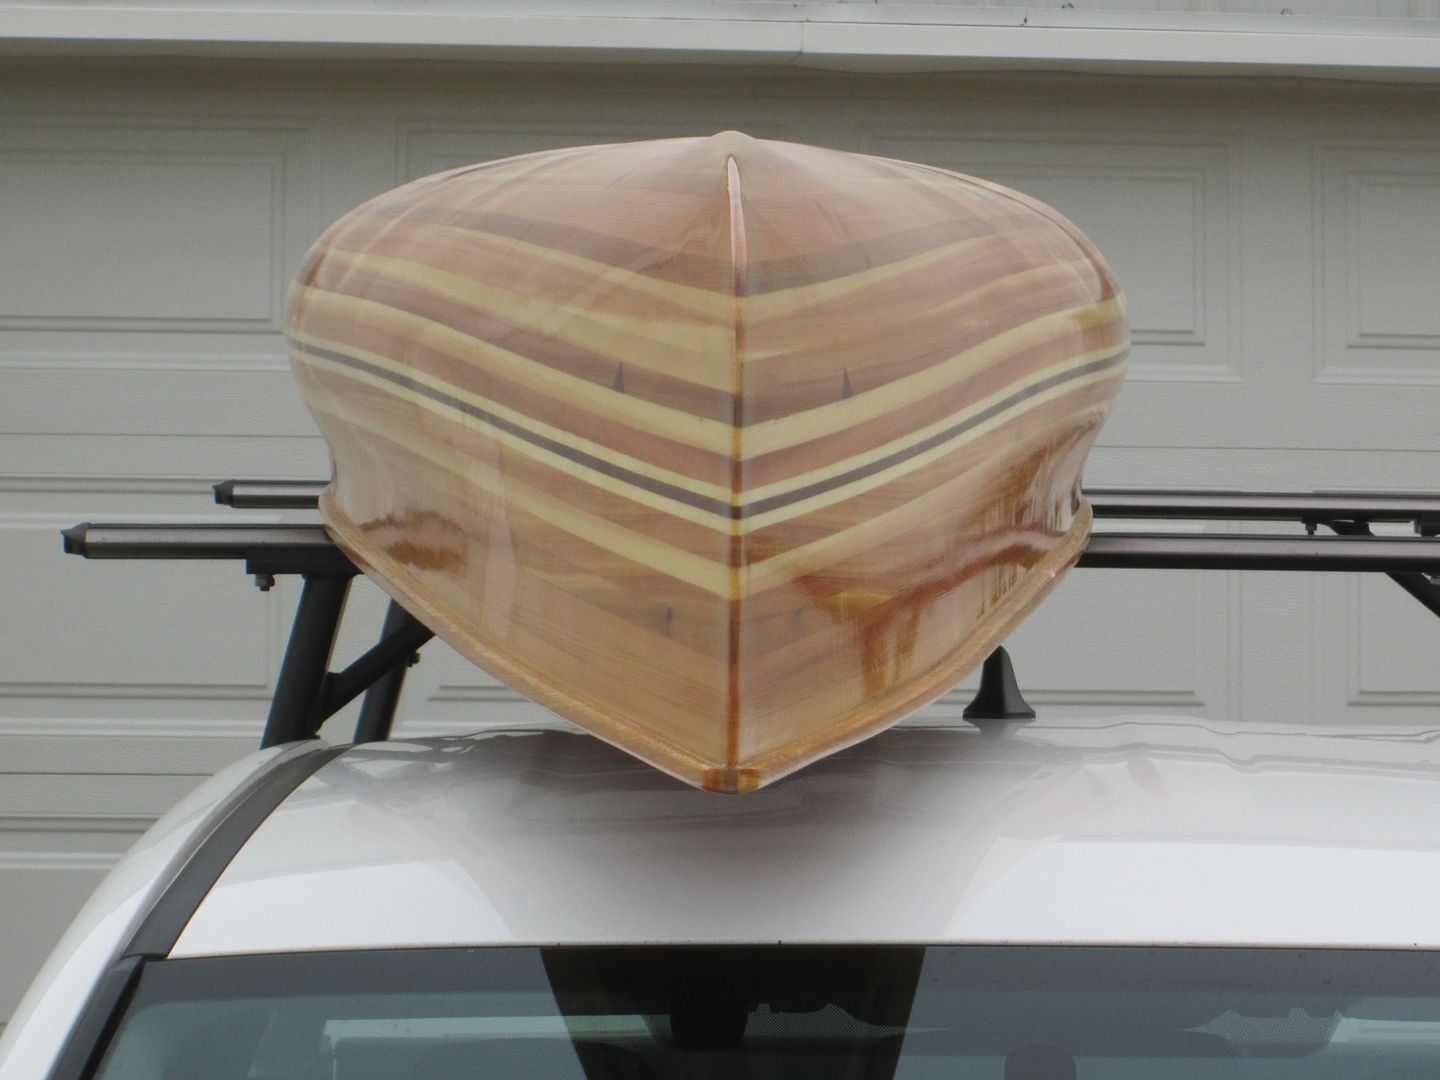
I don't have a better picture of the canoe on my phone so I've included a snip from the plans.
 

Attachments

  • 20240518_151418.jpg
    20240518_151418.jpg
    171.7 KB · Views: 15
  • Screenshot_20240603_200108_Microsoft 365 (Office).jpg
    Screenshot_20240603_200108_Microsoft 365 (Office).jpg
    61.5 KB · Views: 14
I dealt with this, while glassing a composite.
Instead of using a release agent ( Patal) I opted for Heat shrink window film. Adhesion to the plastic, was not a problem. Keeping plastic tight to the plug was.
I wet out one side, with the hull tilting away. I let this side cure, about 6 hrs. I used some plastic strips. and several spring clamps to hold the tumblehome, on that side tight, to the plug.
I then went to the other side, tilting it as I did the first side, and wet it out.
It worked, but not the best way.

After having said that.

I don't think you will have any trouble.
Just don't wet it out, and walk away.
Watch it and address any pulling away, as it occurs.
You should be fine.


IMG_3874.JPG


IMG_3873.JPG


IMG_3892.JPG
 
That looks similar to an idea I had. I plan on putting a second layer on the football anyway, so thought about tilting the boat and doing one side at a time but overlapping the whole football to make that section double thickness.

Seems like a lot of effort though. I'd rather do the whole thing at once and just babysit those tumble home curves until they're set up.
 
I've done multiple boats with a hard chine like the Kite. If you round over that chine a little I think the glass will have no problem sticking to the hull once it's wet out.

On the inside you'll need to add a filet or else the fiberglass will want to bridge the sharp inside corner. For the filet you can thicken epoxy, put it in a zip-lock baggie, and nip off a corner to squeeze it out like a piping bag.

Nice looking boat.

Alan
 
Rex, thanks for posting this interesting question with images. I can't help with the fiberglassing question, but I want to be a little picky about terminology, particularly for purposes of the thread title, which will be the subject of future searchers and researchers.

So I built this solo canoe with a hard chine

The angle at the chine is probably similar to the kite, around 45°, but is then curved inward instead of just a straight.

I believe the angle feature you are referring to would not be a sharp chine, but is rather a sharp tuck-in to the gunwale above the tumblehome. The chine would be below the tumblehome where the bottom begins to curve up, and the only sharp chine canoes I know are specialized whitewater canoes. The feature you are describing is often called shouldered tumblehome or simply a shoulder.

Do I have the hull geometry correct? If so, I'd like to change the title from chine to shoulder.

On edit: In searching around the internet, I do see a few usages of chine to describe a sharp shoulder angle, including on the Ashes site. In addition, skin-on-frame kayaks built with sharp angles at each major stringer are sometimes called multi-chine hulls. However, the dominant and traditional usage of "chine" on a canoe or kayak is to describe the transitional area from the bottom of the canoe to the sides. Plus, the angled turn-in from the top of the tumblehome or flare to the gunwale has been called a "shoulder" since Harold Deal and Dave Yost first implemented it on the Curtis Dragonfly in 1983, followed by hundreds of other shouldered touring canoe designs.

I'm going to compromise on terminology and call the feature being discussed here "shoulder chine" in the title.

Pardon the interruption. Please continue with this interesting topic. I just watched a video where Nick Schade explains how to strip a sharp bottom chine.
 
I agree that that's a nice looking hull. My Freedom solo had a similar feature and I had no issues with glassing it even without the filet on the inside. Interior needed a little more attention to keep it tight to the hull but I refrigerated the epoxy to give a little more working time (not sure that made much difference). I wet out the glass, pressed it tightly to the tumblehome and went back over it a few times to keep it stuck (pretty much pressing straight in rather than rubbing... rubbing it would help it pull away). My advice would be to just take your time & work slowly and carefully. I had more of an issue with runs in the fill coats in that area than I had with adhesion of the wet-out.
 
Rex, thanks for posting this interesting question with images. I can't help with the fiberglassing question, but I want to be a little picky about terminology, particularly for purposes of the thread title, which will be the subject of future searchers and researchers.


I believe the angle feature you are referring to would not be a sharp chine, but is rather a sharp tuck-in to the gunwale above the tumblehome. The chine would be below the tumblehome where the bottom begins to curve up, and the only sharp chine canoes I know are specialized whitewater canoes. The feature you are describing is often called shouldered tumblehome or simply a shoulder.

Do I have the hull geometry correct? If so, I'd like to change the title from chine to shoulder.

On edit: In searching around the internet, I do see a few usages of chine to describe a sharp shoulder angle, including on the Ashes site. In addition, skin-on-frame kayaks built with sharp angles at each major stringer are sometimes called multi-chine hulls. However, the dominant and traditional usage of "chine" on a canoe or kayak is to describe the transitional area from the bottom of the canoe to the sides. Plus, the angled turn-in from the top of the tumblehome or flare to the gunwale has been called a "shoulder" since Harold Deal and Dave Yost first implemented it on the Curtis Dragonfly in 1983, followed by hundreds of other shouldered touring canoe designs.

I'm going to compromise on terminology and call the feature being discussed here "shoulder chine" in the title.

Pardon the interruption. Please continue with this interesting topic. I just watched a video where Nick Schade explains how to strip a sharp bottom chine.
Glenn. Go ahead and change it as you see fit. I realized that it wasn't completely accurate but it seemed to be somewhat common usage.

I actually tried Nick's technique from that video on my canoe but was not entirely successful. I ended up over-bevelling the inside and left a pretty noticable gap in a few places. A filet of epoxy on the inside of the crease is a necessity now. I just hope it all stays together as I take it off the forms.
 
Thanks for the compliments on the hull. It's just 5/4 decking from Home Depot and I had fully intended to speed build this so I could use it on a trip later in June, but I got carried away with book matching and grain matching at the joints. It's taken a lot longer than I planned but I do like the look of it as well.

There's still plenty to screw up so I'll continue taking my time from here on in.
 
Fiberglassing the outside is perhaps one of the easiest parts of the build. I have built many boats with a knuckle, and have never had a problem, the glass adheres fine. One the inside, I used to glass in a narrow strip first along the crease. However, having gotten lazy in the last few solo builds, I didn't do that, or a filet, and everything was fine. Think I had one area where the glass pulled away from the crease, I just cut it out after it dried and put a patch over it. I'm more about function than looks though.
 
I'm through sanding now and planning to glass this weekend. For a first-timer, how important is it to have an extra set of hands around? I'm going do some final research tonight (ie. watch some Youtube videos) and write out a list of steps so I'm prepared but maybe I should have someone around for the glassing stage at least - if only to mix up batches of epoxy.
 
In my (limited) experience, I found that having my daughter help with the wet-out was beneficial but, as the fill coats used far less epoxy, I was able to do them on my own very comfortably. If you're doing a seal coat of epoxy prior to wetting out the first layer of glass, I suspect that you'd be able to work it completely alone (but I'm not sure as I've never done that).

Then again, it never hurts to have a helper and, you never know, maybe they'll take interest in building / paddling too.
 
I've never had an extra set of hands. It takes me about 1 1/2 hours from laying out cloth to shutting off the lights.

After draping the cloth over the hull cut off all but 1-2 inches below the gunwale. If you leave more cloth it will want to pull the cloth away from the tumblehome.

Mix 20+ ounces for your first batch and pour it out on top of the hull. Spread it with a squeegee.

Depending on the size of the hull and how much that first batch covered I might mix another 20 ounces or I might do less.

As you get to the sides it slows down and I'll start using smaller 12 ounce batches.

I do as much as I can with a squeegee before switching to the roller.

I try to get the resin on the hull as quick as I can and then go back later to even things out and ensure everything is fully saturated.

It will start to kick much slower when spread out on the hull than it will in the cup.

Alan
 
Thanks for the advice.

At what point should I add bias cut strips to the stems? After the initial wet-out or later, after fill coats are applied

That comes down to personal preference. I usually put my stem reinforcements in place dry, lay the full layer over top, and wet them all out together. This is assuming they're all the same material.

Other people like to put the reinforcement on top of the main layer, usually just after the main layer is wet out. I do it this way if the reinforcement layer has more abrasion resistance than the main layer (like dynel over fiberglass or fiberglass over carbon). Other people do it this way because they feel they're able to get a smoother transition.

I think the one thing everyone will agree on is that the extra layers should be placed at the same time as the main layer. No need to wait.

Alan
 
Lots of great advice. Getting the bias strips on with the wetout allows you to scrape those edges when the epoxy sets, before you start with fill coats. Then you can fill the weave of everything together. This just reduces the number of steps. This being your first time with epoxy/glass, you might consider waiting to add the strips until after you have the wetout done to your satisfaction.

Mark
 
I think the one thing everyone will agree on is that the extra layers should be placed at the same time as the main layer. No need to wait.
I would agree with Alan here. It's like the "monolithic pour" that concrete workers like to do as the final product (structure) is stronger that way. It's usually not super evident in a canoe, but still has effect. Put as many layers as you can down and get them wet out at the same time or one right after another with the resin all still runny or at least a very green set. You can work more air out that way more easily, and the fibers will sort of intermingle with each other between layers to increase "interlaminar" shear strength some. It's a little bit, but every little bit sometimes helps. If the first layer (or one on top) sets and has a sort of dry spot that you can't or don't see, putting the next layer (like those bias strips) on and working air out of it may not get the air out of the set layer underneath as it won't compress and force air out so it gets trapped under that layer above. I've not done this many at a time, but I've seen guys put up to 6 layers of glass or other reinforcements down dry and then wet through the whole thing at the same time, all by hand, no vacuum bagging done. I was never that brave. All the resin basically sets at the same time as, even if there were several batches, they were all mixed within maybe a half hour or so. They'd done it before and were quick.

I've done it bagging, put all layers into a decked C-1 hull mold, attach most of the bag, mix all the resin and pour it into the hull on top of the fabric layers, then afix the bag totally, turn on the vacuum and "Sluuuuuurp!" (loud sucking sound), get the bag down tight and pull as many of the wrinkles out as could be easily done, then start squeeging resin around, working on top of the bag, resin under it (Clean!). Excess resin goes into a manifold around the perimeter of the hull mold. Let it set, then trim the glass sticking out of the mold (onto flange). Do the deck (more complicated with the cockpit hole), seam the boat, outfit and go paddlin'!
 
I add bias strips on top of the main layer, when adding fill coats..
Prevents me from sanding into the main layer, and thinning it.

As far as adding an extra layer, to the football ?
I always add on top of the main layer, before adding fill coats.
It blends in better. I have found it near impossible to even see that extra layer.
Again, adding on top of the main layer, prevents thinning the main layer.

IMG_2016_zpsqqrblnfc.jpg


Trying to wet out two layers at a time by hand is very difficult. I was suckered into it once. It won't happen again.

what bias strips and an extra layer over the football looks like.
IMG_4144.JPG


Jim
 
I got the wet-out done with the football section and I guess I'm adding the stem strips with the fill coat. It was hectic enough without having to deal with those extra strips so I'm glad I left them out. Seems like everything went oK and the knuckle/tumblehome was no big deal at all, apart from some creases in the fabric that I can still see. Not the end of the world if they're visible.

The issue I hadn't anticipated was the long strands coming off that football layer. I just left them long and figured as long as they were buried in the epoxy, they won't be an issue. I tried to pull some off and cut them but it would have taken forever and I thought it would screw things up even worse.

Now I just need to hope I got enough epoxy on there.
 
After the epoxy has cured a day, come back with a scraper, and remove the strands, as well as feather the edges of the football. That's if you put the extra layer on top of main.
If under main layer, you will have to live with it.
Another reason to put the extra layer on top .

IMG_3860.JPG


Jim
 
The issue I hadn't anticipated was the long strands coming off that football layer. I just left them long and figured as long as they were buried in the epoxy, they won't be an issue. I

Once the epoxy is green (no longer sticky but still softish) those strands can easily be smoothed with either a scraper or sharp chisel. You'll probably want to do that at least to some extent before the main layer so they don't telegraph through so much.

You can do the same with the perimeter of the football layer.

Of they're all wet out at the same time the strands and perimeter don't telegraph through to much but if done separately they will.

Alan
 
Back
Top