- Joined
- Jul 25, 2012
- Messages
- 838
- Reaction score
- 22
For those folks who might have need of an axe handle replacement, I'll show you how I do it. I'm really hesitant to do this as it may seem I'm putting myself up as some kind of expert which I'm surely not. But, on the other hand, there are probably some grand axe heads out there which could make their owners a dandy axe if they only had a well fitting handle. And it's so much better than using them as a door stop.
The text for a given photo will be found below the picture.
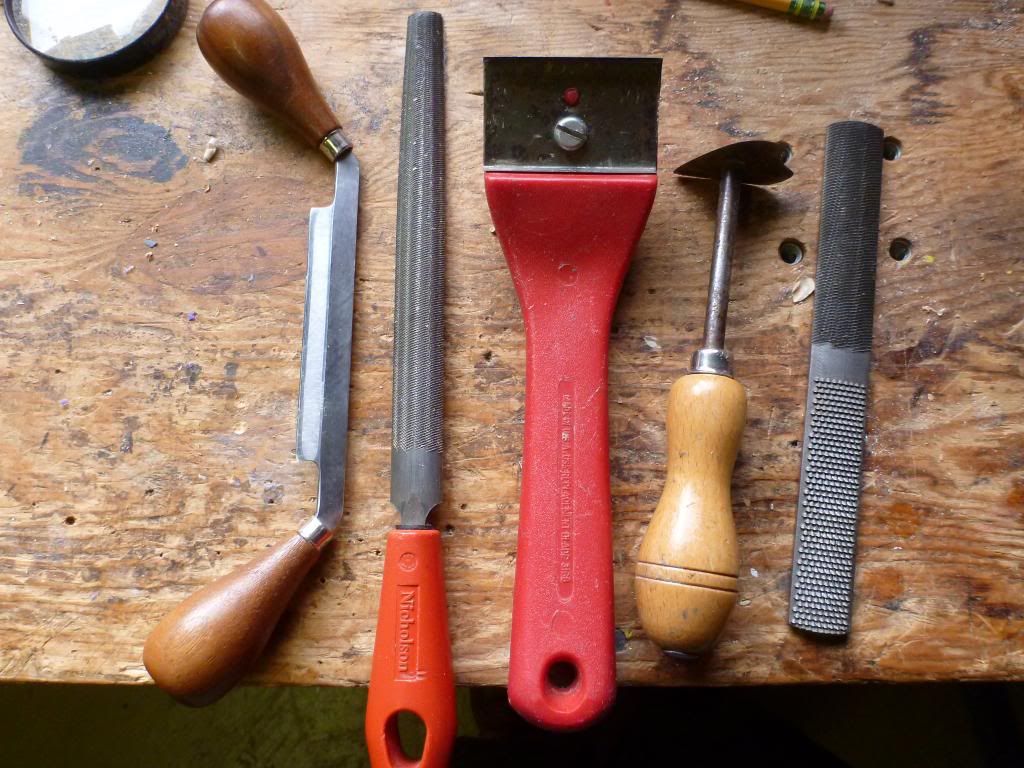
These are the tools I use, probably you have most if not all of them. Left to right; a little carving draw knife, b*st*rd file, paint scraper, glue scraper, 4-way file. Both files have an flat side and a slightly rounded side.
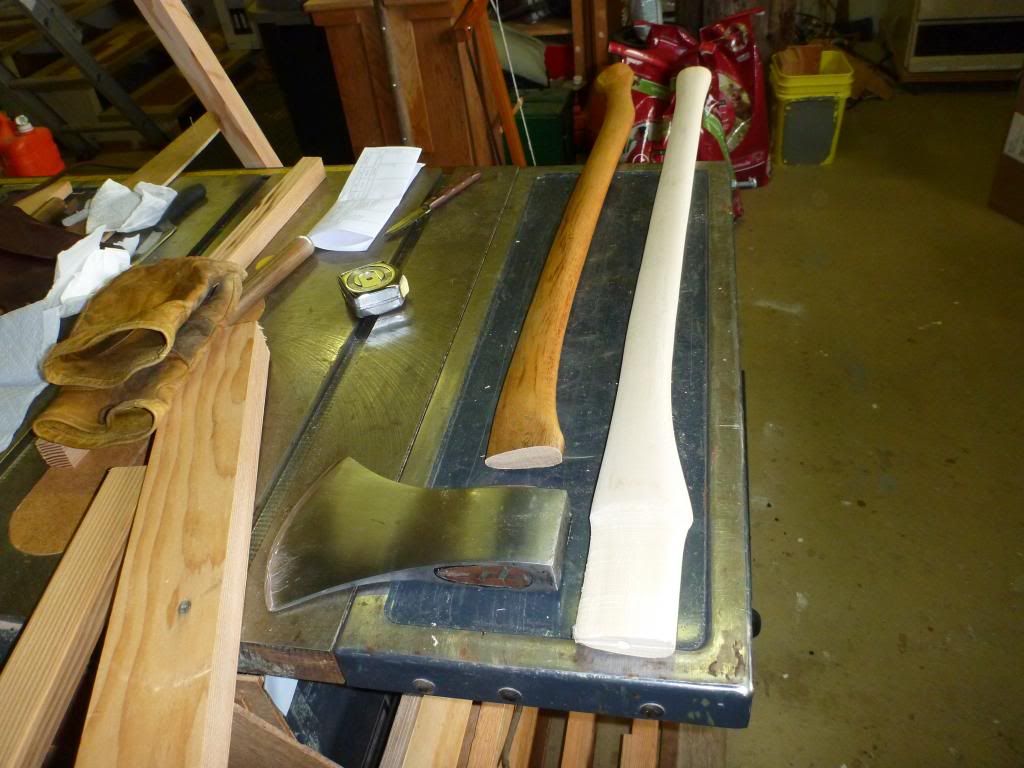
This is my Ox-Head axe and I'm going to replace the curved handle with the straight one you see here. I'll save the old handle and maybe it can be of use on some later project.
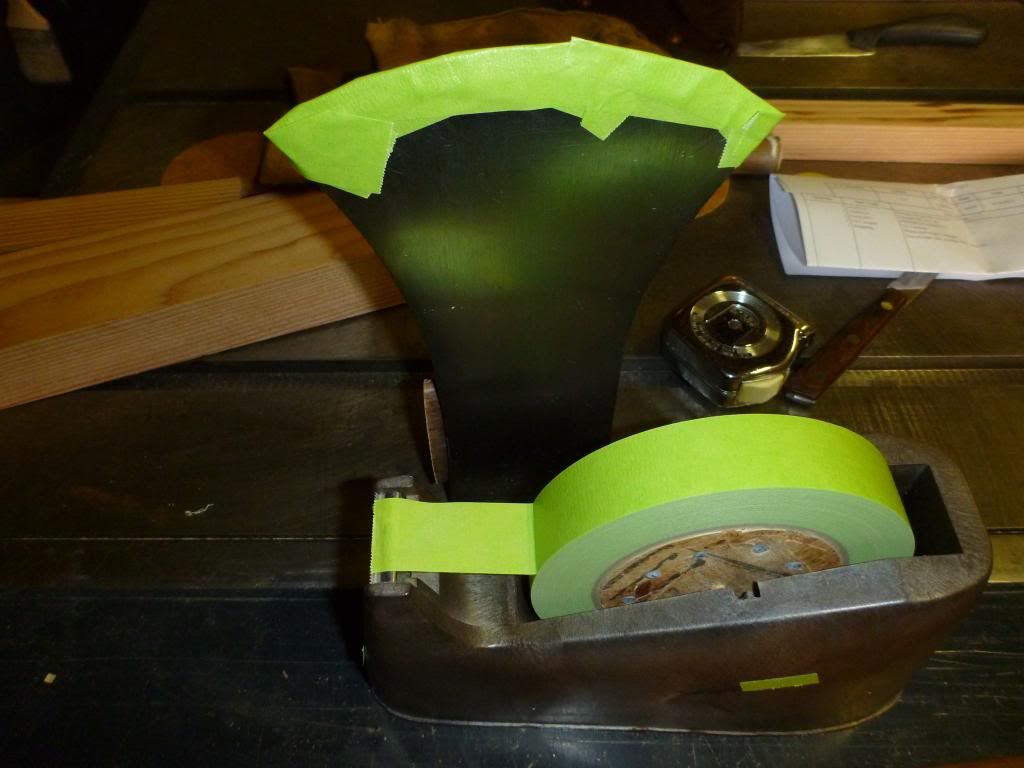
I try to remember to cover the sharp with several layers of masking tape before I get started, it's so easy to be working along and forget where you ought not put your fingers.
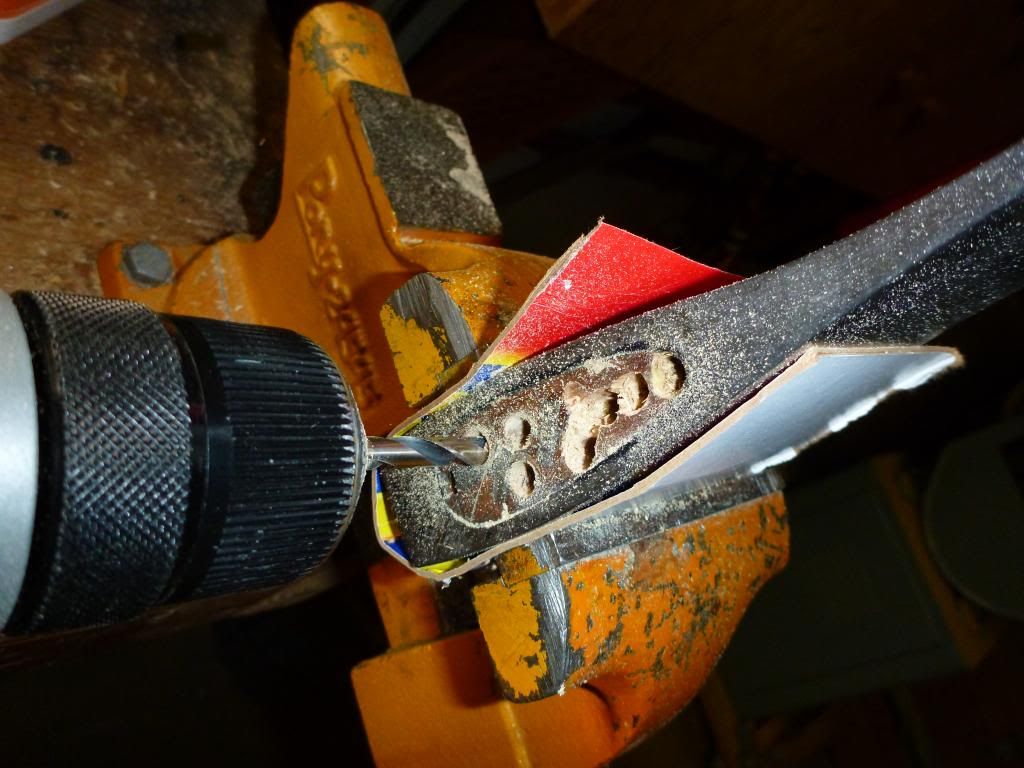
Drilling out the remains of the handle, more about this later. Just put a mental book mark here because we've got to return to this.
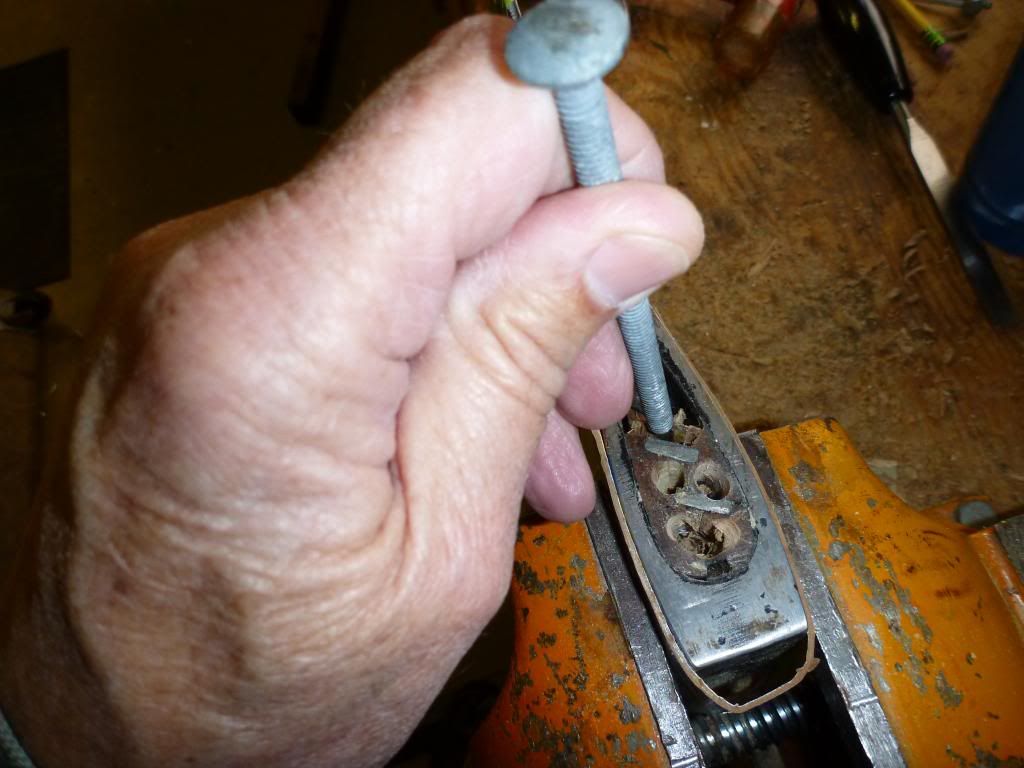
Punching out the waste wood; now this may look primitive but it actually works well, the long bolt will reach all the way through and the end of it is cupped just a little so it grips the wood you're pushing out.
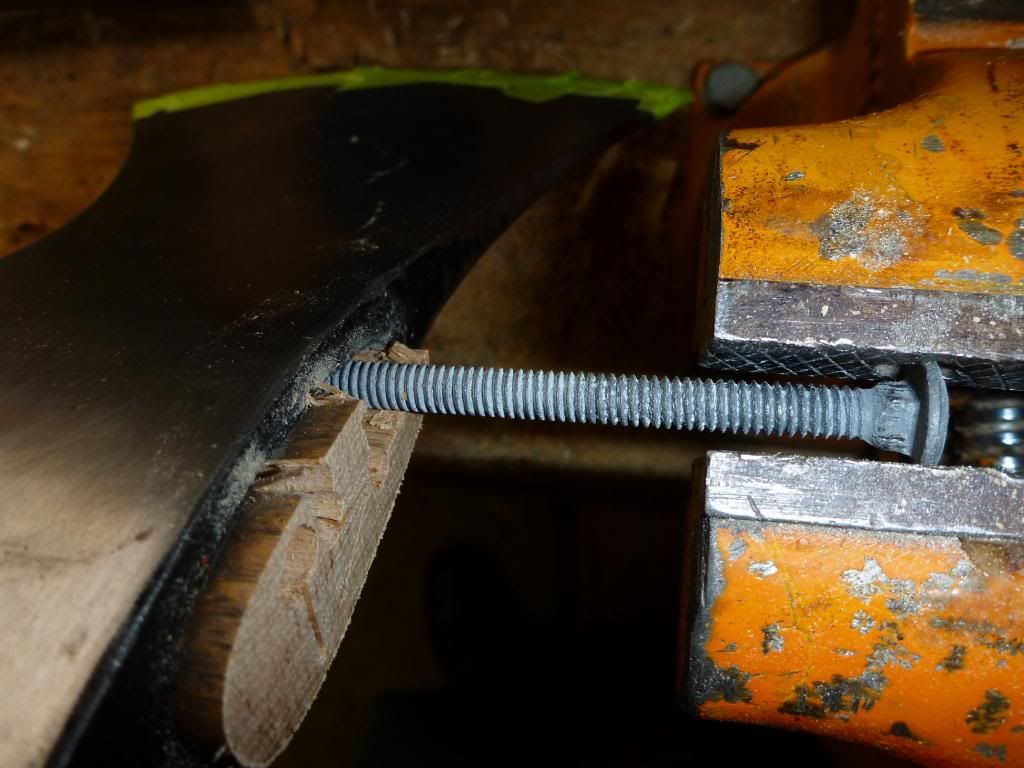
And when it gets stuck as most any punch will, clamp the end in the vise and screw it out from the axe head!
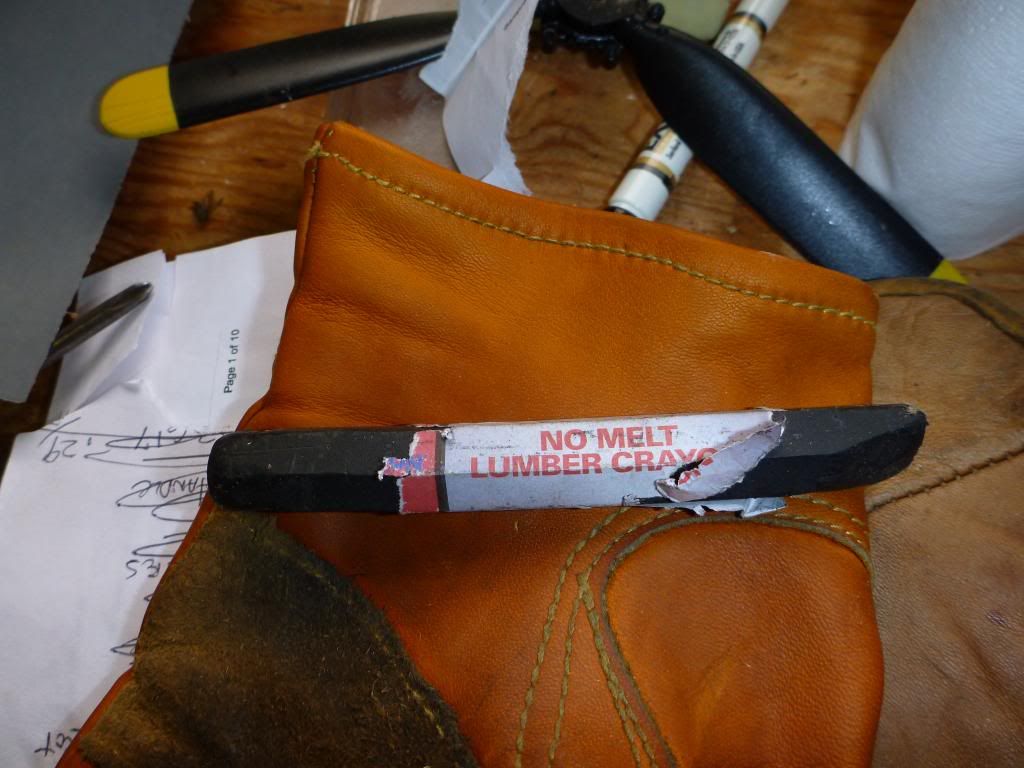
Now once the axe head is free of all debris of the old handle I take this lumber marker and scribble the inside of the eye so as to mark the high points on the new axe handle. I'm guessing here but this marker seems to be made of carbon and graphite and maybe clay. There are other markers that have colors and are made with wax, I don't like the idea of any wax inside the head to act to slick things up. If you can't find this kind of marker a #1 pencil will work as well. Just not as well.
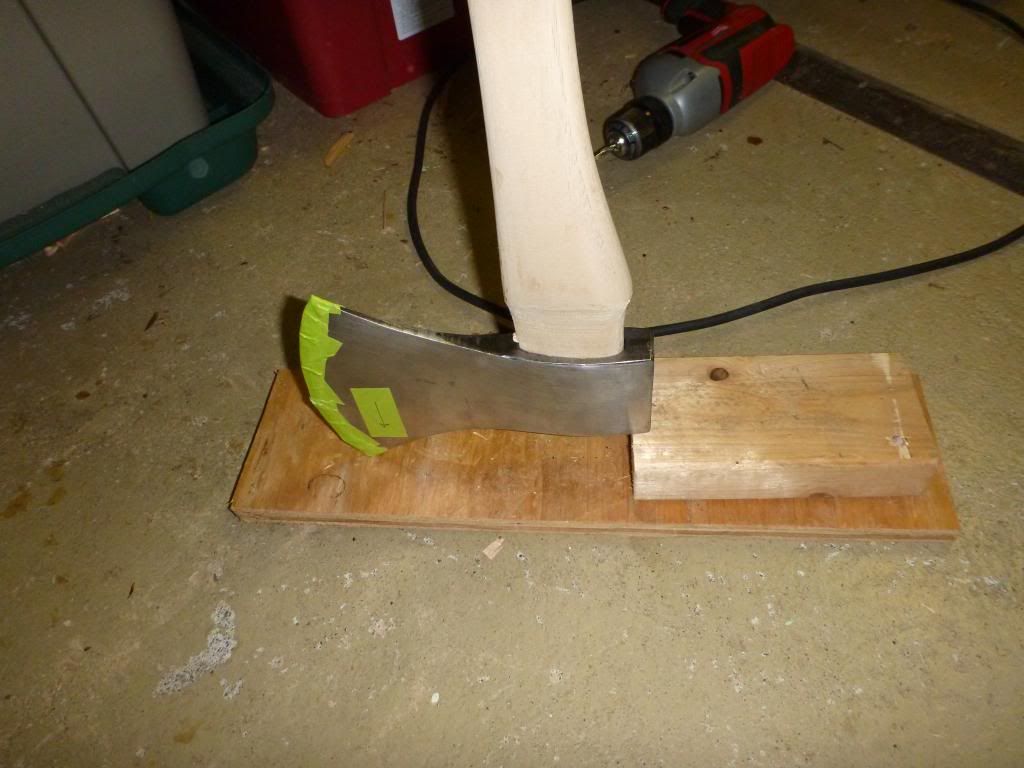
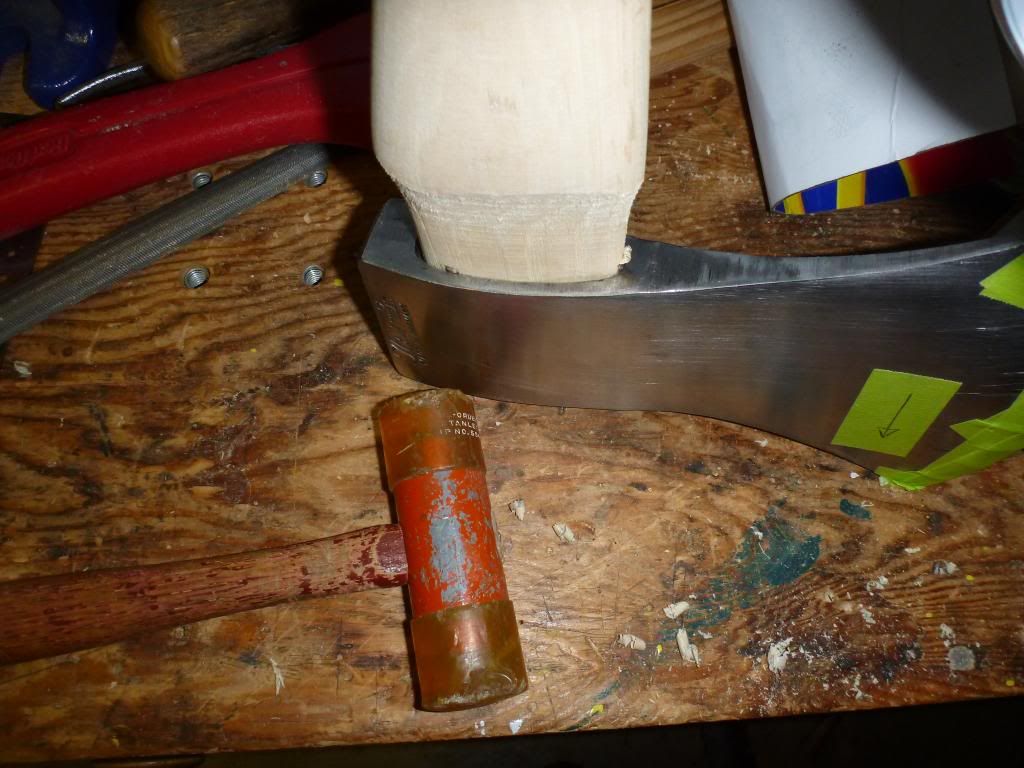
This is the setup I'll use tapping the new handle down into the axe head to check for fit. I was lucky, the new handle fit into the start of the eye without any trimming, if it hadn't I'd have reduced the handle end until it would start.
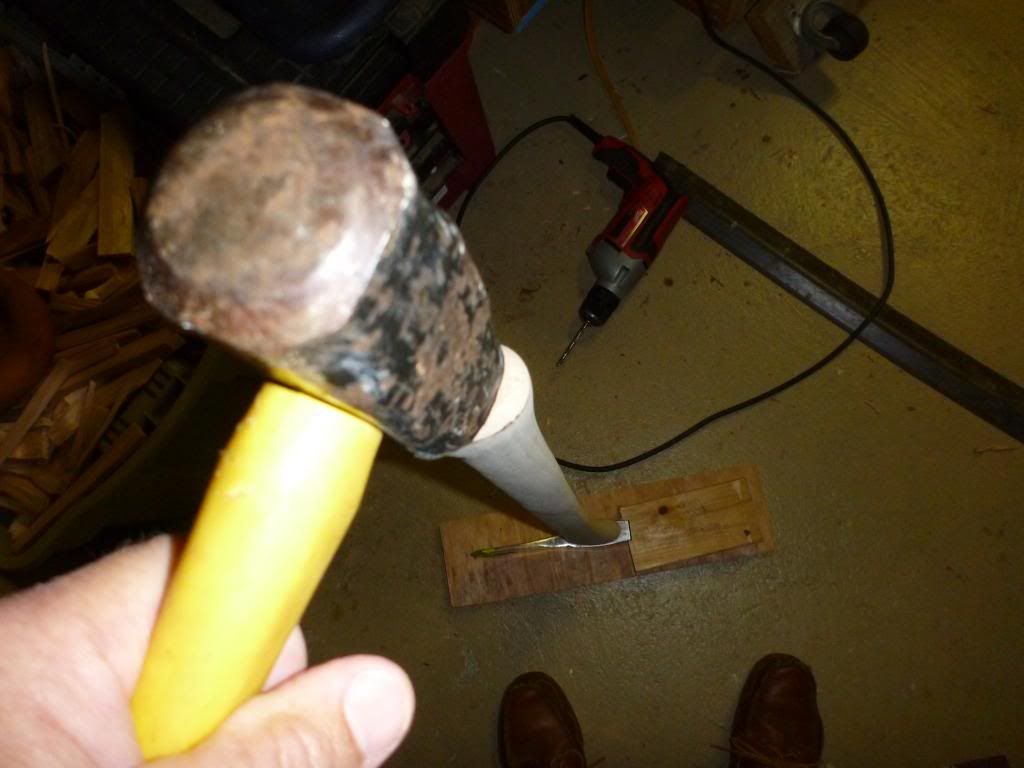
I borrowed the tuning hammer from my watch repair kit to drive the handle down into the axe head.
When you're working the head off the handle, use a soft headed mallet or maybe a drift from a block of wood. Try not to rock the head fore and aft but straight down off the handle. If you look closely you can see just a little bit of marking on the handle that will need to be taken down.
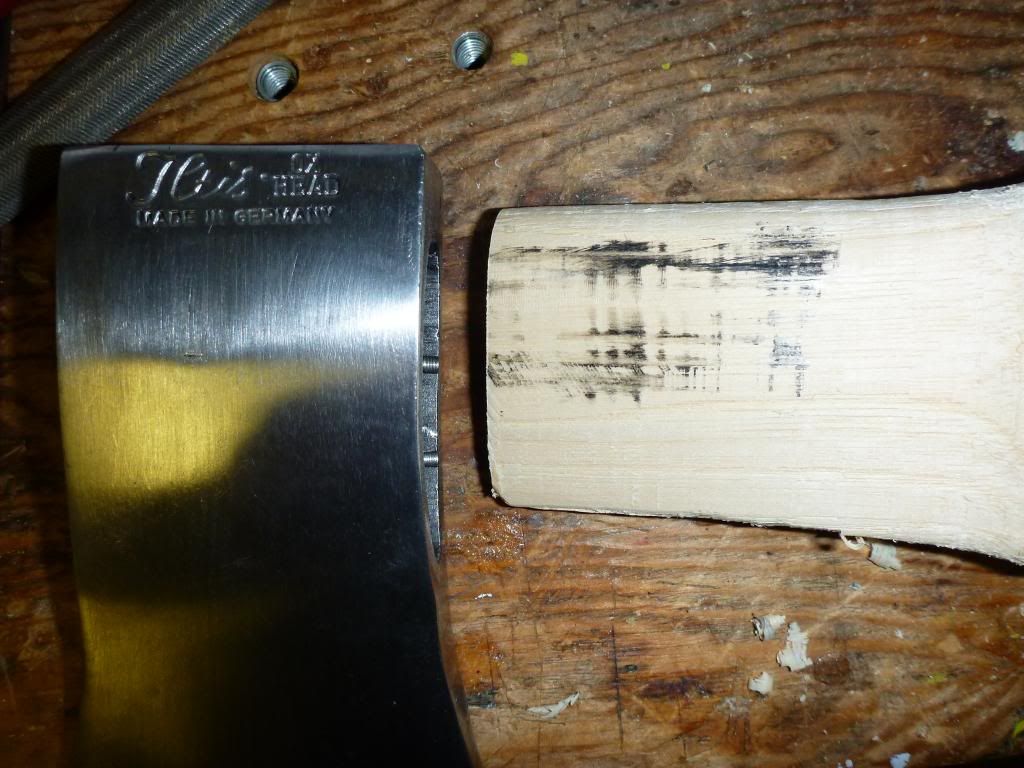
Now you can see the black marks that will need to be scraped and then filed to remove stock until the handle fits all the way into the axe head bearing equally all around. The filing leaves a nice smooth surface to be marked anew on the next test fitting.
If you look close at the interior of the eye you can see two shinny places where the drill bit cut into the axe head. Since I'm not a politician I've got to tell you that this is a serious mistake. And I did it. I lost track of the far end of my drill bit. I've looked and looked at this and I think it will be O.K. it's not deep but it is something really to be avoided. It really doesn't matter that I've never done this before: one time is two too many.
Old Ben said "Experience keeps a dear school but fools will learn at no other."
Alright, let's see what this fool has learned:
First I'll pick a central part of the stock to do my drilling. No more near the edge. Then I'll drill only half way through the wood, stop, and drill from the other side. Once I've got a hole all the way through I'll put down the power drill and use hand tools. I'll look for a long shank screwdriver to make into a chisel that will work to worry out smaller sections of wood. I'll take the time to go carefully.
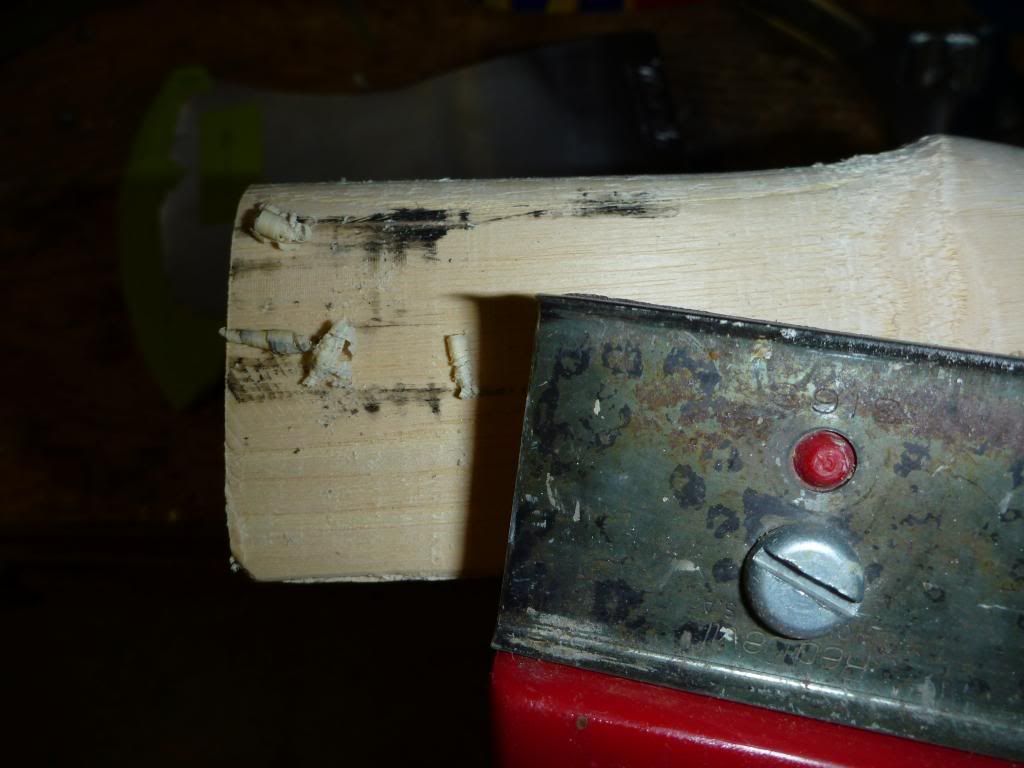
Here is the paint scraper starting to remove some high places. After the scraper is used I'll smooth out the surface with a file and test fit the handle again. I can get about three fittings and then I need to put more lumber marker blacking inside the axe head. This whole cycle isn't exciting but absolutely necessary for a handle that will stay tight on the head. I keep going until the head is where I want it on the handle and on the last fitting the whole handle shows black indicating that there is good contact all around the head. Once that happens I'll file off all the black marks on the wood and scrub out the inside of the axe head with Lava soap to get it clean too. I'm not going to show all 30-50 fittings necessary to get this fit; take it on faith.
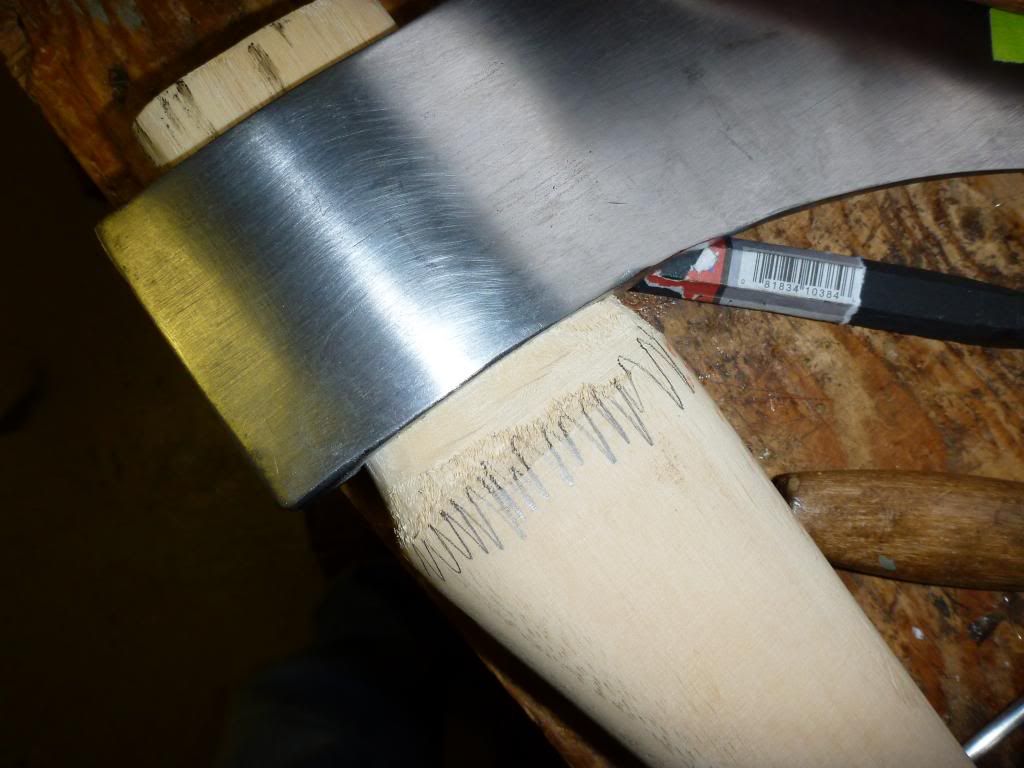
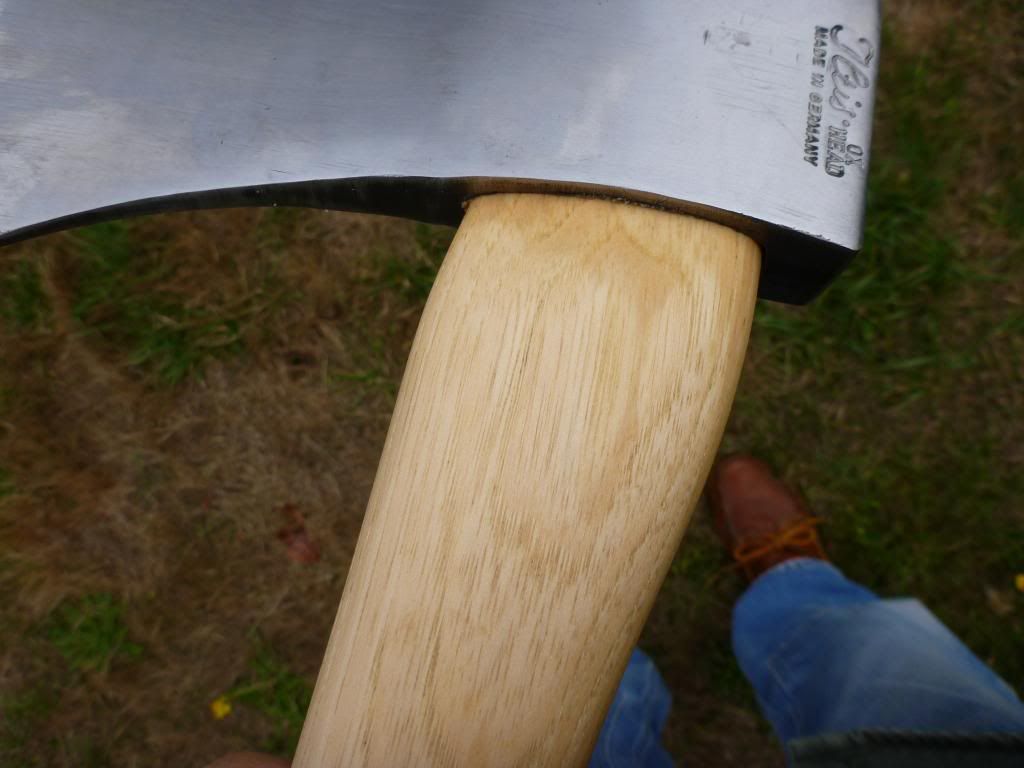
Now the head is fitted to the new handle, you could drive the wedge home and stop there. But I think the extra the manufacturer leaves on the shoulder of the handle looks ugly and isn't all that great to hold either. The area I'm talking about is marked with the zig-zag pencil mark.
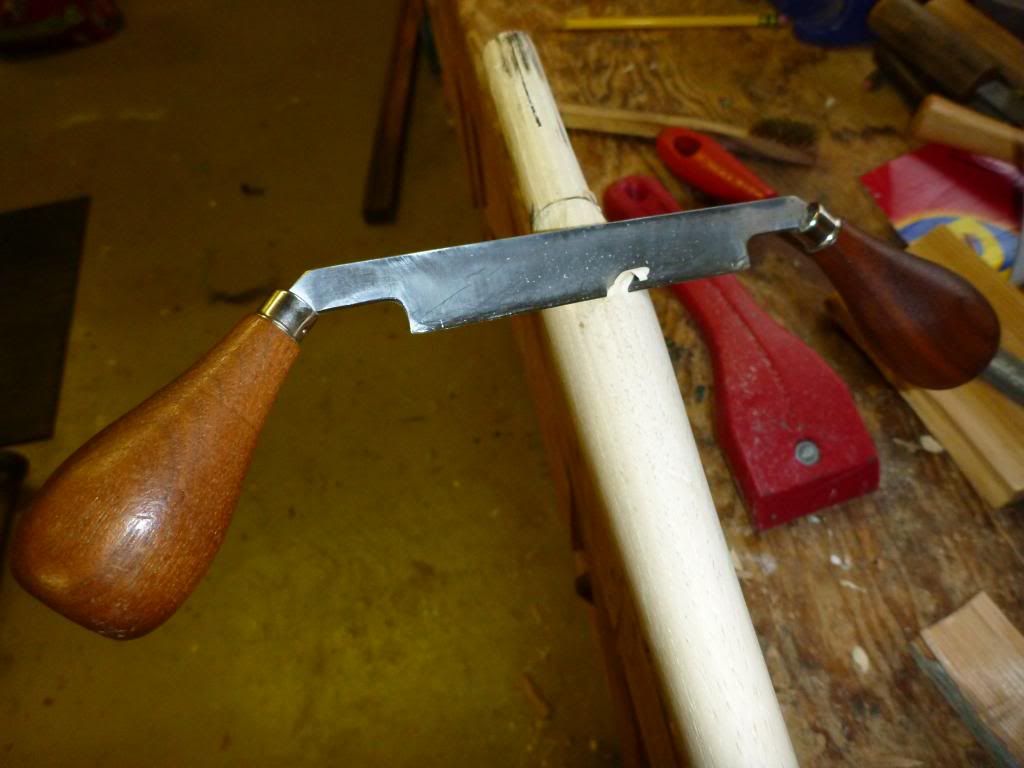
Fairly large stock removal using the draw knife, you've got to watch the grain, you don't want to pull up a large splinter of wood. What I aim for is a series of "waves" in the surface where I've removed a chip of wood. Then work the surface down to where you want it using the files.
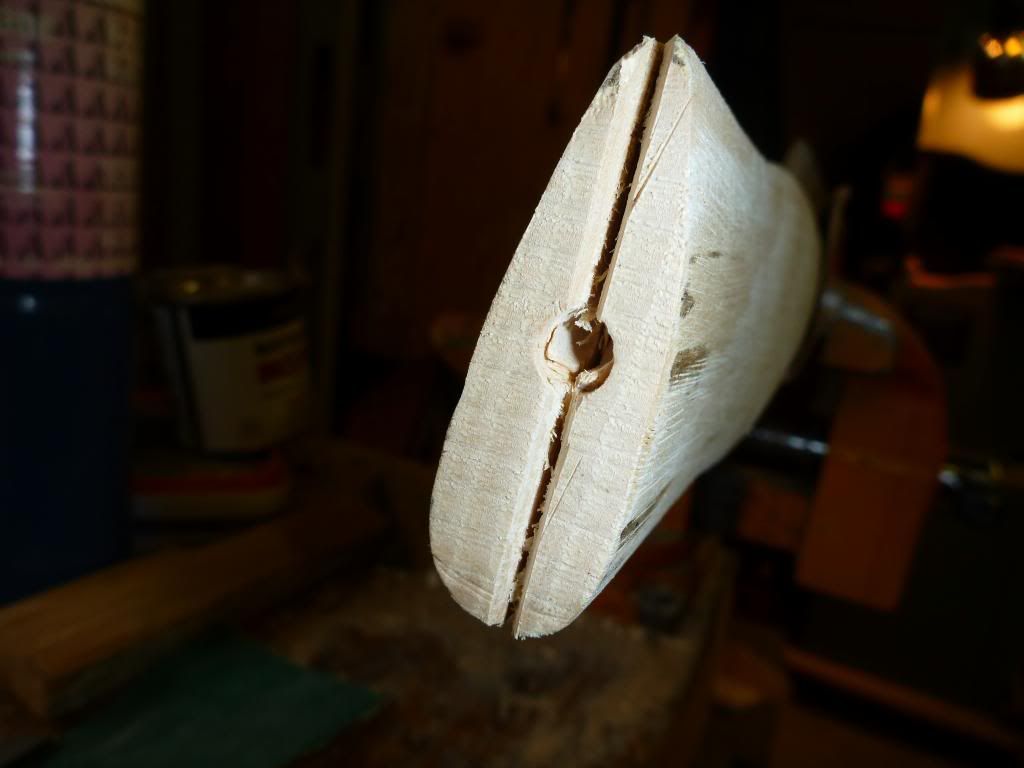
Once the handle is fitted down for the last time, the slot for the wedge will be squeezed down so tight you haven't a prayer of a chance to fit it in, the answer for this is to relieve the opening with a knife before it gets compressed so tight.
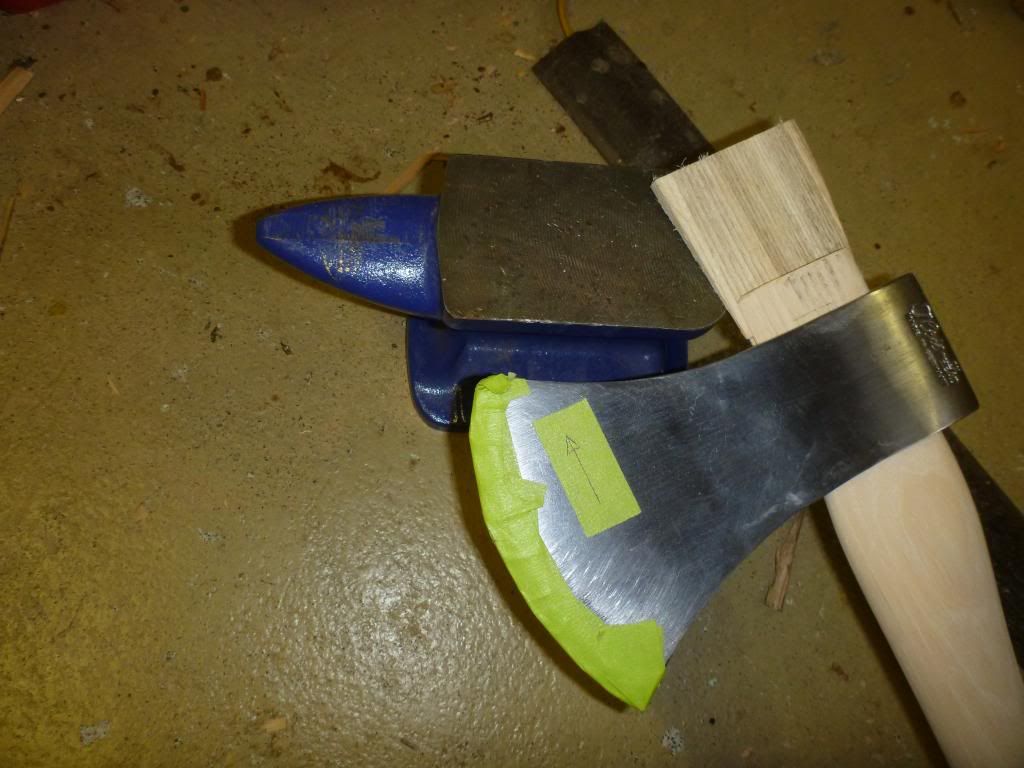
The wedge is started and that is my little anvil that I'll place the head on when it's being driven home. It's interesting the process of driving the wedge home: as the wedge is moving into place the hammer blows feel kind of like "thud" but then when it's as tight as ever it can be and nothing more can be done, the hammer blows rebound all most like bouncing back up.
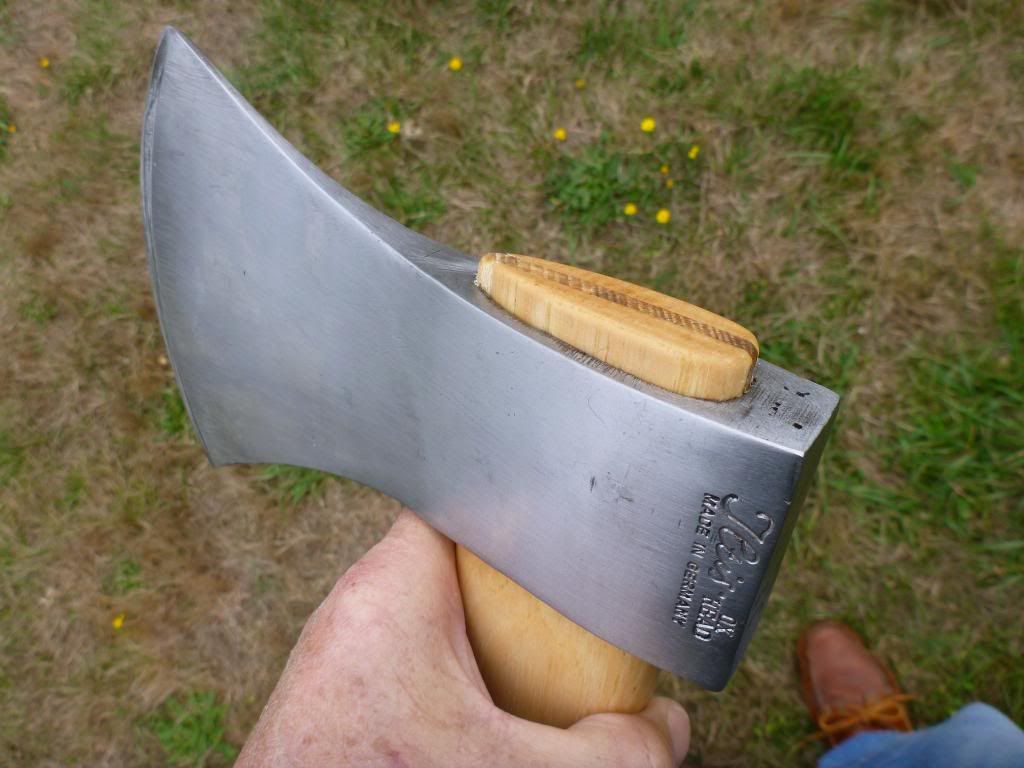
This is what the axe looks like now that it's done. I elected to leave the steel wedge out this time; so far it is still tight.
Best Wishes,
Rob
The text for a given photo will be found below the picture.

These are the tools I use, probably you have most if not all of them. Left to right; a little carving draw knife, b*st*rd file, paint scraper, glue scraper, 4-way file. Both files have an flat side and a slightly rounded side.

This is my Ox-Head axe and I'm going to replace the curved handle with the straight one you see here. I'll save the old handle and maybe it can be of use on some later project.

I try to remember to cover the sharp with several layers of masking tape before I get started, it's so easy to be working along and forget where you ought not put your fingers.

Drilling out the remains of the handle, more about this later. Just put a mental book mark here because we've got to return to this.

Punching out the waste wood; now this may look primitive but it actually works well, the long bolt will reach all the way through and the end of it is cupped just a little so it grips the wood you're pushing out.

And when it gets stuck as most any punch will, clamp the end in the vise and screw it out from the axe head!

Now once the axe head is free of all debris of the old handle I take this lumber marker and scribble the inside of the eye so as to mark the high points on the new axe handle. I'm guessing here but this marker seems to be made of carbon and graphite and maybe clay. There are other markers that have colors and are made with wax, I don't like the idea of any wax inside the head to act to slick things up. If you can't find this kind of marker a #1 pencil will work as well. Just not as well.

This is the setup I'll use tapping the new handle down into the axe head to check for fit. I was lucky, the new handle fit into the start of the eye without any trimming, if it hadn't I'd have reduced the handle end until it would start.

I borrowed the tuning hammer from my watch repair kit to drive the handle down into the axe head.

When you're working the head off the handle, use a soft headed mallet or maybe a drift from a block of wood. Try not to rock the head fore and aft but straight down off the handle. If you look closely you can see just a little bit of marking on the handle that will need to be taken down.

Now you can see the black marks that will need to be scraped and then filed to remove stock until the handle fits all the way into the axe head bearing equally all around. The filing leaves a nice smooth surface to be marked anew on the next test fitting.
If you look close at the interior of the eye you can see two shinny places where the drill bit cut into the axe head. Since I'm not a politician I've got to tell you that this is a serious mistake. And I did it. I lost track of the far end of my drill bit. I've looked and looked at this and I think it will be O.K. it's not deep but it is something really to be avoided. It really doesn't matter that I've never done this before: one time is two too many.
Old Ben said "Experience keeps a dear school but fools will learn at no other."
Alright, let's see what this fool has learned:
First I'll pick a central part of the stock to do my drilling. No more near the edge. Then I'll drill only half way through the wood, stop, and drill from the other side. Once I've got a hole all the way through I'll put down the power drill and use hand tools. I'll look for a long shank screwdriver to make into a chisel that will work to worry out smaller sections of wood. I'll take the time to go carefully.

Here is the paint scraper starting to remove some high places. After the scraper is used I'll smooth out the surface with a file and test fit the handle again. I can get about three fittings and then I need to put more lumber marker blacking inside the axe head. This whole cycle isn't exciting but absolutely necessary for a handle that will stay tight on the head. I keep going until the head is where I want it on the handle and on the last fitting the whole handle shows black indicating that there is good contact all around the head. Once that happens I'll file off all the black marks on the wood and scrub out the inside of the axe head with Lava soap to get it clean too. I'm not going to show all 30-50 fittings necessary to get this fit; take it on faith.

Now the head is fitted to the new handle, you could drive the wedge home and stop there. But I think the extra the manufacturer leaves on the shoulder of the handle looks ugly and isn't all that great to hold either. The area I'm talking about is marked with the zig-zag pencil mark.

Fairly large stock removal using the draw knife, you've got to watch the grain, you don't want to pull up a large splinter of wood. What I aim for is a series of "waves" in the surface where I've removed a chip of wood. Then work the surface down to where you want it using the files.

Once the handle is fitted down for the last time, the slot for the wedge will be squeezed down so tight you haven't a prayer of a chance to fit it in, the answer for this is to relieve the opening with a knife before it gets compressed so tight.

The wedge is started and that is my little anvil that I'll place the head on when it's being driven home. It's interesting the process of driving the wedge home: as the wedge is moving into place the hammer blows feel kind of like "thud" but then when it's as tight as ever it can be and nothing more can be done, the hammer blows rebound all most like bouncing back up.


This is what the axe looks like now that it's done. I elected to leave the steel wedge out this time; so far it is still tight.
Best Wishes,
Rob